|
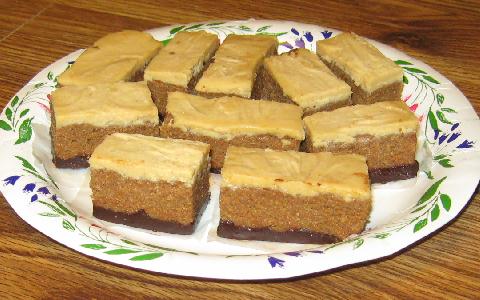
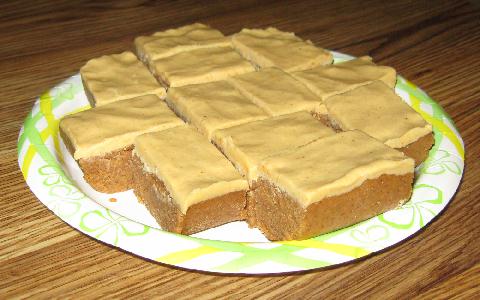
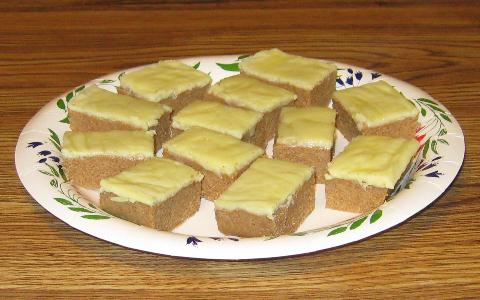
Chocolate Peanut Butter Bran Buddy Bars—Prototype 1:
Uses two 8-oz. packages of Philly 1/3-less-fat cream cheese
Crust:
Melt: 12 oz. semi-sweet chocolate
Add: 2 oz. Philly 1/3-less-fat cream cheese (softened)
Add: 2 tbsp. sugar
Add: 1 tbsp: skim milk
Mix together.
Add: 1/2 package (i.e., 8.8 oz.) of Kellogg's All Bran Bran Buds
Mix together.
Press into 13" x 9" pan (a good idea is to line it with wax paper
first).
Refrigerate, at least until reasonably firm.
Filling:
Soften: remaining 14 oz. of Philly 1/3-less-fat cream cheese
Add: 4 oz. creamy peanut butter
Add: 3/4 cup sugar
Mix together.
Add filling on top of crust and spread out.
Refrigerate until firm, then cut into squares.
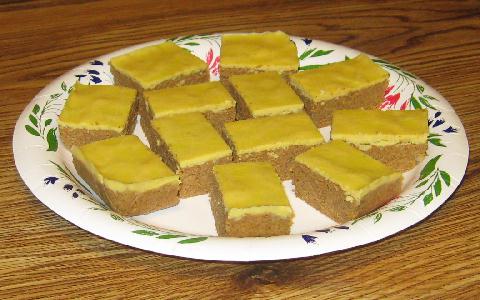
Chocolate Peanut Butter Bran Buddy Bars—Prototype 2:
Still uses two 8-oz. packages of Philly 1/3-less-fat cream cheese
Crust:
Melt: 12 oz. semi-sweet chocolate
Add: 4 oz. (INSTEAD OF 2 oz.) Philly 1/3-less-fat cream cheese (softened)
Add: 2 tbsp. sugar
Add: 1 tbsp: skim milk
ADD: 2 TEASPOONS OF VANILLA
Mix together.
Add: 1/2 package (i.e., 8.8 oz.) of Kellogg's All Bran Bran Buds
Mix together.
Press into 13" x 9" pan (a good idea is to line it with wax paper
first).
Refrigerate, at least until reasonably firm.
Filling:
Soften: remaining 12 oz. (INSTEAD OF 14 oz.) of Philly 1/3-less-fat cream
cheese
Add: 4 oz. creamy peanut butter
ADD: 2 OZ. SEMI-SWEET CHOCOLATE (MELTED)
Add: 3/4 cup sugar
Mix together.
Add filling on top of crust and spread out.
Refrigerate until firm, then cut into squares.
SUMMARY OF DIFFERENCES FOR PROTOTYPE 2, COMPARED TO PROTOTYPE 1:
Crust gets 2 teaspoons of vanilla, plus 2 additional oz. of cream cheese.
Filling gets 2 less oz. of cream cheese. In other words, 2 oz. of the cream
cheese gets shifted from the filling to the crust. Filling also gets 2 oz.
of melted semi-sweet chocolate.
Originally, the aforementioned 2 oz. of chocolate for the filling was
supposed to be shifted from the crust's allocation (resulting in only 10 oz.
of semi-sweet chocolate for the crust), but this step was forgotten. So the
crust still got a full 12 oz., all of this chocolate being mixed in and the
crust being made up before the error of forgetfulness was discovered. So a
separate allocation of 2 oz. of chocolate was used for the filling
(resulting in a total of 14 oz. of semi-sweet chocolate for the entire
recipe, instead of 12 oz. as originally planned). It is hoped that next
time, the step to take 2 oz. from the 12 oz. allocation of melted chocolate
will NOT BE FORGOTTEN.
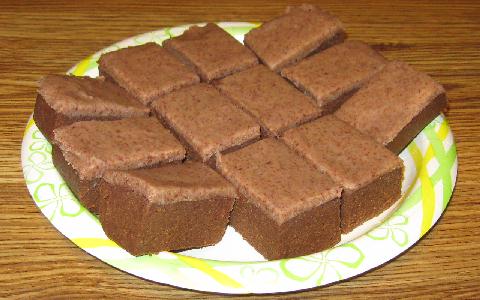
Chocolate Peanut Butter Bran Buddy Bars—Prototype 3:
What Prototype 2 was meant to be. In other words, a grand total of 12 oz.
semi-sweet chocolate was used for the entire recipe. Memorial success won
out this time as the crust got only the intended 10 oz. of the melted
chocolate (and the filling still got the remaining 2 oz.).
However, a new concern was triggered by eating these bars perhaps a day or
so after they were prepared. The Bran Buds lost their crunch! It is likely
that the moisture from other ingredients rendered them more chewy and/or
soggy. The result was a texture that did not seem to feel great when eaten.
Somebody suggested using Splenda (sucralose) instead of sugar to suppress
the crunch's loss.
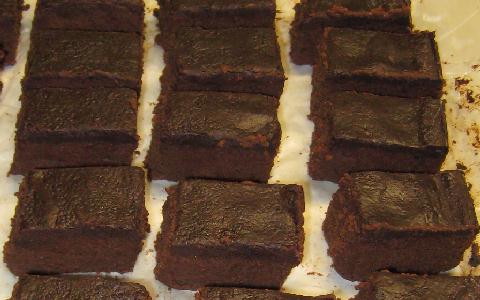
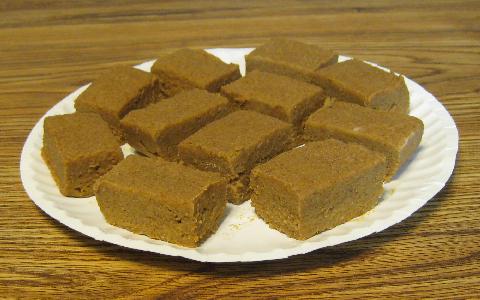
Chocolate Peanut Butter Bran Buddy Bars—Prototype 4:
Repeat Prototype 3, 12 oz. total of melted semi-sweet chocolate and all, but
with a new approach. Give up on the crunch. But avoid the unsatisfactory
texture of the seemingly soggy Bran Buds as well.
All of the ingredients, both for the crust and for the filling are
ultimately mixed together before being put into the pan. But...the Bran Buds
are finely ground in a blender to a flour-like texture first, before being
added to the other ingredients.
Here is a suggested sequence (with the quantities repeated for convenience):
Soften: two 8-oz. packages of Philly 1/3-less-fat cream cheese (and set
aside)
Grind: 1/2 package (i.e., 8.8 oz.) of Kellogg's All Bran Bran Buds (and set
aside)
Make sure the Bran Buds are finely ground to a flour-like texture (use a
blender or food processor).
Measure: 3/4 cup PLUS 2 tbsp. sugar
Add: 1 tbsp: skim milk
Add: 2 Teaspoons of vanilla
Mix together.
Add: 4 oz. creamy peanut butter
Mix together.
Melt: 12 oz. semi-sweet chocolate
Combine this with the sugar/milk/vanilla/peanut butter mixture (quickly,
while the chocolate is still melted).
Next, add the softened cream cheese to the above mixture, and mix well.
Finally, add the powdered Bran Buds to this mixture, and blend well (plenty
of effort needed here as the texture becomes stiff). Spread all this into a
13" x 9" pan (a good idea is to line it with wax paper first).
Refrigerate until firm, then cut into squares. Expect a somewhat fudge-like
texture. Please keep in mind that sugar was used in this prototype (not
Splenda).
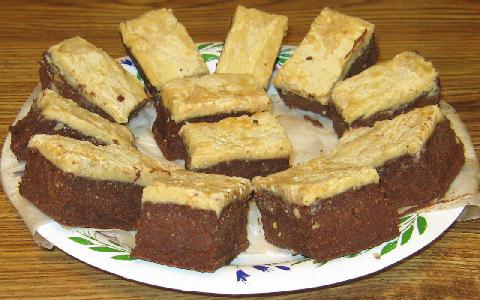
Chocolate Peanut Butter Bran Buddy Bars—Prototype 5:
While Prototype 4 had a decent taste, its single-mixture appearance might
have been too mysterious for some. So it's back to the two-layered approach,
but with some major changes: The peanut butter goes to the bottom, and the
chocolate (all of it!) goes to the top. And baking (!) is added as well.
First, the crust. Start with the first 8-oz. package of the softened cream
cheese and blend it with the 4 oz. of creamy peanut butter, the 1 tbsp. of
skim milk, the 1/2 package (i.e., 8.8 oz.) of Bran Buds, finely ground, and
1/2 cup of the sugar. Press it all into a 13" x 9" pan (lined with
wax paper).
Then bake this crust at 350 degrees (preheat the oven first) for 10 minutes.
Next comes the filling, a blend of the second 8-oz. package of the softened
cream cheese, the entire 12 oz. of melted, semi-sweet chocolate, the 2
teaspoons of vanilla and 1/4 cup plus 2 tbsp. of the sugar.
Spread this filling evenly onto the crust in the pan (cooling it off first
is not necessary, and was largely skipped here).
Then return the pan to the 350-degree oven for another 10 minutes. Remove
and let cool afterward, for about an hour, then place into refrigerator, and
let the recipe firm up there before cutting into squares.
One of the challenges was deciding how much of the recipe's total sugar to
allocate to the crust, which was initially going to contain only the peanut
butter and the ground Bran Buds, along with the crust's small share of the
sugar. However, this mixture was determined to be way too dry. Ultimately,
some of the cream cheese (likely all of which was originally planned to be
allocated to the filling) was gradually added to get the moisture up. And
this was done, unfortunately, after the peanut butter and the Bran Buds
powder got mixed together earlier. So blending in the cream cheese was
difficult. Some heating assistance was needed, therefore the mixture got a
little "microwaving" in order make the cream cheese hopefully more
workable. The milk, originally planned for the filling on top, also got
switched to the crust on the bottom in order to contribute to the moisture.
So the filling got "robbed" of all of its milk, half of its cream
cheese, plus some of its initial share of the sugar (to compensate for the
cream cheese shift) in order to "pay" the "thirsty"
crust. To bake this crust was also a late decision, in hopes of possibly
enhancing the blend for a better firmness, in light of the cream cheese's
late addition (and therefore difficulties in blending) to the crust. The
filling's stiffness led to the additional baking (in hopes of the filling
evening out more).
It should also be noted here that the peanut butter used in this prototype
was unsalted (salted varieties were likely used in at least some of the
earlier prototypes).
The result of all this is a lightly-colored crust on the bottom, along with
dark-colored filling on top, in keeping with the looks of many popular,
square-shaped, baked goods. Furthermore, the peanut butter's light, brown
color matches the crust exclusively containing it. And the filling's dark,
brown color does a good job of reflecting the chocolate solely allocated to
this upper layer.
Chocolate Peanut Butter Bran Buddy Bars—Prototype 6:
A repetition of Prototype 5, but with some challenging reallocations (and
additional, yet minor changes)!
Shift 4 ounces of cream cheese from the filling to the crust (2 tablespoons
of sugar were also supposed to be transferred along with this cream cheese
in the filling-to-crust shift, and probably was indeed done, but the memory
of this action is not 100% certain).
Sequential details (combining order) for crust:
12 oz. cream cheese
4 oz. unsalted peanut butter
1 tbsp. skim milk
(blend the three wet ingredients above before adding the two dry ones below)
1/2 cup plus (hopefully) 2 tbsp. sugar
8.8 oz. Bran Buds (ground up, of course)
Sequential details (combining order) for filling:
12 oz. melted, semi-sweet chocolate
2 teaspoons vanilla (should have added this one last, instead of at this
point, because it quickly stiffened the chocolate)
4 oz. cream cheese
1/4 cup (hopefully only this amount) sugar
Now things get really challenging. Press only HALF the chocolate filling
into the 13" x 9" wax-paper-lined pan (if necessary, apply a
minimal amount of broiler heat to facilitate the spreading). Then firm this
up by chilling it in the freezer for 20 minutes.
Remove the pan from the freezer, and add the crust mixture on top of the
lower chocolate layer. Press it down firmly, then return the pan to the
freezer for another 20 minutes.
Next, take the pan out of the freezer and press the remaining half of the
chocolate filling on top of the crust layer. This step was too difficult,
because the chocolate hardened too soon. Got to cut down next time on the
freezer duration that follows the crust addition (seems like the filling
absorbed the crust's cold temperature too quickly). Just make sure that the
crust is packed as firmly as possible. But not all was lost, thanks to a
quick heat application (broiling the pan in the oven for about a couple of
minutes). Spreading the top filling suddenly became extremely easy.
Next, it's "back to cool" time, but this time the pan goes into
the refrigerator, not the freezer.
Far more than enough time required for firmness passed (probably about two
hours) before the contents of the pan were cut.
Unfortunately, the chocolate filling tended to break up badly during the
cutting phase. Applying some oven heat helped a little, but not enough.
|
|
Chocolate Bran Buddy Bars—Prototype 1:
After having made Prototype 6 of the Chocolate Peanut Butter Bran Buddy
Bars, it was time to try a chocolate-only version (which is largely based on
that prototype).
For the crust (featuring cocoa, along with additional milk, sugar and
vanilla) start with...
1/4 cup skim milk, heated and combined with...
1/4 cup cocoa powder. Fully dissolve this in the milk, then blend in...
12 oz. cream cheese. Then add...
1 cup sugar. Blend thoroughly, then add...
2 teaspoons vanilla (next to last ingredient here). Blend this in, then
finally mix in...
8.8 oz. finely ground Bran Buds
Sequential details (combining order) for filling:
12 oz. melted, semi-sweet chocolate
4 oz. cream cheese
1/4 cup sugar
2 teaspoons vanilla (last ingredient here!)
Note that only cream cheese, sugar and vanilla (identical amounts on this
one!) are used for both the crust and filling.
Press half the chocolate filling into the 13" x 9" wax-paper-lined
pan (if necessary, apply a minimal amount of broiler heat to facilitate the
spreading). Then firm this up by chilling it in the freezer for 20 minutes.
Remove the pan from the freezer, and add the crust mixture on top of the
lower chocolate layer. Press it down firmly...but do NOT return the pan to
the freezer afterward (the crust mixture was already fairly stiff).
Instead, proceed directly with pressing the remaining half of the chocolate
filling on top of the crust layer, applying broiler heat as needed (be
careful, and do not overheat). For some reason, spreading the filling (top
and bottom) was not all that easy this time.
Apply a final shot of heat, this time BAKING briefly (instead of broiling),
hopefully to get the chocolate filling layers, especially the bottom one, to
adhere better to the crust.
Cool the pan until it can be comfortably touched, then put it into the
refrigerator. Refrigerate until firm, about 60 to 90 minutes. For the sake
of cutting, do not refrigerate for too long (the idea here is to prevent the
filling layers from cracking up or coming apart).
There was still some disintegration here, but hopefully not as badly as in
the aforementioned Prototype 6 of the chocolate peanut butter bars.
Despite omitting the peanut butter, the taste of the chocolate-only bars was
still close to that of the chocolate peanut butter ones. This was probably
due to whole wheat (of which bran is a particularly important
characteristic) tending to have a "nutty" flavor.
Chocolate Bran Buddy Bars—Prototype 2:
Repeat Prototype 1, but substitute whipped lowfat cottage
cheese for the lowfat cream cheese. And this time, thicken up! Use a
full recipe (instead of half), and put it all in a 9" x 9" pan.
|
|
Chocolate Peanut Butter Bran Buddy Bars—Prototype 7:
This was sort of a new one, featuring three distinct layers and a new
ingredient: white chocolate. Due to this prototype being made after
Prototype 2 of the Chocolate (only) Bran Buddy Bars, whipped cottage
cheese (lowfat, of course) replaced the cream cheese as well.
Sequential details (combining order) for lower filling:
6 oz. melted, semi-sweet chocolate
2 oz. whipped lowfat cottage cheese
1/8 cup sugar
1 teaspoon vanilla (last ingredient here!)
Sequential details (combining order) for crust:
14 oz. whipped lowfat cottage cheese
2 oz. unsalted peanut butter
1 tbsp. skim milk
(blend the three wet ingredients above before adding the two dry ones below)
1/2 cup plus 2 tbsp. sugar
8.8 oz. Bran Buds, ground up
Sequential details (combining order) for upper filling:
6 oz. melted, white chocolate
2 oz. unsalted peanut butter
1/8 cup sugar
1 teaspoon vanilla (last ingredient here!)
Tip: 1/8 cup of sugar weighs 1 ounce, so if a measuring cup of this size is
not available, try using a kitchen scale instead.
Note a 2 ounce swap—2 ounces of the peanut butter being switched from the
crust to the upper filling (mainly to give this filling more of a peanut
butter color), and 2 ounces of cottage cheese (the upper filling's entire
Prototype 6 share in its corresponding cream cheese form) being switched
from the upper filling to the crust.
Also note that the white chocolate replaces the semi-sweet on the top layer.
The pan procedures were similar to those of Prototype 6 (20-minute freezer
exposures, etc.), and the full recipe was actually used here—not
half—along with, however, a 9" x 9" pan (see the comments above
on Prototype 1 of the Chocolate Bran Buddy Bars for further info on this
issue). The cutting was done after probably about an hour and a half of
refrigeration (i.e., that occurred right after the top layer's placement).
There were still some disintegration problems, mainly with the semi-sweet
chocolate filling layer. However, the resulting cut bars were each
transferred to an individual-sized piece of wax paper, re-assembled with the
the broken filling sections, then heat-treated (semi-sweet side up, under
the broiler), and this approach ended up working out quite well. The bars
were then transferred back to the refrigerator for re-hardening.
"Integrated" success was hopefully attained at last!
|
|
Chocolate Bran Buddy Bars—Prototype 3:
Let's face it. To make a batch of three-layered (filling-crust-filling) Bran
Buddies has certainly become so time-consuming. And the lower layer of
filling breaking up upon cutting these bars (after chilling) only added to
the difficulty.
It was time for some kind of compromise. Retain only the top filling layer,
and merge the lower one into the crust. While this would result in the
relatively dry crust being at the bottom and hence more likely to hit the
eater's tongue (sorry, Laurie), at least this reformulated crust would be
somewhat moister. Furthermore, the bars wouldn't be as messy to handle (the
dual-filling-layers version tended to melt easily in one's hand).
So Prototype 2 gets repeated, but the ingredients for the bottom filling
layer get combined with those of the crust mixture. Here are the details:
Crust:
1/4 cup skim milk, heated and combined with...
1/4 cup cocoa powder. Fully dissolve this in the milk, then blend in...
14 oz. lowfat cottage cheese, whipped. Then add...
1 + 1/8 cups sugar. Blend thoroughly, then add...
6 oz. melted, semi-sweet chocolate
1 tablespoon vanilla (next to last ingredient here). Blend this in, then
finally mix in...
8.8 oz. finely ground Bran Buds
Filling:
6 oz. melted, semi-sweet chocolate
2 oz. lowfat cottage cheese, whipped
1/8 cup sugar
1 teaspoon vanilla (last ingredient here!)
Press the crust mixture into a 9" x 9" wax-paper-lined pan. Then
firm this up by chilling it in the freezer for 20 minutes.
Remove the pan from the freezer, and add the chocolate filling on top of the
crust layer, carefully applying broiler heat as needed.
When the pan is cool enough to be comfortably touched, put it into the
refrigerator. Chill until the top filling is almost completely firm, about
60 to 90 minutes, then cut into bars. Return these to the refrigerator, and
chill until fully firm.
|
|
Chocolate Peanut Butter Bran Buddy Bars—Prototype 8:
How about doing to the Chocolate Peanut Butter Bran Buddy Bars the same kind
of thing that was done for Prototype 3 of their chocolate-only counterparts?
In other words, merge the lower, dark, chocolate filling layer into the
crust mixture, but retain the peanut butter filling layer on top.
While this method would make the recipe simpler, another helpful idea
involved an extremely minor shift for the sugar. More specifically, the
total sugar used here amounted to 3/4 of a cup plus 2 tablespoons. The
distribution of this ingredient on Prototype 7 was:
Bottom filling: 1/8 cup
Crust mixture: 1/2 cup plus 2 tablespoons
Upper filling: 1/8 cup
But efforts to measure 1/8 of a cup had been a challenge, due to lack of a
measuring cup in this size. Some claims out there have somehow indicated
this amount as being equal to 2 tablespoons. However, a closer check would
reveal 1/8 of a cup to be more than that, but it wouldn't be by much.
In fact, the difference was negligible enough to make a minor change in how
the sugar would get measured out for this prototype. By merging the two
lower layers based on the above info, the sugar allocation would be:
Combined bottom filling/crust mixture: 1/2 cup plus 1/8 cup plus 2
tablespoons
Upper filling: 1/8 cup
Due to the small enough difference between 1/8 of a cup and 2 tablespoons, a
tiny allocation swap could be made, and the recipe total for the sugar would
still be 3/4 of a cup plus 2 tablespoons, as follows:
Combined bottom filling/crust mixture: 1/2 cup plus 1/8 cup plus 1/8 cup
Upper filling: 2 tablespoons
Hence the sugar for the combined lower mixture would now add up to an
easier-to-handle 3/4 of a cup (and measuring this ingredient for the
upper filling would be easier as well)!
Here, then, are the simplified details:
Crust:
16 oz. whipped lowfat cottage cheese
2 oz. unsalted peanut butter
1 tbsp. skim milk
(blend the above three ingredients before adding the next four ones below)
3/4 cup sugar
6 oz. melted, semi-sweet chocolate (be sure to quickly stir this one in
while it is still melted)
1 teaspoon vanilla (next to last ingredient here!)
8.8 oz. Bran Buds, ground up
Filling:
6 oz. melted, white chocolate
2 oz. unsalted peanut butter
2 tablespoons sugar
1 teaspoon vanilla (last ingredient here!)
Press the crust mixture into a 9" x 9" wax-paper-lined pan. Then
firm this up by chilling it in the refrigerator (not the freezer this
time—it has been determined that refrigeration is sufficient) for 20
minutes.
Remove the pan from the refrigerator, and add the peanut butter filling on
top of the crust layer. If broiler heat is needed, be very careful. Use just
enough to make the filling spreadable (too much heat can brown the filling).
When the pan is cool enough to be comfortably touched, put it into the
refrigerator. Chill until the top filling is almost completely firm, about
60 to 90 minutes, then cut into bars. Return these to the refrigerator, and
chill until fully firm.
Seems like
something went wrong when I tried to compare 1/8 of a cup to 2
tablespoons for this prototype. Chances are, I was using a small
cup that indicated a measurement of 2 tablespoons—a quick,
convenient way to make such a measurement, rather than using a
single measuring tablespoon twice. A few weeks after making this
batch of bars, I did some additional research on the Internet in
regard to the question of how many tablespoons were in 1 cup. I
kept on getting 16 as the answer here. This would mean that 1/8
of a cup would equal only 2 tablespoons—not more than
that, as I thought earlier!
But I wondered why I came up with such a different evaluation.
So I took some measuring spoons and cups, did some further
research, and determined that the "2 TBSP COFFEE
MEASURE" which I very likely used in the earlier comparison
was, in fact, deficient (no, this supposedly was not from a
coffee can, but rather part of a regular set of measuring cups).
Maybe this particular cup was meant for heaping, not leveling.
So after checking with the other measuring utensils, I have
finally arrived at the conclusion that 1/8 cup = 2 tablespoons. |
|
|
Chocolate Peanut Butter Dream Bran Buddy Bars—Prototype 1:
These Bran Buddy Bars just keep on getting better and better. What does this
mean? They're getting devoured more quickly! Because of this, the actual
recipe was increased by 50% and put into a 13" x 9" pan. However,
the normal size recipe is presented here (remember to use a 9" x
9" pan if using this one!) for the sake of reference. Some helpful tips
are provided as well.
Grind the Bran Buds ahead of time, then set side. Next, whip the cottage
cheese ahead of time, then place in refrigerator until it is needed.
Sequential details (combining order) for crust (lower layer):
1/4 cup skim milk, heated
1/4 cup cocoa powder. Fully dissolve this in the milk.
2 oz. melted, semi-sweet chocolate
2 oz. unsalted peanut butter
3/4 cup plus 2 tbsp. sugar
14 oz. whipped lowfat cottage cheese
1 teaspoon vanilla (next to last ingredient here). Blend this in, then
finally mix in...
8.8 oz. Bran Buds, ground up
Sequential details (combining order) for peanut butter filling (middle
layer):
6 oz. melted, white chocolate
3 oz. unsalted peanut butter
3 tbsp. sugar
1 teaspoon vanilla (last ingredient here!)
Sequential details (combining order) for chocolate filling (upper layer):
6 oz. melted, semi-sweet chocolate
2 oz. whipped lowfat cottage cheese
2 tbsp. sugar
Note the added peanut butter (along with a corresponding increase in sugar)
for the peanut butter filling.
"Hey, wait a minute! Wasn't the chocolate filling supposed to include 1
teaspoon of vanilla??" As a matter of fact, yes. Unfortunately, this
late step was forgotten.
Here are some additional tips. Melt the entire recipe's semi-sweet
chocolate, i.e., 8 ounces, before adding any of it to the crust. More
specifically, add the 2 ounces to the milk and cocoa powder
mixture—quickly, of course. Immediately afterward, take the cottage cheese
from the refrigerator, and add 2 ounces of this to the remaining 6 ounces of
melted chocolate (return the remaining cottage cheese to the refrigerator).
Blend these two together, reserving this mixture for the chocolate
filling—set it aside and be sure to protect it against spoilage (since it
may be a long while before the mixture is needed to complete the filling,
refrigeration is recommended until then—at which point the contents can be
reheated). After setting this mixture aside, continue with the crust (adding
peanut butter, etc.).
And here's another tip: 1/4 cup of cocoa powder has been determined to weigh
1.2 ounces (so if this is what the normal-sized recipe calls for, a 50%
increase would require an additional .6 ounce, i.e., 1.8 ounces altogether).
Chill until the top filling is almost completely firm, about an hour, then
cut into bars. Return these to the refrigerator, and chill until fully firm.

|
|
Change of name from Bran
Buddy(-ies) to HiFi Buddy(-ies)
The
way that I came up with the name Bran Buddy/Buddies is derived from
the name of the key ingredient used in these recipes: Kellogg's
All-Bran Bran Buds—or "All Bran Bran Buds" as I often
expressed it (Kellogg's itself being the trademark owner of the All-Bran
and Bran Buds names). I have also used the Bran Buddy
expression for some other Bran-Buds-containing treats that I
have thrown together, not just these bars. But it was for good
reason that I used this kind of naming on all of these recipes.
Yes, they obviously contained bran from the Bran Buds. But they
were also very delicious—high in fiber, yet surprisingly
delectable or "decadent" (as some would say). I
somehow perceived a "nutritious and very delicious"
kind of treat like this as a "buddy"—as in friend,
pal, ally, etc.—this word being, of course, derived from
"Buds" in Bran Buds.
While I have succeeded in getting many people turned on to these
recipes that were both nutrition-friendly and taste-friendly, at
least one person suggested that I drop "Bran" from the
name, due to the likelihood of scaring off some other potential
tasters. This would pose a challenge to me, due to my having
used the "Bran Buddy" form for a few years.
But another term had been on my mind throughout those years as
well—Hi-Fi. Why?
As I was growing up, "Hi-Fi" (or "HiFi," or
"hi-fi," or "hifi") had a nice ring to it,
at least for me and many other people of my generation. Hi-Fi
was an abbreviation for High Fidelity, a term describing
high-quality audio. In more recent times, this wording has
somehow given way to "Hi-Def" or High Definition,
a term still applicable to audio, but a lot more easily
associated with video (particularly HDTV's, i.e.,
high-definition televisions, with wide, flat screens).
However, what I had in mind was the idea of "Hi-Fi"
standing for "High Fiber", at least within the
context of my Bran Buddy concoctions. So I thought that I would
change the name of my high-fiber treats to "Hi-Fi
Buddies" (or "Hi-Fi Buddy Bars"). This sounded
good to me, and I felt that it would sound good to many people
from my generation as well (hopefully in addition to those
people older than us). Many of us who grew up rockin' out to
"hi-fi stereo" systems in the 1970's would acquire a
significant desire for fiber as we got older.
But what about those younger than us? These people may not yet
be as concerned about getting enough fiber, and "Hi-Fi"
and "High Fidelity" may sound too old to them. But at
least "Hi-Fi" easily rhymes with "Wi-Fi",
which itself stands for "Wireless Fidelity" (a bonus
is that the "Fi" part still stands for
"Fidelity"), and this Internet-related term is
something that these younger ones can much more easily relate
to. So as long as the rhyme is there, perhaps "Hi-Fi"
will still have at least a somewhat decent ring with these
people too. Furthermore, even though they might not have a
particularly big appetite for fiber these days, they still may
like the high-fiber snacks anyway.
When someone hears the wording "Hi-Fi Buddies", that
may bring up images of some kind of audiophile community.
"Ah, the joys of high-end electronics!" Anyway, I have
come to conclude that switching to this new naming arrangement,
with "Hi-Fi" standing for "High Fiber" in
this context, was a good move. |
|
|
Chocolate Cherry HiFi Buddy Bars—Prototype 1:
Given that chocolate and cherry are a popular Valentine's Day combination,
let's make some HiFi Buddies for this romantic holiday. This particular
recipe uses cherry butter, a pasty-textured cherry spread available (at
least as of this batch's production) at Whole Foods Market.
This recipe is based mainly on Prototype 8 of the chocolate peanut butter
bars. However, the cherry butter directly replaces the peanut butter. Due to
exchanging this peanut butter for a sweeter ingredient, the sugar is omitted
from the filling as well. The details are as follows:
Crust:
6 oz. melted, semi-sweet chocolate
2 oz. cherry butter (combine quickly with the chocolate above while it is
still melted, and blend in the next two ingredients shortly afterward)
3/4 cup sugar
16 oz. whipped lowfat cottage cheese
1 tbsp. skim milk
1 teaspoon vanilla (next to last ingredient here!)
8.8 oz. Bran Buds, ground up
Filling:
6 oz. melted, white chocolate
2 oz. cherry butter
1 teaspoon vanilla (last ingredient here!)
Press the crust mixture into a 9" x 9" wax-paper-lined pan. Firm
it up in the refrigerator for 20 minutes or freezer for 10 minutes.
Remove the pan from whatever cooler was used, and add the cherry filling on
top of the crust layer. Tip: if the filling is stiff, microwave it a little
to soften, before it gets put on the crust (this is better than the broiler
heat approach).
Place the pan in the refrigerator. Chill until the top filling is almost
completely firm, about 60 to 90 minutes, then cut into bars. Return these to
the refrigerator, and chill until fully firm.

Chocolate Cherry HiFi Buddy Bars—Prototype 2:
No need to add more cherry! No need to lower it either. But the quest was on
for the filling to have a more reddish appearance. Repeat Prototype 1, but
shift 1 ounce of the cherry butter from the crust to the filling (which
would furthermore have more of a distinct cherry taste). This means 1 ounce
of cherry butter for the crust, and 3 ounces of it for the filling.
Another change was to defer the crust's sugar until after the cottage
cheese. In Prototype 1, there was a lumpiness problem in fully blending the
semi-sweet chocolate mixture with the cottage cheese. This was likely caused
by the cold cottage cheese being combined long after the chocolate was
melted. What happened was that the chocolate mixture had an extended
chance to cool back down, thanks in part to mixing the sugar into it before
bringing on the cottage cheese. The mixing bowl used was metal, so microwave
usage was not a suitable choice. A cautious use of a conventional oven would
reheat the contents enough to produce a desired thorough blend. As for
Prototype 2, a further step was to somehow preheat the metal bowl. One way
of doing this was by heating it in an oven. Another helpful approach
involved filling a sink with some hot water and placing the bowl of mixture
there and blending the contents without getting any of the sink's water into
the bowl.
Fast forward to the point after the top filling is spread over the crust!
Place the completed pan in the refrigerator, and chill until the top filling
is almost completely firm. But this time allow about 2 1/2 to 3 hours,
due to a softer filling (because of it having more of the soft cherry
butter), then cut into bars. Return these to the refrigerator, and chill
until fully firm.
|
|
Peanut Butter HiFi Buddy Bars—Prototype 1:
Let's take a good look back at all these "Buddy" bars. Chocolate
and peanut butter "shared" their "rule" with each other
for the first few recipes. Then chocolate got to have a recipe all to
itself. Later on, this popular flavor teamed up with cherry early in a year
as Valentine's Day approached.
But peanut butter never got to have such a bar recipe all to itself...until
now. Okay, white chocolate is used here, but this stuff is relatively
neutral, at least compared to its darker, brown counterparts. In fact, many
feel that this white ingredient should not even be called
"chocolate". Possible alternative names have included "white
candy". What can one officially call this thing? Maybe
"neutral confection"? Still, for now, let's call this ingredient
"white chocolate", whether it really is chocolate or not. Anyway,
in light of this ingredient being so neutral that many flavorings added to
it have easily dominated this white stuff, it should be reasonably safe to
say that peanut butter is the sole flavor ruler (or at least easily the
dominator) of this recipe described here.
So what do you do for such a nutty prototype here?
Looks like Prototype 8 of the Chocolate Peanut Butter Bran Buddy Bars is a
good starting point. The changes are extremely simple and only need to be
made in the crust: delete the semi-sweet chocolate, and increase the peanut
butter by 4 ounces and the sugar by 1/4 cup. That all! The results:
Crust:
16 oz. whipped lowfat cottage cheese
6 oz. unsalted peanut butter
1 tbsp. skim milk
(blend the above three ingredients before adding the next three ones below)
1 cup sugar
1 teaspoon vanilla (next to last ingredient here!)
8.8 oz. Bran Buds, ground up
Filling:
6 oz. melted, white chocolate
2 oz. unsalted peanut butter
2 tablespoons sugar
1 teaspoon vanilla (last ingredient here!)
Use a 9" x 9" pan, of course.
Peanut Butter HiFi Buddy Bars—Prototype 2:
If the above recipe was too sweet, perhaps this was the case only with the
filling. However, the crust seemed like it could use a little more
sweetness. So let's repeat Prototype 1, but shift all of the filling's sugar
to the crust.
In light of a 13" x 9" pan being used for Prototype 2, the
amounts shown below reflect this bigger batch:
Crust:
24 oz. whipped lowfat cottage cheese
9 oz. unsalted peanut butter
1 + 1/2 tbsp. skim milk
(blend the above three ingredients before adding the next three ones below)
1 + 1/2 cup plus 3 tbsp. sugar
1/2 tbsp. vanilla (next to last ingredient here!)
13.2 oz. Bran Buds, ground up
Filling:
9 oz. melted, white chocolate
3 oz. unsalted peanut butter
1/2 tbsp. vanilla (last ingredient here!)
Repeating what was just stated, a 13" x 9" (not 9" x
9"!) pan was used, and the ingredient amounts shown here reflect
this.
Some tips are worth noting here. Vigorously stir the filling immediately
after adding the vanilla, because this last ingredient causes the filling to
get stiff. And (for all Bran/HiFi Buddy Bar recipes) stir, with even more
intense vigor, the crust mixture immediately after adding the Bran Buds for
the same type of reason. It is advisable to dump this entire amount of Bran
Buds "powder" on top of the other crust ingredients, and then blend
the contents as quickly as possible, before this dry, ground-up bran
absorbs a lot of the moisture from the wet ingredients, thus rendering the
crust very stiff.
|
|
Banana HiFi Buddy Bars—Prototype 1:
Let's go bananas with this one! Plan ahead by taking two medium-to-large
sized bananas (enough to make 8 ounces of puree) and let them get ripe. Then
peel and puree them (a blender or food processor is recommended here) just
before using in the recipe that follows:
Crust:
16 oz. whipped lowfat cottage cheese
6 oz. banana puree
1 tbsp. skim milk
(blend the above three ingredients before adding the next three ones below)
1/3 cup sugar
1 teaspoon vanilla (next to last ingredient here!)
8.8 oz. Bran Buds, ground up
Filling:
6 oz. melted, white chocolate
2 oz. banana puree
1 teaspoon vanilla (last ingredient here!)
Fit all this into a 9" x 9" pan, and chill until firm.
|
|
Fluffernutter HiFi Buddy Bars—Prototype 1:
This is the simplest HiFi Buddy Bar recipe yet—there is only one layer, and
these bars should keep for a very long time at room temperature (no
refrigeration needed).
The sequence suggested by the song's lyrics are crucial. According to the
original tune, the peanut butter went on the bread first, and the
Marshmallow Fluff was added afterward. For the Hifi Buddy Bars, it's a
different story, so pay close attention.
Sequential details (combining order) for single layer:
1 jar (i.e., 7.5 ounces) Marshmallow Fluff (or other brand of marshmallow
cream, if you cannot get the Fluff brand)
4 oz. unsalted peanut butter (mixture will become very stiff after combining
the first two ingredients)
8.8 oz. Bran Buds, ground up (last ingredient here!)
Mix hard! You are dealing with a very stiff mixture. Then press it all into
a 9" x 9" wax-paper-lined pan. Get it leveled off, and expect a
thin layer. Once this is done, cut into bars and enjoy!
Fluffernutter HiFi Buddy Bars—Prototype 2:
Those bars need to be made thicker and softer. This means increasing the
recipe, but also giving the marshmallow cream a proportionally higher
boost—which increases its flavor as well.
Sequential details:
1 large "tub" (i.e., 16 ounces) Marshmallow Fluff (or other
marshmallow cream)
6 oz. unsalted peanut butter
13.2 oz. Bran Buds, ground up (last ingredient here!)
Mix hard, press into 9" x 9" pan, level off, cut into bars, enjoy
some, store the rest at room temperature (chilling will result in stiffer,
harder bars).
Fluffernutter HiFi Buddy Bars—Prototype 3:
Increase the peanut butter...slightly.
Sequential details:
1 large "tub" (i.e., 16 ounces) Marshmallow Fluff (or other
marshmallow cream)
7 oz. unsalted peanut butter
Tip: Heat these first two ingredients, blend well, then (if needed) heat
again just before adding the last ingredient. This should help ease the
stiffness somewhat.
13.2 oz. Bran Buds, ground up (last ingredient here!)
Mix hard and quickly, press into an 8" x 8" pan or dish,
level off and cut into bars (store at room temperature).
|
|
Lemon HiFi Buddy Bars—Prototypes 1 & 2:
The ingredients are the same for both of these prototypes. The difference is
in the ways that the filling is handled.
Crust:
5 oz. lemonade concentrate, thawed
1/3 cup sugar
16 oz. whipped lowfat cottage cheese
(blend the above three ingredients first before adding the Bran Buds)
8.8 oz. Bran Buds, ground up
(blend this into the above mixture as fast and "furiously" as
possible)
Filling:
6 oz. melted, white chocolate
1 oz. lemonade concentrate, thawed
Spread the crust mixture into an 8" x 8" pan, then add the filling
on top, and chill until firm.
|
|
Orange HiFi Buddy Bars—Prototype 1:
This one is easily based on the Lemon HiFi Buddy Bars. There is only one
difference: orange juice concentrate replaces the lemonade concentrate that
was used in the lemon recipe. Simple enough. Here are the details for quick
reference:
Crust:
5 oz. orange juice concentrate, thawed
1/3 cup sugar
16 oz. whipped lowfat cottage cheese
(blend the above three ingredients first before adding the Bran Buds)
8.8 oz. Bran Buds, ground up
(blend this into the above mixture as fast and "furiously" as
possible)
Filling:
6 oz. melted, white chocolate
1 oz. orange juice concentrate, thawed
Spread the crust mixture into an 8" x 8" pan, then add the filling
on top, and chill until firm (cut them about an hour after chilling).
|
|
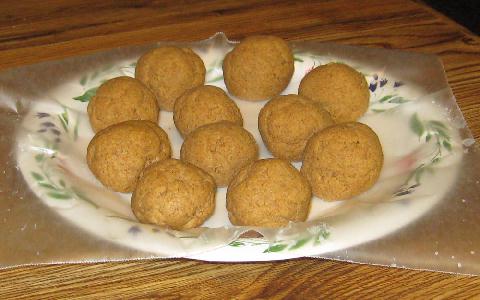
Orange HiFi Buddy Balls—Prototype 1:
That's right: "Balls" is correct. This is a new approach.
All the Crust and all the Filling ingredients of the Orange HiFi Buddy Bars
recipe are combined together into a single mixture. Note that the total
amount of orange juice concentrate used is 6 ounces. Also, the Bran Buds
should be the last ingredient—blend together all the other ones first.
The resulting mixture may be a bit too soft at first, so refrigerate this in
order to get it a little more firm.
Then take a little bit of the mixture at a time, forming it into a ball,
about 1 1/2 inches in diameter, and place it onto wax paper. Repeat this
until all the mixture is used up. This should result in about 24 balls.
Refrigerate at least about an hour.
|
|
Pumpkin HiFi Buddy Bars—Prototype 1:
Are you ready for some football ("American football" to many of
those who live outside the USA)? While this sport is a major part of the
autumn season, pumpkins are largely associated with this time of year as
well, and pumpkin pie, in particular, is a popular treat (especially around
November). Here's a HiFi Buddy version!
Crust:
4.5 oz. pumpkin butter (available at Trader Joe's)
1/3 cup granulated sugar
16 oz. whipped lowfat cottage cheese
(fully blend the above three ingredients first before adding the Bran Buds)
8.8 oz. Bran Buds, ground up
(blend quickly into the above mixture)
Filling:
6 oz. melted, white chocolate
1.5 oz. pumpkin butter
Spread the crust mixture into an 8" x 8" pan, then add the filling
on top, and chill until firm.
Buddy Balls variation:
Simply combine all of the Crust and all of the Filling ingredients of the
Pumpkin HiFi Buddy Bars recipe into a single mixture. Then form this into
balls, about 1 1/2 inches in diameter, and chill for at least an hour.
|
|
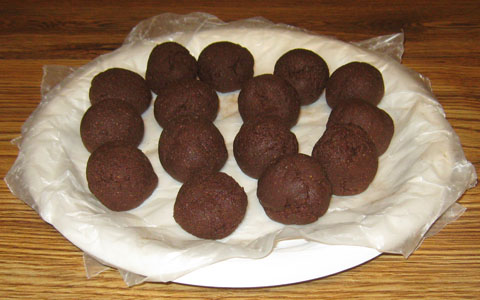
Chocolate HiFi Buddy Balls—Prototype 1:
12 oz. semi-sweet chocolate. Heat only until it just becomes fully melted,
then mix in...
1/4 cup cocoa powder. Heat this mixture a little more, then blend in, as
thoroughly as possible...
1/4 cup skim milk. Heat this mixture a little more, mix it more thoroughly,
then gradually combine...
16 oz. lowfat cottage cheese, whipped. Then add...
1 + 1/4 cups sugar. Blend thoroughly, then add...
1 + 1/3 tablespoons vanilla (next to last ingredient here). Blend this in,
then finally mix in...
8.8 oz. finely ground Bran Buds. Mix quickly with vigor.
Let resulting mixture sit for at least 5-10 minutes, perhaps even in the
refrigerator. Then form into balls. Refrigerate until firm. Makes about 24
(each one close to 1 1/2" in diameter, based upon about 2.1 to 2.2
ounces per ball).
Orange-Chocolate variation:
Replace the 1/4 cup skim milk with 3 ("touch of orange") to 4
("possibly overwhelming orange") ounces of orange juice
concentrate.
Chocolate HiFi Buddy Balls—Prototype 2:
12 oz. semi-sweet chocolate
1/4 cup cocoa powder
1/4 cup skim milk (heated and combined with the cocoa powder)
16 oz. nonfat vanilla yogurt cheese (derived through straining from 32 oz. of
nonfat vanilla yogurt, preferably Market Basket)
7/8 cup sugar
1 tablespoon vanilla
8.8 oz. finely ground Bran Buds (last ingredient, mix this one in quickly with
vigor)
Let resulting mixture sit for at least 5-10 minutes, perhaps even in the
refrigerator. Then form into balls. Refrigerate until firm. Makes about 25-30
(each one close to 1 1/2" in diameter, based upon about 2 ounces per ball).
|
|
Peanut Butter HiFi Buddy Balls—Prototype 1:
6 oz. melted, white chocolate
8 oz. unsalted peanut butter
16 oz. whipped lowfat cottage cheese
1 tbsp. skim milk
1 cup plus 2 tbsp. sugar
2 teaspoons vanilla (last ingredient just before the Bran Buds)
8.8 oz. Bran Buds, ground up (make sure that all the other ingredients are
thoroughly blended first, then quickly combine this one using a serious
amount of intensity, expecting stiff results)
These is no need to let the resulting mixture sit for long. It gets very
stiff rather quickly. Form this into balls, and refrigerate until firm.
Makes about 24 (each one close to 1 1/2" in diameter, based upon about
1.9 to 2.0 ounces per ball).
Peanut Butter HiFi Buddy Balls—Prototype 2:
Repeat Prototype 1, but...
Reduce peanut butter by 2 ounces, to 6 ounces
Reduce sugar by 3 tablespoons, to 15 tablespoons (1 cup minus 1 tablespoon)
|
|
Chocolate Peanut Butter HiFi Buddy Balls—Prototypes 1 & 2:
For both prototypes, prepare a bowl of the mixture for Chocolate HiFi
Buddy Balls, Prototype 1.
For Prototype 1 of these combination balls, prepare a bowl of the mixture
for Peanut Butter HiFi Buddy Balls, Prototype 1.
For Prototype 2 of these combination balls, prepare a bowl of the mixture
for Peanut Butter HiFi Buddy Balls, Prototype 2.
From the bowls of both of these flavors, take equal amounts from each
one—about one ounce from each mixture is suggested—and roll them together
into a single ball. The result is a somewhat marbled pattern (about a
two-ounce, 1 1/2" size). Repeat this until the bowls are empty. There
will probably be some extra mixture left in one of the bowls after the other
one is empty. Simply take double amounts (such as about two ounces) from the
surplus bowl and form into balls solely in that flavor. The yield should be
close to 4 dozen balls.
|
|
Maple HiFi Buddy Balls—Prototype 1:
6 oz. melted, white chocolate
16 oz. whipped lowfat cottage cheese ("no salt added" recommended)
(When combining the two above ingredients, start off by blending just some
of the cottage cheese—perhaps close to half of the total amount—with all
of the white chocolate, using heat along the way, so that this chocolate
does not solidify back up. Once it is thoroughly "dissolved", no
additional heat should be needed upon adding the rest of the cottage
cheese.)
1 cup maple sugar
2 teaspoons maple flavoring
8.8 oz. finely ground Bran Buds (mix this in last, and mix it fast)
This small, simple list of ingredients only yields about 18 two-ounce balls,
so increase the proportions if more balls are desired.
|
|
Eggnog HiFi Buddy Balls—Prototype 1:
12 oz. white chocolate
1 pint light eggnog
16 oz. yogurt cheese
1/2 cup granulated sugar
8.8 oz. Bran Buds, ground up
A key tip here is using a double boiler or something similar, rather than a
microwave oven, not only to melt the chocolate, but also to heat up the eggnog,
thus evaporating it a little as well. Cook and fully blend these two together.
The sugar and yogurt cheese need to be mixed in at some point as well, but make
sure that these first four ingredients are well mixed (and cooled down if still
hot) before the Bran Buds are added. After mixing in these Bran Buds, the
resulting mixture should thicken a little. Then place the bowl or pot (cooled
down) of mixture into the refrigerator for at least a few hours (perhaps no less
than six). This should enable the mixture to get somewhat stiffer. The longer
the mixture sits in the refrigerator, the firmer the mixture should be. When it
is stiff enough, form it into balls, about 2 ounces each, or roughly 1 1/2"
in diameter.
|
-------------------------------------------------------
|
Awesome, Rawkin' Egg "Nawg" Pancake Batter:
Combine a 50-50 blend of Trader Joe's Buttermilk Pancake (& All Purpose
Baking) Mix and egg nog.
(Do not add eggs, because the egg nog already contains some.)
Expect batter to be thick.
Gradually add water (or more egg nog) to produce a suitably thin
consistency.
Tip: If the pancakes are very hot, cool them slightly in order to better
enjoy the egg nog flavor.
|
-------------------------------------------------------
|
Additional Trader Joe's Buttermilk Pancake & All Purpose Baking Mix notes:
Using a scale for weighing, instead of a measuring cup:
1 cup of this pancake mix (packed down) = 7 ounces
(Unless otherwise specified, eggs are optional, but not really necessary.)
Chocolate version: Add 3 tablespoons of granulated sugar and 3 tablespoons of
cocoa powder to the aforementioned cup of pancake mix. Add semi-sweet chocolate
chips as well (about 3/8 cup should suffice) for a great chocolaty taste.
Chocolate chip cookie dough version: Fold 3 1/2 ounces of this cookie dough,
finely chopped, into the batter prepared with the aforementioned cup
of pancake mix (in other words, first combine the pancake mix with water
and/or other liquid ingredients, then add the cookie dough afterwards).

Orange version: Add 2 tablespoons of grated orange peel (rind) to the
aforementioned cup of pancake mix, and instead of adding water to this
mix (per package instructions), substitute orange juice.
Lemon version: Add 1/2 cup of lemon juice and 1/4 cup of granulated
sugar to the aforementioned cup of pancake mix, mix together, then add
water until desired consistency is obtained.
Almond version: Add 2 teaspoons of granulated sugar and 2 teaspoons of almond
extract to 6 ounces (rather than 7 ounces) of the aforementioned
pancake mix for a "touch" of almond flavor (or use 1 tablespoon each
of the granulated sugar and almond extract for an easily strong enough almond
presence).
Cinnamon roll version (my attempted answer to an IHOP limited-time offer
from the past): Using the aforementioned cup of pancake mix, prepare
pancakes the regular way with water, but also prepare these two toppings as
well:
1. Cottage cheese (not cream cheese) icing (mix together 1/2 cup of whipped
cottage cheese, 2 tablespoons of confectioner's sugar, and 1/4 teaspoon of
vanilla)
2. Cinnamon "filling" (mix together 1/4 cup of brown sugar, 1
tablespoon of cinnamon, and just enough maple syrup to obtain a thick liquid
consistency)
Use both of these to top off the pancakes.
Cookies+creme version: Add about 7 ounces of chocolate sandwich cookies (with
vanilla creme centers), broken up, to the aforementioned cup of pancake mix
(a helpful example would be 28 Oreo Thins cookies).
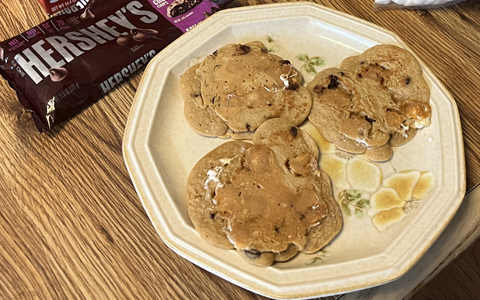
S'mores version: Add about 7 ounces of graham crackers, ground up (or broken
up), to the aforementioned cup of pancake mix, along with about 1/2 cup of
milk chocolate chips (such as Hershey's) and about 1/2 cup of miniature
marshmallows (packed down).
|
-------------------------------------------------------
|
Barbecue Latkes:
Prepare latkes according to the potato latkes package, but whatever amount
of water this package calls for, replace 1/3 of it with barbecue sauce.
For example, if using Streit's Potato Pancake Mix, and the package says to
add 2 eggs and 2 cups of water to the mix, go ahead and use the 2 eggs, but
add only 1 1/3 cups of water, along with 2/3 cup of barbecue sauce, to the
mix.
Buffalo Ranch Latkes:
This is similar to the barbecue latkes recipe. However, instead of using
barbecue sauce, use an equal amount of a 50-50 blend of wing sauce and ranch
dressing. By utilizing the above example, 2 eggs and 1 1/3 cups of water,
along with 1/3 cup of wing sauce and 1/3 cup of ranch dressing, would be
added to the mix.
Aish (Hebrew for "fire") Latkes:
Using the recipe for Barbecue Latkes, above, add one teaspoon of
Mad Dog 357 hot sauce (or some other very hot
sauce) to the mixture.
|
-------------------------------------------------------
|
Matzah Pizza Stack (or "Matzone" or "Matzah Calzone"):
Top 7 planks of matzah with sauce prepared from one to two 6-ounce cans of
tomato paste (probably closer to two cans, as the tomato flavor could hardly
be detected with only one can on an earlier try—in fact, make that two full
cans). Spice up this sauce beforehand according to taste (e.g, with Italian
seasoning, oregano, crushed red pepper). Sprinkle some hard, grated cheese
(optional) on top of the sauce. Add pepperoni (optional), 16 slices per
plank, to 5 of the planks. Using 2 8-ounce packages of shredded cheese,
divide this cheese among all 7 planks. Bake and/or broil the topped planks
until cheese is melted. Assemble these 7 planks immediately afterward,
toppings-sides-upward. Add an 8th plank of matzah, a plain one, on top of
all this. Let the resulting stack sit until the moisture from the lower
contents has softened the 8th plank on top. Then cut into desired sizes and
serve promptly.
|
-------------------------------------------------------
|
Basic Bran-Buds-Based Pie Crust:
For one 9.5" pie plate (expect crust to be somewhat thicker than
normal)
Mix:
8 oz. whipped lowfat cottage cheese
1/3 cup sugar
1/2 teaspoon vanilla
Optional (useful for eggnog pies):
1/2 teaspoon cinnamon
1/8 teaspoon nutmeg
1/4 cup eggnog
Then add:
4.4 oz. Bran Buds, ground up
Mix quickly and vigorously. Then press into pie plate and refrigerate.
Suggestion: Line pie plate with a circular piece of wax paper on the bottom.
|
-------------------------------------------------------
|
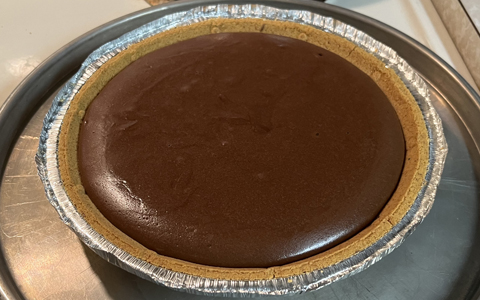
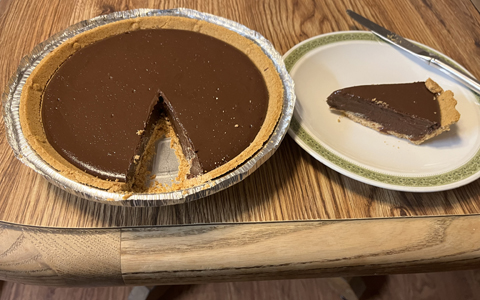
Chilled Eggnog Pie—Prototype 1:
For one a 9.5" pie plate, prepare a
Basic Bran-Buds-Based Pie Crust,
and include the optional ingredients for eggnog pies.
Then for the filling, combine 2 packages of instant vanilla pudding mix (I
used Trader Joe's, each package being a 3.39 oz. size) with 3 cups of light
eggnog (I used Hood). Mix well, let the resulting mixture thicken a little,
then pour it into the crust, and chill (preferably for at least three
hours). Note: One variation is to increase the eggnog to 3 1/2 cups, but the
filling may be a little runny when the pie is sliced (unless it is served
frozen).
Chilled Eggnog Pie—Prototype 2:
Crust:
1 package (or prepared) 8" graham cracker pie crust
Batter:
8 oz. (about 1 cup) whipped, lowfat cottage cheese
8 oz. softened Neufchatel cheese ("light cream cheese")
1/2 cup granulated sugar
1 teaspoon vanilla extract
2 cups of eggnog
1 tablespoon xanthan gum
Pour batter into crust and chill for at least 2 hours.
Chilled Eggnog Pie—Prototype 3:
Crust:
1 package (or prepared) 8" graham cracker pie crust
Batter:
8 oz. (about 1 cup) whipped, lowfat cottage cheese
8 oz. softened Neufchatel cheese ("light cream cheese")
1/2 cup granulated sugar
3/4 teaspoon vanilla extract
1 1/3 cups of eggnog
1 tablespoon xanthan gum
Pour batter into crust and chill for at least 2 hours.
|
-------------------------------------------------------
|
Chilled Pumpkin Eggnog Pie—Prototype 1:
I used a somewhat smaller pie plate (perhaps a little over 8.5") for
this recipe. The pumpkin part of this one is largely based on the
Pumpkin HiFi Buddy Bars (Prototype 1),
but there is a slight shift in regard to
the pumpkin butter.
First, prepare this crust, and press it into the pie plate:
2 oz. pumpkin butter (I used Trader Joe's)
2 tablespoons + 2 teaspoons sugar (this equals 1/6 cup)
8 oz. whipped lowfat cottage cheese
(fully blend the above three ingredients first before adding the Bran Buds)
4.4 oz. Bran Buds, ground up
(blend quickly into the above mixture)
Next prepare this "lower" filling, and spread it onto the crust
(try to get the filling almost to the top of the crust):
3 oz. melted, white chocolate
1 oz. pumpkin butter
Note two things here:
1. This is, generally speaking, half of the Buddy Bars recipe.
2. Some of the pumpkin butter has been, proportionally speaking, shifted
from the crust to the "lower" filling (so the crust only gets 2
oz., not 2.25 oz., and the filling gets 1 oz., as opposed to .75 oz.).
Chill all this until the pumpkin filling is firm.
Make the "upper" filling:
1 package instant vanilla pudding mix (such as Trader Joe's)
1 3/4 cup light eggnog (such as Hood)
Mix these, let the mixture stiffen a little (perhaps about 5 minutes), then
pour it onto the other contents in the pie plate, and chill the whole thing
for at least three hours.
The result of this one: The eggnog filling was sort of runny (and would
easily slide off the rather slick pumpkin filling), as well as overwhelmed
by the pumpkin flavor. Maybe this is because eggnog tends be mild, while
pumpkin, at least when used in dessert recipes like this one, tends to be a
lot more spicy.
Furthermore, the color of the pumpkin filling was nearly identical to its
eggnog counterpart (I had hoped for a decent difference, in order to be able
to more easily distinguish this recipe from an eggnog-only pie).
|
-------------------------------------------------------
|
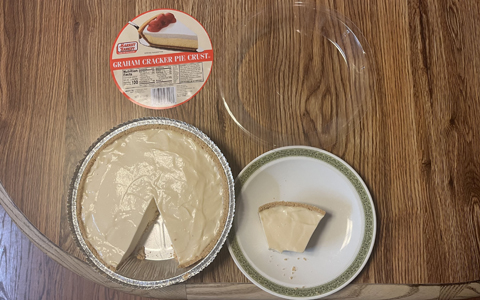
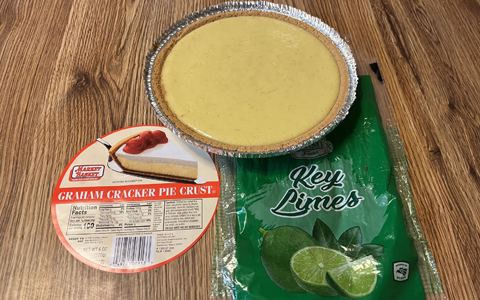
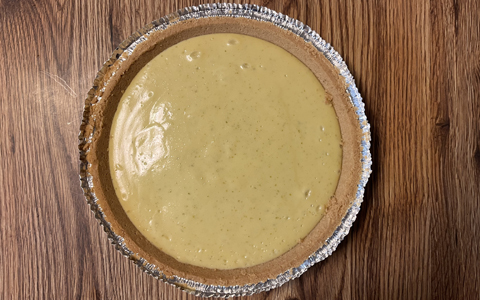
Baked Key Lime Pie—Prototype 1:
Batter:
3 eggs (brown recommended, large; note—both yolks and whites
are used here)
1/2 cup key lime juice
3-4 teaspoons grated key lime zest (peel)
14-ounce can of sweetened condensed milk
Pour the batter into a graham cracker pie crust (about 9") and bake at
325 degrees for 20 minutes. Afterwards, remove the pie from the oven and
cool it down at room temperature for about an hour, then refrigerate
until firm.
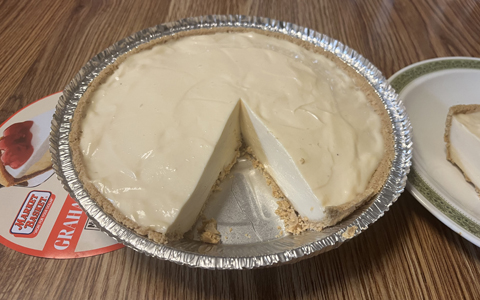
Baked Key Lime Pie—Prototype 2:
Batter:
3 eggs (brown recommended, large; note—both yolks and whites
are used here)
1/3 cup key lime juice
1 tablespoon grated key lime zest (peel)
14-ounce can of sweetened condensed milk
1 teaspoon xanthan gum
Pour the batter into a graham cracker pie crust (one of those retail,
ready-to-use crusts that come in "pie tins", about 9") and
bake on a cookie sheet at 325 degrees for 20 minutes. Afterwards, remove
the pie from the oven and cool it down at room temperature for about an
hour, then refrigerate until firm.
|
-------------------------------------------------------
|
Pecan Pie—Prototype 1:
Filling:
2 eggs (brown recommended, large)
1 tablespoon sugar
1 teaspoon xanthan gum
(Tip: blend these three above ingredients first, before adding the other
ones below.)
2 cups light corn syrup
1 teaspoon vanilla
1/4 teaspoon salt
4 oz. chopped pecans (about 1 cup, after chopping)
Evenly divide the filling into two graham cracker pie crusts (about
9") and bake at 350 degrees for 30 minutes (or until center of
filling reaches 200 degrees). Afterwards, remove the pies from the oven
and cool them down at room temperature for about an hour, then serve,
store or refrigerate.
Pecan Pie—Prototype 2:
Filling:
2 eggs (brown recommended, large)
1 tablespoon sugar
1 teaspoon xanthan gum
(Tip: blend these three above ingredients first, before adding the other
ones below.)
2 cups light corn syrup
1 teaspoon vanilla
1/4 teaspoon salt
4 oz. chopped pecans (about 1 cup, after chopping)
Pour (carefully!) the entire filling into one graham cracker pie crust
(about 9") and bake at 350 degrees for 30 minutes (or until center of
filling reaches 200 degrees). Afterwards, remove the pie from the oven
and cool it down at room temperature for about an hour, then serve,
store or refrigerate.
Pecan Pie—Prototype 3:
Filling:
2 eggs (brown recommended, large)
1 tablespoon sugar
2 teaspoons xanthan gum
(Tip: blend these three above ingredients first, before adding the other
ones below.)
2 cups light corn syrup
1 teaspoon vanilla
1/4 teaspoon salt
4 oz. chopped pecans (about 1 cup, after chopping)
Pour (carefully!) the entire filling into one graham cracker pie crust
(about 9") and bake at 350 degrees for 35 minutes (or until center of
filling reaches 200 degrees). Afterwards, remove the pie from the oven
and cool it down at room temperature for about an hour, then serve,
store or refrigerate.
|
-------------------------------------------------------
|
Baked Cocoa Pie—Prototype 1:
Batter:
3 eggs (brown recommended, large; note—both yolks and whites
are used here)
1/2 cup cocoa powder
14-ounce can of sweetened condensed milk
Pour the batter into a graham cracker pie crust (one of those retail,
ready-to-use crusts that come in "pie tins", about 9") and
bake on a cookie sheet at 325 degrees for 20 minutes. Afterwards, remove
the pie from the oven and cool it down at room temperature for about an
hour, then refrigerate until firm.

Baked Cocoa Pie—Prototype 2:
Repeat
Prototype 1,
but add 3/4 teaspoon of xanthan gum to the batter.
Baked Cocoa Pie—Prototype 3:
Again, repeat
Prototype 1,
but this time add only 1/2 teaspoon of xanthan gum to the batter.
|
-------------------------------------------------------
|
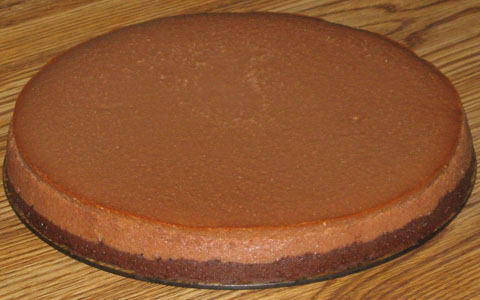
Baked Chocolate Cheesecake—Prototype 10.1:
Crust:
2 oz. melted, semi-sweet chocolate
4 teaspoons skim milk, heated
4 teaspoons cocoa powder. Fully dissolve this in the chocolate and milk,
then gradually blend in...
5 oz. whipped, lowfat cottage cheese. Then add...
3/8 cup granulated sugar. Blend thoroughly, then add...
1 teaspoon vanilla (next to last ingredient here). Blend this in, then
finally mix in (quickly and vigorously, all at once)...
2.9 oz. finely ground Bran Buds
Press this crust mixture into the bottom of a lightly buttered 9"
cheesecake pan (such as removable-bottom or spring-form). There is no need
to press the crust up the pan's sidewall.
Batter:
2 cups lowfat cottage cheese
2 tablespoons melted or softened butter
2 eggs
7/8 cup granulated sugar
1/2 cup skim milk
1/4 cup flour
1/2 teaspoon salt
3 tablespoons cocoa powder
Blend all these ingredients together thoroughly, particularly the butter and
eggs (an electric mixer or food processor may be needed for this), then pour
this batter into the pan (on top of the crust, of course). Promptly place
this into the oven—preheated at 300 degrees—and bake for 100 minutes (or
until cake tester comes out clean). Remove from oven, cool down to about
room temperature, carefully remove from pan, and refrigerate (perhaps at
least three hours is a good suggestion at this last step).
Baked Chocolate Cheesecake—Prototype 10.2:
Crust:
3 oz. semi-sweet chocolate. Heat only until it just becomes fully melted,
then mix in...
1 tablespoon cocoa powder. Heat this mixture a little more, then blend in,
as thoroughly as possible...
1 tablespoon skim milk. Heat this mixture a little more, mix it more
thoroughly, then gradually combine...
4 oz. lowfat cottage cheese, whipped. Then add...
1/4 cup plus 1 tablespoon granulated sugar. Blend thoroughly, then add...
1 teaspoon vanilla (next to last ingredient here). Blend this in, then
finally mix in...
2.2 oz. finely ground Bran Buds. Mix quickly with vigor.
Press this crust mixture into the bottom of a lightly buttered 9"
cheesecake pan (such as removable-bottom or spring-form).
Batter:
1/2 cup skim milk
2 tablespoons melted butter
3 tablespoons cocoa powder
7/8 cup granulated sugar
1/4 cup flour
1/2 teaspoon salt
2 cups lowfat cottage cheese
1 teaspoon vanilla
2 eggs
Blend all these ingredients together thoroughly and pour into pan. Promptly
place into 300-degree oven (preheated), and bake for 100 minutes (or until
cake tester comes out clean). Remove from oven, cool down to about room
temperature, carefully remove from pan, and refrigerate.
Baked Chocolate Cheesecake—Prototype 10.3:
Repeat the previous version, but make these changes for the crust:
Boost semi-sweet chocolate by 1 ounce, to 4 ounces.
Boost skim milk by 1 tablespoon, to 2 tablespoons.
Baked Chocolate Cheesecake—Prototype 10.4:
Repeat the previous version, but boost the crust's skim milk by 2
tablespoons, to 1/4 cup. Tip: Immediately after adding the Bran Buds to the
crust's other ingredients, act real fast! Get the Bran Buds soaked and mix
quickly, yet thoroughly. The resulting crust mixture should have a thick,
liquid texture. But this is not going to stay this runny for long. So
before it hardens, dump it into the bottom of the pan, and tilt this pan in
various directions until the mixture has coated the entire bottom. If
necessary, carefully spread this mixture (using something small, such as a
finger) to close any remaining gaps, but be as quick as possible. Give the
pan a slight shake as needed to help level out the crust.
Baked Chocolate Cheesecake—Prototype 10.5:
The quest is still on for crust improvement! Repeat the previous version,
but boost the crust's skim milk, by 4 teaspoons, to 1/3 cup. Increase the
granulated sugar as well, by a tablespoon, to 3/8 cup for a tastier crust. Finally, use
the bath approach for this cheesecake (i.e., wrap foil around the pan, and
place it in a hot "tub"—see Baked Eggnog Cheesecake,
Prototypes 8 and 9, below, for more info).
Baked Chocolate Cheesecake—Prototype 11:
Repeat Prototype 10.5, but...
For the crust, boost cocoa powder by 1 teaspoon, to 1 1/3 tablespoons.
For the batter, reduce salt by 1/4 teaspoon, to 1/4 teaspoon.
The latest update for the ingredient lists...
Crust:
4 oz. semi-sweet chocolate, melted
1 1/3 tablespoons cocoa powder
1/3 cup skim milk
4 oz. lowfat cottage cheese, whipped (no-salt-added recommended)
3/8 cup granulated sugar
1 teaspoon vanilla (next to last ingredient here)
2.2 oz. finely ground Bran Buds
Batter:
1/2 cup skim milk
2 tablespoons melted butter
3 tablespoons cocoa powder
7/8 cup granulated sugar
1/4 cup flour
1/4 teaspoon salt
2 cups lowfat cottage cheese, whipped (no-salt-added recommended)
1 teaspoon vanilla
2 eggs
Baked Chocolate Cheesecake—Prototype 12:
Repeat Prototype 11, but...
For the crust, eliminate the skim milk, and boost the whipped cottage cheese
by 4 oz., to 8 oz.
Baked Chocolate Cheesecake—Prototype 13:
Repeat Prototype 12, but make these changes for the batter:
Boost whipped cottage cheese by 4 ounces (1/2 cup), to 20 ounces (2 1/2
cups).
Boost flour by 4 teaspoons (1/12 cup), to 1/3 cup.
Add 1 tablespoon of lemon juice.
Bake this cheesecake for two hours (at 300 degrees, with hot water
bath), then remove from oven, and allow about two hours for cooling before
removing from pan. NOTE: If using a 9 1/2" pan (instead of 9"),
cut this baking time to 110 minutes.
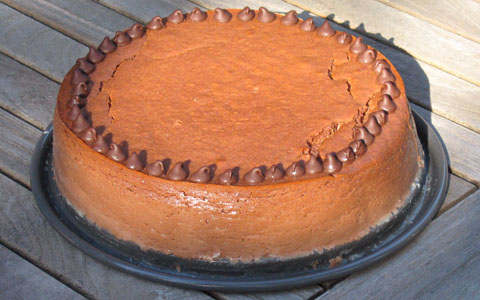
Baked Chocolate Cheesecake—Prototype 14:
Batter only:
4 tablespoons melted/softened butter
6 tablespoons cocoa powder
1 3/4 cups granulated sugar
1/2 cup all-purpose flour
1/2 teaspoon salt
32 ounces nonfat yogurt cheese
2 teaspoons vanilla
4 eggs
Pour into buttered 9-inch springform pan, place into hot bath and bake for the
first 30 minutes at 325 degrees. Then lower temperature to 300 degrees and bake
for 45 more minutes. Cool outside of oven and bath for about 1 1/4 hours, then
refrigerate. For a nicer touch, place semi-sweet chocolate chips,
flat-side-down, in a circle around the cheesecake's top surface at its outer
edge shortly after removal from the oven (avoid burns—be careful not to touch
the pan's hot sidewall while placing the chocolate chips).
Baked Chocolate Cheesecake—Prototype 15:
2-to-1 Blend of Yogurt Cheese and Cottage Cheese:
Prepare ahead of time 32 ounces of yogurt cheese, derived from two 32-ounce
containers (that's 64 ounces altogether) of nonfat yogurt. If the resulting
yogurt cheese falls below 32 ounces, add back enough of the whey (that was
strained out from the yogurt) to make up the difference. To this yogurt cheese
combine one 16-ounce container of whipped, lowfat cottage cheese.
Grease a 9 1/2" (or 9") pan, but do not wrap foil around it until just
before the batter is added (spreading the crust in an already wrapped pan can
result in greater disturbance to the foil, thus increasing leakage risks).
Chocolate Crust:
4 oz. semi-sweet chocolate, melted
1 1/3 tablespoons cocoa powder
8 oz. (1 cup) 2-to-1 blend of yogurt cheese and cottage cheese (see above)
3/8 cup granulated sugar
1 teaspoon vanilla
2.2 oz. finely ground Bran Buds
Place resulting mixture in 9 1/2" (or 9") pan.
Chocolate Batter:
4 tablespoons melted/softened butter
3/8 cup cocoa powder
1 3/4 cups granulated sugar
1/4 cup all-purpose flour
3 tablespoons arrowroot
1/2 teaspoon salt
40 ounces (5 cups) 2-to-1 blend of yogurt cheese and cottage cheese (see above)
2 teaspoons vanilla
4 eggs
Pour the batter over the crust and bake this cheesecake in a hot water tub at
300 degrees for 100 minutes (if using a 9 1/2" pan). Then shut off oven and
cool cheesecake down while still in it (and in tub), with door slightly ajar,
for an hour. Afterwards, remove from oven and tub and (a border of chocolate
chips can be added at this point) continue to cool down at room temperature for
another 100 minutes, then remove from pan and refrigerate.
Baked Chocolate Cheesecake—Prototype 16:
2-to-1 Blend of Yogurt Cheese and Cottage Cheese:
Prepare ahead of time 32 ounces of yogurt cheese, derived from two 32-ounce
containers (that's 64 ounces altogether) of nonfat yogurt. If the resulting
yogurt cheese falls below 32 ounces, add back enough of the whey (that was
strained out from the yogurt) to make up the difference. To this yogurt cheese
combine one 16-ounce container of whipped, lowfat cottage cheese.
Grease a 9 1/2" (or 9") pan, but do not wrap foil around it until just
before the batter is added (spreading the crust in an already wrapped pan can
result in greater disturbance to the foil, thus increasing leakage risks).
Chocolate Crust:
4 oz. semi-sweet chocolate, melted
2 tablespoons cocoa powder
8 oz. (1 cup) 2-to-1 blend of yogurt cheese and cottage cheese (see above)
3/8 cup granulated sugar
1 teaspoon vanilla
2 oz. finely ground Bran Buds
Place resulting mixture in 9 1/2" (or 9") pan.
Chocolate Batter:
4 tablespoons melted/softened butter
3/8 cup cocoa powder
1 3/4 cups granulated sugar
1/4 cup all-purpose flour
3 tablespoons arrowroot
1/2 teaspoon salt
40 ounces (5 cups) 2-to-1 blend of yogurt cheese and cottage cheese (see above)
2 teaspoons vanilla
4 eggs
Chocolate syrup (Trader
Joe's Organic Midnight Moo recommended), about 1/2 cup (8 tablespoons) altogether
Expect more than 7 cups of the resulting batter, but do not add this to the pan
all at once (otherwise, the syrup, which is also added here, may end up
floating—or perhaps sinking—too much to a single level, due to
density differences). Rather, this needs to be done in four installments. Wrap
the pan in foil just before adding the first installment. Minimize the foil's
disturbance in order to minimize its leakage risk.
For each of the first three installments, scoop about 1 3/4 to 2 cups of batter
into the pan. Then add about 2 tablespoons of chocolate syrup (close to 1 1/3
ounces by weight if using the TJ's brand recommended above). The best way to do
this is to squirt some thick, parallel stripes of it throughout the pan (the
TJ's syrup, as of this writing, comes in a squeezable bottle with a squirt
nozzle). Then pull a knife in perpendicular directions through these stripes in
the batter (just deeply enough for the installment being added) in order to
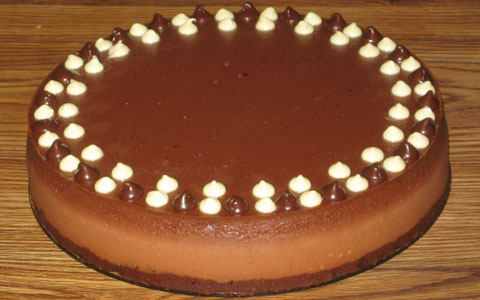
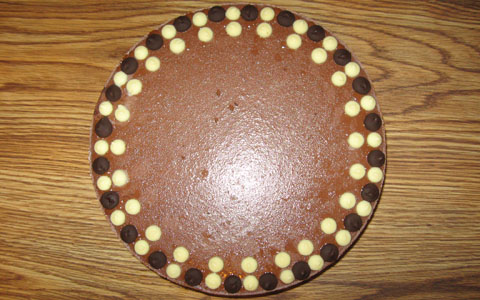
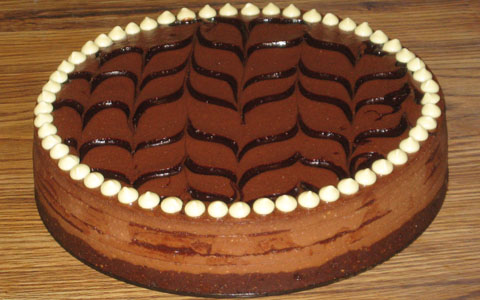
produce a wavy, swirl pattern (see photo below for an example).
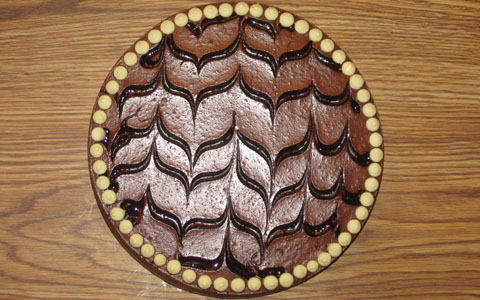
(Top view of finished cheesecake, with a suggested pattern)
Use extra care in the
later installments when adding batter (i.e., gently scoop it) into the pan.
After adding an installment, bake the pan with its contents at 325 degrees for
15 minutes, in a tub filled with at least 1/4 to 1/2 inch of boiling water. To
reduce spillage risks, do not fill the tub all the way at this point, because
the whole tub-and-pan assembly is going to need to be removed from the oven (in
order to comfortably add contents to the pan) between installments.
After all this is done, there should be about 1 3/4 to 2 cups of batter
remaining, with 45 minutes of baking time reached at this point (15 minutes for
each of the first three installments). Now comes the fourth installment—add
the batter and syrup in the same way as with the earlier three installments. But
try to place (and swirl) the syrup as neatly as possible on top, because this is
what is going to end up being exposed. So appearance is particularly important
for this final installment. Next, return the entire pan-and-tub assembly to the
oven. At this point, fill up the tub generously with boiling water. Resume
baking, but with the oven temperature lowered to 300 degrees, for about another
75 minutes (based upon usage of a 9 1/2" pan).
Afterward, shut the oven off, and leave its door slightly ajar, with the
cheesecake still inside—and in the tub—for an hour. Next, remove the
cheesecake from the oven and tub, and—if desired—add a border of
chocolate chips around the edge of this cheesecake. Continue to cool it down at
room temperature for another two hours. After doing so, remove the cheesecake
from pan and refrigerate.
Baked Chocolate Cheesecake—Prototype 17 (7-Way Chocolate):
2-to-1 Blend of Yogurt Cheese and Cottage Cheese:
Prepare ahead of time 32 ounces of yogurt cheese, derived from two 32-ounce
containers (that's 64 ounces altogether) of nonfat yogurt. If the resulting
yogurt cheese falls below 32 ounces, add back enough of the whey (that was
strained out from the yogurt) to make up the difference. To this yogurt cheese
combine one 16-ounce container of whipped, lowfat cottage cheese.
Grease a 9 1/2" (or 9") pan, but do not wrap foil around it until just
before the batter is added (spreading the crust in an already wrapped pan can
result in greater disturbance to the foil, thus increasing leakage risks).
Chocolate Crust:
4 oz. semi-sweet chocolate, melted
2 tablespoons cocoa powder
8 oz. (1 cup) 2-to-1 blend of yogurt cheese and cottage cheese (see above)
3/8 cup granulated sugar
1 teaspoon vanilla
2 oz. finely ground All-Bran
Place resulting mixture in 9 1/2" (or 9") pan. Allow mixture to get
firm. See note in comments below for more information on this.
Chocolate Batter:
4 tablespoons melted/softened butter
3/8 cup cocoa powder
1 3/4 cups granulated sugar
1/4 cup all-purpose flour
3 tablespoons arrowroot
40 ounces (5 cups) 2-to-1 blend of yogurt cheese and cottage cheese (see above)
2 teaspoons vanilla
4 eggs
Double-chocolate sandwich cookies, about 2 dozen
Chocolate syrup (Trader Joe's Organic Midnight Moo recommended), about 6
tablespoons altogether
Expect more than 7 cups of the resulting batter, but do not add this to the pan
all at once (otherwise, the cookies and syrup, which are also added here, may
end up floating and/or sinking too much to a single level, due to density
differences). Rather, this needs to be done in five installments. Wrap the pan
in foil just before adding the first installment. Minimize the foil's
disturbance in order to minimize its leakage risk.
For each of the first four installments, gently scoop about 1 1/2 cups of
batter into the pan. Add about 6 cookies (don't bother breaking them up—keeping
them whole is fine and, in fact, recommended), ensuring that they are fully
coated and immersed. Then add a generous amount, close to 1/4 cup, of chocolate
syrup (almost 3 ounces by weight if using the TJ's brand recommended above)—but
add this syrup only for the second installment (of the first four
installments described here). The best way to do this is to squirt some thick,
parallel stripes of it throughout the pan (the TJ's syrup, as of this writing,
comes in a squeezable bottle with a squirt nozzle). But—do not
swirl the syrup with a knife on this second installment.
After adding an installment, bake the pan with its contents at 325 degrees for
15 minutes, in a tub filled with at least 1/4 to 1/2 inch of boiling water. To
reduce spillage risks, do not fill the tub all the way at this point, because
the whole tub-and-pan assembly is going to need to be removed from the oven (in
order to comfortably add contents to the pan) between installments.
For the fifth (and final) installment, gently add the remaining batter to the
pan, but do not add any more cookies. Instead, add some more chocolate
syrup on the top surface. Squirt thick, parallel stripes of this syrup,
about a couple of tablespoons altogether (almost 1 1/2 ounces by weight if using
TJ's), throughout the pan. Then pull a knife in perpendicular directions through
these top stripes in the batter (just deeply enough for the uppermost
installment's surface) in order to produce a wavy, swirl pattern (see photo
below for a suggestion). Do all this as neatly as possible (avoid cutting into
the lower installments underneath).
After the fifth installment (including the syrup) is in place, return the entire
pan-and-tub assembly to the oven. At this point, fill up the tub generously with
boiling water. Resume baking, but with the oven temperature lowered to 300 degrees,
for about another 65 minutes (based upon usage of a 9 1/2" pan).
Afterward, shut the oven off, and leave its door slightly ajar, with the
cheesecake still inside—and in the tub—for an hour. Next, remove the
cheesecake from the oven and tub. Now, for the final chocolate touch, add a
border of chocolate chips, semi-sweet and white, around the edge of this
cheesecake (see photo below). Continue to cool it down at room temperature for
another two hours. After doing so, remove the cheesecake from pan and refrigerate.
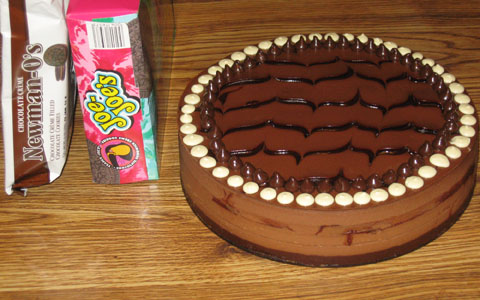
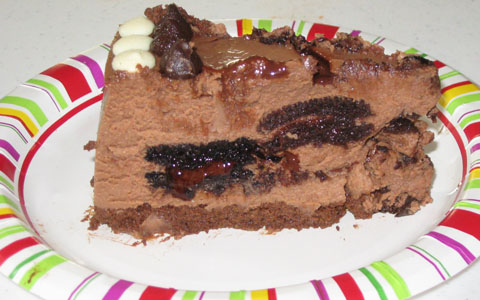
Baked Chocolate Cheesecake—Prototype 18:
2-to-1 Blend of Yogurt Cheese and Cottage Cheese:
Prepare ahead of time 32 ounces of yogurt cheese, derived from two 32-ounce
containers (that's 64 ounces altogether) of nonfat yogurt. If the resulting
yogurt cheese falls below 32 ounces, add back enough of the whey (that was
strained out from the yogurt) to make up the difference. To this yogurt cheese
combine one 16-ounce container of whipped, lowfat cottage cheese.
Grease a 9 1/2" (or 9") pan, but do not wrap foil around it until just
before the batter is added (spreading the crust in an already wrapped pan can
result in greater disturbance to the foil, thus increasing leakage risks).
Chocolate Crust:
4 oz. semi-sweet chocolate, melted
2 tablespoons cocoa powder
8 oz. (1 cup) 2-to-1 blend of yogurt cheese and cottage cheese (see above)
3/8 cup granulated sugar
1 teaspoon vanilla
2 oz. finely ground All-Bran
Place resulting mixture in the greased pan and pre-bake without tub at 300
degrees for 10 minutes, then cool enough to comfortably touch at least the pan's
upper sidewall.
Chocolate Batter:
4 tablespoons melted/softened butter
3/8 cup cocoa powder
1 3/4 cups granulated sugar
1/4 cup all-purpose flour
3 tablespoons arrowroot
40 ounces (5 cups) 2-to-1 blend of yogurt cheese and cottage cheese (see above)
2 teaspoons vanilla
4 eggs
Wrap the pan in foil at this point. Carefully pour the batter over the crust and
bake this cheesecake in a hot water tub at 300 degrees for 105 minutes (if using
a 9 1/2" pan). Then shut off oven and cool cheesecake down while still in
it (and in tub), with door slightly ajar, for an hour. Afterwards, remove from
oven and tub and continue to cool down at room temperature for another 105
minutes, then remove from pan and refrigerate.
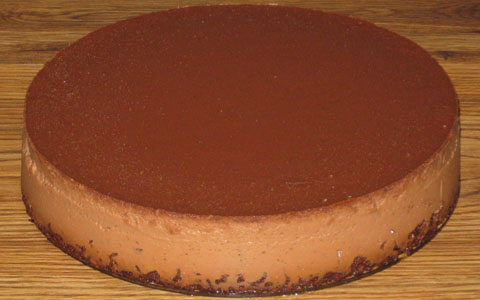
Baked Chocolate Cheesecake—Prototype 19:
3-Cheese Blend (1CT-1NC-4YG):
Prepare ahead of time 32 ounces of yogurt cheese, derived from two 32-ounce
containers (that's 64 ounces altogether) of nonfat yogurt. If the resulting
yogurt cheese falls below 32 ounces, add back enough of the whey (that was
strained out from the yogurt) to make up the difference. To this yogurt cheese
combine 8 ounces of whipped, lowfat cottage cheese and 8 ounces of softened
Neufchatel cheese ("light cream cheese").
Grease a 9 1/2" (or 9") pan, but do not wrap foil around it until just
before the batter is added (spreading the crust in an already wrapped pan can
result in greater disturbance to the foil, thus increasing leakage risks).
Chocolate Crust:
4 oz. semi-sweet chocolate, melted
3/8 cup granulated sugar
2 tablespoons cocoa powder
8 oz. (1 cup) 3-cheese blend (see above)
1 teaspoon vanilla
2 oz. finely ground All-Bran
Place the resulting mixture in the greased pan and pre-bake without tub at 300
degrees for 5-10 minutes, depending on the mixture's thickness (closer to 10
minutes if thin enough to be fully distributed across the pan's bottom by gentle
shaking, closer to 5 minutes if thick enough to require spreading out this
mixture by pressing on it with a utensil and/or fingers), then cool enough to
comfortably touch at least the pan's upper sidewall.
Chocolate Batter:
1 3/4 cups granulated sugar
3/8 cup cocoa powder
40 oz. (5 cups) 3-cheese blend (see above)
1/4 cup + 1 tablespoon (5 tablespoons altogether) arrowroot
2 teaspoons vanilla
5 eggs
Wrap the pan in foil at this point. Carefully pour the batter over the crust and
bake this cheesecake in a hot water tub at 300 degrees for 105 minutes (if using
a 9 1/2" pan). Then shut off oven and cool cheesecake down while still in
it (and in tub), with door slightly ajar, for an hour. Afterwards, remove from
oven and tub and (at this point, add a border of chocolate chips if desired)
continue to cool down at room temperature for another 105 minutes, then remove
from pan and refrigerate.
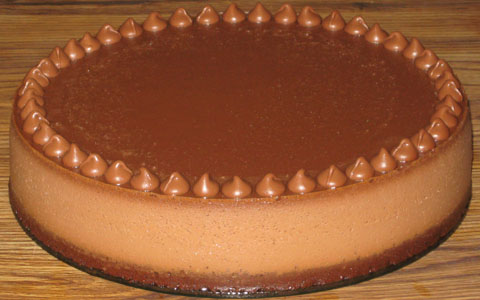
Baked Chocolate Cheesecake—Prototype 20 (7-Way Chocolate):
3-Cheese Blend (1CT-1NC-4YG):
Prepare ahead of time 32 ounces of yogurt cheese, derived from two 32-ounce
containers (that's 64 ounces altogether) of nonfat yogurt. If the resulting
yogurt cheese falls below 32 ounces, add back enough of the whey (that was
strained out from the yogurt) to make up the difference. To this yogurt cheese
combine 8 ounces of whipped, lowfat cottage cheese and 8 ounces of softened
Neufchatel cheese ("light cream cheese").
Grease a 9 1/2" (or 9") pan, but do not wrap foil around it until just
before the batter is added (spreading the crust in an already wrapped pan can
result in greater disturbance to the foil, thus increasing leakage risks).
Chocolate Crust:
4 oz. semi-sweet chocolate, melted
3/8 cup granulated sugar
2 tablespoons cocoa powder
8 oz. (1 cup) 3-cheese blend (see above)
1 teaspoon vanilla
2 oz. finely ground All-Bran
Place the resulting mixture in the greased pan and pre-bake without tub at 300
degrees for 5-10 minutes, depending on the mixture's thickness (closer to 10
minutes if thin enough to be fully distributed across the pan's bottom by gentle
shaking, closer to 5 minutes if thick enough to require spreading out this
mixture by pressing on it with a utensil and/or fingers), then cool enough to
comfortably touch at least the pan's upper sidewall.
Chocolate Batter:
1 3/4 cups granulated sugar
3/8 cup cocoa powder
40 oz. (5 cups) 3-cheese blend (see above)
1/4 cup + 1 tablespoon (5 tablespoons altogether) arrowroot
2 teaspoons vanilla
5 eggs
Double-chocolate sandwich cookies (such as Newman's Own), about 2 dozen
Dark Decoration Batter (thoroughly blend these two ingredients together):
2 tablespoons chocolate syrup (such as Trader Joe's Organic Midnight Moo)
2 tablespoons chocolate batter (see above)
Expect more than 7 cups of the resulting chocolate batter (and reserve 2
tablespoons of this for the dark decoration batter), but do not add this to the
pan all at once (otherwise, the cookies, which are also added here, may end up
floating and/or sinking too much to a single level, due to density differences).
Rather, this needs to be done in five installments. Wrap the pan in foil just
before adding the first installment. Minimize the foil's disturbance in order to
minimize its leakage risk.
For each of the first four installments, gently scoop about 1 1/2 cups of batter
into the pan. Add about 6 cookies (don't bother breaking them up—keeping
them whole is fine and, in fact, recommended), ensuring that they are fully
coated and—as much as possible—immersed.
After adding an installment, bake the pan with its contents at 325 degrees for
15 minutes, in a tub filled with at least 1/4 to 1/2 inch of boiling water. To
reduce spillage risks, do not fill the tub all the way at this point, because
the whole tub-and-pan assembly is going to need to be removed from the oven (in
order to comfortably add contents to the pan) between installments.
For the fifth (and final) installment, gently add the remaining batter to the
pan, but do not add any more cookies. Instead, add the dark decoration batter on
the top surface. From a beaker, pour thick, parallel stripes of this decorative
batter throughout the top surface in the pan. Then pull a knife in perpendicular
directions through these dark stripes in the lighter-colored batter (just deeply
enough for the uppermost installment's surface) in order to produce a wavy,
swirl pattern (see photo below). Do all this as neatly as possible (try to avoid
cutting into the lower installments underneath).
After the fifth installment (including the dark decoration batter) is in place,
return the entire pan-and-tub assembly to the oven. At this point, fill up the
tub generously with boiling water. Resume baking, but with the oven temperature
lowered to 300 degrees, for about another 65 minutes (based upon usage of a 9
1/2" pan).
Afterward, shut the oven off, and leave its door slightly ajar, with the
cheesecake still inside—and in the tub—for an hour. Next, remove the
cheesecake from the oven and tub. Now, for the final chocolate touch, add a
border of chocolate chips, semi-sweet and white, around the edge of this
cheesecake (see photo below). Continue to cool it down at room temperature for
another two hours. After doing so, remove the cheesecake from pan and
refrigerate.
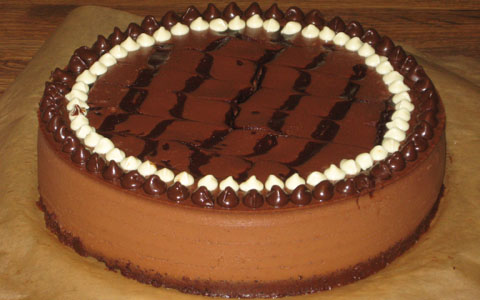
Baked Chocolate Cheesecake—Prototype 21:
3-Cheese Blend (3CT-1NC-2YG):
Prepare ahead of time 16 ounces of yogurt cheese, derived from one 32-ounce
container of nonfat yogurt. If the resulting yogurt cheese falls below 16
ounces, add back enough of the whey (that was strained out from the yogurt) to
make up the difference. To this yogurt cheese combine 24 ounces of whipped,
lowfat cottage cheese and 8 ounces of softened Neufchatel cheese ("light
cream cheese").
Grease a 9 1/2" (or 9") pan, but do not wrap foil around it until just
before the batter is added (spreading the crust in an already wrapped pan can
result in greater disturbance to the foil, thus increasing leakage risks).
Chocolate Crust:
4 oz. semi-sweet chocolate, melted
3/8 cup granulated sugar
2 tablespoons cocoa powder
8 oz. (1 cup) 3-cheese blend (see above)
1 teaspoon vanilla
2 oz. finely ground All-Bran
Place the resulting mixture in the greased pan and pre-bake without tub at 300
degrees for 5-10 minutes, depending on the mixture's thickness (closer to 10
minutes if thin enough to be fully distributed across the pan's bottom by gentle
shaking, closer to 5 minutes if thick enough to require spreading out this
mixture by pressing on it with a utensil and/or fingers), then cool enough to
comfortably touch at least the pan's upper sidewall.
Chocolate Batter:
1 3/4 cups granulated sugar
3/8 cup cocoa powder
40 oz. (5 cups) 3-cheese blend (see above)
1 1/2 teaspoons xanthan gum
2 teaspoons vanilla
5 eggs
Wrap the pan in foil at this point. Carefully pour the batter over the crust and
bake this cheesecake in a hot water tub at 300 degrees for 75 minutes (if using
a 9 1/2" pan). Then shut off oven and cool cheesecake down while still in
it (and in tub), with door slightly ajar, for an hour. Afterwards, remove from
oven and tub and (at this point, add a border of chocolate chips if desired)
continue to cool down at room temperature for another two hours, then remove
from pan and refrigerate.
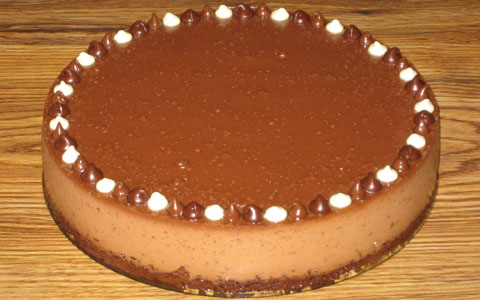
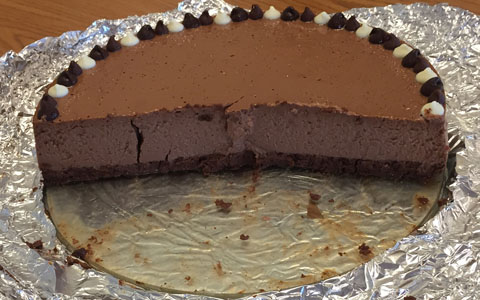
Baked Chocolate Cheesecake—Prototype 22 (7-Way Chocolate):
3-Cheese Blend (3CT-1NC-2YG):
Prepare ahead of time 16 ounces of yogurt cheese, derived from one 32-ounce
container of nonfat yogurt. If the resulting yogurt cheese falls below 16
ounces, add back enough of the whey (that was strained out from the yogurt) to
make up the difference. To this yogurt cheese combine 24 ounces of whipped,
lowfat cottage cheese and 8 ounces of softened Neufchatel cheese ("light
cream cheese").
Grease a 9 1/2" (or 9") pan, but do not wrap foil around it until just
before the batter is added (spreading the crust in an already wrapped pan can
result in greater disturbance to the foil, thus increasing leakage risks).
Chocolate Crust:
4 oz. semi-sweet chocolate, melted
3/8 cup granulated sugar
2 tablespoons cocoa powder
8 oz. (1 cup) 3-cheese blend (see above)
1 teaspoon vanilla
2 oz. finely ground All-Bran
Place the resulting mixture in the greased pan and pre-bake without tub at 300
degrees for 5-10 minutes, depending on the mixture's thickness (closer to 10
minutes if thin enough to be fully distributed across the pan's bottom by gentle
shaking, closer to 5 minutes if thick enough to require spreading out this
mixture by pressing on it with a utensil and/or fingers), then cool enough to
comfortably touch at least the pan's upper sidewall.
Chocolate Batter:
1 3/4 cups granulated sugar
3/8 cup cocoa powder
40 oz. (5 cups) 3-cheese blend (see above)
1 1/2 teaspoons xanthan gum
2 teaspoons vanilla
6 eggs
Double-chocolate sandwich cookies (such as Newman's Own), about 2 dozen
Expect just over 7 cups of the resulting chocolate batter, but do not add this to
the pan all at once. Rather, this needs to be done in two installments. Wrap the
pan in foil just before adding the first installment. Minimize the foil's
disturbance in order to minimize its leakage risk.
For the first installment, start off by gently scooping some batter into the
pan just until the crust is fully coated. Afterwards, lay flat about 6 cookies
onto this batter. Then add more batter, coating these cookies well. Lay flat
another 6 cookies, but try to place them such that they are not overlapping any
of the first layer of cookies. Coat this second layer as well with additional
batter. Next, add a third layer of about 6 cookies, laying them flat also. Try
to avoid overlapping the second layer. However, it is okay (and encouraged) if
they are directly above the first layer of cookies. Add more batter, coating the
third layer. Finally, add a fourth layer of about 6 cookies—laying these
flat too—and try to avoid overlap with the third layer cookies, but feel
free to position the fourth layer's directly above those of the second. Fully
coat this final cookie layer, and—with the rest of the batter less
roughly 1 1/2 to 2 cups—try to make the top surface of the batter
reasonably level within the pan (it's okay if some of the cookies float upward
and protrude a bit, but make sure that they are still lying horizontally).
After this is done, bake the pan with its contents at 325 degrees for 30
minutes, in a tub filled with at least about 1/2 inch of boiling water. To
reduce spillage risks, do not fill the tub all the way at this point, because
the whole tub-and-pan assembly is going to need to be removed from the oven (in
order to comfortably add contents to the pan) for the next installment.
For that second (final) installment, gently add the remaining 1 1/2 to 2 cups of
batter to the pan (no additional cookies at this point). Then add some chocolate
syrup (such as Trader Joe's Organic Midnight Moo)—about a few tablespoons
altogether—by pouring thick, parallel stripes onto the top surface in the
pan. Then pull a knife in perpendicular directions through these dark stripes in
the lighter-colored batter (just deeply enough for the uppermost installment's
surface) in order to produce a wavy, swirl pattern. Do all this as neatly as
possible (try to avoid cutting into the lower installment underneath). (If
desired, try a different chocolate syrup pattern, such as concentric circles.
See photo and comments below.)
After this last installment is in place, return the entire pan-and-tub assembly
to the oven. At this point, fill up the tub more generously with boiling water.
Resume baking, but with the oven temperature lowered to 300 degrees, for about
another 75 minutes (based upon usage of a 9 1/2" pan).
Afterward, shut the oven off, and leave its door slightly ajar, with the
cheesecake still inside—and in the tub—for an hour. Next, remove the
cheesecake from the oven and tub. Now, for the final chocolate touch, add a
border of chocolate chips, semi-sweet and white, around the edge of this
cheesecake (see photo below). Continue to cool it down at room temperature for
another two hours. After doing so, remove the cheesecake from pan and
refrigerate.
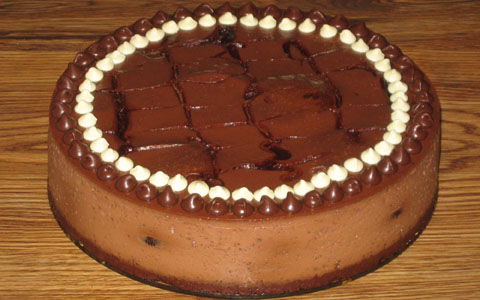
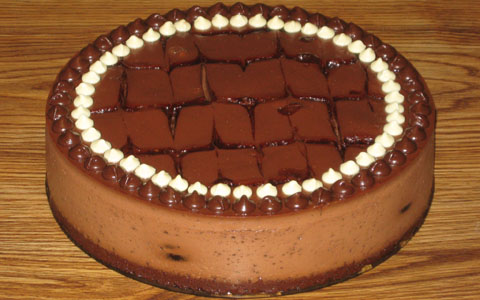
(The first cheesecake shown here made in January, the second one in March,
of 2018)
Baked Chocolate Cheesecake—Prototype 23:
3-Cheese Blend (3CT-1NC-2YG):
Prepare ahead of time 16 ounces of yogurt cheese, derived from one 32-ounce
container of nonfat yogurt. If the resulting yogurt cheese falls below 16
ounces, add back enough of the whey (that was strained out from the yogurt) to
make up the difference. To this yogurt cheese combine 24 ounces of whipped,
lowfat cottage cheese and 8 ounces of softened Neufchatel cheese ("light
cream cheese").
Grease a 9 1/2" (or 9") pan, but do not wrap foil around it until just
before the batter is added (spreading the crust in an already wrapped pan can
result in greater disturbance to the foil, thus increasing leakage risks).
Chocolate Crust:
4 oz. semi-sweet chocolate, melted
3/8 cup granulated sugar
2 tablespoons cocoa powder
8 oz. (1 cup) 3-cheese blend (see above)
1 teaspoon vanilla
2 oz. finely ground All-Bran
Place the resulting mixture in the greased pan and pre-bake without tub at 300
degrees for 5-10 minutes, depending on the mixture's thickness (closer to 10
minutes if thin enough to be fully distributed across the pan's bottom by gentle
shaking, closer to 5 minutes if thick enough to require spreading out this
mixture by pressing on it with a utensil and/or fingers), then cool enough to
comfortably touch at least the pan's upper sidewall.
Chocolate Batter:
1 3/4 cups granulated sugar
3/8 cup cocoa powder
40 oz. (5 cups) 3-cheese blend (see above)
1 1/2 teaspoons xanthan gum
2 teaspoons vanilla
6 eggs
Wrap the pan in foil at this point. Carefully pour the batter over the crust and
bake this cheesecake in a hot water tub at 300 degrees for 75 minutes (if using
a 9 1/2" pan). Then shut off oven and cool cheesecake down while still in
it (and in tub), with door slightly ajar, for an hour. Afterwards, remove from
oven and tub and (at this point, add a border of chocolate chips if desired)
continue to cool down at room temperature for another two hours, then remove
from pan and refrigerate.
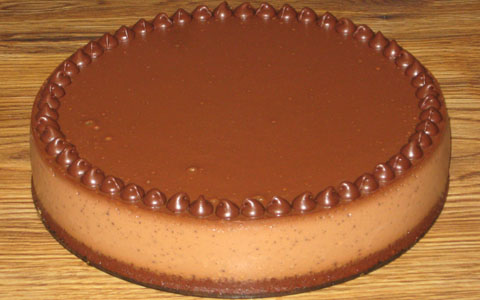
Baked Chocolate Cheesecake—Prototype 24:
3-Cheese Blend (1CT-1NC-1YG):
Prepare ahead of time 16 ounces of yogurt cheese, derived from one 32-ounce
container of nonfat yogurt. If the resulting yogurt cheese falls below 16
ounces, add back enough of the whey (that was strained out from the yogurt) to
make up the difference. To this yogurt cheese combine 16 ounces of whipped,
lowfat cottage cheese and 16 ounces (two 8-ounce packages) of softened
Neufchatel cheese ("light cream cheese").
Grease a 9 1/2" (or 9") pan, but do not wrap foil around it until just
before the batter is added (spreading the crust in an already wrapped pan can
result in greater disturbance to the foil, thus increasing leakage risks).
Chocolate Crust:
4 oz. semi-sweet chocolate, melted
3/8 cup granulated sugar
2 tablespoons cocoa powder
8 oz. (1 cup) 3-cheese blend (see above)
1 teaspoon vanilla
2 oz. finely ground All-Bran
Place the resulting mixture in the greased pan and pre-bake without tub at 300
degrees for 5-10 minutes, depending on the mixture's thickness (closer to 10
minutes if thin enough to be fully distributed across the pan's bottom by gentle
shaking, closer to 5 minutes if thick enough to require spreading out this
mixture by pressing on it with a utensil and/or fingers), then cool enough to
comfortably touch at least the pan's upper sidewall.
Chocolate Batter:
1 3/4 cups granulated sugar
3/8 cup cocoa powder
40 oz. (5 cups) 3-cheese blend (see above)
1 1/2 teaspoons xanthan gum
2 teaspoons vanilla
6 eggs
Wrap the pan in foil at this point. Carefully pour the batter over the crust and
bake this cheesecake in a hot water tub at 300 degrees for 75 minutes (if using
a 9 1/2" pan). Then shut off oven and cool cheesecake down while still in
it (and in tub), with door slightly ajar, for an hour. Afterwards, remove from
oven and tub and (at this point, add a border of chocolate chips if desired)
continue to cool down at room temperature for another two hours, then remove
from pan and refrigerate.
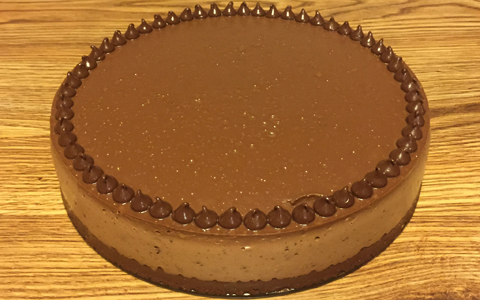
Baked Chocolate Cheesecake—Prototype 25:
3-Cheese Blend (1CT-1NC-1YG):
Prepare ahead of time 16 ounces of yogurt cheese, derived from one 32-ounce
container of nonfat yogurt. If the resulting yogurt cheese falls below 16
ounces, add back enough of the whey (that was strained out from the yogurt) to
make up the difference. To this yogurt cheese combine 16 ounces of whipped,
lowfat cottage cheese and 16 ounces (two 8-ounce packages) of softened
Neufchatel cheese ("light cream cheese").
Grease a 9 1/2" (or 9") pan, but do not wrap foil around it until just
before the batter is added (spreading the crust in an already wrapped pan can
result in greater disturbance to the foil, thus increasing leakage risks).
Chocolate Crust:
4 oz. semi-sweet chocolate, melted
3/8 cup granulated sugar
2 tablespoons cocoa powder
8 oz. (1 cup) 3-cheese blend (see above)
1 teaspoon vanilla
2 oz. finely ground All-Bran
Place the resulting mixture in the greased pan and pre-bake without tub at 300
degrees for 5-10 minutes, depending on the mixture's thickness (closer to 10
minutes if thin enough to be fully distributed across the pan's bottom by gentle
shaking, closer to 5 minutes if thick enough to require spreading out this
mixture by pressing on it with a utensil and/or fingers), then cool enough to
comfortably touch at least the pan's upper sidewall.
Chocolate Batter:
1 3/4 cups granulated sugar
3/8 cup cocoa powder
40 oz. (5 cups) 3-cheese blend (see above)
1 teaspoon xanthan gum
2 teaspoons vanilla
6 eggs
Wrap the pan in foil at this point. Carefully pour the batter over the crust and
bake this cheesecake in a hot water tub at 300 degrees for 75 minutes (if using
a 9 1/2" pan). Then shut off oven and cool cheesecake down while still in
it (and in tub), with door slightly ajar, for an hour. Afterwards, remove from
oven and tub and (at this point, add a border of chocolate chips if desired)
continue to cool down at room temperature for another two hours, then remove
from pan and refrigerate.
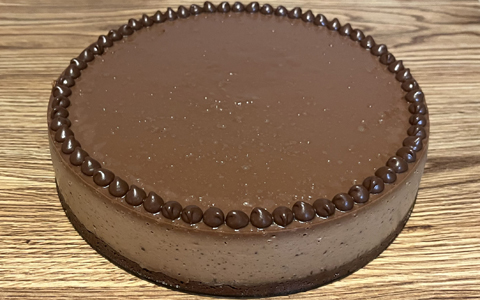
New Late 2025 Crust Baking Procedure:
Pre-bake the crust mixture without tub at 300 degrees for 20
minutes, then remove from oven and cool down at room temperature, for at
least 30 minutes.
Baked Chocolate Cheesecake—Prototype 26 (7-Way Chocolate):
3-Cheese Blend (1CT-1NC-1YG):
Prepare ahead of time 16 ounces of yogurt cheese, derived from one 32-ounce
container of nonfat yogurt. If the resulting yogurt cheese falls below 16
ounces, add back enough of the whey (that was strained out from the yogurt) to
make up the difference. To this yogurt cheese combine 16 ounces of whipped,
lowfat cottage cheese and 16 ounces (two 8-ounce packages) of softened
Neufchatel cheese ("light cream cheese").
Grease a 9 1/2" (or 9") pan, but do not wrap foil around it
yet (see below).
Chocolate Crust:
4 oz. semi-sweet chocolate, melted
3/8 cup granulated sugar
2 tablespoons cocoa powder
8 oz. (1 cup) 3-cheese blend (see above)
1 teaspoon vanilla
2 oz. finely ground All-Bran
Place the resulting mixture in the greased pan and pre-bake without tub at 300
degrees for 10 minutes, then cool enough to comfortably touch at least the
pan's upper sidewall.
Chocolate Batter:
1 3/4 cups granulated sugar
3/8 cup cocoa powder
40 oz. (5 cups) 3-cheese blend (see above)
1 teaspoon xanthan gum
2 teaspoons vanilla
6 eggs
Cookies:
Double-chocolate sandwich cookies, about 2 dozen (Whole Foods 365 or
Newman's Own recommended)
Expect just over 7 cups of the resulting batter, but do not add this to the
pan all at once. Rather, this needs to be done in three installments. Wrap
the pan in foil just before adding the first installment (to minimize the
foil's disturbance and therefore its leakage risk, do not put it on any
earlier). Or as an alternative to using foil, place this pan in an
Easy Bath Cheesecake Wrap—and don't bother
waiting for the pan to get comfortably cool to do so.
For each of the first two installments, gently (especially with the second
installment!) scoop about 3 cups of batter into the pan, and add about 12
cookies (don't bother breaking them up—keeping them whole is fine and,
in fact, recommended), ensuring that they are fully coated and—as much
as possible—immersed. After adding the first installment, bake the pan
with its contents for 20 minutes, at 325 degrees. However, after adding the
second installment, bake the pan with its contents, still at 325 degrees,
but only for 15 minutes. Then reduce the temperature to 300 degrees, and
continue baking for another 15 minutes (that's a 30-minute "baking
installment" here—the first 15 minutes at 325 degrees and the
next 15 at 300). For both installments here, bake with the pan in a tub
filled with at least 1/4 to 1/2 inch of boiling water, but (to reduce
spillage risks) do not fill the tub all the way at this point, because the
whole tub-and-pan assembly is going to need to be removed from the oven
(in order to comfortably add contents to the pan) between installments.
After all this is done, there should be just over a cup of batter left,
with 50 minutes of baking time reached at this point (20 minutes for the
first installment, and 30 for the second one). Now comes the third
installment—carefully add the last of this batter (do not add any more
cookies at this point) on top of the pan's other contents. Try to fully coat
the entire surface, especially wherever cookie pieces may be showing. Next,
return the entire pan-and-tub assembly to the oven. At this point, fill up
the tub generously with boiling water. Resume baking at 300 degrees for
another 55 minutes (based upon usage of a 9 1/2" pan).
Afterward, shut the oven off, and leave its door slightly ajar, with the
cheesecake still inside—and in the tub—for an hour. Next, remove
the cheesecake from the oven and tub. Now, for a special chocolate touch,
add two concentric borders of chocolate chips, one of semi-sweet and the
other of white, around the edge of this cheesecake (see photo below).
Continue to cool it down at room temperature for another two hours. After
doing so, remove the cheesecake from pan, then add a chocolate syrup drizzle
pattern on top (see photo below for a suggestion) and refrigerate
(or add the drizzle at a later point).
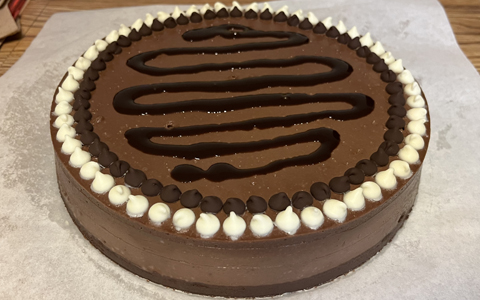
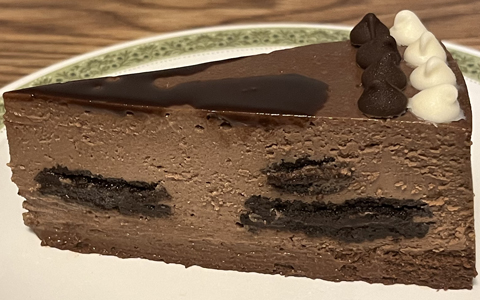
|
-------------------------------------------------------
|
Baked Eggnog Cheesecake—Prototype 1:
Crust:
4 oz. whipped lowfat cottage cheese
3 tablespoons granulated sugar
1/4 teaspoon vanilla
1/4 teaspoon cinnamon
1/8 teaspoon nutmeg
1/8 teaspoon rum extract (such as McCormick)
2 tablespoons light eggnog (such as Hood)
Thoroughly blend these above 7 ingredients together. Afterward, quickly and
vigorously mix in:
2.2 oz. finely ground Bran Buds
Press this resulting mixture into the bottom of a lightly buttered 9"
cheesecake pan.
Batter:
2 cups lowfat cottage cheese
2 tablespoons melted or softened butter
2 eggs
1/2 cup granulated sugar
3/4 cup light eggnog (such as Hood)
1/3 cup flour
1/2 teaspoon salt
1 teaspoon lemon juice
Blend all these ingredients together thoroughly, particularly the butter and
eggs, then pour this batter into the pan, on top of the crust. Promptly
place this into the oven—preheated at 300 degrees—and bake for 100 minutes
(or until cake tester comes out clean). Remove from oven, cool down to about
room temperature (about 1 1/2 hours), carefully remove from pan, and chill.
Baked Eggnog Cheesecake—Prototype 2:
Repeat Prototype 1, but make these changes for the batter:
Boost eggnog by 3/4 cup, to 1 1/2 cups.
Boost flour by 1/6 cup, to 1/2 cup (to help compensate for the increase in
liquid).
Baked Eggnog Cheesecake—Prototype 3:
Repeat Prototype 2, but make these changes for the batter:
Boost eggnog by 1/2 cup, to 2 cups.
Add 1 tablespoon of rum extract (yes, that is a generous amount).
Add 1/8 teaspoon of nutmeg.
Also, let's make the crust a little tastier. Combine 1 tablespoon of brown
sugar with the crust's earlier ingredients (i.e., before blending in the
Bran Buds).
Baked Eggnog Cheesecake—Prototype 4:
Repeat Prototype 3, but make these changes for the batter:
Boost nutmeg by 3/8 teaspoon, to 1/2 teaspoon (thus adding more spice).
Boost flour by 1 tablespoon, to 1/2 cup plus 1 tablespoon (for the sake of
firmness, to compensate for the liquid increases in Prototype 3).
Baked Eggnog Cheesecake—Prototype 5:
Okay, repeat Prototype 4, but decrease the batter's rum extract from 1
tablespoon to only 2/3 (i.e., from 3 teaspoons to only 2).
Baked Eggnog Cheesecake—Prototype 6:
Spice it up a little more! Repeat Prototype 5, and boost the batter's nutmeg
by 1/2 teaspoon to 1 full teaspoon.
Baked Eggnog Cheesecake—Prototype 7:
Repeat Prototype 6, but spice up the batter even more by adding 1 teaspoon
of cinnamon to it. Also increase the moisture and flavor for the crust by
boosting its eggnog from 2 tablespoons to 1/2 cup (with this change,
the crust mixture becomes somewhat pour-able, subject to the timing of
blending in the Bran Buds, so be sure to let this mixture firm up a little
in the pan before adding the batter on top).
Baked Eggnog Cheesecake—Prototype 8:
Okay—repeat Prototype 6 again, but reduce the batter's rum extract from 2
to 1 + 1/2 teaspoons (in other words, to put it simply, 1/2 tablespoon). For
this prototype, skip the crust.
Baked Eggnog Cheesecake—Prototype 9:
Repeat Prototype 8, and increase the batter's flour from 1/2 cup + 1
tablespoon (that's 9 tablespoons) to 3/4 cup (that's 12
tablespoons—therefore the flour is getting about a 33% boost). No crust.
Where are we at this point with the baked eggnog cheesecake
prototypes??
Okay, I felt that at this point, I should provide the details of the ingredients
so far—plus sequential info. This is batter-only (no crust).
Grease a 9" springform pan. For best results take the bath
approach—wrap this pan up to the sides with foil, in order to suppress
water leaks (heavy-duty aluminum is a good choice).
Mix thoroughly together:
2 tablespoons butter, softened or melted
1/2 cup granulated sugar
Then blend in:
1 teaspoon lemon juice
1/2 tablespoon rum extract
Then mix in:
2 cups (such as a 16-ounce container) of lowfat cottage cheese (such as
Hood, no salt added)—whip this in a blender just until the curds no
longer show, before adding to the above ingredients.
Next add:
2 cups of light eggnog (such as Hood or Oakhurst)
Follow up gradually with a dry combination of:
3/4 cup flour
1/2 teaspoon salt
1 teaspoon nutmeg
Completely mix all of the above ingredients used so far, then finally add:
2 eggs (last ingredient here)—aim to get these at least fully mixed
in (yet without overbeating, if possible).
Have enough boiling hot water available at this point if using the bath
approach (if the water is cold, the baking is going to get off to a start
that's too cold!), and pour some into a large pan—let's call this the
"tub".
Also, the oven should be preheated to 300 degrees.
Pour the batter into the springform pan. No bath? Then put the pan directly
into the oven. But for the bath approach, place this pan into the
"tub", add more hot water (perhaps to the batter's height), and
put the whole thing into the oven. Bake for about 100 minutes.
Afterward, take the springform pan out of the oven (and out of the
"tub" if applicable) for the cooldown.
Baked Eggnog Cheesecake—Prototype 10:
Okay, let's give the crust another try. Its ingredient list at this point is
as follows, with the latest changes noted:
4 oz. whipped lowfat cottage cheese
3 tablespoons granulated sugar
1 tablespoon brown sugar
1/4 teaspoon vanilla
1/4 teaspoon cinnamon
1/4 teaspoon nutmeg (up from 1/8 teaspoon, for more flavor)
1/4 teaspoon rum extract (up from 1/8 teaspoon, for more flavor)
1/4 cup light eggnog (that's 4 tablespoons, a reasonable compromise
between 2 tablespoons and 1/2 cup)
2.2 oz. finely ground Bran Buds
For the sake of flavor, the increase in the nutmeg and rum extract seemed
like a reasonable compensation for the decrease in eggnog from its 1/2 cup
usage in Prototype 7.
For the batter, repeat Prototype 9, but in light of the questionable need
for salt—combined with a desire to cut down what seemed to be unnecessary
sodium, reduce the salt from 1/2 teaspoon to 1/4 teaspoon (seemed like a
reasonable compromise, in case the recipe still needed some salt).
Use the bath approach on this one, foil and all.
Baked Eggnog Cheesecake—Prototype 11:
Seems like maybe a little too much emphasis has been placed on the
"eggnog" in "eggnog cheesecake" (and too little on
"cheesecake"). This prototype is slightly mellower and sweeter.
So repeat Prototype 10, but make these changes for the batter:
Boost granulated sugar by 1/6 cup, to 2/3 cup.
Decrease rum extract by 1/2 teaspoon, to 1 teaspoon.
Add 1 teaspoon of vanilla extract (include this one when blending in the
lemon juice and rum extract).
Remember that only 1/4 teaspoon of salt is to be used here (not 1/2
teaspoon).
As for the bath approach, instead of placing the springform pan directly in
the hot "tub", put it immediately above it, preferably by
using a grate between the two (the "tub" itself being placed close
to halfway up in the oven).
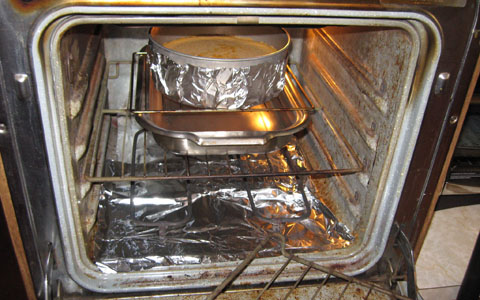
In order to prevent steam from rising up into the bottom of the cheesecake's
pan, it is still advisable to wrap a piece of foil around its bottom.
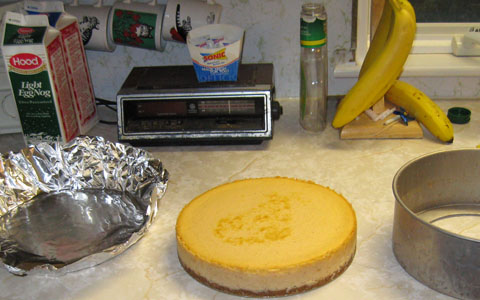
Baked Eggnog Cheesecake—Prototype 12:
Crust:
1.5 oz. melted, white chocolate
1/2 cup (4 oz.) lowfat cottage cheese, whipped, no salt added
1 teaspoon lemon juice
2 tablespoons granulated sugar
3 tablespoons brown sugar
2 teaspoons cinnamon
1/2 teaspoon vanilla
2.2 oz. Bran Buds, ground up
Batter:
2 tablespoons butter, softened or melted
2/3 cup granulated sugar
1 tablespoon lemon juice
1/2 tablespoon rum extract
1 teaspoon vanilla extract
2 1/2 cups (20 oz.) whipped lowfat cottage cheese, no salt added
2 cups of light eggnog
1 cup flour
1/4 teaspoon salt
1/2 teaspoon nutmeg
2 eggs
Bake in (not above!) a tub at 300 degrees for about 2 hours,
then remove from oven, and let this cheesecake cool off for about 2 hours
before removing from pan.
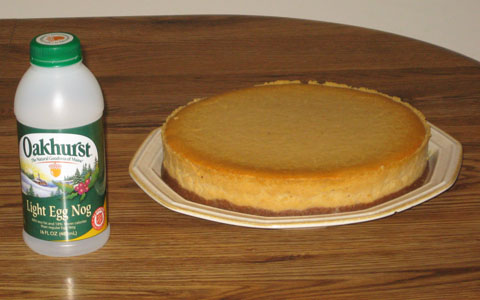
Baked Eggnog Cheesecake—Prototype 13:
Repeat Prototype 12, but replace the crust's 1/2 cup of lowfat cottage
cheese with 1/2 cup of light eggnog.
Also, bake this cheesecake for about 110 minutes (instead of 120). Continue
doing it "in-the-tub" style ("in" is here
to stay at this point—just be careful with that foil, disturbing it as
little as possible: gently wrap it onto the pan immediately before placing
the cheesecake into the bath for baking, not earlier—first grease the pan,
then "crust" it, then pre-bake it [if applicable—but use no tub
during this phase], then cool it, then "batter" it, then
"foil" it, then "tub-and-bake" it). Got it?
Baked Eggnog Cheesecake—Prototype 14:
Repeat Prototype 13, but reduce the batter's rum extract by 1/2 teaspoon,
back to only 1 teaspoon.
Also, after the crust has been placed into the pan, pre-bake it (no tub
during this phase) for about 20 minutes at 300 degrees, then cool it off
until it can be comfortably touched. Add the batter afterward and bake (in a
tub at this point) for about 110 minutes.
Baked Eggnog Cheesecake—Prototype 15:
So where are we at now?
Crust:
1.5 oz. melted, white chocolate
1/2 cup light eggnog
1 teaspoon lemon juice
2 tablespoons granulated sugar
3 tablespoons brown sugar
2 teaspoons cinnamon
1/2 teaspoon vanilla
2.2 oz. Bran Buds, ground up
Pre-bake, no tub, for about 15 minutes at 300 degrees, then cool (enough to
touch).
Batter:
2 tablespoons butter, softened or melted
2/3 cup granulated sugar
2 teaspoons lemon juice
1 teaspoon rum extract
1 teaspoon vanilla extract
2 1/2 cups (20 oz.) lowfat cottage cheese
2 cups of light eggnog
1 cup flour
1/4 teaspoon salt
1/2 teaspoon nutmeg
2 eggs
Bake, with tub, for about 90 minutes at 300 degrees, then cool off for about
100 minutes, then remove from pan and refrigerate.
Baked Eggnog Cheesecake—Prototype 16:
Crust:
1.5 oz. melted, white chocolate
8 oz. lowfat yogurt cheese
1/4 cup granulated sugar
3 tablespoons brown sugar
2 teaspoons cinnamon
1/2 teaspoon vanilla
2.2 oz. Bran Buds, ground up
Do NOT pre-bake the crust. It should be more than firm enough at this point.
Batter:
2 tablespoons butter, softened or melted
2/3 cup granulated sugar
1 teaspoon rum extract
1 teaspoon vanilla extract
2 1/2 cups (20 oz.) nonfat yogurt cheese
2 cups light eggnog
1 cup all-purpose flour
1/4 teaspoon salt
1/2 teaspoon nutmeg
2 eggs
Bake, with tub, for about 70 minutes at 300 degrees, then cool off for about 70
minutes, then remove from pan and refrigerate.
Baked Eggnog Cheesecake—Prototype 17:
2-to-1 Blend of Yogurt Cheese and Cottage Cheese:
Prepare ahead of time 16 ounces of yogurt cheese, derived from one 32-ounce
container of nonfat yogurt. If the resulting yogurt cheese falls below 16
ounces, add back enough of the whey (that was strained out from the yogurt) to
make up the difference. To this yogurt cheese combine 8 ounces (1 cup) of
whipped, lowfat cottage cheese.
Crust:
1 oz. melted, white chocolate
1/2 cup (4 oz.) 2-to-1 blend of yogurt cheese and cottage cheese (see above)
2 tablespoons granulated sugar
1 1/3 tablespoons brown sugar
1 teaspoon cinnamon
1/4 teaspoon vanilla
1.1 oz. Bran Buds, ground up
Pour this crust mixture into pan (9 to 9 1/2 inches) and pre-bake without tub at
300 degrees for 5 minutes, then cool enough to comfortably touch at least the
pan's upper sidewall.
Batter:
2 tablespoons butter, softened or melted
2/3 cup granulated sugar
1 teaspoon rum extract
1 teaspoon vanilla extract
2 1/2 cups (20 oz.) 2-to-1 blend of yogurt cheese and cottage cheese (see above)
2 cups light eggnog
1/4 cup all-purpose flour
1/4 cup arrowroot
1/4 teaspoon salt
1/2 teaspoon nutmeg
2 eggs
Bake, with tub, for about 70 minutes at 300 degrees, then cool off for about 70
minutes, then remove from pan and refrigerate.
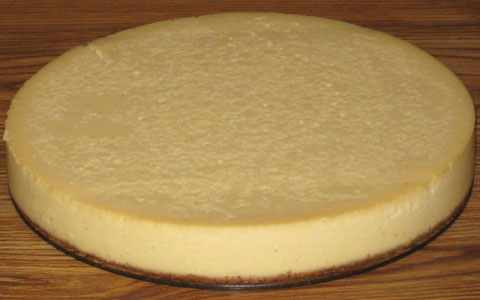
Baked Eggnog Cheesecake—Prototype 18:
2-to-1 Blend of Yogurt Cheese and Cottage Cheese:
Prepare ahead of time 16 ounces of yogurt cheese, derived from one 32-ounce
container of nonfat yogurt. If the resulting yogurt cheese falls below 16
ounces, add back enough of the whey (that was strained out from the yogurt) to
make up the difference. To this yogurt cheese combine 8 ounces (1 cup) of
whipped, lowfat cottage cheese.
Crust:
1 oz. melted, white chocolate
1/2 cup (4 oz.) 2-to-1 blend of yogurt cheese and cottage cheese (see above)
2 tablespoons granulated sugar
1 1/3 tablespoons brown sugar
1 teaspoon cinnamon
1/4 teaspoon vanilla
1.1 oz. Bran Buds, ground up
Pour this crust mixture into pan (9 to 9 1/2 inches) and pre-bake without tub at
300 degrees for 5 minutes, then cool enough to comfortably touch at least the
pan's upper sidewall.
Batter:
2 tablespoons butter, softened or melted
2/3 cup granulated sugar
1 teaspoon rum extract
1 teaspoon vanilla extract
2 1/2 cups (20 oz.) 2-to-1 blend of yogurt cheese and cottage cheese (see above)
2 cups light eggnog
2 tablespoons all-purpose flour
3/8 cup arrowroot
1/4 teaspoon salt
1/2 teaspoon nutmeg
2 eggs
Bake, with tub, for about 90 minutes at 300 degrees. Next, turn oven off,
leaving cheesecake in it (still in tub as well), with oven's door slightly ajar,
for another 45 minutes. Afterwards, remove cheesecake from oven and tub, and let
this cool off (cheesecake still in pan) for about 90 minutes. Then remove from
pan and refrigerate.
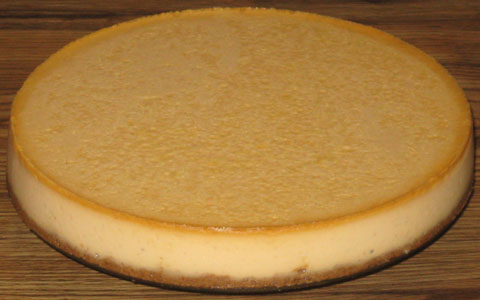
Baked Eggnog Cheesecake—Prototype 19:
2-to-1 Blend of Yogurt Cheese and Cottage Cheese:
Prepare ahead of time 16 ounces of yogurt cheese, derived from one 32-ounce
container of nonfat yogurt. If the resulting yogurt cheese falls below 16
ounces, add back enough of the whey (that was strained out from the yogurt) to
make up the difference. To this yogurt cheese combine 8 ounces (1 cup) of
whipped, lowfat cottage cheese.
Crust:
1 oz. melted, white chocolate
1/2 cup (4 oz.) 2-to-1 blend of yogurt cheese and cottage cheese (see above)
2 tablespoons granulated sugar
2 tablespoons brown sugar
1 teaspoon cinnamon
1/2 teaspoon vanilla
1 oz. All-Bran, ground up
Pour this crust mixture into pan (9 to 9 1/2 inches) and pre-bake without tub at
300 degrees for 5 minutes, then cool enough to comfortably touch at least the
pan's upper sidewall.
Batter:
2 tablespoons butter, softened or melted
2/3 cup granulated sugar
1 teaspoon rum extract
1 teaspoon vanilla extract
2 1/2 cups (20 oz.) 2-to-1 blend of yogurt cheese and cottage cheese (see above)
2 cups light eggnog
2 tablespoons all-purpose flour
3/8 cup arrowroot
1/2 teaspoon nutmeg
2 eggs
Bake, with tub, for about 90 minutes at 300 degrees. Next, turn oven off,
leaving cheesecake in it (still in tub as well), with oven's door slightly ajar,
for another 45 minutes. Afterwards, remove cheesecake from oven and tub, and let
this cool off (cheesecake still in pan) for about 90 minutes. Then remove from
pan and refrigerate. Note: See comments below for more information
in regard to cooking and cooling times.
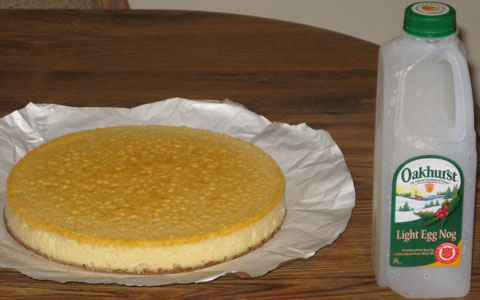
Baked Eggnog Cheesecake—Prototype 20:
Repeat
Prototype 19,
but boost the batter's arrowroot by 2 tablespoons, to 1/2 cup.
Baked Eggnog Cheesecake—Prototype 21:
Batter:
2 cups (16 ounces) lowfat cottage cheese, whipped
4 ounces Neufchatel cheese ("light cream cheese"), softened
5/8 cup (1/2 cup plus 2 tablespoons) granulated sugar
1 teaspoon vanilla extract
1 teaspoon rum extract
1/2 teaspoon nutmeg
2 cups light eggnog
7 tablespoons (1/2 cup less 1 tablespoon) arrowroot
2 eggs
Place into greased 13" x 9" pan (such as a "Pyrex" glass
type), bake in tub at 300 degrees for 120 minutes, shut oven off, leaving door
slightly ajar, for 60 minutes, remove pan containing cheesecake from tub and
oven and let cool at room temperature for 120 minutes, then (with cheesecake
still in pan) refrigerate.
Baked Eggnog Cheesecake—Prototype 22:
3-Cheese Blend (1CT-1NC-4YG):
Prepare ahead of time 16 ounces of yogurt cheese, derived from one 32-ounce
container of nonfat yogurt. If the resulting yogurt cheese falls below 16
ounces, add back enough of the whey (that was strained out from the yogurt) to
make up the difference. To this yogurt cheese combine 4 ounces of whipped,
lowfat cottage cheese and 4 ounces of softened Neufchatel cheese ("light
cream cheese"). All this should yield 24 ounces (about 3 cups).
Batter:
24 oz. (about 3 cups) 3-cheese blend (see above)
3/4 cup granulated sugar
1 teaspoon vanilla extract
1 teaspoon rum extract
1/2 teaspoon nutmeg
2 1/3 cups light eggnog
1/2 cup arrowroot
3 eggs
Place into greased 13" x 9" glass ("Pyrex") pan, bake in tub
at 300 degrees for 90-100 minutes, shut oven off, leaving door slightly ajar, for 60
minutes, remove pan containing cheesecake from tub and oven and let cool at room
temperature for 90-100 minutes, then (with cheesecake still in pan) refrigerate.
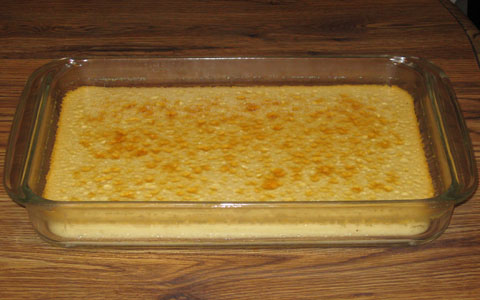
Baked Eggnog Cheesecake—Prototype 23:
2-to-1 Blend of Yogurt Cheese and Cottage Cheese (1CT-2YG [1 part cottage
cheese, 2 parts yogurt cheese]):
Prepare ahead of time 16 ounces of yogurt cheese, derived from one 32-ounce
container of nonfat yogurt. If the resulting yogurt cheese falls below 16
ounces, add back enough of the whey (that was strained out from the yogurt) to
make up the difference. To this yogurt cheese combine 8 ounces (1 cup) of
whipped, lowfat cottage cheese.
Batter:
24 oz. (about 3 cups) 2-to-1 blend of yogurt cheese and cottage cheese (see
above)
3/4 cup granulated sugar
1 teaspoon vanilla extract
1 teaspoon rum extract
1/2 teaspoon nutmeg
2 1/3 cups light eggnog
1 tablespoon xanthan gum
3 eggs
Place into greased 13" x 9" glass ("Pyrex") pan, and bake
in tub at 300 degrees for 80-90 minutes. Shut off oven afterwards, leaving door
slightly ajar, for 60 minutes. Next, remove pan containing cheesecake from tub
and oven, and let cool at room temperature for 90-120 minutes, then (with
cheesecake still in pan) refrigerate.
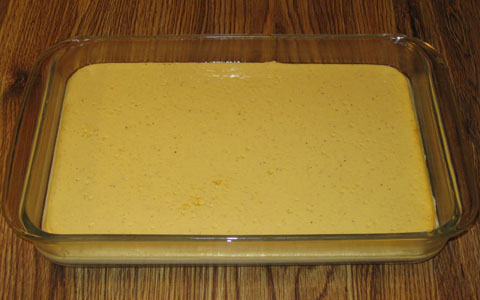
Baked Eggnog Cheesecake—Prototype 24:
2-to-1 Blend of Yogurt Cheese and Cottage Cheese (1CT-2YG):
Prepare ahead of time 16 ounces of yogurt cheese, derived from one 32-ounce
container of nonfat yogurt. If the resulting yogurt cheese falls below 16
ounces, add back enough of the whey (that was strained out from the yogurt) to
make up the difference. To this yogurt cheese combine 8 ounces (1 cup) of
whipped, lowfat cottage cheese.
Batter:
24 oz. (about 3 cups) 2-to-1 blend of yogurt cheese and cottage cheese (see
above)
3/4 cup granulated sugar
1 teaspoon vanilla extract
1 teaspoon rum extract
1/2 teaspoon nutmeg
2 1/3 cups light eggnog
2 1/2 teaspoons xanthan gum
3 eggs
Place into greased 13" x 9" glass ("Pyrex") pan, and bake
in tub at 300 degrees for 90 minutes. Shut off oven afterwards, leaving door
slightly ajar, for 60 minutes. Next, remove pan containing cheesecake from tub
and oven, and let cool at room temperature for 90 minutes, then (with cheesecake
still in pan) refrigerate.
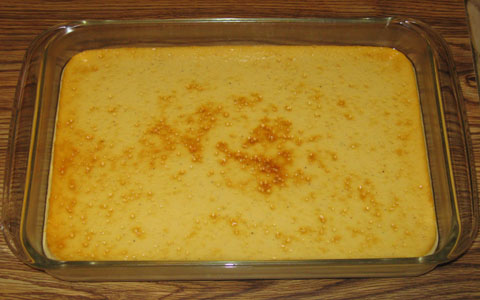
Baked Eggnog Cheesecake—Prototype 25:
2-to-1 Blend of Yogurt Cheese and Cottage Cheese (1CT-2YG):
Prepare ahead of time 16 ounces of yogurt cheese, derived from one 32-ounce
container of nonfat yogurt. If the resulting yogurt cheese falls below 16
ounces, add back enough of the whey (that was strained out from the yogurt) to
make up the difference. To this yogurt cheese combine 8 ounces (1 cup) of
whipped, lowfat cottage cheese.
Batter:
24 oz. (about 3 cups) 2-to-1 blend of yogurt cheese and cottage cheese (see
above)
3/4 cup granulated sugar
1 teaspoon vanilla extract
1 teaspoon rum extract
1/2 teaspoon nutmeg
1 tablespoon xanthan gum
2 cups light eggnog
3 eggs
Place into greased 13" x 9" glass ("Pyrex") pan, and bake
in tub at 300 degrees for 90 minutes. Shut off oven afterwards, leaving door
slightly ajar, for 60 minutes. Next, remove pan containing cheesecake from tub
and oven, and let cool at room temperature for 120 minutes, then (with
cheesecake still in pan) refrigerate.
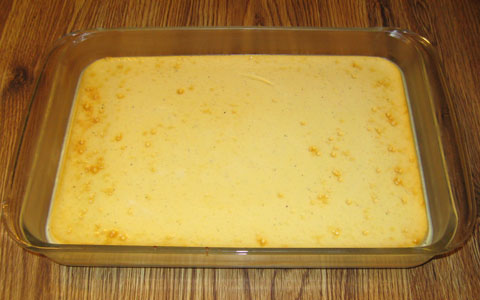
Baked Eggnog Cheesecake—Prototype 26:
2-to-1 Blend of Yogurt Cheese and Cottage Cheese (1CT-2YG):
Prepare ahead of time 16 ounces of yogurt cheese, derived from one 32-ounce
container of nonfat yogurt. If the resulting yogurt cheese falls below 16
ounces, add back enough of the whey (that was strained out from the yogurt) to
make up the difference. To this yogurt cheese combine 8 ounces (1 cup) of
whipped, lowfat cottage cheese.
Batter:
24 oz. (about 3 cups) 2-to-1 blend of yogurt cheese and cottage cheese (see
above)
3/4 cup granulated sugar
1 teaspoon vanilla extract
6/10 (about) teaspoon rum extract (but see comments below)
1/2 teaspoon nutmeg
1 1/3 tablespoons xanthan gum (tip: blend this in before adding the
eggnog)
2 cups light eggnog
3 eggs
Place about 2/3 of this batter into a greased 13" x 9" glass
("Pyrex") pan, and bake in tub at 300 degrees for 70 minutes. After
this is done, remove from oven and carefully add the remaining 1/3
batter on top of the earlier installment. Return to oven and continue baking at
300 degrees for another 80 minutes. Shut off oven afterwards, leaving door
slightly ajar, for 60 minutes. Next, remove pan containing cheesecake from tub
and oven, and let cool at room temperature for 120 minutes, then (with
cheesecake still in pan) refrigerate.
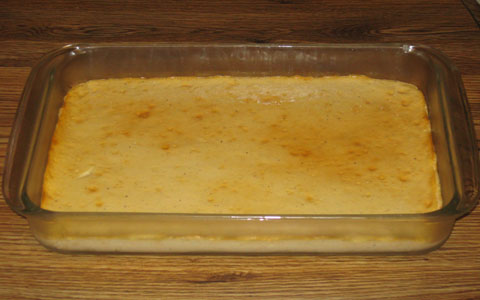
Baked Eggnog Cheesecake—Prototype 27:
Eggnog Concentrate:
Place 2 cups of eggnog into the upper pot of a double-boiler. Very slowly
heat the contents (this can, and probably should, be done on the lowest
burner setting—more importantly, try to get the eggnog's temperature
to settle between 165 and 180 degrees during this process). Stir often,
cooking this eggnog until it is almost down to about 1/4 of its initial
weight. Then let this cool off (at least a little).
Batter:
24 oz. (about 3 cups) whipped, lowfat cottage cheese
3/4 cup granulated sugar
1 teaspoon vanilla extract
1/2 teaspoon nutmeg
Eggnog concentrate (see above)
1 tablespoon xanthan gum
3 eggs
Place into greased 13" x 9" glass ("Pyrex") pan, and bake
in tub at 300 degrees for 90 minutes. Shut off oven afterwards, leaving door
slightly ajar, for 60 minutes. Next, remove pan containing cheesecake from tub
and oven, and let cool at room temperature for 120 minutes, then (with
cheesecake still in pan) refrigerate.
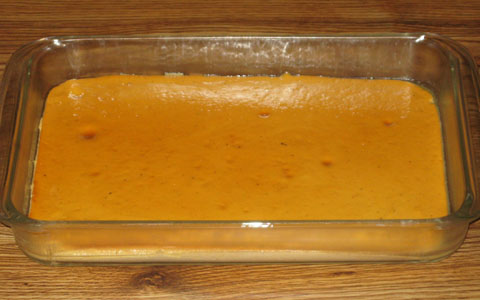
Baked Eggnog Cheesecake—Prototype 28:
Eggnog Concentrate:
Place 2 cups of eggnog into the upper pot of a double-boiler. Very slowly
heat the contents (this can, and probably should, be done on the lowest
burner setting—more importantly, try to get the eggnog's temperature
to settle between 165 and 180 degrees during this process). Stir often,
cooking this eggnog until it is almost down to about 1/3 to 1/4 of its
initial weight. Then let this cool off (at least a little). Tip:
Prepare this concentrate ahead of time. The evaporation process can take
about 7 to 8 hours, depending on the amount of heat applied. Allow
the concentrate to cool down afterwards, then refrigerate until ready for
use.
Batter:
16 oz. (about 2 cups) whipped, lowfat cottage cheese
8 oz. softened Neufchatel cheese ("light cream cheese")
3/4 cup granulated sugar
1 teaspoon vanilla
Eggnog concentrate (see above)
1 teaspoon xanthan gum
3 eggs
Place into greased 13" x 9" glass ("Pyrex") pan, and bake
in tub at 300 degrees for 90 minutes. Shut off oven afterwards, leaving door
slightly ajar, for 60 minutes. Next, remove pan containing cheesecake from tub
and oven, and let cool at room temperature for 120 minutes, then (with
cheesecake still in pan) refrigerate.
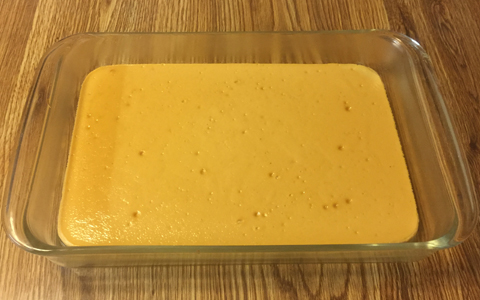
Baked Eggnog Cheesecake—Prototype 29:
Eggnog Concentrate:
Place 2 cups of eggnog into the upper pot of a double-boiler. Very slowly
heat the contents (this can, and probably should, be done on the lowest
burner setting—more importantly, try to get the eggnog's temperature
to settle between 165 and 180 degrees during this process). Stir often,
cooking this eggnog until it is almost down to about 1/3 to 1/4 of its
initial weight. Then let this cool off (at least a little). Tip:
Prepare this concentrate ahead of time. The evaporation process can take
about 7 to 8 hours, depending on the amount of heat applied. Allow
the concentrate to cool down afterwards, then refrigerate until ready for
use.
Batter:
16 oz. (about 2 cups) whipped, lowfat cottage cheese
8 oz. softened Neufchatel cheese ("light cream cheese")
3/4 cup granulated sugar
1 teaspoon vanilla
Eggnog concentrate (see above)
1/2 teaspoon xanthan gum
3 eggs
Place into greased 13" x 9" glass ("Pyrex") pan, and bake
in tub at 300 degrees for 90 minutes. Shut off oven afterwards, leaving door
slightly ajar, for 60 minutes. Next, remove pan containing cheesecake from tub
and oven, and let cool at room temperature for 120 minutes, then (with
cheesecake still in pan) refrigerate.
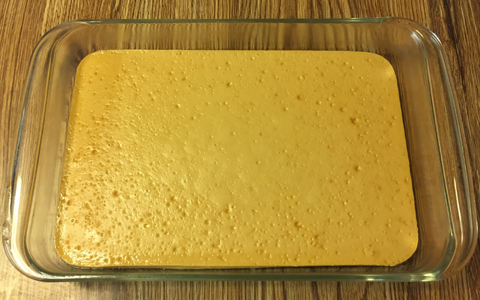
Baked Eggnog Cheesecake—Prototype 30:
Crust:
2 oz. melted, white chocolate
8 oz. (about 1 cup) whipped, lowfat cottage cheese
1/4 cup granulated sugar
1/4 cup brown sugar
1/2 teaspoon vanilla
3 oz. graham crackers, ground up
Place the resulting mixture into a greased 13" x 9" glass
("Pyrex") pan and pre-bake without tub at 300 degrees for 25 minutes,
then remove from oven (cooling off is optional here).
Batter:
16 oz. (about 2 cups) whipped, lowfat cottage cheese
8 oz. softened Neufchatel cheese ("light cream cheese")
3/4 cup granulated sugar
1 teaspoon vanilla
2 cups light eggnog (such as Hood)
1 1/2 teaspoons xanthan gum
3 eggs
Expect close to 6 cups of the resulting batter, but do not add this to
the pan all at once. Rather, this needs to be done in four
installments.
For each of the first three installments, gently scoop about 1 1/2 cups of
batter into the pan, fully covering the surface (here's a tip—scoop small
amounts of batter into scattered places throughout the pan, letting this batter
fill in nearby gaps, and if any of these remain, use a rubber spatula and
gently spread the batter to cover these gaps up), and then bake this pan with
its contents for 25 minutes, at 325 degrees. However, at the end of the third
installment's 25 minutes, add on another 30 minutes of baking time, but only at
300 degrees (that's a 55 minute "baking installment"—the first
25 minutes at 325 degrees and the next 30 at 300). For all four installments,
bake with the pan in a tub filled with at least 1/4 to 1/2 inch of boiling
water.
After the first three installments are done, there should be about 1 1/2 cups of
batter left, with 105 minutes of baking time reached at this point (25 minutes
for each of the first two installments, and 55 for the third one). Now comes the
fourth installment—carefully add the last of this batter on top of the
pan's earlier installments, fully coating the entire surface. Next, return the
entire pan-and-tub assembly to the oven, with the temperature remaining at 300
degrees. Resume baking for another 90 minutes.
Afterward, shut the oven off, and leave its door slightly ajar, with the
cheesecake still inside—and in the tub—for an hour. Next, remove the
cheesecake from the oven and tub. Continue to cool it down at room temperature
for another 120 minutes, then (with cheesecake still in pan) refrigerate.
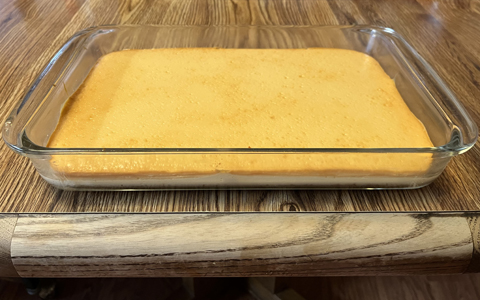
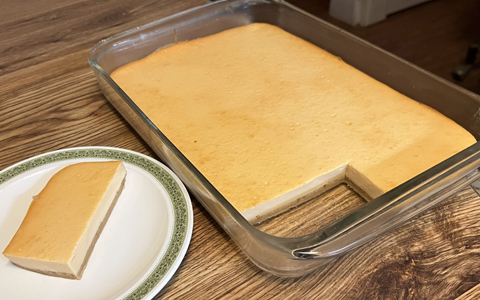
Baked Eggnog Cheesecake—Prototype 31:
Crust:
2 oz. melted, white chocolate
8 oz. (about 1 cup) whipped, lowfat cottage cheese
1/4 cup granulated sugar
1 tablespoon brown sugar
1 teaspoon cinnamon
1/2 teaspoon vanilla
3 oz. graham crackers, ground up (if these are cinnamon-flavored, omit the cinnamon shown above)
Place the resulting mixture into a greased 13" x 9" glass
("Pyrex") pan and pre-bake without tub at 300 degrees for 25 minutes,
then remove from oven (cooling off is optional here).
Batter:
16 oz. (about 2 cups) whipped, lowfat cottage cheese
8 oz. softened Neufchatel cheese ("light cream cheese")
3/4 cup granulated sugar
1 teaspoon vanilla
2 cups light eggnog (such as Hood)
1 teaspoon xanthan gum
3 eggs
Expect close to 6 cups of the resulting batter, but do not add this to
the pan all at once. Rather, this needs to be done in four
installments.
For each of the first three installments, gently scoop about 1 1/2 cups of
batter into the pan, fully covering the surface (here's a tip—scoop small
amounts of batter into scattered places throughout the pan, letting this batter
fill in nearby gaps, and if any of these remain, use a rubber spatula and
gently spread the batter to cover these gaps up), and then bake this pan with
its contents for 25 minutes, at 325 degrees. However, at the end of the third
installment's 25 minutes, add on another 30 minutes of baking time, but only at
300 degrees (that's a 55 minute "baking installment"—the first
25 minutes at 325 degrees and the next 30 at 300). For all four installments,
bake with the pan in a tub filled with at least 1/4 to 1/2 inch of boiling
water.
After the first three installments are done, there should be about 1 1/2 cups of
batter left, with 105 minutes of baking time reached at this point (25 minutes
for each of the first two installments, and 55 for the third one). Now comes the
fourth installment—carefully add the last of this batter on top of the
pan's earlier installments, fully coating the entire surface. Next, return the
entire pan-and-tub assembly to the oven, with the temperature remaining at 300
degrees. Resume baking for another 60 minutes.
Afterward, shut the oven off, and leave its door slightly ajar, with the
cheesecake still inside—and in the tub—for an hour. Next, remove the
cheesecake from the oven and tub. Continue to cool it down at room temperature
for another 120 minutes, then (with cheesecake still in pan) refrigerate.
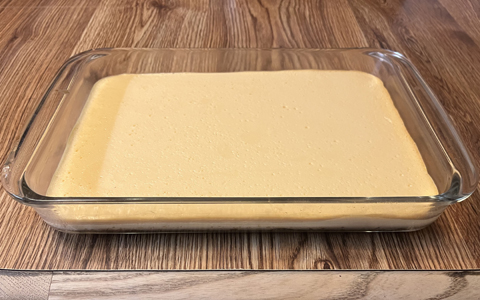
Baked Eggnog Cheesecake—Prototype 32:
Crust:
2 oz. melted, white chocolate
8 oz. (about 1 cup) whipped, lowfat cottage cheese
1/4 cup granulated sugar
1 tablespoon brown sugar
1 teaspoon cinnamon
1/2 teaspoon vanilla
3 oz. graham crackers, ground up (if these are cinnamon-flavored, omit the cinnamon shown above)
Place the resulting mixture into a greased 13" x 9" glass
("Pyrex") pan and pre-bake without tub at 300 degrees for 25 minutes,
then remove from oven (cooling off is optional here).
Batter:
16 oz. (about 2 cups) whipped, lowfat cottage cheese
8 oz. softened Neufchatel cheese ("light cream cheese")
3/4 cup granulated sugar
1 teaspoon vanilla
1 teaspoon rum extract
1/2 teaspoon nutmeg
2 cups light eggnog (such as Hood)
1 teaspoon xanthan gum
3 eggs
Expect close to 6 cups of the resulting batter, but do not add this to
the pan all at once. Rather, this needs to be done in four
installments.
For each of the first three installments, gently scoop about 1 1/2 cups of
batter into the pan, fully covering the surface (here's a tip—scoop small
amounts of batter into scattered places throughout the pan, letting this batter
fill in nearby gaps, and if any of these remain, use a rubber spatula and
gently spread the batter to cover these gaps up), and then bake this pan with
its contents for 25 minutes, at 325 degrees*. However, at the end of the third
installment's 25 minutes, add on another 10 minutes of baking time, but only at
300 degrees (that's a 35 minute "baking installment"—the first
25 minutes at 325 degrees and the next 10 at 300). For all four installments,
bake with the pan in a tub filled with at least 1/4 to 1/2 inch of boiling
water.
* (The temperature for the first installment ended up unintentionally at 345
degrees. To compensate for this error, the temperature for the second installment
was set to 315 degrees. See comments below for more details.)
After the first three installments are done, there should be about 1 1/2 cups of
batter left, with 85 minutes of baking time reached at this point (25 minutes
for each of the first two installments, and 35 for the third one). Now comes the
fourth installment—carefully add the last of this batter on top of the
pan's earlier installments, fully coating the entire surface. Next, return the
entire pan-and-tub assembly to the oven, with the temperature remaining at 300
degrees. Resume baking for another 50 minutes.
Afterward, shut the oven off, and leave its door slightly ajar, with the
cheesecake still inside—and in the tub—for an hour. Next, remove the
cheesecake from the oven and tub. Continue to cool it down at room temperature
for another 120 minutes, then (with cheesecake still in pan) refrigerate.
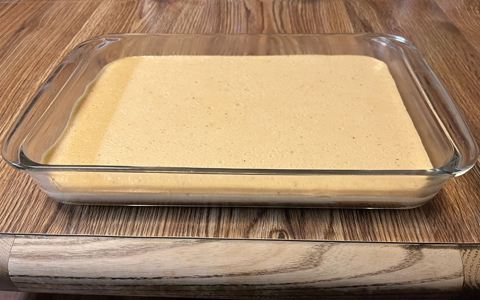
Baked Eggnog Cheesecake—Prototype 33:
Crust:
2 oz. melted, white chocolate
8 oz. (about 1 cup) whipped, lowfat cottage cheese
1/4 cup granulated sugar
1 tablespoon brown sugar
1 teaspoon cinnamon
1/2 teaspoon vanilla
3 oz. graham crackers, ground up (if these are cinnamon-flavored, omit the cinnamon shown above)
Place the resulting mixture into a greased 13" x 9" glass
("Pyrex") pan and pre-bake without tub at 300 degrees for 30 minutes,
then remove from oven (cooling off is optional here).
Batter:
16 oz. (about 2 cups) whipped, lowfat cottage cheese
8 oz. softened Neufchatel cheese ("light cream cheese")
3/4 cup granulated sugar
1 teaspoon vanilla
1/2 teaspoon rum extract
1/2 teaspoon nutmeg
2 cups light eggnog (such as Hood)
3/4 teaspoon xanthan gum
3 eggs
Expect close to 6 cups of the resulting batter, but do not add this to
the pan all at once. Rather, this needs to be done in four
installments.
For each of the first three installments, gently scoop about 1 1/2 cups of
batter into the pan, fully covering the surface (here's a tip—scoop small
amounts of batter into scattered places throughout the pan, letting this batter
fill in nearby gaps, and if any of these remain, use a rubber spatula and
gently spread the batter to cover these gaps up), and then bake this pan with
its contents for 25 minutes, at 325 degrees. However, at the end of the third
installment's 25 minutes, add on another 10 minutes of baking time, but only at
300 degrees (that's a 35 minute "baking installment"—the first
25 minutes at 325 degrees and the next 10 at 300). For all four installments,
bake with the pan in a tub filled with at least 1/4 to 1/2 inch of boiling
water.
After the first three installments are done, there should be about 1 1/2 cups of
batter left, with 85 minutes of baking time reached at this point (25 minutes
for each of the first two installments, and 35 for the third one). Now comes the
fourth installment—carefully add the last of this batter on top of the
pan's earlier installments, fully coating the entire surface. Next, return the
entire pan-and-tub assembly to the oven, with the temperature remaining at 300
degrees. Resume baking for another 40 minutes.
Afterward, shut the oven off, and leave its door slightly ajar, with the
cheesecake still inside—and in the tub—for an hour. Next, remove the
cheesecake from the oven and tub. Continue to cool it down at room temperature
for another 120 minutes, then (with cheesecake still in pan) refrigerate.
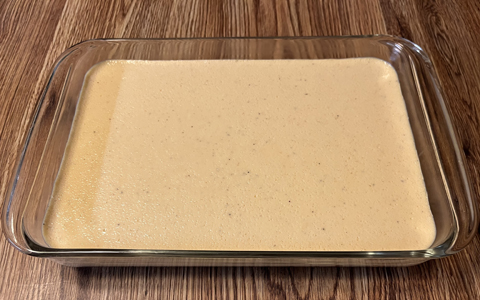
Baked Eggnog Cheesecake—Prototype 34:
Crust:
4 oz. melted, white chocolate
8 oz. (about 1 cup) whipped, lowfat cottage cheese
1/4 cup granulated sugar
1 tablespoon brown sugar
1 teaspoon cinnamon
1/2 teaspoon vanilla
3 oz. graham crackers, ground up (if these are cinnamon-flavored, omit the cinnamon shown above)
Place the resulting mixture into a greased 13" x 9" glass
("Pyrex") pan and pre-bake without tub at 300 degrees for 30
minutes, then remove from oven and cool down at room temperature (for at
least 30 minutes).
Batter:
16 oz. (about 2 cups) whipped, lowfat cottage cheese
8 oz. softened Neufchatel cheese ("light cream cheese")
3/4 cup granulated sugar
1 teaspoon vanilla
1/2 teaspoon rum extract
1/2 teaspoon nutmeg
2 cups light eggnog (such as Hood)
3/4 teaspoon xanthan gum
3 eggs
Original Baking Procedure:
Expect close to 6 cups of the resulting batter, but do not add this to
the pan all at once. Rather, this needs to be done in four
installments.
For each of the first three installments, gently scoop about 1 1/2 cups of
batter into the pan, fully covering the surface (here's a tip—scoop small
amounts of batter into scattered places throughout the pan, letting this batter
fill in nearby gaps, and if any of these remain, use a rubber spatula and
gently spread the batter to cover these gaps up), and then bake this pan with
its contents for 25 minutes, at 325 degrees. However, at the end of the third
installment's 25 minutes, add on another 5 minutes of baking time, but only at
300 degrees (that's a 30 minute "baking installment"—the first
25 minutes at 325 degrees and the next 5 at 300). For all four installments,
bake with the pan in a tub filled with at least 1/4 to 1/2 inch of boiling
water.
After the first three installments are done, there should be about 1 1/2 cups of
batter left, with 80 minutes of baking time reached at this point (25 minutes
for each of the first two installments, and 30 for the third one). Now comes the
fourth installment—carefully add the last of this batter on top of the
pan's earlier installments, fully coating the entire surface. Next, return the
entire pan-and-tub assembly to the oven, with the temperature remaining at 300
degrees. Resume baking for another 30 minutes.
Afterward, shut the oven off, and leave its door slightly ajar, with the
cheesecake still inside—and in the tub—for an hour. Next, remove the
cheesecake from the oven and tub. Continue to cool it down at room temperature
for another 120 minutes, then (with cheesecake still in pan) refrigerate.
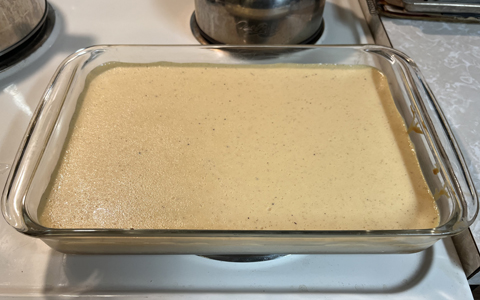
New December 2025 Baking Procedure:
Expect close to 6 cups of the resulting batter, but do not add this to
the pan all at once. Rather, this needs to be done in four installments.
Wrap the pan in foil (or—as an alternative—use a cheesecake pan
bath wrap) just before adding the first batter installment (to minimize the
foil's disturbance and therefore its leakage risk, do not put it on any
earlier).
For each of these four installments, gently scoop about 1 1/2 cups of batter
into the pan, fully covering the surface (here's a tip—scoop small
amounts of batter into scattered places throughout the pan, letting this batter
fill in nearby gaps, and if any of these remain, use a rubber spatula and
gently spread the batter to cover these gaps up), and then bake this pan with
its contents for 25 minutes—at 325 degrees for the first two installments,
and at 300 degrees for the remaining two. For the first three installments, bake
with the pan in a tub filled with at least 1/4 to 1/2 inch of boiling water, but
(to reduce spillage risks) do not fill the tub all the way at this point,
because the whole tub-and-pan assembly is going to need to be removed from the
oven (in order to comfortably add contents to the pan) between installments.
However, fill up the tub generously with boiling water just before the final
baking installment.
Afterward, shut the oven off, and leave its door slightly ajar, with the
cheesecake still inside—and in the tub—for an hour. Next, remove the
cheesecake from the oven and tub. Continue to cool it down at room temperature
for another two hours. After doing so, remove the cheesecake from pan and
refrigerate.

|
-------------------------------------------------------
-------------------------------------------------------
|
Baked Peanut Butter Cheesecake—Prototype 1:
Batter:
2 tablespoons melted or softened butter
6 oz. unsalted peanut butter
1/2 cup skim milk (it is a good idea to warm this up first, at least if it
is being directly added to the butter or a mixture dominated by it)
15 tbsp. (i.e., 1 cup minus 1 tbsp.) granulated sugar (note—of this one,
1/2 cup of it is specific to the cheesecake base recipe, and the other 7
tablespoons are specific to the peanut butter flavor)
1/4 cup flour
1/2 teaspoon salt
2 cups lowfat cottage cheese, no salt added
2 eggs
Blend all these ingredients together thoroughly, particularly the butter and
eggs, then pour this batter into a lightly buttered 9" cheesecake pan.
Promptly place in oven—preheated at 300 degrees—and bake for 90 minutes
(or until cake tester comes out clean). Remove from oven, cool down to about
room temperature, carefully remove from pan, and refrigerate.
Baked Peanut Butter Cheesecake—Prototype 2:
Repeat Prototype 1, but increase the granulated sugar by one tablespoon,
to an easier-to-manage full cup.
Bake for only 80 minutes, or until cake tester comes clean.
Baked Peanut Butter Cheesecake—Prototype 3:
Crust:
2 oz. melted, white chocolate
2 oz. unsalted peanut butter
4 oz. whipped lowfat cottage cheese, no salt added
1/4 cup skim milk
1/3 cup granulated sugar
1/2 teaspoon vanilla (last ingredient just before the Bran Buds)
2.2 oz. Bran Buds, ground up
Batter:
2 tablespoons melted or softened butter
4.5 oz. unsalted peanut butter
1/2 cup skim milk
5/6 cup (i.e., 1/2 + 1/3 cup) granulated sugar
1/4 cup flour
1/4 teaspoon salt
2 cups whipped lowfat cottage cheese, no salt added
2 eggs
Bake at 300 degrees for about 95 minutes (with tub immersion), or until cake
tester comes clean.
Baked Peanut Butter Cheesecake—Prototype 4:
Repeat Prototype 3, but reduce the batter's peanut butter by 1.5 ounces, to
3 ounces, and also reduce the batter's granulated sugar by 1/12 cup
(i.e., 4 teaspoons) to 3/4 cup (i.e., 1/2 + 1/4 cup).
Bake for about 100 minutes (with tub immersion), or until cake tester comes
clean.
Internal Tweaking
Notes
Peanut Butter: (A) 4 oz. :: (B) 3.5 oz. :: (C) 3oz.?
Granulated Sugar: 1/2 cup plus (A) 5.333 tbsp. to 4.667 tbsp. :: (B) 4.667
tbsp. to 4.08333 (that's 4 + 1/12) tbsp. :: (C) 4 tbsp. to 3.5
tbsp.? |
Baked Peanut Butter Cheesecake—Prototype 5:
2-to-1 Blend of Yogurt Cheese and Cottage Cheese:
Prepare ahead of time 32 ounces of yogurt cheese, derived from two 32-ounce
containers (that's 64 ounces altogether) of nonfat yogurt. If the resulting
yogurt cheese falls below 32 ounces, add back enough of the whey (that was
strained out from the yogurt) to make up the difference. To this yogurt cheese
combine one 16-ounce container of whipped, lowfat cottage cheese.
Grease a 9 1/2" (or 9") pan, but do not wrap foil around it until just
before the batter is added (spreading the crust in an already wrapped pan can
result in greater disturbance to the foil, thus increasing leakage risks).
Crust:
2 oz. melted, white chocolate
4 oz. unsalted peanut butter
1/2 cup granulated sugar
1/2 teaspoon vanilla
8 oz. (1 cup) 2-to-1 blend of yogurt cheese and cottage cheese (see above)
2 oz. All-Bran, ground up
Pour this crust mixture into pan (9 to 9 1/2 inches) and pre-bake without tub at
300 degrees for 10 minutes, then cool enough to comfortably touch at least the
pan's upper sidewall.
Batter:
4 tablespoons melted/softened butter (unsalted recommended)
8 oz. unsalted peanut butter
1 1/2 cups granulated sugar
1/4 cup all-purpose flour
3 tablespoons arrowroot
40 oz. (5 cups) 2-to-1 blend of yogurt cheese and cottage cheese (see above)
4 eggs
Pour on top of crust. Bake in tub at 300 degrees for 100 minutes (if using a 9
1/2" pan). Then cool down while still in oven (with this oven shut off) and
in tub with door slightly ajar for an hour. Afterwards, remove from oven and tub
(right after doing so, add a border of peanut butter—or other flavor—chips
around the cheesecake's top edge, if desired). Then continue to cool down at
room temperature for another 100 minutes, then remove from pan and refrigerate.
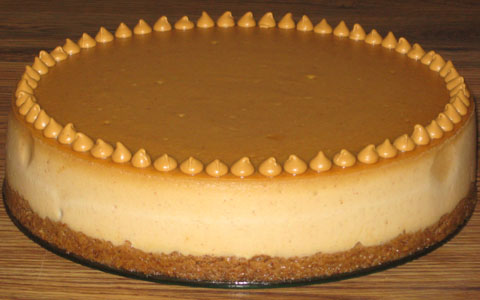
|
-------------------------------------------------------
|
Baked Maple Cheesecake—Prototype 1:
Crust:
4 oz. whipped lowfat cottage cheese (such as Hood, no salt added)
1/4 cup maple sugar
1/4 cup skim milk
Thoroughly blend these above 3 ingredients together. Afterward, quickly and
vigorously mix in:
2.2 oz. finely ground Bran Buds
Grease a springform pan, 9". For best results take the bath
approach—wrap this pan up to the sides with foil, in order to suppress
water leaks (heavy-duty aluminum is a good choice).
Mix thoroughly together:
2 tablespoons butter, softened or melted
1/2 cup maple sugar
Then blend in:
1 teaspoon lemon juice
Then mix in:
2 cups (such as a 16-ounce container) of lowfat cottage cheese (such as
Hood, no salt added)—whip this in a blender just until the curds no longer
show, before adding to the above ingredients.
Next add:
1/2 cup skim milk
Follow up gradually with a dry combination of:
1/4 cup flour
1/4 teaspoon salt
Completely mix all of the above ingredients used so far, then finally add:
2 eggs (last ingredient here)—aim to get these at least fully mixed in (yet
without overbeating, if possible).
Make sure that the oven is preheated to 300 degrees. If using the bath
approach, have enough boiling hot water available, and fill a large
"tub" with it and place this in the oven, close to halfway up.
Pour the batter into the springform pan. Next, put this pan into the oven.
If using the bath approach, place the springform pan immediately above the
"tub" (not into it!). Bake for about 90 minutes. Afterward, take
the springform pan out of the oven, and let the cheesecake cool off. After
it has cooled down to about room temperature, carefully remove it from the
pan, and refrigerate.
Baked Maple Cheesecake—Prototype 2:
Repeat Prototype 1, but boost the crust's maple sugar by 1/4 cup, to 1/2
cup.
Baked Maple Cheesecake—Prototype 3:
Crust:
1/2 cup (4 oz.) whipped lowfat cottage cheese
1/2 cup maple sugar
1/4 cup skim milk
2.2 oz. finely ground Bran Buds
Pour this into pan and pre-bake at 300 degrees for 10 minutes, then allow to
cool to touch.
Batter:
2 tablespoons butter, softened or melted
2/3 cup maple sugar
1/2 tablespoon lemon juice
2 1/4 cups (20 oz.) whipped lowfat cottage cheese
1/2 cup skim milk
1/3 cup flour
1/4 teaspoon salt
2 eggs
Pour batter on top of crust in pan, and bake in hot tub at 300 degrees for
about 100 minutes (if using a pan almost 9 1/2 inches big). Cool off in pan
afterward, then remove from pan, and refrigerate.
Baked Maple Cheesecake—Prototype 4:
2-to-1 Blend of Yogurt Cheese and Cottage Cheese:
Prepare ahead of time 16 ounces of yogurt cheese, derived from one 32-ounce
container of nonfat yogurt. If the resulting yogurt cheese falls below 16
ounces, add back enough of the whey (that was strained out from the yogurt) to
make up the difference. To this yogurt cheese combine 8 ounces (1 cup) of
whipped, lowfat cottage cheese.
Crust:
1 oz. melted, white chocolate
4 oz. (1/2 cup) 2-to-1 blend of yogurt cheese and cottage cheese (see above)
1/4 cup maple sugar
1/4 teaspoon maple flavoring
1.1 oz. Bran Buds, ground up
Pour this crust mixture into pan (9 to 9 1/2 inches) and pre-bake without tub at
300 degrees for 5 minutes, then cool enough to comfortably touch at least the
pan's upper sidewall.
Batter:
2 tablespoons melted or softened butter
5/8 cup maple sugar
2 tablespoons all-purpose flour
1 1/3 tablespoons arrowroot
1/4 teaspoon salt
20 oz. (2 1/2 cups) 2-to-1 blend of yogurt cheese and cottage cheese (see above)
1 teaspoon maple flavoring
2 eggs
Pour on top of crust. Then bake in tub at 300 degrees for 60 minutes (if using a
9 1/2" pan), cool (outside of oven and tub) for an hour, remove from pan
and refrigerate.
Baked Maple Cheesecake—Prototype 5:
2-to-1 Blend of Yogurt Cheese and Cottage Cheese:
Prepare ahead of time 2 pounds of yogurt cheese, derived from two 32-ounce
containers of nonfat yogurt. If the resulting yogurt cheese falls below 32
ounces, add back enough of the whey (that was strained out from the yogurt) to
make up the difference. To this yogurt cheese combine 16 ounces (1 pint) of
whipped, lowfat cottage cheese.
Crust:
2 oz. melted, white chocolate
8 oz. (1 cup) 2-to-1 blend of yogurt cheese and cottage cheese (see above)
1/2 cup maple sugar
1/2 teaspoon maple flavoring
2 oz. All-Bran, ground up
Pour this crust mixture into pan (9 to 9 1/2 inches) and pre-bake without tub at
300 degrees for 10 minutes, then cool enough to comfortably touch at least the
pan's upper sidewall.
Batter:
4 tablespoons melted or softened butter
1 1/4 cups maple sugar
1/4 cup all-purpose flour
3 tablespoons arrowroot
40 oz. (5 cups) 2-to-1 blend of yogurt cheese and cottage cheese (see above)
2 teaspoons maple flavoring
4 eggs
Pour the batter over the crust and bake this cheesecake in a tub at 300 degrees
for 100 minutes (if using a 9 1/2" pan). Then cool the cheesecake down
while still in oven (with this oven shut off) and in tub with door slightly ajar
for an hour. Afterwards, remove from oven and tub and continue to cool down at
room temperature for another 100 minutes, then remove from pan and refrigerate.
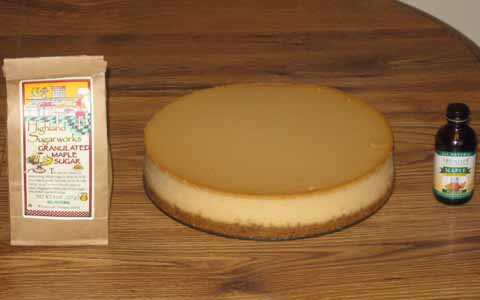
Baked Maple Cheesecake—Prototype 6:
3-Cheese Blend (1CT-1NC-4YG):
Prepare ahead of time 32 ounces of yogurt cheese, derived from two 32-ounce
containers (that's 64 ounces altogether) of nonfat yogurt. If the resulting
yogurt cheese falls below 32 ounces, add back enough of the whey (that was
strained out from the yogurt) to make up the difference. To this yogurt cheese
combine 8 ounces of whipped, lowfat cottage cheese and 8 ounces of softened
Neufchatel cheese ("light cream cheese").
Crust:
2 oz. melted, white chocolate
8 oz. (1 cup) 3-cheese blend (see above)
1/2 cup maple sugar
1/2 teaspoon maple flavoring
2 oz. All-Bran, ground up
Place the resulting mixture in a greased 9 1/2" (or 9") pan and
pre-bake without tub at 300 degrees for 5-10 minutes, depending on the mixture's
thickness (closer to 10 minutes if thin enough to be fully distributed across
the pan's bottom by gentle shaking, closer to 5 minutes if thick enough to
require spreading out this mixture by pressing on it with a utensil and/or
fingers), then cool enough to comfortably touch at least the pan's upper
sidewall.
Batter:
40 oz. (5 cups) 3-cheese blend (see above)
1 1/4 cups maple sugar
1/4 cup + 1 tablespoon (5 tablespoons altogether) arrowroot
2 teaspoons maple flavoring
5 eggs
Pour the batter over the crust and bake this cheesecake in a tub at 300 degrees
for 110 minutes (if using a 9 1/2" pan). Then cool the cheesecake down
while still in oven (with this oven shut off) and in tub with door slightly ajar
for an hour. Afterwards, remove from oven and tub and continue to cool down at
room temperature for another 110 minutes, then remove from pan and refrigerate.
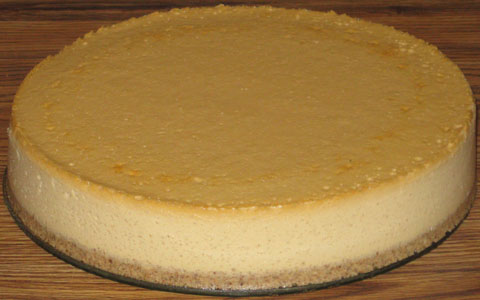
Baked Maple Cheesecake—Prototype 7:
3-Cheese Blend (3CT-1NC-2YG):
Prepare ahead of time 16 ounces of yogurt cheese, derived from one 32-ounce
container of nonfat yogurt. If the resulting yogurt cheese falls below 16
ounces, add back enough of the whey (that was strained out from the yogurt) to
make up the difference. To this yogurt cheese combine 24 ounces of whipped,
lowfat cottage cheese and 8 ounces of softened Neufchatel cheese ("light
cream cheese").
Grease a 9 1/2" (or 9") springform pan, but do not wrap foil around it
yet (see below).
Crust:
2 oz. melted, white chocolate
8 oz. (1 cup) 3-cheese blend (see above)
1/4 cup maple sugar (see comments below)
1/4 cup brown sugar
3/4 teaspoon maple flavoring
2 oz. All-Bran, ground up
Place the resulting mixture in the greased pan and pre-bake without tub at 300
degrees for 5-10 minutes, depending on the mixture's thickness (closer to 10
minutes if thin enough to be fully distributed across the pan's bottom by gentle
shaking, closer to 5 minutes if thick enough to require spreading out this
mixture by pressing on it with a utensil and/or fingers), then cool enough to
comfortably touch at least the pan's upper sidewall.
Batter:
1 1/4 cups maple sugar
40 oz. (5 cups) 3-cheese blend (see above)
2 teaspoons maple flavoring
1 1/2 teaspoons xanthan gum
6 eggs
Wrap the pan in foil just before adding the batter (to minimize the foil's
disturbance and therefore its leakage risk, do not put it on any earlier).
Next, carefully pour the batter over the crust and bake this cheesecake in a hot
water tub at 300 degrees for 90 minutes (if using a 9 1/2" pan). Then
shut off oven and cool cheesecake down while still in it (and in tub), with door
slightly ajar, for an hour. Afterwards, remove from oven and tub and continue to
cool down at room temperature for another two hours, then remove from pan and
refrigerate.
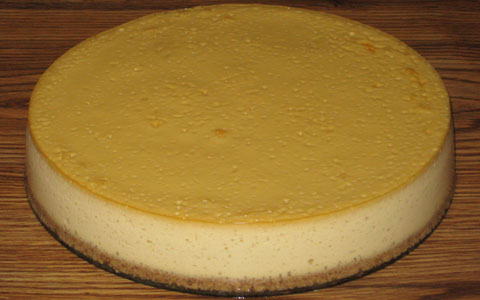
Baked Maple Cheesecake—Prototype 8:
3-Cheese Blend (1CT-1NC-1YG):
Prepare ahead of time 16 ounces of yogurt cheese, derived from one 32-ounce
container of nonfat yogurt. If the resulting yogurt cheese falls below 16
ounces, add back enough of the whey (that was strained out from the yogurt) to
make up the difference. To this yogurt cheese combine 16 ounces of whipped,
lowfat cottage cheese and 16 ounces (two 8-ounce packages) of softened
Neufchatel cheese ("light cream cheese").
Grease a 9 1/2" (or 9") springform pan, but do not wrap foil around
it yet (see below).
Crust:
4 oz. melted, white chocolate
8 oz. (1 cup) 3-cheese blend (see above)
1/2 cup maple sugar
1/2 teaspoon maple flavoring
2 oz. All-Bran, ground up
Place the resulting mixture in the greased pan and pre-bake without tub at 300
degrees for 30 minutes, then cool enough to comfortably touch at least the pan's
upper sidewall.
Batter:
1 1/4 cups maple sugar
40 oz. (5 cups) 3-cheese blend (see above)
2 teaspoons maple flavoring
1 teaspoon xanthan gum
6 eggs
Wrap the pan in foil just before adding the batter (to minimize the foil's
disturbance and therefore its leakage risk, do not put it on any earlier).
Or as an alternative to using foil, place this pan in an
Easy Bath Cheesecake Wrap—and don't bother
waiting for the pan to get comfortably cool to do so.
Next, pour the batter over the crust and bake this cheesecake in a hot water tub
at 300 degrees for 85 minutes (if using a 9 1/2" pan). Then cool the
cheesecake down while still in oven (with this oven shut off) and in tub with
door slightly ajar for an hour. Afterwards, remove from oven and tub and
continue to cool down at room temperature for another 120 minutes, then remove
from pan and refrigerate.
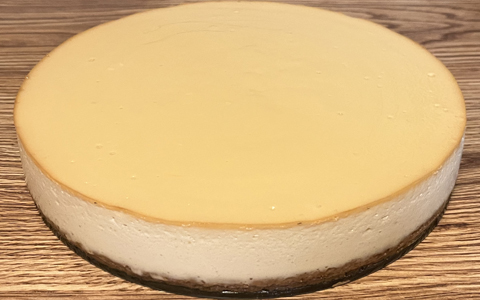
|
-------------------------------------------------------
|
Baked Lemon Cheesecake—Prototype 3:
Crust:
1.5 oz. melted, white chocolate
1 tablespoon water
1 tablespoon lemon juice
1/2 tablespoon grated lemon peel
1/4 cup granulated sugar
4 oz. lowfat cottage cheese, whipped (such as Hood, no salt added)
Fully blend the above ingredients before adding:
2.2 oz. finely ground Bran Buds
Blend the Bran Buds into the above mixture as fast and "furiously"
as possible and then pour quickly into a greased, 9" springform pan.
Mix thoroughly together:
2 tablespoons butter, softened or melted
1/2 cup granulated sugar
Then blend in:
1 tablespoon lemon juice
Then mix in:
2 cups (such as a 16-ounce container) of lowfat cottage cheese (such as
Hood, no salt added)—whip this in a blender just until the curds no longer
show, before adding to the above ingredients.
Next add:
1/2 cup skim milk
Follow up gradually with a dry combination of:
1 teaspoon grated lemon peel
1/4 cup flour
1/4 teaspoon salt
Completely mix all of the above ingredients used so far, then finally add:
2 eggs (last ingredient here)—aim to get these at least fully mixed in (yet
without overbeating, if possible).
Make sure that the oven is preheated to 300 degrees. If using the bath
approach, have enough boiling hot water available, and fill a large
"tub" with it and place this in the oven, close to halfway up.
Pour the batter into the springform pan. Next, put this pan into the oven.
If using the bath approach, place the springform pan immediately above the
"tub". Bake for about 90 minutes. Afterward, take the springform
pan out of the oven, and let the cheesecake cool off. After it has cooled
down to about room temperature, carefully remove it from the pan, and
refrigerate.
Baked Lemon Cheesecake—Prototype 4:
Yogurt Cheese:
Prepare ahead of time 3 pounds of yogurt cheese, derived from three 32-ounce
containers of nonfat yogurt. If the resulting yogurt cheese falls below 48
ounces, add back enough of the whey (that was strained out from the yogurt) to
make up the difference.
Crust:
2 oz. melted, white chocolate
1 tablespoon lemon juice (tip: microwave this juice a little, then add it
directly to the melted white chocolate, and mix thoroughly)
8 oz. (1 cup) yogurt cheese (see above)
1/3 cup granulated sugar
2 teaspoons grated lemon peel
2 oz. All-Bran, ground up
Gently pour this crust mixture into bottom of pan (9 to 9 1/2 inches) and
pre-bake without tub at 300 degrees for 10 minutes, then cool enough to
comfortably touch at least the pan's upper sidewall.
Batter:
4 tablespoons melted or softened butter
1 3/8 cups granulated sugar
2 tablespoons lemon juice
2 teaspoons grated lemon peel
1/4 cup all-purpose flour
3 tablespoons arrowroot
40 oz. (5 cups) yogurt cheese (see above)
2 teaspoons vanilla
4 eggs
Pour the batter over the crust and bake this cheesecake in a tub at 300 degrees
for 100 minutes (if using a 9 1/2" pan). Then cool the cheesecake down
while still in oven (with this oven shut off) and in tub with door slightly ajar
for an hour. Afterwards, remove from oven and tub and continue to cool down at
room temperature for another 100 minutes, then remove from pan and refrigerate.
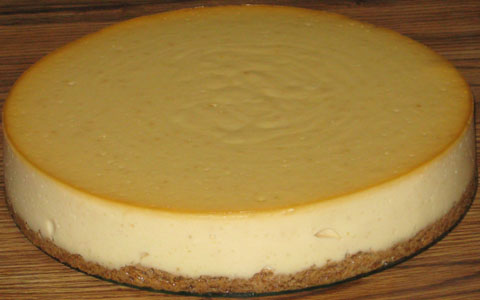
Baked Lemon Cheesecake—Prototype 5:
Repeat
Prototype 4,
but make this change for the batter:
Boost the granulated sugar by 1 tablespoon, to 1 7/16 cups (1 3/8 cups + 1 tablespoon).
Baked Lemon Cheesecake—Prototype 6:
Yogurt Cheese:
Prepare ahead of time 3 pounds of yogurt cheese, derived from three 32-ounce
containers of nonfat yogurt. If the resulting yogurt cheese falls below 48
ounces, add back enough of the whey (that was strained out from the yogurt) to
make up the difference.
Crust:
2 oz. melted, white chocolate
1 tablespoon lemon juice (tip: heat up or microwave this juice a little,
then add it directly to the melted white chocolate, and mix thoroughly)
8 oz. (1 cup) yogurt cheese (see above)
1/3 cup granulated sugar
2 teaspoons grated lemon peel
2 oz. All-Bran, ground up
Place this crust mixture into bottom of pan (9 to 9 1/2 inches) and pre-bake
without tub at 300 degrees for 10 minutes, then cool enough to comfortably touch
at least the pan's upper sidewall.
Batter:
4 tablespoons melted or softened butter
1 5/8 cups granulated sugar
3 tablespoons lemon juice
2 teaspoons grated lemon peel
1/4 cup all-purpose flour
3 tablespoons arrowroot
40 oz. (5 cups) yogurt cheese (see above)
2 teaspoons vanilla
4 eggs
Pour the batter over the crust and bake this cheesecake in a tub at 300 degrees
for 100 minutes (if using a 9 1/2" pan). Then cool the cheesecake down
while still in oven (with this oven shut off) and in tub with door slightly ajar
for an hour. Afterwards, remove from oven and tub and continue to cool down at
room temperature for another 100 minutes, then remove from pan and refrigerate.
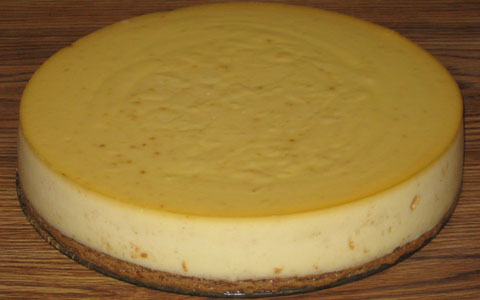
Baked Lemon Cheesecake—Prototype 7:
3-Cheese Blend (1CT-1NC-4YG):
Prepare ahead of time 32 ounces of yogurt cheese, derived from two 32-ounce
containers (that's 64 ounces altogether) of nonfat yogurt. If the resulting
yogurt cheese falls below 32 ounces, add back enough of the whey (that was
strained out from the yogurt) to make up the difference. To this yogurt cheese
combine 8 ounces of whipped, lowfat cottage cheese and 8 ounces of softened
Neufchatel cheese ("light cream cheese").
Crust:
2 oz. melted, white chocolate
1 tablespoon lemon juice (tip: heat up or microwave this juice a little, then
add it directly to the melted white chocolate, and mix thoroughly)
8 oz. (1 cup) 3-cheese blend (see above)
1/3 cup granulated sugar
2 teaspoons grated lemon peel
2 oz. All-Bran, ground up
Place the resulting mixture in the greased pan and pre-bake without tub at 300
degrees for 5-10 minutes, depending on the mixture's thickness (closer to 10
minutes if thin enough to be fully distributed across the pan's bottom by gentle
shaking, closer to 5 minutes if thick enough to require spreading out this
mixture by pressing on it with a utensil and/or fingers), then cool enough to
comfortably touch at least the pan's upper sidewall.
Batter:
1 5/8 cups granulated sugar
40 oz. (5 cups) 3-cheese blend (see above)
2 teaspoons vanilla
3 tablespoons lemon juice
2 teaspoons grated lemon peel
1/4 cup + 1 tablespoon (5 tablespoons altogether) arrowroot
5 eggs
Pour the batter over the crust and bake this cheesecake in a tub at 300 degrees
for 120 minutes (if using a 9 1/2" pan). Then cool the cheesecake down
while still in oven (with this oven shut off) and in tub with door slightly ajar
for an hour. Afterwards, remove from oven and tub and continue to cool down at
room temperature for another 120 minutes, then remove from pan and refrigerate.
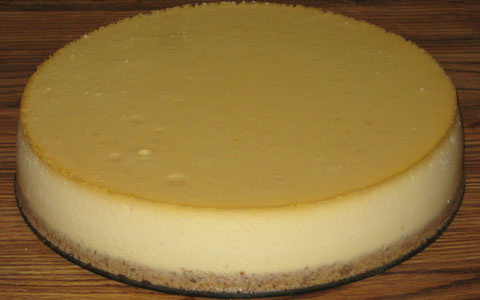
|
-------------------------------------------------------
|
Baked Orange Cheesecake—Prototype 3:
Crust:
1.5 oz. melted, white chocolate
3 tablespoons orange juice
1/2 tablespoon grated orange peel
3 tablespoons sugar
4 oz. lowfat cottage cheese, whipped (such as Hood, no salt added)
Fully blend the above ingredients before adding:
2.2 oz. finely ground Bran Buds
Blend the Bran Buds into the above mixture as quickly as possible and then
pour quickly into a greased springform pan, 9".
Mix thoroughly together:
2 tablespoons butter, softened or melted
1/2 cup sugar
Then blend in:
1/4 cup orange juice
Then mix in:
2 cups (such as a 16-ounce container) of lowfat cottage cheese (such as
Hood, no salt added)—whip this in a blender just until the curds no longer
show, before adding to the above ingredients.
Next add:
1/2 cup skim milk
Follow up gradually with a dry combination of:
1 teaspoon grated orange peel
1/4 cup flour
1/4 teaspoon salt
Completely mix all of the above ingredients used so far, then finally add:
2 eggs (last ingredient here)—aim to get these at least fully mixed in (yet
without overbeating, if possible).
Make sure that the oven is preheated to 300 degrees. If using the bath
approach, have enough boiling hot water available, and fill a large
"tub" with it and place this in the oven, close to halfway up.
Pour the batter into the springform pan. Next, put this pan into the oven.
If using the bath approach, place the springform pan immediately above the
"tub". Bake for about 90 minutes. Afterward, take the springform
pan out of the oven, and let the cheesecake cool off. After it has cooled
down to about room temperature, carefully remove it from the pan, and
refrigerate.
Baked Orange Cheesecake—Prototype 4:
Repeat Prototype 3, but...
Make these changes for the crust:
Boost white chocolate by 1/2 oz., to 2 oz.
Boost orange juice by 1 tablespoon, to 1/4 cup.
Boost sugar by 1 tablespoon, to 1/4 cup.
And make this change for the batter:
Boost grated orange peel by 1 teaspoon, to 2 teaspoons.
Baked Orange Cheesecake—Prototype 5:
Yogurt Cheese:
Prepare ahead of time 3 pounds of yogurt cheese, derived from three 32-ounce
containers of nonfat yogurt. If the resulting yogurt cheese falls below 48
ounces, add back enough of the whey (that was strained out from the yogurt) to
make up the difference.
Crust:
2 oz. melted, white chocolate
1/4 cup orange juice (tip: microwave this juice a little, then add it directly
to the melted white chocolate, and mix thoroughly)
8 oz. (1 cup) yogurt cheese (see above)
5 tablespoons sugar
2 teaspoons grated orange peel
2 oz. All-Bran, ground up
Gently pour this crust mixture into bottom of pan (9 to 9 1/2 inches) and
pre-bake without tub at 300 degrees for 10 minutes, then cool enough to
comfortably touch at least the pan's upper sidewall.
Batter:
4 tablespoons melted or softened butter
1 1/3 cups sugar
1/2 cup orange juice
4 teaspoons grated orange peel
1/4 cup all-purpose flour
3 tablespoons arrowroot
40 oz. (5 cups) yogurt cheese (see above)
2 teaspoons vanilla
4 eggs
Pour the batter over the crust and bake this cheesecake in a tub at 300 degrees
for 100 minutes (if using a 9 1/2" pan). Then cool the cheesecake down
while still in oven (with this oven shut off) and in tub with door slightly ajar
for an hour. Afterwards, remove from oven and tub and continue to cool down at
room temperature for another 100 minutes, then remove from pan and refrigerate.
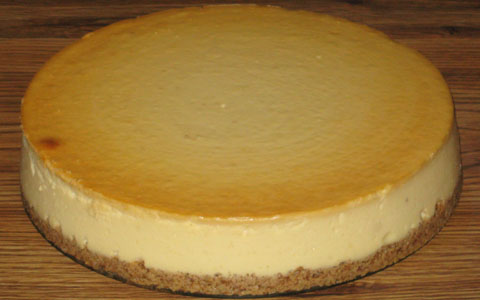
|
-------------------------------------------------------
|
Baked Chocolate Peanut Butter Cheesecake—Prototype 1:
(No tub used at all in baking the batter layers.)
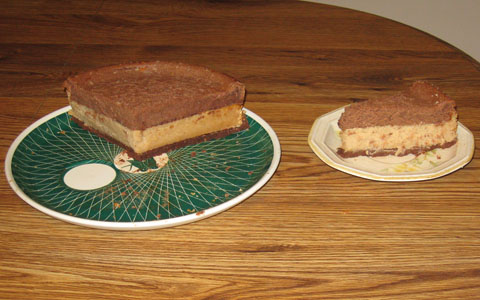
Baked Chocolate Peanut Butter Cheesecake—Prototype 2:
Use a tub when baking.
Chocolate Batter:
1/2 cup skim milk
2 tablespoons melted or softened butter
3 tablespoons cocoa powder
7/8 cup sugar
1 teaspoon lemon juice
1/3 cup flour
1/4 teaspoon salt
2 1/2 cups (20 oz.) lowfat cottage cheese, whipped (no-salt-added
recommended)
1 teaspoon vanilla
2 eggs
Place this batter into a lightly buttered 9" cheesecake pan, and bake
at 300 degrees (batter only, no crust), for about 100 minutes (or until cake
tester comes out clean). Cool down, and remove from pan.
Chocolate Crust (bake this one together with the peanut butter batter,
below):
4 oz. semi-sweet chocolate, melted
1 1/3 tablespoons cocoa powder
1 cup (8 oz.) lowfat cottage cheese, whipped (no-salt-added recommended)
3/8 cup sugar
1 teaspoon vanilla (next to last ingredient here)
2.2 oz. finely ground Bran Buds
Promptly pour/press this crust mixture into the bottom of a lightly buttered
9" cheesecake pan.
Peanut Butter Batter:
2 tablespoons melted or softened butter
3 oz. unsalted peanut butter
1 teaspoon lemon juice
1/2 cup skim milk
3/4 cup sugar
1/3 cup flour
1/4 teaspoon salt
2 1/2 cups (20 oz.) lowfat cottage cheese, whipped (no-salt-added
recommended)
2 eggs
Add this batter on top of the chocolate crust in the pan, and bake at 300
degrees (batter only, no crust), for about 100 minutes (or until cake tester
comes out clean). After removing the pan from the oven, very carefully
transfer the cooled chocolate batter layer into the pan, on top of the
peanut butter layer. Then cool down, and afterwards remove entire cheesecake
from pan.
Baked Chocolate Peanut Butter Cheesecake—Prototype 3 (introduction):
Repeat Prototype 2, but...
Make these changes for each of the two batters:
Boost lemon juice by 2 teaspoons, to 1 tablespoon.
Boost flour by 2 teaspoons, to 3/8 cup.
And make this change for the peanut butter batter only:
Boost peanut butter by 1 oz., to 4 oz.
And carefully follow these steps below, many of which are new:
Pour/press the crust mixture into the bottom of a lightly buttered 9"
cheesecake pan.
Next, add the chocolate (not peanut butter!) batter on top of this crust.
Then carefully wrap foil around this pan.
Next, place this pan into a tub of boiling hot water, and put this into an
oven, preheated to 325 degrees (not 300 at this point).
Bake this only for about 30 minutes.
Now comes the tricky part! WARNING: Use plenty of caution at this
point, due to the pan being very hot! Carefully place the peanut
butter batter on top of the chocolate one. How?? Instead of dumping the
whole thing all at once on the chocolate, try this delicate approach. Start
off by scooping small amounts of the peanut butter batter out of its bowl
(or whatever container is being used). A small measuring cup (1/2-cup size
is good) or ladle is useful here. Pour these small amounts around the
edge of the pan, not the middle (but rather allow the batter to flow
there on its own, if possible). This should reduce the likelihood of the
peanut butter batter breaching the chocolate one. When the bowl of the
peanut butter batter is almost empty, it is probably safe to more directly
dump the rest of this right onto what just got poured, which itself should
be deep enough by then. Still, it is a good idea to do this gently enough to
avoid the chocolate breach.
Next, reduce the temperature to 300 degrees, and return the pan to
the oven. Resume baking for about 80 minutes (or until cake tester comes out
clean).
The usage of the oven isn't done yet! Now, turn off the oven, but keep the
cheesecake in it (along with its tub), with the oven's door slightly ajar.
Allow one hour for this gradual cooldown. Afterwards, take the cheesecake
out of the oven and out of the tub, but keep the cheesecake in its 9"
pan.
Next, cool the cheesecake off, at room temperature, for another two hours.
Finally, remove it from its pan and refrigerate.
Baked Chocolate Peanut Butter Cheesecake—Prototype 3 (full recipe
presentation):
For the cottage cheese, no-salt-added is recommended.
Chocolate Crust:
4 oz. semi-sweet chocolate, melted
1 1/3 tablespoons cocoa powder
1 cup (8 oz.) lowfat cottage cheese, whipped
3/8 cup sugar
1 teaspoon vanilla (next to last ingredient here)
2.2 oz. finely ground Bran Buds
Promptly pour/press this crust mixture into the bottom of a lightly buttered
9" cheesecake pan.
Chocolate Batter:
1/2 cup skim milk
2 tablespoons melted or softened butter
3 tablespoons cocoa powder
7/8 cup sugar
1 tablespoon lemon juice
3/8 cup flour
1/4 teaspoon salt
2 1/2 cups (20 oz.) lowfat cottage cheese, whipped
1 teaspoon vanilla
2 eggs
Pour this chocolate batter on top of the crust. Carefully wrap foil around
the pan afterwards. Remember to not put the foil on any earlier
than this! The goal is to disturb it as little as possible, as a
preventative measure against water leakage. Then place the wrapped pan
into a tub of boiling hot water, and bake all this at 325 degrees (make sure
oven is preheated) for about 40 minutes only.
Peanut Butter Batter:
2 tablespoons melted or softened butter
4 oz. unsalted peanut butter
1 tablespoon lemon juice
1/2 cup skim milk
3/4 cup sugar
3/8 cup flour
1/4 teaspoon salt
2 1/2 cups (20 oz.) lowfat cottage cheese, whipped
2 eggs
After the initial baking is done with the chocolate crust and batter,
carefully place the peanut butter batter on top by scooping small amounts
of it around the edge of the pan (try to let this batter flow towards
the middle on its own), in order to minimize the likelihood of breaching the
chocolate batter below.
Lower the oven temperature to 300 degrees, and resume baking for
about 80 minutes.
Afterwards, turn the oven off, but keep the cheesecake in it (along with its
tub), with the door slightly ajar. Allow one hour for this gradual cooldown.
Next, take the cheesecake out of the oven and out of the tub, but keep the
cheesecake in its 9" pan.
Cool the cheesecake off, at room temperature, for another two hours.
Finally, remove it from its pan and refrigerate.
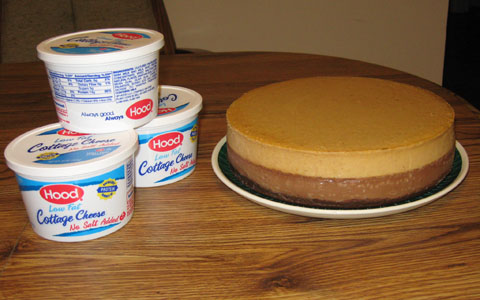
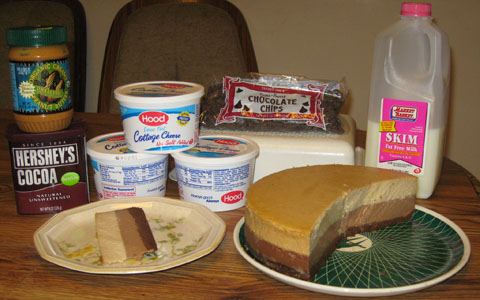
Baked Chocolate Peanut Butter Cheesecake—Prototype 4:
2-to-1 Blend of Yogurt Cheese and Cottage Cheese:
Prepare ahead of time 32 ounces of yogurt cheese, derived from two 32-ounce
containers (that's 64 ounces altogether) of nonfat yogurt. If the resulting
yogurt cheese falls below 32 ounces, add back enough of the whey (that was
strained out from the yogurt) to make up the difference. To this yogurt cheese
combine one 16-ounce container of whipped, lowfat cottage cheese.
Chocolate Crust:
4 oz. semi-sweet chocolate, melted
1 1/3 tablespoons cocoa powder
8 oz. (1 cup) 2-to-1 blend of yogurt cheese and cottage cheese (see above)
3/8 cup sugar
1 teaspoon vanilla
2.2 oz. finely ground Bran Buds
Place resulting mixture in 9 1/2" (or 9") pan.
Chocolate Batter:
2 tablespoons melted or softened butter
3 tablespoons cocoa powder
7/8 cup sugar
1/4 cup flour, all-purpose
1/4 teaspoon salt
20 oz. (2 1/2 cups) 2-to-1 blend of yogurt cheese and cottage cheese (see above)
1 teaspoon vanilla
2 eggs
Pour on top of crust. Wrap pan in foil and place in tub. Bake all this at 325
degrees for about 40 minutes.
Peanut Butter Batter:
2 tablespoons melted or softened butter
4 oz. unsalted peanut butter
3/4 cup sugar
1/4 cup flour, all-purpose
1/4 teaspoon salt
20 oz. (2 1/2 cups) 2-to-1 blend of yogurt cheese and cottage cheese (see above)
2 eggs
Carefully scoop this on top of the chocolate batter and return to oven, this
time at only 300 degrees. Bake for about 60 more minutes.
Turn oven off, leaving cheesecake in it (still in tub as well), with the door
slightly ajar, for another 50 minutes.
Remove cheesecake from oven and tub and let cool in its pan at room temperature
for another 100 minutes. As an option, immediately after removal from oven,
decorate this cheesecake with chocolate chips (or peanut butter cup candies such
as miniature size cups or broken pieces of larger cups) around its edge.
Afterwards, remove cheesecake from pan and refrigerate.
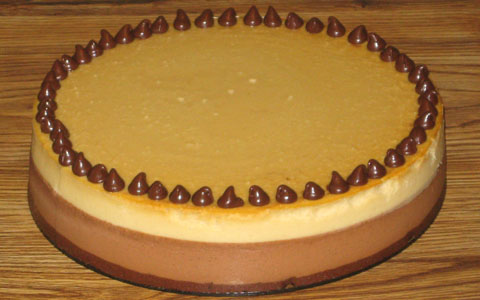
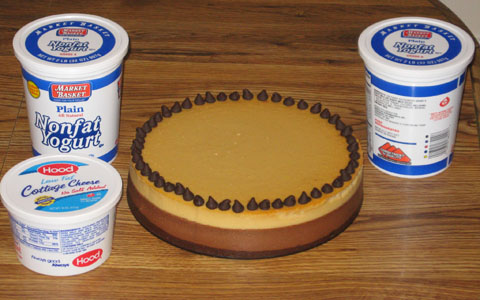
Baked Chocolate Peanut Butter Cheesecake—Prototype 5:
Repeat
Prototype 4,
but make these changes for each of the two batters:
Cut the all-purpose flour in half (i.e., reduce the flour by 2 tablespoons,
to only 2 tablespoons).
Add 1 1/3 tablespoons of arrowroot.
Remember, this is for each batter (i.e., the chocolate gets 1 1/3 tablespoons
of this "new" ingredient, and the peanut butter also gets 1 1/3 tablespoons of
it—so altogether for both batters, a total of 2 2/3 tablespoons of arrowroot
is directly replacing 4 of the flour's tablespoons, while the other 4 tablespoons
of this "older" ingredient are retained)! To summarize these updates...
Chocolate Batter:
2 tablespoons all-purpose flour
1 1/3 tablespoons arrowroot
Peanut Butter Batter:
2 tablespoons all-purpose flour
1 1/3 tablespoons arrowroot
Baked Chocolate Peanut Butter Cheesecake—Prototype 6:
2-to-1 Blend of Yogurt Cheese and Cottage Cheese:
Prepare ahead of time 32 ounces of yogurt cheese, derived from two 32-ounce
containers (that's 64 ounces altogether) of nonfat yogurt. If the resulting
yogurt cheese falls below 32 ounces, add back enough of the whey (that was
strained out from the yogurt) to make up the difference. To this yogurt cheese
combine one 16-ounce container of whipped, lowfat cottage cheese.
Grease a 9 1/2" (or 9") pan, but do not wrap foil around it until just
before the batter is added (spreading the crust in an already wrapped pan can
result in greater disturbance to the foil, thus increasing leakage risks).
Chocolate Crust:
4 oz. semi-sweet chocolate, melted
2 tablespoons cocoa powder
8 oz. (1 cup) 2-to-1 blend of yogurt cheese and cottage cheese (see above)
3/8 cup granulated sugar
1 teaspoon vanilla
2 oz. finely ground All-Bran
Place resulting mixture in the greased pan and pre-bake without tub at 300
degrees for 10 minutes, then cool enough to comfortably touch at least the pan's
upper sidewall.
Chocolate Batter:
2 tablespoons melted/softened butter (unsalted recommended)
3 tablespoons cocoa powder
7/8 cup granulated sugar
2 tablespoons all-purpose flour
1 1/2 tablespoons arrowroot
20 oz. (2 1/2 cups) 2-to-1 blend of yogurt cheese and cottage cheese (see above)
1 teaspoon vanilla
2 eggs
Wrap the pan in foil at this point. Carefully pour the batter on top of the
crust and bake all this in a hot water tub at 325 degrees for about 40 minutes.
Afterwards, take the tub-and-pan assembly out of the oven and promptly add the
batter indicated below.
Peanut Butter Batter:
2 tablespoons melted/softened butter (unsalted recommended)
4 oz. unsalted peanut butter
3/4 cup granulated sugar
2 tablespoons all-purpose flour
1 1/2 tablespoons arrowroot
20 oz. (2 1/2 cups) 2-to-1 blend of yogurt cheese and cottage cheese (see above)
2 eggs
Carefully scoop this on top of the chocolate batter (it is best to do this
around the edge of the pan and let the peanut butter batter flow towards the
middle) and return the tub-and-pan assembly to the oven, this time at only 300
degrees. Bake for about 60 more minutes (if using a 9 1/2" pan). Then shut
off the oven and cool the cheesecake down while still in it (and in tub), with
the oven door slightly ajar, for about an hour. Afterwards, remove the
cheesecake (still in its springform pan) from the oven and tub and continue to
cool it down at room temperature for another 100 minutes. As an option,
immediately after removal from the oven, decorate this cheesecake with chocolate
chips (or peanut butter cup candies such as miniature size cups or broken pieces
of larger cups) around its edge.
After cooling down at room temperature, remove the cheesecake from its pan and
refrigerate.
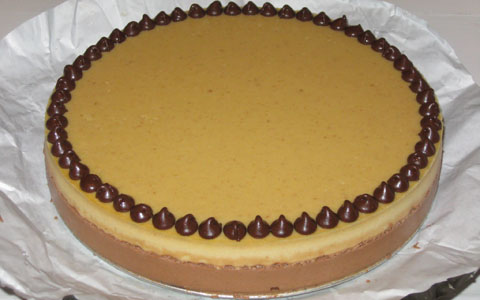
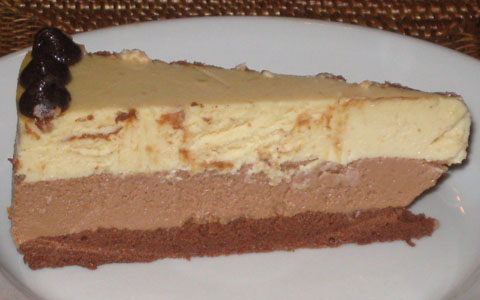
Baked Chocolate Peanut Butter Cheesecake—Prototype 7:
3-Cheese Blend (1CT-1NC-4YG):
Prepare ahead of time 32 ounces of yogurt cheese, derived from two 32-ounce
containers (that's 64 ounces altogether) of nonfat yogurt. If the resulting
yogurt cheese falls below 32 ounces, add back enough of the whey (that was
strained out from the yogurt) to make up the difference. To this yogurt cheese
combine 8 ounces of whipped, lowfat cottage cheese and 8 ounces of softened
Neufchatel cheese ("light cream cheese").
Grease a 9 1/2" (or 9") pan, but do not wrap foil around it until just
before the batter is added (spreading the crust in an already wrapped pan can
result in greater disturbance to the foil, thus increasing leakage risks).
Chocolate Crust:
4 oz. semi-sweet chocolate, melted
3/8 cup granulated sugar
2 tablespoons cocoa powder
8 oz. (1 cup) 3-cheese blend (see above)
1 teaspoon vanilla
2 oz. finely ground All-Bran
Place the resulting mixture in the greased pan and pre-bake without tub at 300
degrees for 5-10 minutes, depending on the mixture's thickness (closer to 10
minutes if thin enough to be fully distributed across the pan's bottom by gentle
shaking, closer to 5 minutes if thick enough to require spreading out this
mixture by pressing on it with a utensil and/or fingers), then cool enough to
comfortably touch at least the pan's upper sidewall.
Chocolate Batter:
20 oz. (2 1/2 cups) 3-cheese blend (see above)
1 teaspoon vanilla
7/8 cup granulated sugar
3 tablespoons cocoa powder
2 1/2 tablespoons arrowroot
2 1/2 eggs *
Wrap the pan in foil at this point. Carefully pour the batter on top of the
crust and bake all this in a hot water tub at 325 degrees for about 40 minutes.
Afterwards, take the tub-and-pan assembly out of the oven and promptly add the
batter indicated below.
Peanut Butter Batter:
20 oz. (2 1/2 cups) 3-cheese blend (see above)
3/4 cup granulated sugar
4 oz. unsalted peanut butter
2 1/2 tablespoons arrowroot
2 1/2 eggs *
Carefully scoop this on top of the chocolate batter (it is best to do this
around the edge of the pan and let the peanut butter batter flow towards the
middle) and return the tub-and-pan assembly to the oven, this time at only 300
degrees. Bake for about 65-70 (but see comments below) more minutes
(if using a 9 1/2" pan). Then shut
off the oven and cool the cheesecake down while still in it (and in tub), with
the oven door slightly ajar, for about an hour. Afterwards, remove the
cheesecake (still in its springform pan) from the oven and tub and continue to
cool it down at room temperature for another 105-110 minutes. As an option,
immediately after removal from the oven, decorate this cheesecake with chocolate
and/or peanut butter chips (or peanut butter cup candies such as miniature size
cups or broken pieces of larger cups) around its edge.
After cooling down at room temperature, remove the cheesecake from its pan and
refrigerate.
* For more information on half-egg usage, see "Measuring Half Of An Egg" in
Cheesecake Tips.
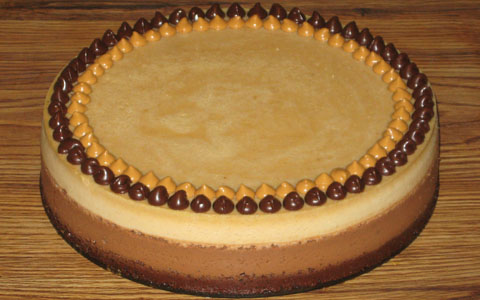
Baked Chocolate Peanut Butter Cheesecake—Prototype 8:
3-Cheese Blend (3CT-1NC-2YG):
Prepare ahead of time 16 ounces of yogurt cheese, derived from one 32-ounce
container of nonfat yogurt. If the resulting yogurt cheese falls below 16
ounces, add back enough of the whey (that was strained out from the yogurt) to
make up the difference. To this yogurt cheese combine 24 ounces of whipped,
lowfat cottage cheese and 8 ounces of softened Neufchatel cheese ("light
cream cheese").
Grease a 9 1/2" (or 9") pan, but do not wrap foil around it until just
before the batter is added (spreading the crust in an already wrapped pan can
result in greater disturbance to the foil, thus increasing leakage risks).
Chocolate Crust:
4 oz. semi-sweet chocolate, melted
3/8 cup granulated sugar *
2 tablespoons cocoa powder *
8 oz. (1 cup) 3-cheese blend (see above)
1 teaspoon vanilla
2 oz. finely ground All-Bran
* (unintentionally omitted in the September 2018 instance—see comments
below for more details)
Place the resulting mixture in the greased pan and pre-bake without tub at 300
degrees for 5-10 minutes, depending on the mixture's thickness (closer to 10
minutes if thin enough to be fully distributed across the pan's bottom by gentle
shaking, closer to 5 minutes if thick enough to require spreading out this
mixture by pressing on it with a utensil and/or fingers), then cool enough to
comfortably touch at least the pan's upper sidewall.
Chocolate Batter:
7/8 cup granulated sugar
3 tablespoons cocoa powder
20 oz. (2 1/2 cups) 3-cheese blend (see above)
1 teaspoon vanilla
3/4 teaspoon xanthan gum
3 eggs
Wrap the pan in foil at this point. Carefully pour the batter on top of the
crust and bake all this in a hot water tub at 325 degrees for about 30 minutes.
Afterwards, take the tub-and-pan assembly out of the oven and promptly add the
batter indicated below.
Peanut Butter Batter:
3/4 cup granulated sugar
4 oz. unsalted peanut butter
20 oz. (2 1/2 cups) 3-cheese blend (see above)
3/4 teaspoon xanthan gum
3 eggs
Carefully scoop this on top of the chocolate batter (it is best to do this
around the edge of the pan and let the peanut butter batter flow towards the
middle) and return the tub-and-pan assembly to the oven, this time at only 300
degrees. Bake for about 55 more minutes (if using a 9 1/2"
pan). Then shut off the oven and cool the cheesecake down while still in it (and
in tub), with the oven door slightly ajar, for about an hour. Afterwards, remove
the cheesecake (still in its springform pan) from the oven and tub and continue
to cool it down at room temperature for another two hours. As an option,
immediately after removal from the oven, decorate this cheesecake with chocolate
and/or peanut butter chips (or peanut butter cup candies such as miniature size
cups or broken pieces of larger cups) around its edge.
After cooling down at room temperature, remove the cheesecake from its pan and
refrigerate.
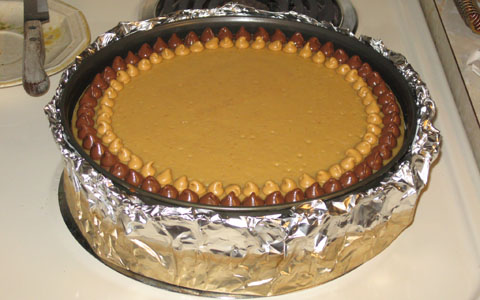
Baked Chocolate Peanut Butter Cheesecake—Prototype 9:
3-Cheese Blend (3CT-1NC-2YG):
Prepare ahead of time 16 ounces of yogurt cheese, derived from one 32-ounce
container of nonfat yogurt. If the resulting yogurt cheese falls below 16
ounces, add back enough of the whey (that was strained out from the yogurt) to
make up the difference. To this yogurt cheese combine 24 ounces of whipped,
lowfat cottage cheese and 8 ounces of softened Neufchatel cheese ("light
cream cheese").
Grease a 9 1/2" (or 9") pan, but do not wrap foil around it until just
before the batter is added (spreading the crust in an already wrapped pan can
result in greater disturbance to the foil, thus increasing leakage risks).
Chocolate/Peanut Butter Crust:
2 oz. semi-sweet chocolate, melted
2 oz. peanut butter chips, melted
3/8 cup granulated sugar
2 tablespoons cocoa powder
8 oz. (1 cup) 3-cheese blend (see above)
1 teaspoon vanilla
2 oz. finely ground All-Bran
Place the resulting mixture in the greased pan and pre-bake without tub at 300
degrees for 10 minutes, then cool enough to comfortably touch at least the pan's
upper sidewall.
Chocolate Batter:
7/8 cup granulated sugar
3 tablespoons cocoa powder
20 oz. (2 1/2 cups) 3-cheese blend (see above)
1 teaspoon vanilla
3/4 teaspoon xanthan gum
3 eggs
Wrap the pan in foil at this point. Carefully pour the batter on top of the
crust and bake all this in a hot water tub at 325 degrees for about 30 minutes.
Afterwards, take the tub-and-pan assembly out of the oven and promptly add the
batter indicated below.
Peanut Butter Batter:
3/4 cup granulated sugar
4 oz. unsalted peanut butter
20 oz. (2 1/2 cups) 3-cheese blend (see above)
3/4 teaspoon xanthan gum
3 eggs
Carefully scoop this on top of the chocolate batter (it is best to do this
around the edge of the pan and let the peanut butter batter flow towards the
middle) and return the tub-and-pan assembly to the oven, this time at only 300
degrees. Bake for about 55 more minutes (if using a 9 1/2"
pan). Then shut off the oven and cool the cheesecake down while still in it (and
in tub), with the oven door slightly ajar, for about an hour. Afterwards, remove
the cheesecake (still in its springform pan) from the oven and tub and continue
to cool it down at room temperature for another two hours. As an option,
immediately after removal from the oven, decorate this cheesecake with chocolate
and/or peanut butter chips (or peanut butter cup candies such as miniature size
cups or broken pieces of larger cups) around its edge.
After cooling down at room temperature, remove the cheesecake from its pan and
refrigerate.
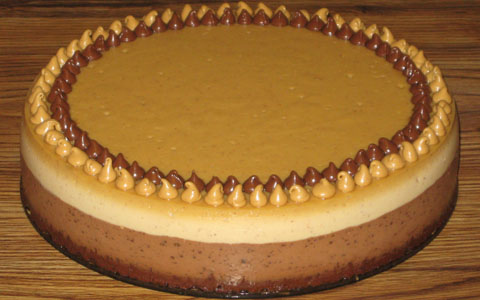
Baked Chocolate Peanut Butter Cheesecake—Prototype 10:
3-Cheese Blend (1CT-1NC-1YG):
Prepare ahead of time 16 ounces of yogurt cheese, derived from one 32-ounce
container of nonfat yogurt. If the resulting yogurt cheese falls below 16
ounces, add back enough of the whey (that was strained out from the yogurt) to
make up the difference. To this yogurt cheese combine 16 ounces of whipped,
lowfat cottage cheese and 16 ounces (two 8-ounce packages) of softened
Neufchatel cheese ("light cream cheese").
Grease a 9 1/2" (or 9") pan, but do not wrap foil around it until just
before the batter is added (spreading the crust in an already wrapped pan can
result in greater disturbance to the foil, thus increasing leakage risks).
Chocolate/Peanut Butter Crust:
2 oz. semi-sweet chocolate, melted
2 oz. peanut butter chips, melted
3/8 cup granulated sugar
2 tablespoons cocoa powder
8 oz. (1 cup) 3-cheese blend (see above)
1 teaspoon vanilla
2 oz. finely ground All-Bran
Place the resulting mixture in the greased pan and pre-bake without tub at 300
degrees for 10 minutes, then cool enough to comfortably touch at least the pan's
upper sidewall.
Chocolate Batter:
7/8 cup granulated sugar
3 tablespoons cocoa powder
20 oz. (2 1/2 cups) 3-cheese blend (see above)
1 teaspoon vanilla
1/2 teaspoon xanthan gum
3 eggs
Wrap the pan in foil at this point. Carefully pour the batter on top of the
crust and bake all this in a hot water tub at 325 degrees for about 30 minutes.
Afterwards, take the tub-and-pan assembly out of the oven and promptly add the
batter indicated below.
Peanut Butter Batter:
3/4 cup granulated sugar
4 oz. unsalted peanut butter
20 oz. (2 1/2 cups) 3-cheese blend (see above)
1/2 teaspoon xanthan gum
3 eggs
Carefully scoop this on top of the chocolate batter (it is best to do this
around the edge of the pan and let the peanut butter batter flow towards the
middle) and return the tub-and-pan assembly to the oven, this time at only 300
degrees. Bake for about 55 more minutes (if using a 9 1/2"
pan). Then shut off the oven and cool the cheesecake down while still in it (and
in tub), with the oven door slightly ajar, for about an hour. Afterwards, remove
the cheesecake (still in its springform pan) from the oven and tub and continue
to cool it down at room temperature for another two hours. As an option,
immediately after removal from the oven, decorate this cheesecake with chocolate
and/or peanut butter chips (or peanut butter cup candies such as miniature size
cups or broken pieces of larger cups) around its edge.
After cooling down at room temperature, remove the cheesecake from its pan and
refrigerate.
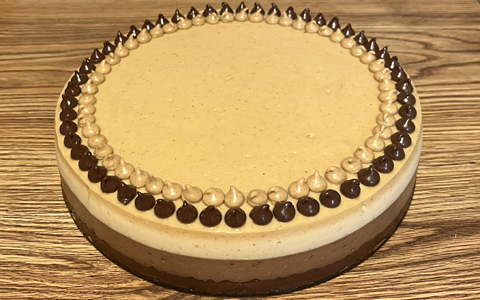
|
-------------------------------------------------------
|
Baked Banana Cheesecake—Prototype 1:
Crust:
2 oz. banana puree
1.5 oz. melted, white chocolate
4 oz. lowfat cottage cheese (such as Hood, no salt added), whipped
4 teaspoons skim milk
4 teaspoons granulated sugar
1/2 teaspoon vanilla
2.2 oz. finely ground Bran Buds (blend in last, do it fast)
Batter:
2 tablespoons butter, softened or melted
2 oz. ground banana powder (see intro comments above for more info)
1/2 cup granulated sugar
1 tablespoon lemon juice
2 1/2 cups (20 oz.) of lowfat cottage cheese (such as Hood, no salt added),
whipped
1/2 cup skim milk
1/2 teaspoon vanilla
Follow up gradually with a dry combination of:
1/3 cup flour
1/4 teaspoon salt
Completely mix all of the above ingredients used so far, then finally add:
2 eggs (last ingredient here)—aim to get these at least fully mixed in (yet
without overbeating, if possible).
Make sure that the oven is preheated to 300 degrees. Use a bath. Bake for
about 110 minutes. Cool off afterward. Then carefully remove from pan, and
refrigerate.
Baked Banana Cheesecake—Prototype 2:
Repeat Prototype 1, but make these changes:
For the crust, replace the 2 ounces of banana puree with 1 ounce of banana
concentrate (see intro comments above for more info), and boost the skim
milk by 8 teaspoons, to 1/4 cup.
For the batter, replace the 2 ounces of banana powder with 3 ounces of
banana concentrate.
Baked Banana Cheesecake—Prototype 3:
Repeat Prototype 2, but make these changes:
For the crust, revert the 1 ounce of banana concentrate to 2 ounces of
banana puree, and replace the 1/4 cup of skim milk with 1/4 cup of additional
cottage cheese—thus the cottage cheese is boosted from 1/2 cup to 3/4 cup
(6 ounces).
For the batter, eliminate the banana concentrate there as well, replacing it
with 8 ounces of banana puree, and double the flour, from 1/3 cup to 2/3
cup. Also, cut the milk here from 1/2 cup to only 1/3 cup.
Bake in a tub at 300 degrees for about 110 minutes (if using a 9 1/2"
pan).
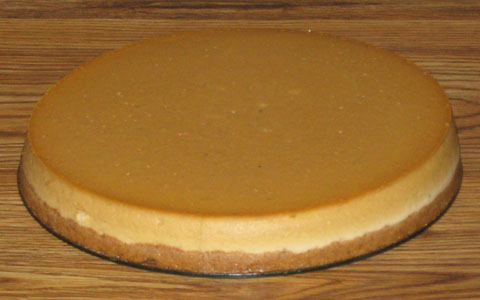
Baked Banana Cheesecake—Prototype 4:
2-to-1 Blend of Yogurt Cheese and Cottage Cheese:
Prepare ahead of time 16 ounces of yogurt cheese, derived from one 32-ounce
container of nonfat yogurt. If the resulting yogurt cheese falls below 16
ounces, add back enough of the whey (that was strained out from the yogurt) to
make up the difference. To this yogurt cheese combine 8 ounces (1 cup) of
whipped, lowfat cottage cheese.
Crust:
2 oz. banana puree (note: the puree here is optional—use it if a
banana-flavored crust is desired)
1 oz. melted, white chocolate
1/2 cup (4 oz.) 2-to-1 blend of yogurt cheese and cottage cheese (see above)
2 tablespoons granulated sugar
2 tablespoons brown sugar
1 teaspoon cinnamon
1/2 teaspoon vanilla
1 oz. All-Bran, ground up
Pour this crust mixture into pan (9 to 9 1/2 inches) and pre-bake without tub at
300 degrees for 5 minutes, then cool enough to comfortably touch at least the
pan's upper sidewall.
Batter:
2 tablespoons melted or softened butter
5/8 cups granulated sugar
6 ounces of banana puree
2 tablespoons all-purpose flour
2 2/3 tablespoons arrowroot
20 oz. (2 1/2 cups) 2-to-1 blend of yogurt cheese and cottage cheese (see above)
1 teaspoon vanilla
2 eggs
Pour on top of crust. Then bake in tub at 300 degrees for 90 minutes (if using a
9 1/2" pan), cool (outside of oven and tub) for another 90 minutes, remove
from pan and refrigerate.
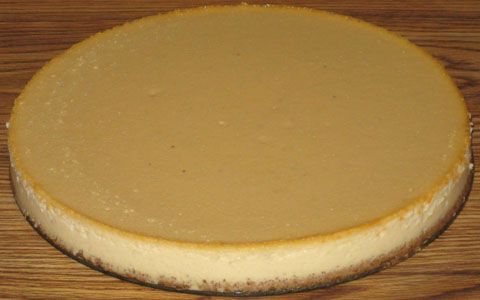
Baked Banana Cheesecake—Prototype 5:
2-to-1 Blend of Yogurt Cheese and Cottage Cheese:
Prepare ahead of time 2 pounds of yogurt cheese, derived from two 32-ounce
containers of nonfat yogurt. If the resulting yogurt cheese falls below 32
ounces, add back enough of the whey (that was strained out from the yogurt) to
make up the difference. To this yogurt cheese combine 16 ounces (1 pint) of
whipped, lowfat cottage cheese.
Crust:
4 oz. banana puree
2 oz. melted, white chocolate
1 cup (8 oz.) 2-to-1 blend of yogurt cheese and cottage cheese (see above)
1/4 cup granulated sugar
2 tablespoons brown sugar
1 teaspoon cinnamon
1/2 teaspoon vanilla
2 oz. All-Bran, ground up
Pour this crust mixture into pan (9 to 9 1/2 inches) and pre-bake without tub at
300 degrees for 10 minutes, then cool enough to comfortably touch at least the
pan's upper sidewall.
Batter:
4 tablespoons melted or softened butter
1 1/4 cups granulated sugar
12 ounces of banana puree
1/4 cup all-purpose flour
3/8 cup arrowroot
40 oz. (5 cups) 2-to-1 blend of yogurt cheese and cottage cheese (see above)
2 teaspoons vanilla
4 eggs
Pour on top of crust. Bake in tub at 300 degrees for 120 minutes (if using a 9
1/2" pan). Then cool down while still in oven (with this oven shut off) and
in tub with door slightly ajar for an hour. Afterwards, remove from oven and tub
and continue to cool down at room temperature for another 120 minutes, then
remove from pan and refrigerate.
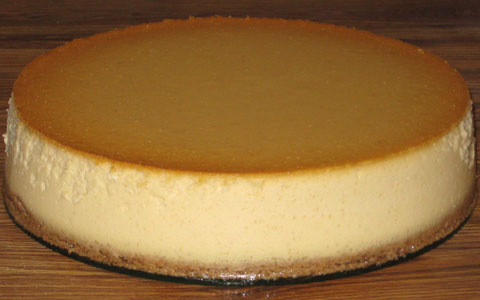
Baked Banana Cheesecake—Prototype 6:
3-Cheese Blend (1CT-1NC-4YG):
Prepare ahead of time 32 ounces of yogurt cheese, derived from two 32-ounce
containers (that's 64 ounces altogether) of nonfat yogurt. If the resulting
yogurt cheese falls below 32 ounces, add back enough of the whey (that was
strained out from the yogurt) to make up the difference. To this yogurt cheese
combine 8 ounces of whipped, lowfat cottage cheese and 8 ounces of softened
Neufchatel cheese ("light cream cheese").
Crust:
2 oz. melted, white chocolate
8 oz. (1 cup) 3-cheese blend (see above)
1/4 cup granulated sugar
2 tablespoons brown sugar
1 teaspoon cinnamon
1/2 teaspoon vanilla
2 oz. All-Bran, ground up
Place the resulting mixture in the greased pan and pre-bake without tub at 300
degrees for 5-10 minutes, depending on the mixture's thickness (closer to 10
minutes if thin enough to be fully distributed across the pan's bottom by gentle
shaking, closer to 5 minutes if thick enough to require spreading out this
mixture by pressing on it with a utensil and/or fingers), then cool enough to
comfortably touch at least the pan's upper sidewall.
Batter:
1 1/4 cups granulated sugar
40 oz. (5 cups) 3-cheese blend (see above)
2 teaspoons vanilla
12 ounces of banana puree (tip: about 18 ounces of whole bananas, i.e.,
with the outer peels included—hopefully two large bananas—should
yield a sufficient amount of the inner fruit)
1/2 cup arrowroot
5 eggs
Original Baking Procedure:
Expect about 8-9 cups of the resulting batter, but do not add this to the pan
all at once. Rather, this needs to be done in three installments. Wrap the
pan in foil just before adding the first batter installment (to minimize the foil's
disturbance and therefore its leakage risk, do not put it on any earlier).
For each of the first two installments, gently scoop about 3 cups of batter into
the pan. After adding an installment, bake the pan with its contents for 30
minutes. For the first installment, bake at 325 degrees. For the second
installment, continue baking at 325, but only for the first 15 minutes here—for
the remaining 15 minutes, reduce the temperature and bake at 300 degrees. For
both installments here, bake with the pan in a tub filled with at least 1/4 to
1/2 inch of boiling water, but (to reduce spillage risks) do not fill the tub
all the way at this point, because the whole tub-and-pan assembly is going to
need to be removed from the oven (in order to comfortably add contents to the
pan) between installments.
After these first two installments are done, there should be about 2-3 cups of
batter left, with 60 minutes of baking time reached at this point (30 minutes
for each of the first two installments). Now comes the third installment—carefully
add the last of this batter on top of the pan's earlier installments (the entire
surface should be fully coated). Next, return the entire pan-and-tub assembly to
the oven. At this point, fill up the tub generously with boiling water. Resume
baking at 300 degrees for another 120 minutes (based upon usage of a 9 1/2"
pan).
Afterward, shut the oven off, and leave its door slightly ajar, with the
cheesecake still inside—and in the tub—for an hour. Next, remove the
cheesecake from the oven and tub. Continue to cool it down at room temperature
for another two hours. After doing so, remove the cheesecake from pan and
refrigerate.
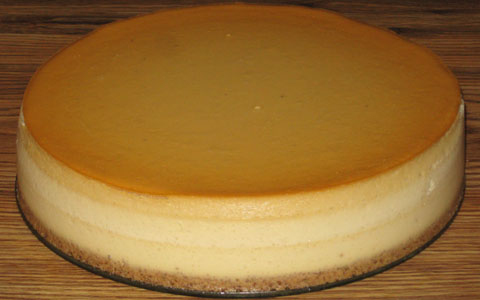
New 2017 Baking Procedure:
Expect close to 8 1/2 cups of the resulting batter, but do not add this to
the pan all at once. Rather, this needs to be done in four installments.
Wrap the pan in foil just before adding the first batter installment (to minimize
the foil's disturbance and therefore its leakage risk, do not put it on any
earlier).
For each of the first three installments, gently scoop about 2 1/2 cups of
batter into the pan, fully covering the surface (here's a tip—scoop small
amounts of batter around the edge of the pan, letting this batter flow towards
the middle on its own), and then bake this pan with its contents for 25 minutes,
at 325 degrees. However, at the end of the third installment's 25 minutes, add
on another 30 minutes of baking time, but only at 300 degrees (that's a 55
minute "baking installment"—the first 25 minutes at 325 degrees
and the next 30 at 300). For these three installments here, bake with the pan in
a tub filled with at least 1/4 to 1/2 inch of boiling water, but (to reduce
spillage risks) do not fill the tub all the way at this point, because the whole
tub-and-pan assembly is going to need to be removed from the oven (in order to
comfortably add contents to the pan) between installments.
After these first three installments are done, there should be about 1 cup of
batter left, with 105 minutes of baking time reached at this point (25 minutes
for each of the first two installments, and 55 for the third one). Now comes the
fourth installment—carefully add the last of this batter on top of the
pan's earlier installments, fully coating the entire surface. Next, return the
entire pan-and-tub assembly to the oven, with the temperature remaining at 300
degrees. At this point, fill up the tub generously with boiling water. Resume
baking for another 105 minutes (based upon usage of a 9 1/2" pan).
Afterward, shut the oven off, and leave its door slightly ajar, with the
cheesecake still inside—and in the tub—for an hour. Next, remove the
cheesecake from the oven and tub. Continue to cool it down at room temperature
for another two hours. After doing so, remove the cheesecake from pan and
refrigerate.
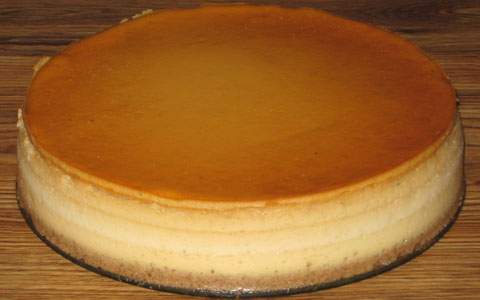
Baked Banana Cheesecake—Prototype 7:
3-Cheese Blend (1CT-1NC-1YG):
Prepare ahead of time 16 ounces of yogurt cheese, derived from one 32-ounce
container of nonfat yogurt. If the resulting yogurt cheese falls below 16
ounces, add back enough of the whey (that was strained out from the yogurt) to
make up the difference. To this yogurt cheese combine 16 ounces of whipped,
lowfat cottage cheese and 16 ounces (two 8-ounce packages) of softened
Neufchatel cheese ("light cream cheese").
Grease a 9 1/2" (or 9") springform pan, but do not wrap foil around it
yet (see below).
Crust:
4 oz. melted, white chocolate
8 oz. (1 cup) 3-cheese blend (see above)
1/4 cup granulated sugar
1/4 cup brown sugar
1 teaspoon cinnamon
1/2 teaspoon vanilla
2 oz. All-Bran, ground up
Place the resulting mixture in the greased pan and pre-bake without tub at 300
degrees for 30 minutes, then cool enough to comfortably touch at least the
pan's upper sidewall.
Batter:
1 1/4 cups granulated sugar
40 oz. (5 cups) 3-cheese blend (see above)
2 teaspoons vanilla
12 ounces banana puree (tip: about 18 ounces of whole bananas, i.e., with the
outer peels included—hopefully two large bananas—should yield a
sufficient amount of the inner fruit)
2 1/4 teaspoons xanthan gum
6 eggs
Expect close to 8 1/2 cups of the resulting batter, but do not add this to
the pan all at once. Rather, this needs to be done in four installments.
Wrap the pan in foil (or—as an alternative—use a cheesecake pan
bath wrap) just before adding the first batter installment (to minimize the
foil's disturbance and therefore its leakage risk, do not put it on any
earlier).
For each of the first three installments, gently scoop about 2 1/2 cups of
batter into the pan, fully covering the surface (here's a tip—scoop small
amounts of batter around the edge of the pan, letting this batter flow towards
the middle on its own), and then bake this pan with its contents for 30 minutes,
at 325 degrees. However, at the end of the third installment's 30 minutes, add
on another 30 minutes of baking time, but only at 300 degrees (that's a 60
minute "baking installment"—the first 30 minutes at 325 degrees
and the next 30 at 300). For these three installments here, bake with the pan in
a tub filled with at least 1/4 to 1/2 inch of boiling water, but (to reduce
spillage risks) do not fill the tub all the way at this point, because the whole
tub-and-pan assembly is going to need to be removed from the oven (in order to
comfortably add contents to the pan) between installments.
After these first three installments are done, there should be about 1 cup
of batter left, with 120 minutes of baking time reached at this point (30
minutes for each of the first two installments, and 60 for the third one). Now
comes the fourth installment—carefully add the last of this batter on top
of the pan's earlier installments, fully coating the entire surface. Next,
return the entire pan-and-tub assembly to the oven, with the temperature
remaining at 300 degrees. At this point, fill up the tub generously with
boiling water. Resume baking for another 90 minutes (based upon usage of a
9 1/2" pan).
Afterward, shut the oven off, and leave its door slightly ajar, with the
cheesecake still inside—and in the tub—for an hour. Next, remove the
cheesecake from the oven and tub. Continue to cool it down at room temperature
for another two hours. After doing so, remove the cheesecake from pan and
refrigerate.
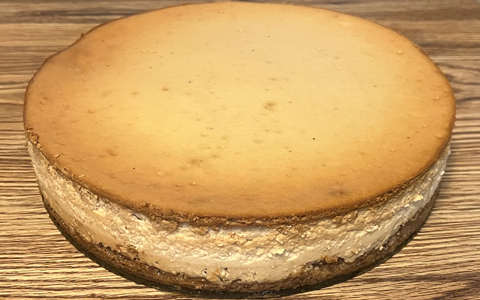
|
-------------------------------------------------------
|
Baked Pumpkin Cheesecake—Prototype 1:
Crust:
2 oz. melted, white chocolate
2 oz. pumpkin butter (such as from Trader Joe's)
4 oz. whipped lowfat cottage cheese, no salt added
1/4 cup skim milk
2 tablespoons granulated sugar
1/2 teaspoon vanilla
2.2 oz. Bran Buds, ground up
Batter:
2 tablespoons melted or softened butter
3 oz. pumpkin butter
1/2 cup skim milk
1/2 cup granulated sugar
1/4 cup flour
1/4 teaspoon salt
2 cups whipped lowfat cottage cheese, no salt added
2 eggs
Bake at 300 degrees for about 110 minutes (with tub immersion), or until
cake tester comes clean.
Baked Pumpkin Cheesecake—Prototype 2:
Repeat Prototype 1, but boost the batter's pumpkin butter by 1 ounce, to 4
ounces.
Baked Pumpkin Cheesecake—Prototype 3:
Crust:
2 oz. melted, white chocolate
2 oz. pumpkin butter (such as from Trader Joe's)
1 cup (8 oz.) whipped lowfat cottage cheese, no salt added
1/4 cup skim milk
1 teaspoon lemon juice
2 tablespoons granulated sugar
2 tablespoons brown sugar
1/2 teaspoon vanilla
2.2 oz. Bran Buds, ground up
Pour this crust mixture into a 9" pan and pre-bake this at 300 degrees
(without tub) for 20 minutes. Then cool this off until the pan is
comfortable enough to touch.
Batter:
2 tablespoons melted or softened butter
5/8 cup granulated sugar
6 oz. pumpkin butter
1 tablespoon lemon juice
1/2 cup skim milk
1/2 cup flour
1/4 teaspoon salt
3 cups (24 oz.) whipped lowfat cottage cheese, no salt added
2 eggs
Bake at 300 degrees (with tub) for 2 hours.
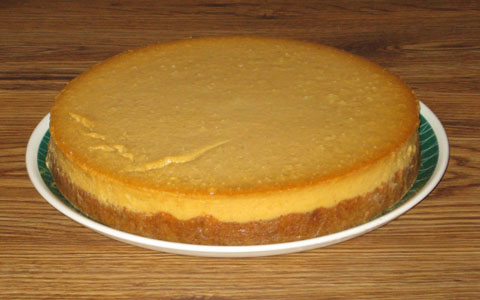
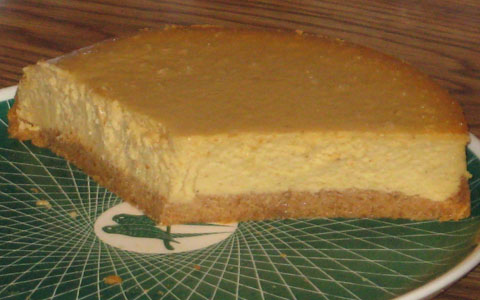
Baked Pumpkin Cheesecake—Prototype 4:
2-to-1 Blend of Yogurt Cheese and Cottage Cheese:
Prepare ahead of time 16 ounces of yogurt cheese, derived from one 32-ounce
container of nonfat yogurt. If the resulting yogurt cheese falls below 16
ounces, add back enough of the whey (that was strained out from the yogurt) to
make up the difference. To this yogurt cheese combine 8 ounces (1 cup) of
whipped, lowfat cottage cheese.
Crust:
1 oz. melted, white chocolate
2 oz. pumpkin butter (such as from Trader Joe's)
1 tablespoon granulated sugar
1 tablespoon brown sugar
1/4 teaspoon vanilla
4 oz. (1/2 cup) 2-to-1 blend of yogurt cheese and cottage cheese (see above)
1.1 oz. Bran Buds, ground up
Pour this crust mixture into pan (9 to 9 1/2 inches) and pre-bake without tub at
300 degrees for 5 minutes, then cool enough to comfortably touch at least the
pan's upper sidewall.
Batter:
2 tablespoons melted or softened butter
1/2 cup granulated sugar
7 oz. pumpkin butter
1/3 cup all-purpose flour
1/4 teaspoon salt
2 1/2 cups (20 oz.) 2-to-1 blend of yogurt cheese and cottage cheese (see above)
1 teaspoon vanilla
2 eggs
Pour on top of crust. Then bake in tub at 300 degrees for 60 minutes (if using a
9 1/2" pan), cool (outside of oven and tub) for an hour, remove from pan
and refrigerate.
Baked Pumpkin Cheesecake—Prototype 5:
2-to-1 Blend of Yogurt Cheese and Cottage Cheese:
Prepare ahead of time 2 pounds of yogurt cheese, derived from two 32-ounce
containers of nonfat yogurt. If the resulting yogurt cheese falls below 32
ounces, add back enough of the whey (that was strained out from the yogurt) to
make up the difference. To this yogurt cheese combine 16 ounces (1 pint) of
whipped, lowfat cottage cheese.
Crust:
2 oz. melted, white chocolate
4 oz. pumpkin butter (such as from Trader Joe's)
2 tablespoons granulated sugar
2 tablespoons brown sugar
1/2 teaspoon vanilla
8 oz. (1 cup) 2-to-1 blend of yogurt cheese and cottage cheese (see above)
2.2 oz. Bran Buds, ground up
Pour this crust mixture into pan (9 to 9 1/2 inches) and pre-bake without tub at
300 degrees for 10 minutes, then cool enough to comfortably touch at least the
pan's upper sidewall.
Batter:
4 tablespoons melted or softened butter
1 cup granulated sugar
14 oz. pumpkin butter
1/4 cup all-purpose flour
3 tablespoons arrowroot
1/2 teaspoon salt
5 cups (40 oz.) 2-to-1 blend of yogurt cheese and cottage cheese (see above)
2 teaspoons vanilla
4 eggs
Pour on top of crust. Bake in tub at 300 degrees for 105 minutes (if using a 9
1/2" pan). Then cool down while still in oven (with this oven shut off) and
in tub with door slightly ajar for an hour. Afterwards, remove from oven and tub
and continue to cool down at room temperature for another 105 minutes, then
remove from pan and refrigerate.
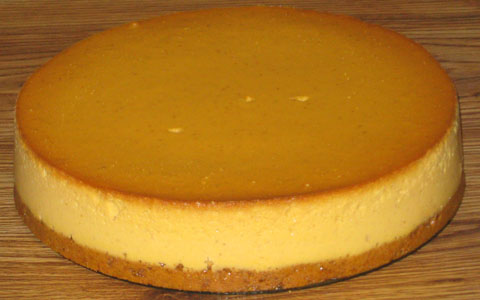
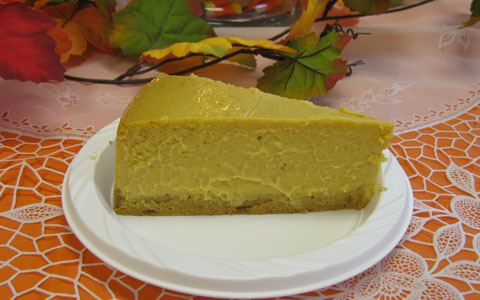
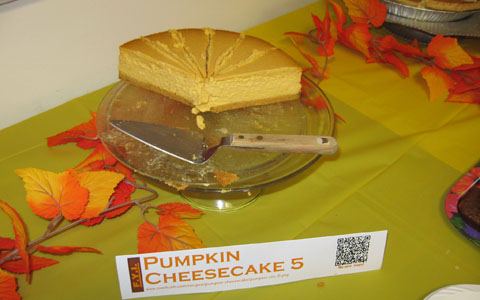
Baked Pumpkin Cheesecake—Prototype 6:
2-to-1 Blend of Yogurt Cheese and Cottage Cheese:
Prepare ahead of time 2 pounds of yogurt cheese, derived from two 32-ounce
containers of nonfat yogurt. If the resulting yogurt cheese falls below 32
ounces, add back enough of the whey (that was strained out from the yogurt) to
make up the difference. To this yogurt cheese combine 16 ounces (1 pint) of
whipped, lowfat cottage cheese.
Crust:
2 oz. melted, white chocolate
4 oz. pumpkin butter (such as from Trader Joe's)
2 tablespoons granulated sugar
2 tablespoons brown sugar
1/2 teaspoon vanilla
8 oz. (1 cup) 2-to-1 blend of yogurt cheese and cottage cheese (see above)
2 oz. All-Bran, ground up
Pour this crust mixture into pan (9 to 9 1/2 inches) and pre-bake without tub at
300 degrees for 10 minutes, then cool enough to comfortably touch at least the
pan's upper sidewall.
Batter:
4 tablespoons melted or softened butter
1 cup granulated sugar
14 oz. pumpkin butter
1/4 cup all-purpose flour
3 tablespoons arrowroot
5 cups (40 oz.) 2-to-1 blend of yogurt cheese and cottage cheese (see above)
2 teaspoons vanilla
4 eggs
Pour on top of crust. Bake in tub at 300 degrees for 105 minutes (if using a 9
1/2" pan). Then cool down while still in oven (with this oven shut off) and
in tub with door slightly ajar for an hour. Afterwards, remove from oven and tub
and continue to cool down at room temperature for another 105 minutes, then
remove from pan and refrigerate.
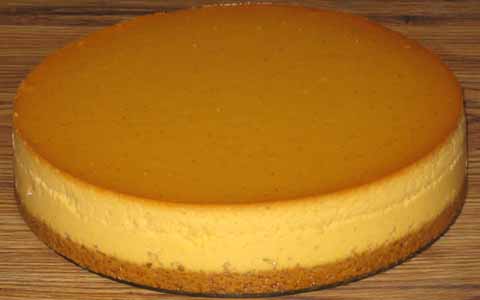
Baked Pumpkin Cheesecake—Prototype 7:
3-Cheese Blend (1CT-1NC-4YG):
Prepare ahead of time 32 ounces of yogurt cheese, derived from two 32-ounce
containers (that's 64 ounces altogether) of nonfat yogurt. If the resulting
yogurt cheese falls below 32 ounces, add back enough of the whey (that was
strained out from the yogurt) to make up the difference. To this yogurt cheese
combine 8 ounces of whipped, lowfat cottage cheese and 8 ounces of softened
Neufchatel cheese ("light cream cheese").
Crust:
2 oz. melted, white chocolate
4 oz. pumpkin butter (such as from Trader Joe's)
2 tablespoons granulated sugar
2 tablespoons brown sugar
1/2 teaspoon vanilla
8 oz. (1 cup) 3-cheese blend (see above)
2 oz. All-Bran, ground up
Place the resulting mixture in a greased 9 1/2" (or 9") pan and
pre-bake without tub at 300 degrees for 5-10 minutes, depending on the mixture's
thickness (closer to 10 minutes if thin enough to be fully distributed across
the pan's bottom by gentle shaking, closer to 5 minutes if thick enough to
require spreading out this mixture by pressing on it with a utensil and/or
fingers), then cool enough to comfortably touch at least the pan's upper
sidewall.
Batter:
1 cup granulated sugar
14 oz. pumpkin butter
40 oz. (5 cups) 3-cheese blend (see above)
1/4 cup + 1 tablespoon (5 tablespoons altogether) arrowroot
2 teaspoons vanilla
5 eggs
Wrap the pan in foil at this point (no earlier, for the sake of minimal foil
disturbance), then pour the batter on top of the crust. Bake in hot water tub at
300 degrees for 105 to 115 minutes (if using a 9 1/2" pan—also see
comments below). Then cool down while still in oven (with this oven shut off)
and in tub with door slightly ajar for an hour. Afterwards, remove from oven
and tub and continue to cool down at room temperature for another 105 to 115
minutes (see comments below), then remove from pan and refrigerate.
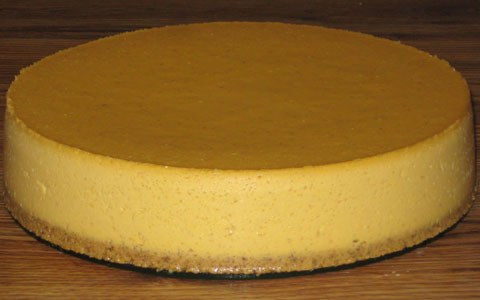
Baked Pumpkin Cheesecake—Prototype 8:
3-Cheese Blend (3CT-1NC-2YG):
Prepare ahead of time 16 ounces of yogurt cheese, derived from one 32-ounce
container of nonfat yogurt. If the resulting yogurt cheese falls below 16
ounces, add back enough of the whey (that was strained out from the yogurt) to
make up the difference. To this yogurt cheese combine 24 ounces of whipped,
lowfat cottage cheese and 8 ounces of softened Neufchatel cheese ("light
cream cheese").
Grease a 9 1/2" (or 9") springform pan, but do not wrap foil around it
yet (see below).
Crust:
2 oz. melted, white chocolate
4 oz. pumpkin butter (such as from Trader Joe's)
8 oz. (1 cup) 3-cheese blend (see above)
2 tablespoons granulated sugar
2 tablespoons brown sugar
1/2 teaspoon vanilla
2 oz. All-Bran, ground up
Place the resulting mixture in the greased pan and pre-bake without tub at 300
degrees for 5-10 minutes, depending on the mixture's thickness (closer to 10
minutes if thin enough to be fully distributed across the pan's bottom by gentle
shaking, closer to 5 minutes if thick enough to require spreading out this
mixture by pressing on it with a utensil and/or fingers), then cool enough to
comfortably touch at least the pan's upper sidewall.
Batter:
1 cup granulated sugar
40 oz. (5 cups) 3-cheese blend (see above)
14 oz. pumpkin butter
2 teaspoons vanilla
1 1/2 teaspoons xanthan gum
6 eggs
Wrap the pan in foil just before adding the batter (to minimize the foil's
disturbance and therefore its leakage risk, do not put it on any earlier).
Next, carefully pour the batter over the crust and bake this cheesecake in a hot
water tub at 300 degrees for 90 minutes (if using a 9 1/2" pan). Then shut
off oven and cool cheesecake down while still in it (and in tub), with door
slightly ajar, for an hour. Afterwards, remove from oven and tub and (at this
point, add a border of chips—such as pumpkin-flavored—if desired)
continue to cool down at room temperature for another two hours, then remove
from pan and refrigerate.
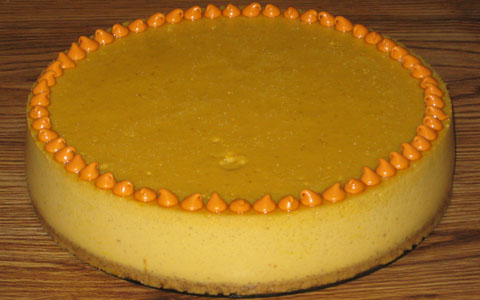
Baked Pumpkin Cheesecake—Prototype 9:
3-Cheese Blend (3CT-1NC-2YG):
Prepare ahead of time 16 ounces of yogurt cheese, derived from one 32-ounce
container of nonfat yogurt. If the resulting yogurt cheese falls below 16
ounces, add back enough of the whey (that was strained out from the yogurt) to
make up the difference. To this yogurt cheese combine 24 ounces of whipped,
lowfat cottage cheese and 8 ounces of softened Neufchatel cheese ("light
cream cheese").
Grease a 9 1/2" (or 9") springform pan, but do not wrap foil around it
yet (see below).
Crust:
2 oz. melted, white chocolate
4 oz. pumpkin butter (such as from Trader Joe's)
8 oz. (1 cup) 3-cheese blend (see above)
2 tablespoons granulated sugar
2 tablespoons brown sugar
1/2 teaspoon vanilla
2 oz. All-Bran, ground up
Place the resulting mixture in the greased pan and pre-bake without tub at 300
degrees for 15 minutes (if the crust is extremely thick however, closer to 10
minutes might be sufficient—on the other hand, the mixture is a lot more
likely to be thin enough to require a good 15 minutes), then cool enough to
comfortably touch at least the pan's upper sidewall.
Batter:
1 cup granulated sugar
40 oz. (5 cups) 3-cheese blend (see above)
14 oz. pumpkin butter
2 teaspoons vanilla
1 3/4 teaspoons xanthan gum
6 eggs
Wrap the pan in foil just before adding the batter (to minimize the foil's
disturbance and therefore its leakage risk, do not put it on any earlier).
Next, carefully pour the batter over the crust and bake this cheesecake in a hot
water tub at 300 degrees for 105 minutes (if using a 9 1/2" pan). Then shut
off oven and cool cheesecake down while still in it (and in tub), with door
slightly ajar, for an hour. Afterwards, remove from oven and tub and (at this
point, add a border of chips—such as pumpkin-flavored—if desired)
continue to cool down at room temperature for another two hours, then remove
from pan and refrigerate.
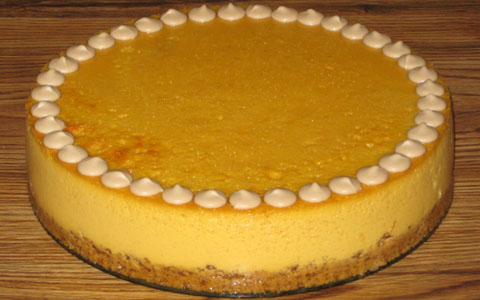
Baked Pumpkin Cheesecake—Prototype 10:
3-Cheese Blend (3CT-1NC-2YG):
Prepare ahead of time 16 ounces of yogurt cheese, derived from one 32-ounce
container of nonfat yogurt. If the resulting yogurt cheese falls below 16
ounces, add back enough of the whey (that was strained out from the yogurt) to
make up the difference. To this yogurt cheese combine 24 ounces of whipped,
lowfat cottage cheese and 8 ounces of softened Neufchatel cheese ("light
cream cheese").
Grease a 9 1/2" (or 9") springform pan, but do not wrap foil around it
yet (see below).
Crust:
2 oz. melted, white chocolate
4 oz. pumpkin butter (such as from Trader Joe's)
8 oz. (1 cup) 3-cheese blend (see above)
2 tablespoons granulated sugar
2 tablespoons brown sugar
1/2 teaspoon vanilla
2 oz. All-Bran, ground up
Place the resulting mixture in the greased pan and pre-bake without tub at 300
degrees for 20 minutes (if the crust is extremely thick however, closer to 15
minutes might be sufficient—on the other hand, the mixture is a lot more
likely to be thin enough to require a good 20 minutes), then cool enough to
comfortably touch at least the pan's upper sidewall.
Batter:
1 cup granulated sugar
40 oz. (5 cups) 3-cheese blend (see above)
14 oz. pumpkin butter
2 teaspoons vanilla
2 teaspoons xanthan gum
6 eggs
Wrap the pan in foil just before adding the batter (to minimize the foil's
disturbance and therefore its leakage risk, do not put it on any earlier).
Next, carefully pour about 2/3 of this batter over the crust and place
the pan in a hot water tub and bake in oven at 300 degrees for 85 minutes (if
using a 9 1/2" pan). Afterwards, remove this from oven and carefully
add the remaining 1/3 batter on top of the earlier installment. Return all this
to oven and continue baking at 300 degrees for another 95 minutes. Then shut
off oven and cool cheesecake down while still in it (and in tub), with door
slightly ajar, for an hour. Next, remove the pan of cheesecake from oven and
tub and (at this point, add a border of chips—such as
pumpkin-flavored—if desired) continue to cool down at room temperature
for another two hours, then remove the cheesecake from its pan and
refrigerate.

Baked Pumpkin Cheesecake—Prototype 11:
3-Cheese Blend (1CT-1NC-1YG):
Prepare ahead of time 16 ounces of yogurt cheese, derived from one 32-ounce
container of nonfat yogurt. If the resulting yogurt cheese falls below 16
ounces, add back enough of the whey (that was strained out from the yogurt) to
make up the difference. To this yogurt cheese combine 16 ounces of whipped,
lowfat cottage cheese and 16 ounces (two 8-ounce packages) of softened
Neufchatel cheese ("light cream cheese").
Grease a 9 1/2" (or 9") springform pan, but do not wrap foil around it
yet (see below).
Crust:
2 oz. melted, white chocolate
4 oz. pumpkin butter (such as from Trader Joe's)
8 oz. (1 cup) 3-cheese blend (see above)
2 tablespoons granulated sugar
2 tablespoons brown sugar
1/2 teaspoon vanilla
2 oz. All-Bran, ground up
Place the resulting mixture in the greased pan and pre-bake without tub at 300
degrees for 25 minutes, then cool enough to comfortably touch at least the
pan's upper sidewall.
Batter:
1 cup granulated sugar
40 oz. (5 cups) 3-cheese blend (see above)
14 oz. pumpkin butter
2 teaspoons vanilla
2 teaspoons xanthan gum
6 eggs
Wrap the pan in foil just before adding the batter (to minimize the foil's
disturbance and therefore its leakage risk, do not put it on any earlier).
Next, carefully pour about 2/3 of this batter over the crust and place
the pan in a hot water tub and bake in oven at 300 degrees for 55 minutes* (if
using a 9 1/2" pan). Afterwards, remove this from oven and carefully
add the remaining 1/3 batter on top of the earlier installment. Return all this
to oven and continue baking at 300 degrees for another 120 minutes*. Then shut
off oven and cool cheesecake down while still in it (and in tub), with door
slightly ajar, for an hour. Next, remove the pan of cheesecake from oven and
tub and (at this point, add a border of chips—such as
pumpkin-flavored—if desired) continue to cool down at room temperature
for another two hours, then remove the cheesecake from its pan and
refrigerate.
* (The 55-minute baking time in the earlier installment was unintentional.
It was supposed to be 85 minutes. This error led to a decision to bake the
later installment for 120 minutes, rather than 95 as originally planned. See
comments below for more details.)
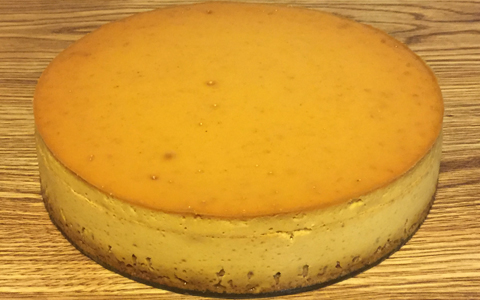
Baked Pumpkin Cheesecake—Prototype 12:
3-Cheese Blend (1CT-1NC-1YG):
Prepare ahead of time 16 ounces of yogurt cheese, derived from one 32-ounce
container of nonfat yogurt. If the resulting yogurt cheese falls below 16
ounces, add back enough of the whey (that was strained out from the yogurt) to
make up the difference. To this yogurt cheese combine 16 ounces of whipped,
lowfat cottage cheese and 16 ounces (two 8-ounce packages) of softened
Neufchatel cheese ("light cream cheese").
Grease a 9 1/2" (or 9") springform pan, but do not wrap foil around it
yet (see below).
Crust:
2 oz. melted, white chocolate
4 oz. pumpkin butter (such as from Trader Joe's)
8 oz. (1 cup) 3-cheese blend (see above)
2 tablespoons granulated sugar
2 tablespoons brown sugar
1/2 teaspoon vanilla
2 oz. All-Bran, ground up
Place the resulting mixture in the greased pan and pre-bake without tub at 300
degrees for 25 minutes, then cool enough to comfortably touch at least the
pan's upper sidewall.
Batter:
1 cup granulated sugar
40 oz. (5 cups) 3-cheese blend (see above)
14 oz. pumpkin butter
2 teaspoons vanilla
2 1/4 teaspoons xanthan gum
6 eggs
Expect close to 8 1/2 cups of the resulting batter, but do not add this to
the pan all at once. Rather, this needs to be done in four installments.
Wrap the pan in foil just before adding the first batter installment (to minimize
the foil's disturbance and therefore its leakage risk, do not put it on any
earlier).
For each of the first three installments, gently scoop about 2 1/2 cups of
batter into the pan, fully covering the surface (here's a tip—scoop small
amounts of batter around the edge of the pan, letting this batter flow towards
the middle on its own), and then bake this pan with its contents for 25 minutes,
at 325 degrees. However, at the end of the third installment's 25 minutes, add
on another 30 minutes of baking time, but only at 300 degrees (that's a 55
minute "baking installment"—the first 25 minutes at 325 degrees
and the next 30 at 300). For these three installments here, bake with the pan in
a tub filled with at least 1/4 to 1/2 inch of boiling water, but (to reduce
spillage risks) do not fill the tub all the way at this point, because the whole
tub-and-pan assembly is going to need to be removed from the oven (in order to
comfortably add contents to the pan) between installments.
After these first three installments are done, there should be about 1 cup of
batter left, with 105 minutes of baking time reached at this point (25 minutes
for each of the first two installments, and 55 for the third one). Now comes the
fourth installment—carefully add the last of this batter on top of the
pan's earlier installments, fully coating the entire surface. Next, return the
entire pan-and-tub assembly to the oven, with the temperature remaining at 300
degrees. At this point, fill up the tub generously with boiling water. Resume
baking for another 105 minutes (based upon usage of a 9 1/2" pan).
Afterward, shut the oven off, and leave its door slightly ajar, with the
cheesecake still inside—and in the tub—for an hour. Next, remove the
cheesecake from the oven and tub. Continue to cool it down at room temperature
for another two hours. After doing so, remove the cheesecake from pan and
refrigerate.
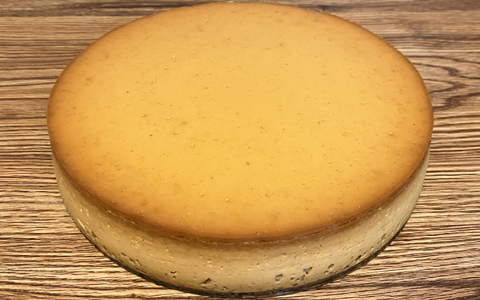
Baked Pumpkin Cheesecake—Prototype 13:
3-Cheese Blend (1CT-1NC-1YG):
Prepare ahead of time 16 ounces of yogurt cheese, derived from one 32-ounce
container of nonfat yogurt. If the resulting yogurt cheese falls below 16
ounces, add back enough of the whey (that was strained out from the yogurt) to
make up the difference. To this yogurt cheese combine 16 ounces of whipped,
lowfat cottage cheese and 16 ounces (two 8-ounce packages) of softened
Neufchatel cheese ("light cream cheese").
Grease a 9 1/2" (or 9") springform pan, but do not wrap foil around it
yet (see below).
Crust:
4 oz. melted, white chocolate
8 oz. (1 cup) 3-cheese blend (see above)
1/4 cup granulated sugar
1/4 cup brown sugar
2 teaspoons cinnamon or pumpkin pie spice
1/2 teaspoon vanilla
2 oz. All-Bran, ground up
Place the resulting mixture in the greased pan and pre-bake without tub at 300
degrees for 30 minutes, then cool enough to comfortably touch at least the
pan's upper sidewall.
Batter:
1 cup granulated sugar
40 oz. (5 cups) 3-cheese blend (see above)
14 oz. pumpkin butter
2 teaspoons vanilla
2 1/4 teaspoons xanthan gum
6 eggs
Expect close to 8 cups of the resulting batter, but do not add this to
the pan all at once. Rather, this needs to be done in four installments.
Wrap the pan in foil (or—as an alternative—use a cheesecake pan
bath wrap) just before adding the first batter installment (to minimize the
foil's disturbance and therefore its leakage risk, do not put it on any
earlier).
For each of the first three installments, gently scoop about 2 1/4 cups of
batter into the pan, fully covering the surface (here's a tip—scoop small
amounts of batter around the edge of the pan, letting this batter flow towards
the middle on its own), and then bake this pan with its contents for 30 minutes,
at 325 degrees. However, at the end of the third installment's 30 minutes, add
on another 30 minutes of baking time, but only at 300 degrees (that's a 60
minute "baking installment"—the first 30 minutes at 325 degrees
and the next 30 at 300). For these three installments here, bake with the pan in
a tub filled with at least 1/4 to 1/2 inch of boiling water, but (to reduce
spillage risks) do not fill the tub all the way at this point, because the whole
tub-and-pan assembly is going to need to be removed from the oven (in order to
comfortably add contents to the pan) between installments.
After these first three installments are done, there should be about 1 1/4 cups
of batter left, with 120 minutes of baking time reached at this point (30
minutes for each of the first two installments, and 60 for the third one). Now
comes the fourth installment—carefully add the last of this batter on top
of the pan's earlier installments, fully coating the entire surface. Next,
return the entire pan-and-tub assembly to the oven, with the temperature
remaining at 300 degrees. At this point, fill up the tub generously with
boiling water. Resume baking for another 90 minutes (based upon usage of a
9 1/2" pan).
Afterward, shut the oven off, and leave its door slightly ajar, with the
cheesecake still inside—and in the tub—for an hour. Next, remove the
cheesecake from the oven and tub. Continue to cool it down at room temperature
for another two hours. After doing so, remove the cheesecake from pan and
refrigerate.
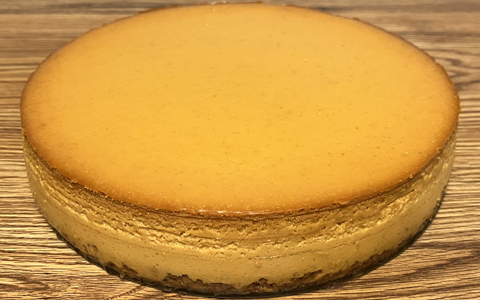
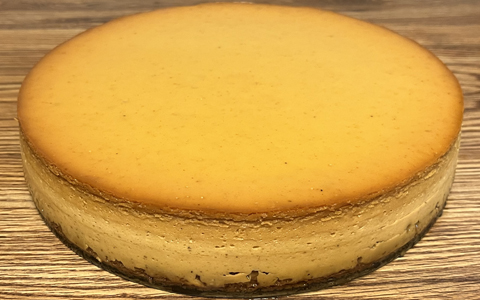
Baked Pumpkin Cheesecake—Prototype 14:
3-Cheese Blend (1CT-1NC-1YG):
Prepare ahead of time 16 ounces of yogurt cheese, derived from one 32-ounce
container of nonfat yogurt. If the resulting yogurt cheese falls below 16
ounces, add back enough of the whey (that was strained out from the yogurt) to
make up the difference. To this yogurt cheese combine 16 ounces of whipped,
lowfat cottage cheese and 16 ounces (two 8-ounce packages) of softened
Neufchatel cheese ("light cream cheese").
Grease a 9 1/2" (or 9") springform pan, but do not wrap foil around it
yet (see below).
Crust:
4 oz. melted, white chocolate
8 oz. (1 cup) 3-cheese blend (see above)
1/4 cup granulated sugar
1/4 cup brown sugar
2 teaspoons pumpkin pie spice
1/2 teaspoon vanilla
2 oz. All-Bran, ground up
Place the resulting mixture in the greased pan and pre-bake without tub at 300
degrees for 30 minutes, then remove from oven and cool down at room temperature
(for at least 30 minutes).
Batter:
1 cup granulated sugar
40 oz. (5 cups) 3-cheese blend (see above)
14 oz. pumpkin butter
2 teaspoons vanilla
2 1/4 teaspoons xanthan gum
6 eggs
Original Baking Procedure:
Expect close to 8 cups of the resulting batter, but do not add this to
the pan all at once. Rather, this needs to be done in four installments.
Wrap the pan in foil (or—as an alternative—use a cheesecake pan
bath wrap) just before adding the first batter installment (to minimize the
foil's disturbance and therefore its leakage risk, do not put it on any
earlier).
For each of the first three installments, gently scoop about 2 1/4 cups of
batter into the pan, fully covering the surface (here's a tip—scoop small
amounts of batter around the edge of the pan, letting this batter flow towards
the middle on its own), and then bake this pan with its contents for 35 minutes,
at 325 degrees. However, at the end of the third installment's 35 minutes, add
on another 30 minutes of baking time, but only at 300 degrees (that's a 65
minute "baking installment"—the first 35 minutes at 325 degrees
and the next 30 at 300). For these three installments here, bake with the pan in
a tub filled with at least 1/4 to 1/2 inch of boiling water, but (to reduce
spillage risks) do not fill the tub all the way at this point, because the whole
tub-and-pan assembly is going to need to be removed from the oven (in order to
comfortably add contents to the pan) between installments.
After these first three installments are done, there should be about 1 1/4 cups
of batter left, with 135 minutes of baking time reached at this point (35
minutes for each of the first two installments, and 65 for the third one). Now
comes the fourth installment—carefully add the last of this batter on top
of the pan's earlier installments, fully coating the entire surface. Next,
return the entire pan-and-tub assembly to the oven, with the temperature
remaining at 300 degrees. At this point, fill up the tub generously with
boiling water. Resume baking for another 75 minutes (based upon usage of a
9 1/2" pan).
Afterward, shut the oven off, and leave its door slightly ajar, with the
cheesecake still inside—and in the tub—for an hour. Next, remove the
cheesecake from the oven and tub. Continue to cool it down at room temperature
for another two hours. After doing so, remove the cheesecake from pan and
refrigerate.
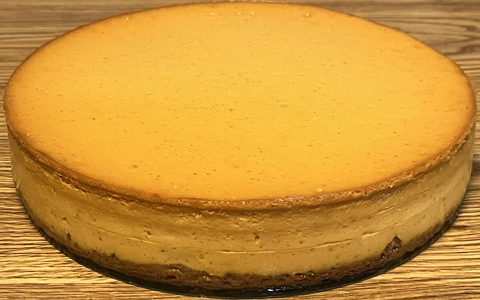
New December 2025 Baking Procedure:
Expect close to 8 cups of the resulting batter, but do not add this to
the pan all at once. Rather, this needs to be done in four installments.
Wrap the pan in foil (or—as an alternative—use a cheesecake pan
bath wrap) just before adding the first batter installment (to minimize the
foil's disturbance and therefore its leakage risk, do not put it on any
earlier).
For each of these four installments, gently scoop about 2 cups of batter into
the pan, fully covering the surface (here's a tip—scoop small amounts of
batter around the edge of the pan, letting this batter flow towards the middle
on its own), and then bake this pan with its contents for 55 minutes—at
325 degrees for the first two installments, and at 300 degrees for the remaining
two. For the first three installments, bake with the pan in a tub filled with at
least 1/4 to 1/2 inch of boiling water, but (to reduce spillage risks) do not
fill the tub all the way at this point, because the whole tub-and-pan assembly
is going to need to be removed from the oven (in order to comfortably add
contents to the pan) between installments. However, fill up the tub generously
with boiling water just before the final baking installment.
Afterward, shut the oven off, and leave its door slightly ajar, with the
cheesecake still inside—and in the tub—for an hour. Next, remove the
cheesecake from the oven and tub. Continue to cool it down at room temperature
for another two hours. After doing so, remove the cheesecake from pan and
refrigerate.
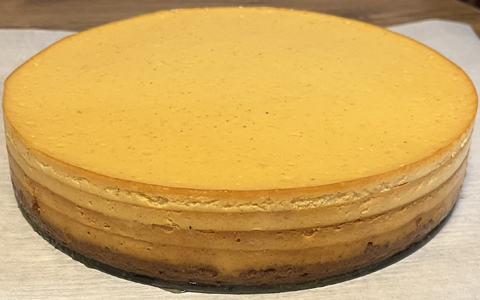
|
-------------------------------------------------------
|
Baked Plain Cheesecake—Prototype 4:
Crust:
1.5 oz. melted, white chocolate
8 oz. lowfat cottage cheese, whipped, no salt added
1 teaspoon lemon juice
3 tablespoons granulated sugar
3 tablespoons brown sugar
2 teaspoons cinnamon
1/2 teaspoon vanilla
2.2 oz. Bran Buds, ground up
Batter:
2 tablespoons melted or softened butter
1/2 cup granulated sugar
1/2 cup skim milk
1 tablespoon lemon juice
1/3 cup flour
1/4 teaspoon salt
2 1/2 cups (20 oz.) lowfat cottage cheese, whipped, no salt added
1 teaspoon vanilla
2 eggs
Bake at 300 degrees for about 100 minutes (i.e., with a 9" pan—but
if using a 9 1/2" pan, make that about 90 minutes), or until cake tester
comes clean (use a tub).
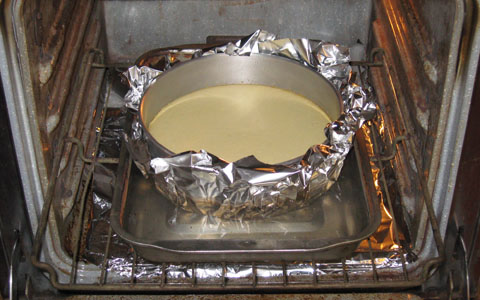
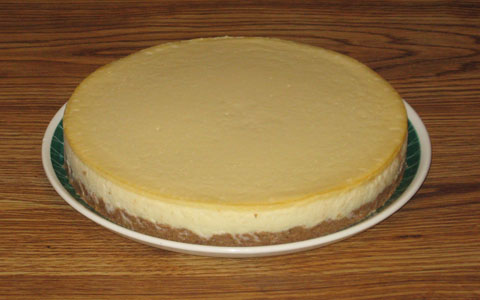
Baked Plain Cheesecake—Prototype 5:
Crust:
1.5 oz. melted, white chocolate
8 oz. lowfat yogurt cheese
3 tablespoons granulated sugar
3 tablespoons brown sugar
2 teaspoons cinnamon
1/2 teaspoon vanilla
2.2 oz. Bran Buds, ground up
Batter:
2 tablespoons melted or softened butter
1/2 cup granulated sugar
1/2 cup skim milk
1 1/4 tablespoons arrowroot
1/3 cup flour
1/4 teaspoon salt
20 oz. lowfat yogurt cheese
1 teaspoon vanilla
2 eggs
Remember, no lemon juice is needed. The tartness is provided here by
the yogurt cheese.
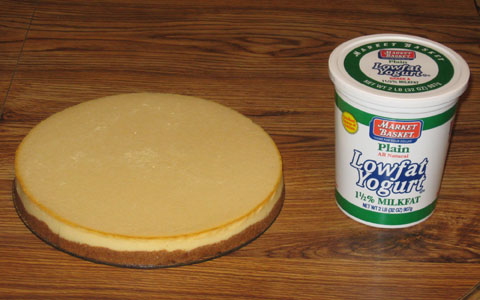
Bake at 300 degrees for about 85 minutes (if using a 9 1/2" pan), in a
tub.
Baked Plain Cheesecake—Prototype 6:
Repeat Prototype 5, but replace the yogurt cheese with regular ("full
fat") cream cheese (both crust and batter). Bake the same way as well
(i.e., 300 degrees, about 85 minutes, with a 9 1/2" pan and a tub).
Baked Plain Cheesecake—Prototype 7:
Repeat Prototype 6, but make these changes:
For the crust, boost the granulated sugar by 1 tablespoon, to 1/4 cup.
For the batter, boost the granulated sugar by 1/4 cup, to 3/4 cup, and increase the
arrowroot by 1/4 teaspoon (1/12 tablespoon) to 4 teaspoons (1 1/3
tablespoons).
Also, for both the crust and the batter, switch back to yogurt cheese,
directly replacing all of the cream cheese. Furthermore, use a half-half
combination of lowfat and nonfat yogurt. This means using 4 ounces of lowfat
and 4 ounces of nonfat yogurt cheese for the crust, and 10 ounces of lowfat
and 10 ounces of nonfat yogurt cheese for the batter.
Bake all this only for about 60 minutes.
Baked Plain Cheesecake—Prototype 8:
Repeat Prototype 7's batter only (omit the crust), but make these changes:
Fully exclude the flour, milk and arrowroot. Use only nonfat yogurt cheese at
this point, and (out of simplification here) cut it by 4 ounces, to 16. More
specifically, start with 32 ounces of nonfat yogurt, and strain it for at least
24 hours. If less than 16 ounces remains, add back enough of the whey strained
out to make up the difference.
The resulting new ingredient list for the batter follows:
2 tablespoons melted or softened butter
3/4 cup granulated sugar
1/4 teaspoon salt
16 oz. nonfat yogurt cheese
1 teaspoon vanilla
2 eggs
Bake in a tub at 300 degrees for 90 minutes, cool in oven (and still in tub as
well, of course) with heat shut off and door slightly ajar for another 60
minutes, then cool outside of oven (and tub) for 60 more minutes before
refrigerating.
Baked Plain Cheesecake—Prototype 9:
50/50 Cheese Blend:
Start with 32 ounces of nonfat yogurt, and strain it for at least 24 hours, thus
producing yogurt cheese. The goal here is to attain 16 ounces of this cheese. If
less than 16 ounces of it remains, add back enough of the whey strained out to
make up the difference. If, however, more than 16 ounces remains, exclude the
extra remaining cheese. Combine the 16-ounce yogurt cheese result with 16 ounces
of whipped, lowfat cottage cheese.
Only 28 ounces of this blend is required for what follows, so save the extra 4
ounces for another purpose (alternatively, you could combine 14 ounces of yogurt
cheese with 14 ounces of cottage cheese, depending on what you have available).
Crust:
1.5 oz. melted, white chocolate
8 oz. 50/50 cheese blend
1/4 cup granulated sugar
3 tablespoons brown sugar
2 teaspoons cinnamon
1/2 teaspoon vanilla
2.2 oz. Bran Buds, ground up
Pour this crust mixture into pan and pre-bake without tub at 300 degrees for 10
minutes, then cool enough to comfortably touch at least the pan's upper
sidewall.
Batter:
2 tablespoons melted or softened butter
3/4 cup granulated sugar
1/3 cup all-purpose flour
1/4 teaspoon salt
20 oz. 50/50 cheese blend
1 teaspoon vanilla
2 eggs
Bake in tub at 300 degrees for 60 minutes (if using a 9 1/2" pan), cool
(outside of oven and tub) for an hour, remove from pan and refrigerate.
Baked Plain Cheesecake—Prototype 10:
2-to-1 Blend of Yogurt Cheese and Cottage Cheese:
Prepare ahead of time 16 ounces of yogurt cheese, derived from one 32-ounce
container of nonfat yogurt. If the resulting yogurt cheese falls below 16
ounces, add back enough of the whey (that was strained out from the yogurt) to
make up the difference. To this yogurt cheese combine 8 ounces (1 cup) of
whipped, lowfat cottage cheese.
Crust:
1 oz. melted, white chocolate
4 oz. (1/2 cup) 2-to-1 blend of yogurt cheese and cottage cheese (see above)
2 tablespoons granulated sugar
1 1/3 tablespoons brown sugar
1 teaspoon cinnamon
1/4 teaspoon vanilla
1.1 oz. Bran Buds, ground up
Pour this crust mixture into pan (9 to 9 1/2 inches) and pre-bake without tub at
300 degrees for 5 minutes, then cool enough to comfortably touch at least the
pan's upper sidewall.
Batter:
2 tablespoons melted or softened butter
5/8 cup granulated sugar
2 tablespoons all-purpose flour
1 1/3 tablespoons arrowroot
1/4 teaspoon salt
20 oz. (2 1/2 cups) 2-to-1 blend of yogurt cheese and cottage cheese (see above)
1 teaspoon vanilla
2 eggs
Pour on top of crust. Then bake in tub at 300 degrees for 60 minutes (if using a
9 1/2" pan), cool (outside of oven and tub) for an hour, remove from pan
and refrigerate.
Baked Plain Cheesecake—Prototype 11:
Yogurt Cheese:
Prepare ahead of time 3 pounds of yogurt cheese, derived from three 32-ounce
containers of nonfat yogurt. If the resulting yogurt cheese falls below 48
ounces, add back enough of the whey (that was strained out from the yogurt) to
make up the difference.
Crust:
2 oz. melted, white chocolate
8 oz. (1 cup) yogurt cheese (see above)
1/4 cup granulated sugar
3 tablespoons brown sugar
2 teaspoons cinnamon
1/2 teaspoon vanilla
2.2 oz. Bran Buds, ground up
Pour this crust mixture into bottom of pan (9 to 9 1/2 inches), spreading the
crust evenly (no pre-baking is needed with this one).
Batter:
4 tablespoons melted or softened butter
1 1/4 cups granulated sugar
1/4 cup all-purpose flour
3 tablespoons arrowroot
1/2 teaspoon salt
40 oz. (5 cups) yogurt cheese (see above)
2 teaspoons vanilla
4 eggs
Pour the batter over the crust and bake this cheesecake in a tub at 300 degrees
for 100 minutes (if using a 9 1/2" pan). Then cool the cheesecake down
while still in oven (with this oven shut off) and in tub with door slightly ajar
for an hour. Afterwards, remove from oven and tub and continue to cool down at
room temperature for another 100 minutes, then remove from pan and refrigerate.
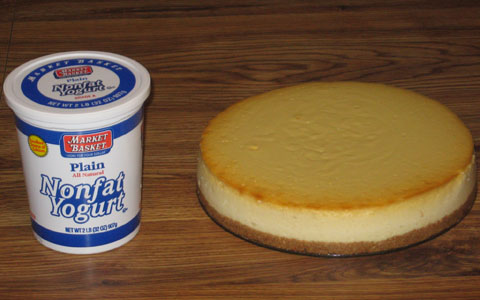
Baked Plain Cheesecake—Prototype 12:
Yogurt Cheese:
Prepare ahead of time 3 pounds of yogurt cheese, derived from three 32-ounce
containers of nonfat yogurt. If the resulting yogurt cheese falls below 48
ounces, add back enough of the whey (that was strained out from the yogurt) to
make up the difference.
Crust:
2 oz. melted, white chocolate
8 oz. (1 cup) yogurt cheese (see above)
1/4 cup granulated sugar
3 tablespoons brown sugar
2 teaspoons cinnamon
1/2 teaspoon vanilla
2 oz. All-Bran, ground up
Place this crust mixture into the bottom of a greased springform pan (9 to
9 1/2 inches), spreading the crust evenly (no pre-baking is needed with
this one).
Batter:
4 tablespoons melted or softened butter
1 1/4 cups granulated sugar
40 oz. (5 cups) yogurt cheese (see above)
2 teaspoons vanilla
1/4 cup all-purpose flour
3 tablespoons arrowroot
4 eggs
Wrap the pan in foil just before adding the batter (to minimize the foil's
disturbance and therefore its leakage risk, do not put it on any earlier).
Next, pour the batter over the crust and bake this cheesecake in a hot water tub at
300 degrees for 100 minutes (if using a 9 1/2" pan). Then cool the cheesecake
down while still in oven (with this oven shut off) and in tub with door slightly ajar
for an hour. Afterwards, remove from oven and tub and continue to cool down at
room temperature for another 100 minutes, then remove from pan and refrigerate.
Baked Plain Cheesecake—Prototype 13:
Yogurt Cheese:
Prepare ahead of time 3 pounds of yogurt cheese, derived from three 32-ounce
containers of nonfat yogurt. If the resulting yogurt cheese falls below 48
ounces, add back enough of the whey (that was strained out from the yogurt) to
make up the difference.
Crust:
2 oz. melted, white chocolate
8 oz. (1 cup) yogurt cheese (see above)
1/4 cup granulated sugar
3 tablespoons brown sugar
2 teaspoons cinnamon
1/2 teaspoon vanilla (but see comments below)
2 oz. All-Bran, ground up
Place the resulting mixture in the greased pan and pre-bake without tub at 300
degrees for 5-10 minutes, depending on the mixture's thickness (closer to 10
minutes if thin enough to be fully distributed across the pan's bottom by gentle
shaking, closer to 5 minutes if thick enough to require spreading out this
mixture by pressing on it with a utensil and/or fingers), then cool enough to
comfortably touch at least the pan's upper sidewall.
Batter:
1 1/4 cups granulated sugar
40 oz. (5 cups) yogurt cheese (see above)
2 teaspoons vanilla
1/4 cup + 1 tablespoon (5 tablespoons altogether) arrowroot
4 eggs
Wrap the pan in foil just before adding the batter (to minimize the foil's
disturbance and therefore its leakage risk, do not put it on any earlier).
Next, pour the batter over the crust and bake this cheesecake in a hot water tub
at 300 degrees for 110 minutes (if using a 9 1/2" pan). Then cool the
cheesecake down while still in oven (with this oven shut off) and in tub with
door slightly ajar for an hour. Afterwards, remove from oven and tub and
continue to cool down at room temperature for another 110 minutes, then remove
from pan and refrigerate.
Baked Plain Cheesecake—Prototype 14:
Yogurt Cheese:
Prepare ahead of time 3 pounds of yogurt cheese, derived from three 32-ounce
containers of nonfat yogurt. If the resulting yogurt cheese falls below 48
ounces, add back enough of the whey (that was strained out from the yogurt) to
make up the difference.
Crust:
2 oz. melted, white chocolate
8 oz. (1 cup) yogurt cheese (see above)
1/4 cup granulated sugar
3 tablespoons brown sugar
2 teaspoons cinnamon
1/2 teaspoon vanilla
2 oz. All-Bran, ground up
Place the resulting mixture in the greased pan and pre-bake without tub at 300
degrees for 5-10 minutes, depending on the mixture's thickness (closer to 10
minutes if thin enough to be fully distributed across the pan's bottom by gentle
shaking, closer to 5 minutes if thick enough to require spreading out this
mixture by pressing on it with a utensil and/or fingers), then cool enough to
comfortably touch at least the pan's upper sidewall.
Batter:
1 1/4 cups granulated sugar
40 oz. (5 cups) yogurt cheese (see above)
2 teaspoons vanilla
1/4 cup + 1 tablespoon (5 tablespoons altogether) arrowroot
5 eggs
Wrap the pan in foil just before adding the batter (to minimize the foil's
disturbance and therefore its leakage risk, do not put it on any earlier).
Next, pour the batter over the crust and bake this cheesecake in a hot water tub
at 300 degrees for 110 minutes (if using a 9 1/2" pan). Then cool the
cheesecake down while still in oven (with this oven shut off) and in tub with
door slightly ajar for an hour. Afterwards, remove from oven and tub and
continue to cool down at room temperature for another 110 minutes, then remove
from pan and refrigerate.
Baked Plain Cheesecake—Prototype 15:
3-Cheese Blend (1CT-1NC-4YG):
Prepare ahead of time 32 ounces of yogurt cheese, derived from two 32-ounce
containers (that's 64 ounces altogether) of nonfat yogurt. If the resulting
yogurt cheese falls below 32 ounces, add back enough of the whey (that was
strained out from the yogurt) to make up the difference. To this yogurt cheese
combine 8 ounces of whipped, lowfat cottage cheese and 8 ounces of softened
Neufchatel cheese ("light cream cheese").
Crust:
2 oz. melted, white chocolate
8 oz. (1 cup) 3-cheese blend (see above)
1/4 cup granulated sugar
3 tablespoons brown sugar
2 teaspoons cinnamon
1/2 teaspoon vanilla
2 oz. All-Bran, ground up
Place the resulting mixture in the greased pan and pre-bake without tub at 300
degrees for 5-10 minutes, depending on the mixture's thickness (closer to 10
minutes if thin enough to be fully distributed across the pan's bottom by gentle
shaking, closer to 5 minutes if thick enough to require spreading out this
mixture by pressing on it with a utensil and/or fingers), then cool enough to
comfortably touch at least the pan's upper sidewall.
Batter:
1 1/4 cups granulated sugar
40 oz. (5 cups) 3-cheese blend (see above)
2 teaspoons vanilla
1/4 cup + 1 tablespoon (5 tablespoons altogether) arrowroot
5 eggs
Wrap the pan in foil just before adding the batter (to minimize the foil's
disturbance and therefore its leakage risk, do not put it on any earlier).
Next, pour the batter over the crust and bake this cheesecake in a hot water tub
at 300 degrees for 120 minutes (if using a 9 1/2" pan). Then cool the
cheesecake down while still in oven (with this oven shut off) and in tub with
door slightly ajar for an hour. Afterwards, remove from oven and tub and
continue to cool down at room temperature for another 120 minutes, then remove
from pan and refrigerate.
Baked Plain Cheesecake—Prototype 16:
3-Cheese Blend (1CT-1NC-4YG):
Prepare ahead of time 32 ounces of yogurt cheese, derived from two 32-ounce
containers (that's 64 ounces altogether) of nonfat yogurt. If the resulting
yogurt cheese falls below 32 ounces, add back enough of the whey (that was
strained out from the yogurt) to make up the difference. To this yogurt cheese
combine 8 ounces of whipped, lowfat cottage cheese and 8 ounces of softened
Neufchatel cheese ("light cream cheese").
Grease a 9 1/2" (or 9") springform pan, but do not wrap foil around it
yet (see below).
Graham Crust:
2 oz. melted, white chocolate
8 oz. (1 cup) 3-cheese blend (see above)
1/4 cup granulated sugar
1 tablespoon brown sugar
1/2 teaspoon vanilla
Completely blend the above ingredients first, then continue with the last one
below.
4 oz. cinnamon graham crackers, ground up
Place resulting crust mixture into bottom of the springform pan and pre-bake
without tub at 300 degrees for 15 minutes, then cool enough to comfortably touch
at least the pan's upper sidewall.
Batter:
1 1/4 cups granulated sugar
40 oz. (5 cups) 3-cheese blend (see above)
2 teaspoons vanilla
1/4 cup + 1 tablespoon (5 tablespoons altogether) arrowroot
5 eggs
Wrap the pan in foil just before adding the batter (to minimize the foil's
disturbance and therefore its leakage risk, do not put it on any earlier).
Next, pour the batter over the crust and bake this cheesecake in a hot water tub
at 300 degrees for 115 minutes (if using a 9 1/2" pan). Then cool the
cheesecake down while still in oven (with this oven shut off) and in tub with
door slightly ajar for an hour. Afterwards, remove from oven and tub and
continue to cool down at room temperature for another 115 minutes, then remove
from pan and refrigerate.
Baked Plain Cheesecake—Prototype 17:
3-Cheese Blend (3CT-1NC-2YG [3 parts cottage cheese, 1 part Neufchatel
cheese, 2 parts yogurt cheese]):
Prepare ahead of time 16 ounces of yogurt cheese, derived from one 32-ounce
container of nonfat yogurt. If the resulting yogurt cheese falls below 16
ounces, add back enough of the whey (that was strained out from the yogurt) to
make up the difference. To this yogurt cheese combine 24 ounces of whipped,
lowfat cottage cheese and 8 ounces of softened Neufchatel cheese ("light
cream cheese").
Grease a 9 1/2" (or 9") springform pan, but do not wrap foil around
it yet (see below).
Crust:
2 oz. melted, white chocolate
8 oz. (1 cup) 3-cheese blend (see above)
1/4 cup granulated sugar
1/4 cup brown sugar
1 teaspoon cinnamon
1/2 teaspoon vanilla
2 oz. All-Bran, ground up
Place the resulting mixture in the greased pan and pre-bake without tub at 300
degrees for 5-10 minutes, depending on the mixture's thickness (closer to 10
minutes if thin enough to be fully distributed across the pan's bottom by gentle
shaking, closer to 5 minutes if thick enough to require spreading out this
mixture by pressing on it with a utensil and/or fingers), then cool enough to
comfortably touch at least the pan's upper sidewall.
Batter:
1 1/4 cups granulated sugar
40 oz. (5 cups) 3-cheese blend (see above)
2 teaspoons vanilla
1/4 cup + 1 tablespoon (5 tablespoons altogether) arrowroot
5 eggs
Wrap the pan in foil just before adding the batter (to minimize the foil's
disturbance and therefore its leakage risk, do not put it on any earlier).
Next, pour the batter over the crust and bake this cheesecake in a hot water tub
at 300 degrees for 120 minutes (if using a 9 1/2" pan). Then cool the
cheesecake down while still in oven (with this oven shut off) and in tub with
door slightly ajar for an hour. Afterwards, remove from oven and tub and
continue to cool down at room temperature for another 120 minutes, then remove
from pan and refrigerate.
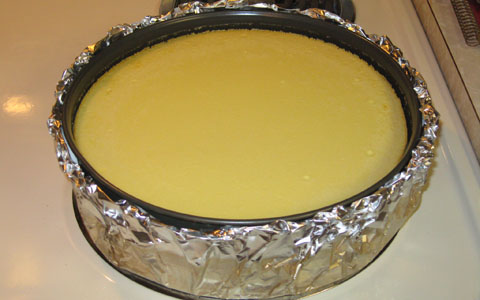
Baked Plain Cheesecake—Prototype 18:
3-Cheese Blend (3CT-1NC-2YG):
Prepare ahead of time 16 ounces of yogurt cheese, derived from one 32-ounce
container of nonfat yogurt. If the resulting yogurt cheese falls below 16
ounces, add back enough of the whey (that was strained out from the yogurt) to
make up the difference. To this yogurt cheese combine 24 ounces of whipped,
lowfat cottage cheese and 8 ounces of softened Neufchatel cheese ("light
cream cheese").
Batter:
1 1/4 cups granulated sugar
40 oz. (5 cups)* 3-cheese blend (see above)
2 teaspoons vanilla
5 eggs
Pour the batter into a greased 13" x 9" glass ("Pyrex") pan
and bake this cheesecake in a hot water tub at 300 degrees for 100 minutes. Then
cool the cheesecake down while still in oven (with this oven shut off) and in
tub with door slightly ajar for an hour. Afterwards, remove pan containing
cheesecake from tub and oven and let cool down at room temperature for another
100 minutes, then (with cheesecake still in pan) refrigerate.
* Find some other use for the roughly 8 ounces of leftover cheese blend—or
otherwise discard (but also see comments below).
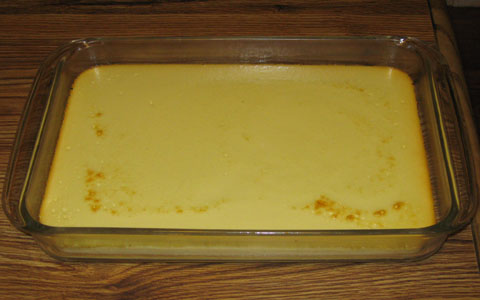
Baked Plain Cheesecake—Prototype 19:
3-Cheese Blend (3CT-1NC-2YG):
Prepare ahead of time 16 ounces of yogurt cheese, derived from one 32-ounce
container of nonfat yogurt. If the resulting yogurt cheese falls below 16
ounces, add back enough of the whey (that was strained out from the yogurt) to
make up the difference. To this yogurt cheese combine 24 ounces of whipped,
lowfat cottage cheese and 8 ounces of softened Neufchatel cheese ("light
cream cheese").
Grease a 9 1/2" (or 9") springform pan, but do not wrap foil around
it yet (see below).
Crust:
2 oz. melted, white chocolate
8 oz. (1 cup) 3-cheese blend (see above)
1/4 cup granulated sugar
1/4 cup brown sugar
1 teaspoon cinnamon
1/2 teaspoon vanilla
2 oz. All-Bran, ground up
Place the resulting mixture in the greased pan and pre-bake without tub at 300
degrees for 5-10 minutes, depending on the mixture's thickness (closer to 10
minutes if thin enough to be fully distributed across the pan's bottom by gentle
shaking, closer to 5 minutes if thick enough to require spreading out this
mixture by pressing on it with a utensil and/or fingers), then cool enough to
comfortably touch at least the pan's upper sidewall.
Batter:
1 1/4 cups granulated sugar
40 oz. (5 cups) 3-cheese blend (see above)
2 teaspoons vanilla
1 1/4 teaspoons xanthan gum
5 eggs
Wrap the pan in foil just before adding the batter (to minimize the foil's
disturbance and therefore its leakage risk, do not put it on any earlier).
Next, pour the batter over the crust and bake this cheesecake in a hot water tub
at 300 degrees for 120 minutes (if using a 9 1/2" pan). Then cool the
cheesecake down while still in oven (with this oven shut off) and in tub with
door slightly ajar for an hour. Afterwards, remove from oven and tub and
continue to cool down at room temperature for another 120 minutes, then remove
from pan and refrigerate.
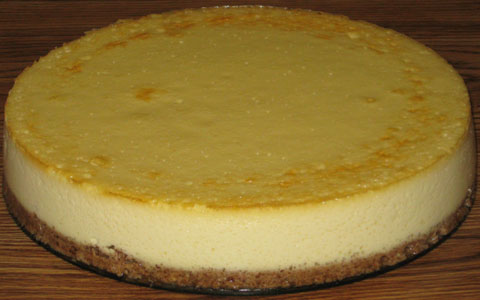
Baked Plain Cheesecake—Prototype 20:
Repeat
Prototype 19,
but for the batter, boost the xanthan gum by 1/2
teaspoon, to 1 3/4 teaspoons.
Also, bake this cheesecake in tub for only about 110 minutes, rather than 120
(if using a 9 1/2" pan). Then cool it down in the oven (shut off at this
point), door slightly ajar, for an hour—just like the previous prototype.
Afterwards, remove from oven and tub and continue to cool down at room
temperature. But do this for 120 minutes (instead of only 110), then remove from
pan and refrigerate.
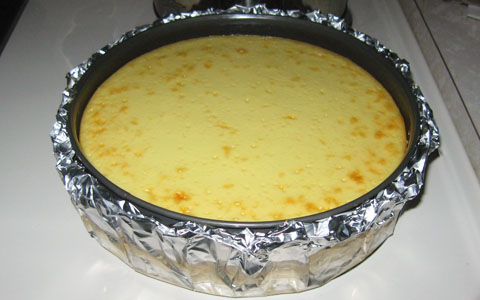
Baked Plain Cheesecake—Prototype 21:
Repeat
Prototype 20,
but for the batter, reduce the xanthan gum by 1/4
teaspoon, to 1 1/2 teaspoons.
Also, bake this cheesecake in tub for only about 90 minutes, rather than 110
(if using a 9 1/2" pan). Then cool it down in the oven (shut off at this
point), door slightly ajar, for an hour—just like the previous prototype.
Afterwards, remove from oven and tub and continue to cool down at room
temperature, doing so for 120 minutes (not 90), then remove from
pan and refrigerate.
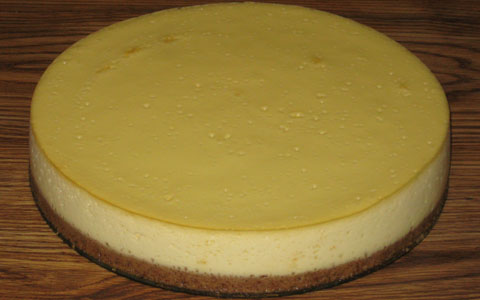
Baked Plain Cheesecake—Prototype 22:
3-Cheese Blend (3CT-1NC-2YG):
Prepare ahead of time 16 ounces of yogurt cheese, derived from one 32-ounce
container of nonfat yogurt. If the resulting yogurt cheese falls below 16
ounces, add back enough of the whey (that was strained out from the yogurt) to
make up the difference. To this yogurt cheese combine 24 ounces of whipped,
lowfat cottage cheese and 8 ounces of softened Neufchatel cheese ("light
cream cheese").
Grease a 9 1/2" (or 9") springform pan, but do not wrap foil around
it yet (see below).
Crust:
2 oz. melted, white chocolate
8 oz. (1 cup) 3-cheese blend (see above)
1/4 cup granulated sugar
1/4 cup brown sugar
1 teaspoon cinnamon
1/2 teaspoon vanilla
2 oz. All-Bran, ground up
Place the resulting mixture in the greased pan and pre-bake without tub at 300
degrees for 10-15 minutes, depending on the mixture's thickness (closer to 15
minutes if thin enough to be fully distributed across the pan's bottom by gentle
shaking, closer to 10 minutes if thick enough to require spreading out this
mixture by pressing on it with a utensil and/or fingers), then cool enough to
comfortably touch at least the pan's upper sidewall.
Batter:
1 1/4 cups granulated sugar
40 oz. (5 cups) 3-cheese blend (see above)
2 teaspoons vanilla
1 1/2 teaspoons xanthan gum
6 eggs
Wrap the pan in foil just before adding the batter (to minimize the foil's
disturbance and therefore its leakage risk, do not put it on any earlier).
Next, pour the batter over the crust and bake this cheesecake in a hot water tub
at 300 degrees for 90 minutes (if using a 9 1/2" pan). Then cool the
cheesecake down while still in oven (with this oven shut off) and in tub with
door slightly ajar for an hour. Afterwards, remove from oven and tub and
continue to cool down at room temperature for another 120 minutes, then remove
from pan and refrigerate.
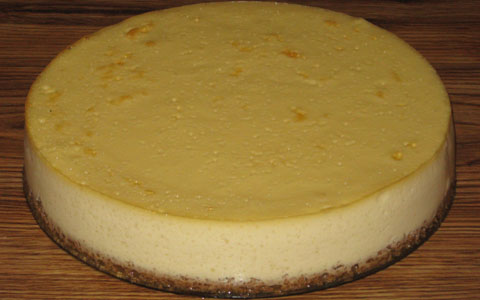
Baked Plain Cheesecake—Prototype 23:
3-Cheese Blend (1CT-1NC-1YG):
Prepare ahead of time 16 ounces of yogurt cheese, derived from one 32-ounce
container of nonfat yogurt. If the resulting yogurt cheese falls below 16
ounces, add back enough of the whey (that was strained out from the yogurt) to
make up the difference. To this yogurt cheese combine 16 ounces of whipped,
lowfat cottage cheese and 16 ounces (two 8-ounce packages) of softened
Neufchatel cheese ("light cream cheese").
Grease a 9 1/2" (or 9") springform pan, but do not wrap foil around
it yet (see below).
Crust:
2 oz. melted, white chocolate
8 oz. (1 cup) 3-cheese blend (see above)
1/4 cup granulated sugar
1/4 cup brown sugar
1 teaspoon cinnamon
1/2 teaspoon vanilla
2 oz. All-Bran, ground up
Place the resulting mixture in the greased pan and pre-bake without tub at 300
degrees for 20 minutes, then cool enough to comfortably touch at least the pan's
upper sidewall.
Batter:
1 1/4 cups granulated sugar
40 oz. (5 cups) 3-cheese blend (see above)
2 teaspoons vanilla
1 teaspoon xanthan gum
6 eggs
Wrap the pan in foil just before adding the batter (to minimize the foil's
disturbance and therefore its leakage risk, do not put it on any earlier).
Next, pour the batter over the crust and bake this cheesecake in a hot water tub
at 300 degrees for 90 minutes (if using a 9 1/2" pan). Then cool the
cheesecake down while still in oven (with this oven shut off) and in tub with
door slightly ajar for an hour. Afterwards, remove from oven and tub and
continue to cool down at room temperature for another 120 minutes, then remove
from pan and refrigerate.
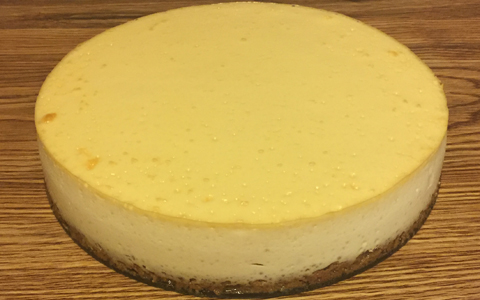
Baked Plain Cheesecake—Prototype 24:
3-Cheese Blend (1CT-1NC-1YG):
Prepare ahead of time 16 ounces of yogurt cheese, derived from one 32-ounce
container of nonfat yogurt. If the resulting yogurt cheese falls below 16
ounces, add back enough of the whey (that was strained out from the yogurt) to
make up the difference. To this yogurt cheese combine 16 ounces of whipped,
lowfat cottage cheese and 16 ounces (two 8-ounce packages) of softened
Neufchatel cheese ("light cream cheese").
Grease a 9 1/2" (or 9") springform pan, but do not wrap foil around
it yet (see below).
Crust:
4 oz. melted, white chocolate
8 oz. (1 cup) 3-cheese blend (see above)
1/4 cup granulated sugar
1/4 cup brown sugar
1 teaspoon cinnamon
1/2 teaspoon vanilla
2 oz. All-Bran, ground up
Place the resulting mixture in the greased pan and pre-bake without tub at 300
degrees for 20 to 30 minutes (see comments below), then cool enough to
comfortably touch at least the pan's upper sidewall.
Batter:
1 1/4 cups granulated sugar
40 oz. (5 cups) 3-cheese blend (see above)
2 teaspoons vanilla
1 teaspoon xanthan gum
6 eggs
Wrap the pan in foil just before adding the batter (to minimize the foil's
disturbance and therefore its leakage risk, do not put it on any earlier). Or as
an alternative, place this pan in an Easy Bath Cheesecake Wrap (see comments
above)—and don't bother waiting for the pan to get comfortably cool to do
so.
Next, pour the batter over the crust and bake this cheesecake in a hot water tub
at 300 degrees for 85 to 90 minutes (if using a 9 1/2" pan—also see
comments below). Then cool the cheesecake down while still in oven (with this
oven shut off) and in tub with door slightly ajar for an hour. Afterwards,
remove from oven and tub and continue to cool down at room temperature for
another 120 minutes, then remove from pan and refrigerate.
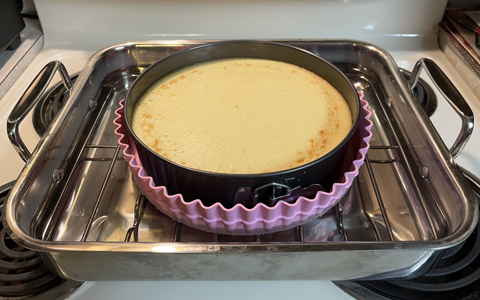
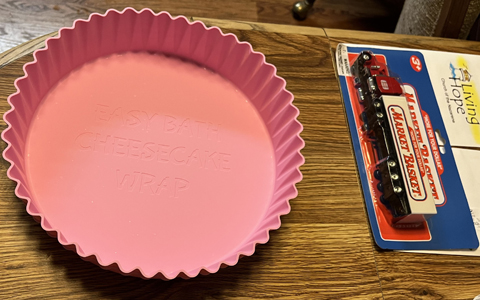
|
-------------------------------------------------------
|
Baked Eggnog Pumpkin Cheesecake—Prototype 1:
Eggnog Crust:
1/2 cup (8 oz.) whipped lowfat cottage cheese, no salt added
3 tablespoons granulated sugar
2 tablespoons brown sugar
1/4 teaspoon vanilla
1/4 teaspoon cinnamon
1/4 teaspoon nutmeg
1/2 teaspoon rum extract
1 teaspoon lemon juice
1/4 cup light eggnog
2.2 oz. finely ground Bran Buds
Pour (or press) into the pan, getting this crust evenly distributed. Next,
refrigerate for about half an hour, or until slightly firm. Afterwards, bake
at 300 degrees for 10 minutes (no bath at this point—just put the pan
directly on the rack), then remove from oven and cool down slightly (until
the pan is no longer too hot to the touch—about 5 minutes).
Pumpkin Batter:
2 tablespoons melted or softened butter
4 oz. pumpkin butter
1 tablespoon lemon juice
1/2 cup skim milk
1/2 cup granulated sugar
3/8 cup flour
1/4 teaspoon salt
2 1/2 cups (20 oz.) whipped lowfat cottage cheese, no salt added
2 eggs
Turn oven up to 325 degrees. Add the pumpkin batter on top of the crust.
Then put the foil on the pan (no earlier—less foil disturbance means less
leakage risk) and place into a hot bath. Bake for about 30 minutes. Tip:
When handling the pan-foil assembly at this point, lift it by the pan's rim,
not by the foil (let the foil cling to the pan's rim—optionally, you
can also position your fingers to hold the foil in place, but do not put
pressure on it to lift the entire pan—otherwise, the foil may tear).
Eggnog Batter:
2 tablespoons butter, softened or melted
2/3 cup granulated sugar
1 tablespoon lemon juice
1/2 tablespoon rum extract
1 teaspoon vanilla extract
2 1/2 cups (20 oz.) whipped lowfat cottage cheese, no salt added
2 cups of light eggnog
7/8 cup flour
1/4 teaspoon salt
1/2 teaspoon nutmeg
2 eggs
Carefully scoop this on top of the pumpkin batter, turn oven down to 300
degrees and resume baking for about 100 minutes.
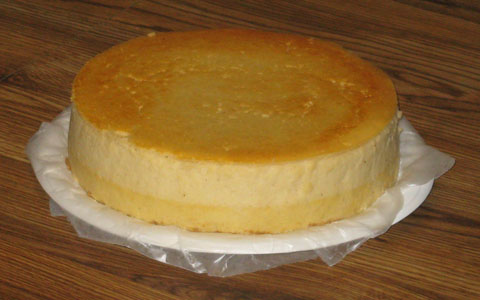
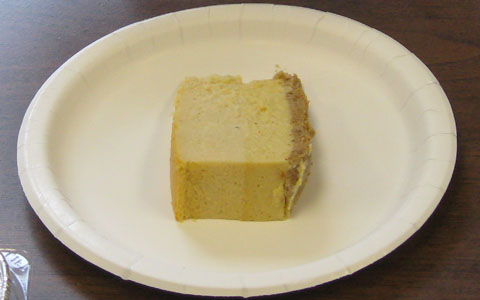
Baked Eggnog Pumpkin Cheesecake—Prototype 2:
Pumpkin Crust:
2 oz. melted, white chocolate
2 oz. pumpkin butter (such as from Trader Joe's)
1 cup (8 oz.) whipped lowfat cottage cheese, no salt added
1 teaspoon lemon juice
2 tablespoons granulated sugar
2 tablespoons brown sugar
1/2 teaspoon vanilla
2.2 oz. Bran Buds, ground up
Pour (or press) into the pan, refrigerate for about half an hour (at least),
then bake at 300 degrees for 15 minutes (no bath), then remove from oven and
cool to touch.
Pumpkin Batter:
2 tablespoons melted or softened butter
5/8 cup granulated sugar
8 oz. pumpkin butter
1 tablespoon lemon juice
1/2 cup skim milk
1/2 cup flour (whole white wheat, such as King Arthur)
1/4 teaspoon salt
3 cups (24 oz.) whipped lowfat cottage cheese, no salt added
2 eggs
Turn oven up to 325 degrees. Add pumpkin batter on top of crust. Put on
foil, place into hot bath. Bake for about 40 minutes.
Eggnog Batter:
2 tablespoons butter, softened or melted
2/3 cup granulated sugar
1 tablespoon lemon juice
1 teaspoon rum extract
1 teaspoon vanilla extract
2 cups (16 oz.) whipped lowfat cottage cheese, no salt added
2 cups of light eggnog
3/4 cup flour (whole white wheat, such as King Arthur)
1/4 teaspoon salt
1/2 teaspoon nutmeg
2 eggs
Carefully scoop this on top of the pumpkin batter, turn oven down to 300
degrees and resume baking for about 120 minutes.
Remove from oven and cool for 3 hours before removing from pan, then
refrigerate (at least for a few hours, allowing the cheesecake to get more
firm).
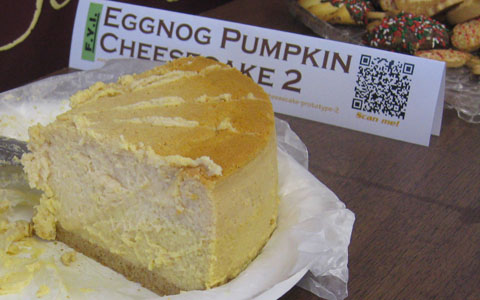
Baked Eggnog Pumpkin Cheesecake—Prototype 3:
2-to-1 Blend of Yogurt Cheese and Cottage Cheese:
Prepare ahead of time 2 pounds of yogurt cheese, derived from two 32-ounce
containers of nonfat yogurt. If the resulting yogurt cheese falls below 32
ounces, add back enough of the whey (that was strained out from the yogurt) to
make up the difference. To this yogurt cheese combine 16 ounces (1 pint) of
whipped, lowfat cottage cheese.
Crust:
2 oz. melted, white chocolate
1 cup (8 oz.) 2-to-1 blend of yogurt cheese and cottage cheese (see above)
1/4 cup granulated sugar
2 2/3 tablespoons brown sugar
2 teaspoons cinnamon
1/2 teaspoon vanilla extract
2.2 oz. Bran Buds, ground up
Pour this crust mixture into pan (9 to 9 1/2 inches) and pre-bake without tub at
300 degrees for 10 minutes, then cool enough to comfortably touch at least the
pan's upper sidewall.
Eggnog Batter:
2 tablespoons butter, softened or melted
2/3 cup granulated sugar
2 cups (16 oz.) 2-to-1 blend of yogurt cheese and cottage cheese (see above)
2 tablespoons all-purpose flour
1/4 cup arrowroot
1/4 teaspoon salt
1/2 teaspoon nutmeg
1 teaspoon vanilla extract
1 teaspoon rum extract
2 cups light eggnog
2 eggs
Turn oven up to 325 degrees. Add eggnog batter on top of crust. Put on foil,
place into hot bath. Bake for about 40 minutes.
Pumpkin Batter:
2 tablespoons melted or softened butter
5/8 cup granulated sugar
3 cups (24 oz.) 2-to-1 blend of yogurt cheese and cottage cheese (see above)
2 tablespoons all-purpose flour
2 tablespoons arrowroot
1/4 teaspoon salt
1 teaspoon vanilla extract
8 oz. pumpkin butter
2 eggs
Carefully scoop this on top of the eggnog batter, turn oven down to 300 degrees
and resume baking for about 120 minutes (if using a 9 1/2" pan). Then cool
down while still in oven (with this oven shut off) and in tub with door slightly
ajar for an hour. Afterwards, remove from oven and tub and continue to cool down
at room temperature for another 3 hours, then remove from pan and refrigerate
(at least for a few hours, allowing the cheesecake to get more firm).
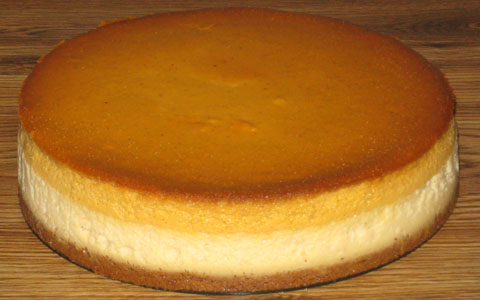
Baked Eggnog Pumpkin Cheesecake—Prototype 4:
2-to-1 Blend of Yogurt Cheese and Cottage Cheese:
Prepare ahead of time 2 pounds of yogurt cheese, derived from two 32-ounce
containers of nonfat yogurt. If the resulting yogurt cheese falls below 32
ounces, add back enough of the whey (that was strained out from the yogurt) to
make up the difference. To this yogurt cheese combine 16 ounces (1 pint) of
whipped, lowfat cottage cheese.
Crust:
2 oz. melted, white chocolate
1 cup (8 oz.) 2-to-1 blend of yogurt cheese and cottage cheese (see above)
1/4 cup granulated sugar
2 2/3 tablespoons brown sugar
2 teaspoons cinnamon
1/2 teaspoon vanilla extract
2.2 oz. Bran Buds, ground up
Pour this crust mixture into pan (9 to 9 1/2 inches) and pre-bake without tub at
300 degrees for 10 minutes, then cool enough to comfortably touch at least the
pan's upper sidewall.
Pumpkin Batter:
2 tablespoons melted or softened butter
5/8 cup granulated sugar
3 cups (24 oz.) 2-to-1 blend of yogurt cheese and cottage cheese (see above)
2 tablespoons all-purpose flour
2 tablespoons arrowroot
1/4 teaspoon salt
1 teaspoon vanilla extract
9 oz. pumpkin butter
2 eggs
Turn oven up to 325 degrees. Add pumpkin batter (all of it) on top of crust. Put
on foil, place into hot bath. Bake for about 40 minutes.
Eggnog Batter:
2 tablespoons butter, softened or melted
2/3 cup granulated sugar
2 cups (16 oz.) 2-to-1 blend of yogurt cheese and cottage cheese (see above)
2 tablespoons all-purpose flour
1/4 cup arrowroot
1/4 teaspoon salt
1/2 teaspoon nutmeg
1 teaspoon vanilla extract
1 teaspoon rum extract
2 cups light eggnog
2 eggs
Carefully scoop this on top of the pumpkin batter, filling up the springform pan
within its capacity (set aside any remaining eggnog batter). Then turn oven down
to 300 degrees and resume baking for about 120 minutes (if using a 9 1/2"
pan). Next, cool down while still in oven (with this oven shut off) and in tub
with door slightly ajar for an hour. Afterwards, remove from oven and tub and
continue to cool down at room temperature for another 3 hours, then remove from
pan and refrigerate (at least for a few hours, allowing the cheesecake to get
more firm).
As for any remaining eggnog batter (which will probably not be much), grab a few
baking cups, pour the batter into them, bake these cupcake-style eggnog
cheesecakes at 300 degrees for about 50 minutes (go ahead, put them in the same
oven as the big cheesecake, but don't bother immersing them in a tub), cool for
about 50 minutes afterward, chill for a least a few hours—and enjoy!
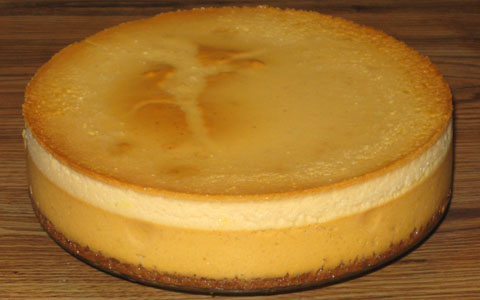
Baked Eggnog Pumpkin Cheesecake—Prototype 5:
2-to-1 Blend of Yogurt Cheese and Cottage Cheese:
Prepare ahead of time 2 pounds of yogurt cheese, derived from two 32-ounce
containers of nonfat yogurt. If the resulting yogurt cheese falls below 32
ounces, add back enough of the whey (that was strained out from the yogurt) to
make up the difference. To this yogurt cheese combine 16 ounces (1 pint) of
whipped, lowfat cottage cheese.
Crust:
2 oz. melted, white chocolate
8 oz. (1 cup) 2-to-1 blend of yogurt cheese and cottage cheese (see above)
1/4 cup granulated sugar
1/4 cup brown sugar
2 teaspoons cinnamon
1/2 teaspoon vanilla
2 oz. All-Bran, ground up
Pour this crust mixture into pan (9 to 9 1/2 inches) and pre-bake without tub at
300 degrees for 10 minutes, then cool enough to comfortably touch at least the
pan's upper sidewall.
Eggnog Batter:
2 tablespoons melted or softened butter
2/3 cup granulated sugar
1 teaspoon rum extract
1 teaspoon vanilla extract
2 1/2 cups (20 oz.) 2-to-1 blend of yogurt cheese and cottage cheese (see above)
2 cups light eggnog
2 tablespoons all-purpose flour
3/8 cup arrowroot
1/2 teaspoon nutmeg
2 eggs
Wrap the pan in foil, and pour the eggnog batter on top of the crust, no higher
than halfway from the crust's surface to the top of the pan (if there is any
excess batter, use it to make "cupcakes", baking these at 300 degrees
for 50 minutes using a bath arrangement—or use this batter together with
a good pancake mix to make pancakes). Then place this pan in a tub—filled
only about halfway, or about half an inch, with boiling water. Bake all this at
325 degrees for about 60 minutes. Then take the whole pan-and-tub setup out of
the oven, and carefully get it to a comfortable place. Promptly add the pumpkin
batter as indicated below.
Pumpkin Batter:
2 tablespoons melted or softened butter
1/2 cup granulated sugar
1 teaspoon vanilla extract
2 1/2 cups (20 oz.) 2-to-1 blend of yogurt cheese and cottage cheese (see above)
7 oz. pumpkin butter
2 tablespoons all-purpose flour
1 1/2 tablespoons arrowroot
2 eggs
Carefully scoop this on top of the eggnog batter and return the pan-and-tub
setup to oven, this time at only 300 degrees, and add more hot water to the tub
(at this point, go ahead and fill it all the way). Bake for about 120 more
minutes.
Turn oven off, leaving cheesecake in it (still in tub as well), with the door
slightly ajar, for another 60 minutes.
Remove cheesecake from oven and tub and let cool in its pan at room temperature
for another 120 minutes.
Afterwards, remove cheesecake from pan and refrigerate.
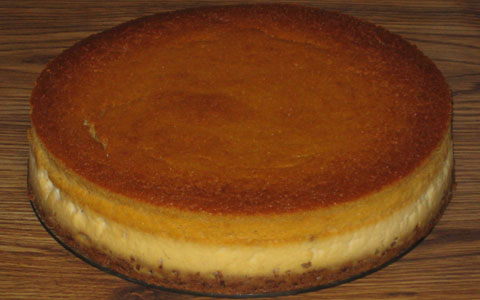
Baked Eggnog Pumpkin Cheesecake—Prototype 6:
2-to-1 Blend of Yogurt Cheese and Cottage Cheese:
Prepare ahead of time 2 pounds of yogurt cheese, derived from two 32-ounce
containers of nonfat yogurt. If the resulting yogurt cheese falls below 32
ounces, add back enough of the whey (that was strained out from the yogurt) to
make up the difference. To this yogurt cheese combine 16 ounces (1 pint) of
whipped, lowfat cottage cheese.
Crust:
2 oz. melted, white chocolate
8 oz. (1 cup) 2-to-1 blend of yogurt cheese and cottage cheese (see above)
1/4 cup granulated sugar
1/4 cup brown sugar
2 teaspoons cinnamon
1 teaspoon vanilla
2 oz. All-Bran, ground up
Pour this crust mixture into pan (9 to 9 1/2 inches) and pre-bake without tub at
300 degrees for 10 minutes, then cool enough to comfortably touch at least the
pan's upper sidewall.
Eggnog Batter:
2 tablespoons melted or softened butter
2/3 cup granulated sugar
1 teaspoon rum extract
1 teaspoon vanilla extract
2 1/2 cups (20 oz.) 2-to-1 blend of yogurt cheese and cottage cheese (see above)
2 cups light eggnog
2 tablespoons all-purpose flour
3/8 cup arrowroot
1/2 teaspoon nutmeg
2 eggs
Wrap the pan in foil, and pour the eggnog batter on top of the crust, no higher
than halfway from the crust's surface to the top of the pan
(for suggestions on what to do with any excess batter, see Prototype 5 of this cheesecake).
Then place this
pan in a tub—filled slightly more than halfway, or about 3/4 of an inch,
with boiling water. Bake all this at 325 degrees for about 60 minutes. Next,
lower the temperature to 300 degrees and continue baking for another 15 minutes.
Then take the whole pan-and-tub setup out of the oven, and carefully get it to a
comfortable place. Promptly add the pumpkin batter as indicated below.
Pumpkin Batter:
2 tablespoons melted or softened butter
1/2 cup granulated sugar
1 teaspoon vanilla extract
2 1/2 cups (20 oz.) 2-to-1 blend of yogurt cheese and cottage cheese (see above)
7 oz. pumpkin butter
2 tablespoons all-purpose flour
1 1/2 tablespoons arrowroot
2 eggs
Carefully scoop this on top of the eggnog batter and return the pan-and-tub
setup to oven, still at 300 degrees, and add more hot water to the tub (at this
point, go ahead and fill it all the way). Bake for about 105 more minutes. After
that, turn oven off, leaving cheesecake in it (still in tub as well), with the
door slightly ajar, for another 60 minutes. Next, remove cheesecake from oven
and tub and let cool in its pan at room temperature for another 120 minutes.
Afterwards, remove cheesecake from pan and refrigerate.
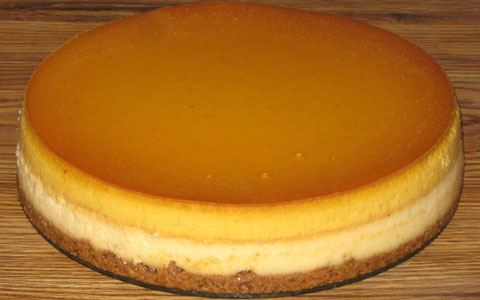
|
-------------------------------------------------------
|
| |
WE INTERRUPT THIS RECIPE
SCRAPBOOK TO BRING YOU...
An unexpected FedEx delivery!
Okay, what happened was...on the morning of the day before my
53rd birthday, I heard sounds of what seemed to be a box
"drop" and a scanner "beep" near my front
door. Without opening this door, I simply glanced out of a
window and spotted a FedEx truck in front of my house. I
afterward took in this box, which bore an Amazon.com logo.
Before long, I was guessing this "Saturday Delivery"
package to be something from my brother (and his household) in
California. It was a good guess.
I opened the box and found three wrapped presents.
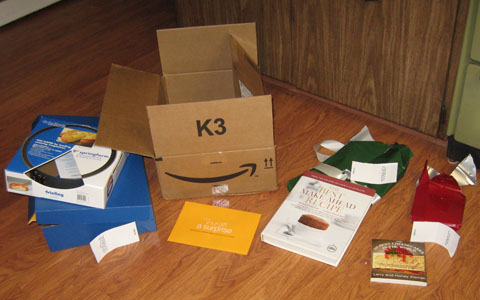
A note was attached to each wrapped item.
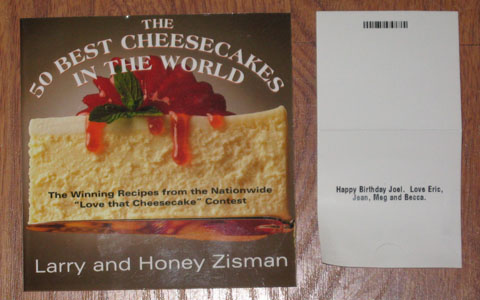

The first gift was a book, The 50 Best Cheesecakes in the
World, which came with this note: "Happy Birthday Joel.
Love Eric, Jean, Meg and Becca." (i.e., my brother, his
wife and their two daughters). The next gift was also a book, The
Best Make-Ahead Recipe, along with this note: "Happy
Birthday Joel. This is for your Cheesecake habit. Check page
370. Other items will arrive later. Love Eric, Jean, Meg and
Becca." On Page 370 itself, in addition to containing a
recipe for New York-Style Cheesecake, there was a top
recommendation for a particular springform pan—so guess what
the third gift was?
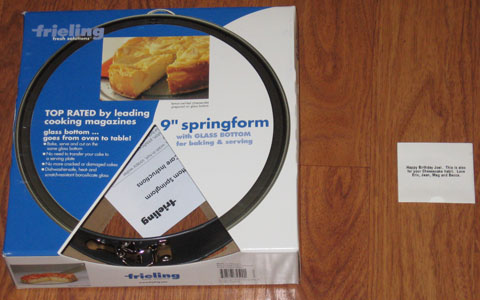
That's right! The third gift was that Page 370 endorsement, a
Frieling 9" springform pan, with—OMS (OhMySurprise)!—a
glass bottom!! Now that was certainly a different kind of
cheesecake pan! The accompanying note said, "Happy Birthday
Joel. This is also for your cheesecake habit. Love Eric, Jean,
Meg and Becca."
The Amazon package also contained an envelope which said
"keep your gift a surprise"/"unwrap your present
before opening this envelope". Figuring that following this
sequence would optimize my unpacking experience, I obediently
opened my three presents first, including reading their
respective accompanying notes. I then anticipated that the
envelope would contain some kind of follow-up message
from Eric, Jean, Meghan and Rebecca which they
would want me to read specifically after unwrapping my
presents. Actually, the envelope's contents turned out to be a
packing slip, describing the three enclosed wrapped items. But I
could still see the reason for accessing this envelope last—discover
the identity of each gift upon unwrapping it, not
upon viewing the packing slip! Okay, Amazon.com! Will do (and so
I complied)!
And so the cheesecake journey rawks on! Thank you, Eric, Jean,
Meghan and Rebecca!
And now, back to the Recipe Scrapbook! |
| |
|
-------------------------------------------------------
|
Baked Cookies+Creme Cheesecake—Prototype 1
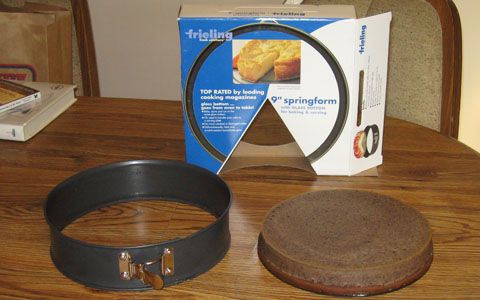
Crust:
4 oz. semi-sweet chocolate, melted
1 1/3 tablespoons cocoa powder
1 cup (8 oz.) lowfat cottage cheese, whipped, no salt added
3/8 cup granulated sugar
1 teaspoon vanilla (next to last ingredient here)
2.2 oz. Bran Buds, ground up
Batter:
2 tablespoons melted or softened butter
1/2 cup granulated sugar
1/2 cup skim milk
1 tablespoon lemon juice
1/3 cup flour
1/4 teaspoon salt
2 1/2 cups (20 oz.) lowfat cottage cheese, whipped, no salt added
1 teaspoon vanilla
2 eggs
12 chocolate sandwich cookies, crushed (add this last, and mix enough to get
it blended in)
Bake in a tub at 300 degrees for about 100 minutes.
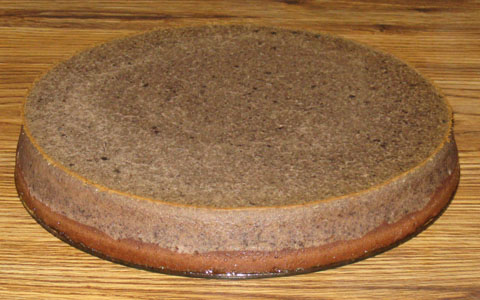
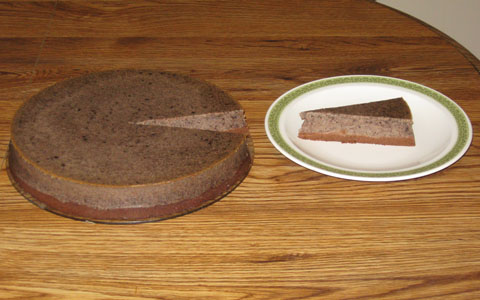
Baked Cookies+Creme Cheesecake—Prototype 2
Repeat Prototype 1, but boost the batter's sandwich cookies by 4, to 16.
Also, cut the baking time to only about 90 minutes.
Baked Cookies+Creme Cheesecake—Prototype 3:
Repeat Prototype 2, but upon adding the crushed cookies, make sure that they
are only folded into the batter. Keep that blender, mixer, or
whatever food processor is used, shut off at this point! Then
transfer all this to the pan.

Baked Cookies+Creme Cheesecake—Prototype 4:
Repeat Prototype 3, but make up a mixture of 1/2 cup of skim milk and 1 tablespoon
of granulated sugar, and soak the cookies—lightly broken up—in this
mixture, until the chocolate outer cookies soften. Then fold all this into
the cheesecake batter before baking. (Note that the milk for this
"soaking" mixture is in addition to the 1/2 cup already
used in the batter. So one full cup of milk is used altogether for this
recipe. In fact, if it becomes difficult getting all the cookies moistened,
at least some of the 1/2 cup of milk intended directly for the batter could
instead be shifted to the cookie mixture.)
Baked Cookies+Creme Cheesecake—Prototype 5:
Crust:
4 oz. semi-sweet chocolate, melted
1 1/3 tablespoons cocoa powder
8 oz. yogurt cheese (half of it lowfat, the other half nonfat)
3/8 cup granulated sugar
1 teaspoon vanilla
2.2 oz. Bran Buds, ground up
Batter:
2 tablespoons melted or softened butter
1 cup granulated sugar
1/3 cup flour
1/4 teaspoon salt
20 oz. yogurt cheese (half of it lowfat, the other half nonfat)
1 teaspoon vanilla
2 eggs
Cookie Mixture:
16 chocolate sandwich cookies, broken preferably in halves (at least make a
reasonable effort here)
1/2 cup skim milk
Fill a resealable ("Ziploc") sandwich or 1-quart bag with the 16
cookies and 1/2 cup skim milk. Seal this bag and shake it to distribute the milk
and moisten the cookies. Refrigerate for a few hours. Then add this to the
batter before baking.
Bake the cheesecake in a tub for about an hour at 300 degrees. Cool it down
afterwards for about 90 minutes before refrigerating.
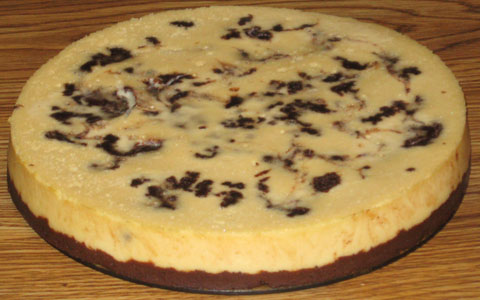
Baked Cookies+Creme Cheesecake—Prototype 6:
2-to-1 Blend of Yogurt Cheese and Cottage Cheese:
Prepare ahead of time 1 pound of yogurt cheese, derived from one 32-ounce
container of nonfat yogurt. If the resulting yogurt cheese falls below 16
ounces, add back enough of the whey (that was strained out from the yogurt) to
make up the difference. To this yogurt cheese combine 8 ounces (1 cup) of
whipped, lowfat cottage cheese.
Crust:
2 oz. semi-sweet chocolate, melted
2 teaspoons cocoa powder
4 oz. (1/2 cup) 2-to-1 blend of yogurt cheese and cottage cheese (see above)
3 tablespoons granulated sugar
1/2 teaspoon vanilla
1.1 oz. Bran Buds, ground up
Batter:
2 tablespoons melted or softened butter
5/8 cup granulated sugar
2 tablespoons all-purpose flour
1 1/3 tablespoons arrowroot
1/4 teaspoon salt
20 oz. (2 1/2 cups) 2-to-1 blend of yogurt cheese and cottage cheese (see above)
1 teaspoon vanilla
2 eggs
Cookie Mixture:
1/4 cup skim milk
1/2 tablespoon granulated sugar
16 chocolate sandwich cookies (such as Back To Nature Classic Creme Cookies), broken
preferably in halves (at least make a reasonable effort here)
Blend the milk and 1/2 tablespoon of sugar together. Place the cookies in a
resealable ("Ziploc") sandwich or 1-quart bag, then add the
milk-and-sugar mixture to it. Close the bag and shake it to distribute the wet
mixture and moisten the cookies. Let this sit for about 1 or 2 minutes. Then add
the contents to the batter before baking.
Bake the cheesecake in a tub at 300 degrees for 60 minutes (if using a 9
1/2" pan), cool (outside of oven and tub) for an hour, remove from pan and
refrigerate (adding a border of chocolate chips on top of the cheesecake, while
it is warm, is a suggested option).
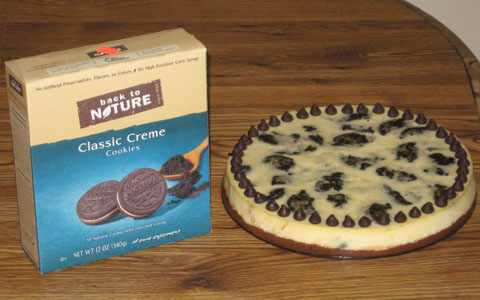
Baked Cookies+Creme Cheesecake—Prototype 7:
2-to-1 Blend of Yogurt Cheese and Cottage Cheese:
Prepare ahead of time 32 ounces of yogurt cheese, derived from two 32-ounce
containers (that's 64 ounces altogether) of nonfat yogurt. If the resulting
yogurt cheese falls below 32 ounces, add back enough of the whey (that was
strained out from the yogurt) to make up the difference. To this yogurt cheese
combine one 16-ounce container of whipped, lowfat cottage cheese.
Crust:
4 oz. semi-sweet chocolate, melted
1 1/3 tablespoons cocoa powder
8 oz. (1 cup) 2-to-1 blend of yogurt cheese and cottage cheese (see above)
3/8 cup granulated sugar
1 teaspoon vanilla
2.2 oz. finely ground Bran Buds
Batter:
4 tablespoons melted or softened butter
1 1/4 cups granulated sugar
1/4 cup all-purpose flour
3 tablespoons arrowroot
1/2 teaspoon salt
40 oz. (5 cups) 2-to-1 blend of yogurt cheese and cottage cheese (see above)
2 teaspoons vanilla
4 eggs
Cookies:
32 chocolate sandwich cookies (such as Back To Nature Classic Creme Cookies),
broken preferably in halves
Pour the batter on top of the crust. Do not pre-soak the cookies. Simply
add them, broken up, directly to the batter before baking.
Bake the cheesecake in a tub at 300 degrees for 105 minutes (if using a 9
1/2" pan). Then cool the cheesecake down while still in oven (with this
oven shut off) and in tub with door slightly ajar for an hour. Afterwards,
remove from oven and tub and continue to cool down at room temperature for
another 105 minutes (if desired, add a border of chocolate chips while
cheesecake is still warm), then remove from pan and refrigerate.
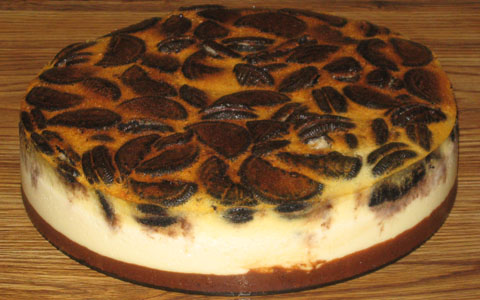
Baked Cookies+Creme Cheesecake—Prototype 8:
Yogurt Cheese:
Prepare ahead of time 3 pounds of yogurt cheese, derived from three 32-ounce
containers of nonfat yogurt. If the resulting yogurt cheese falls below 48
ounces, add back enough of the whey (that was strained out from the yogurt) to
make up the difference.
Crust:
4 oz. semi-sweet chocolate, melted
2 tablespoons cocoa powder
8 oz. (1 cup) yogurt cheese (see above)
3/8 cup granulated sugar
1 teaspoon vanilla
2 oz. finely ground Bran Buds
Place all this into a 9 or 9 1/2 inch springform pan.
Batter:
4 tablespoons melted or softened butter
1 1/4 cups granulated sugar
1/4 cup all-purpose flour
3 tablespoons arrowroot
1/2 teaspoon salt
40 oz. (5 cups) yogurt cheese (see above)
2 teaspoons vanilla
4 eggs
Cookies:
1 package, a 12-ounce size or—if package is a different size—12
ounces, of chocolate sandwich cookies, broken preferably in halves (Back To
Nature Classic Creme Cookies are recommended—not only for their great,
all-natural taste, but these were found in 12-ounce packages)
Expect about 7 cups of the resulting batter, but do not add this to the pan all
at once. Rather, this needs to be done in five installments. Wrap the pan in
foil just before adding the first installment. Minimize the foil's disturbance
in order to minimize its leakage risk.
For each of the first four installments, add about 1 1/2 cups of batter and one
fourth of the cookies to the pan. There is no need to be exact—evenly
distributing the cookies is the intent here. Because of this, use extra care in
the later installments when adding contents (i.e., do it gently) to the pan.
Ensure that the cookies are fully coated, and immersed as much as possible.
After adding the installment, bake the pan with its contents for 15 minutes. For
each of the first three installments, bake at 325 degrees. For the fourth
installment, reduce the temperature and bake at 300 degrees. For all four
installments here, bake with the pan in a tub filled with at least 1/4 to 1/2
inch of boiling water, but (to reduce spillage risks) do not fill the tub all
the way at this point, because the whole tub-and-pan assembly is going to need
to be removed from the oven (in order to comfortably add contents to the pan)
between installments.
After all this is done, there should be about a cup of batter but no cookies
remaining, with 60 minutes of baking time reached at this point (15 minutes for
each of the first four installments). Now comes the fifth installment—carefully
add the last of this batter on top of the pan's other contents. Try to fully
coat the entire surface, especially wherever cookie pieces may be showing. Next,
return the entire pan-and-tub assembly to the oven. At this point, fill up the
tub generously with boiling water. Resume baking at 300 degrees for another 55
minutes (based upon usage of a 9 1/2" pan).
Afterward, shut the oven off, and leave its door slightly ajar, with the
cheesecake still inside—and in the tub—for an hour. Next, remove the
cheesecake from the oven and tub, and—if desired—add a border of
chocolate chips around the edge of this cheesecake. Continue to cool it down at
room temperature for another two hours. After doing so, remove the cheesecake
from pan and refrigerate.
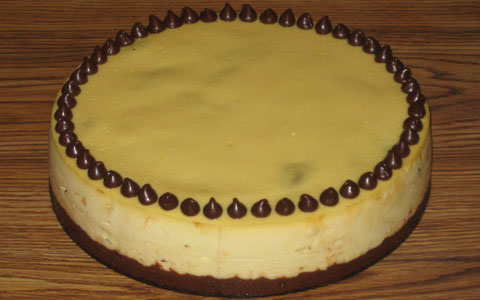
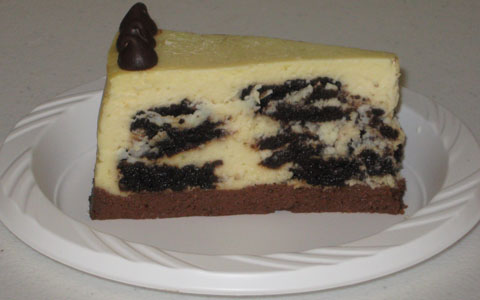
Baked Cookies+Creme Cheesecake—Prototype 9:
Yogurt Cheese:
Prepare ahead of time 3 pounds of yogurt cheese, derived from three 32-ounce
containers of nonfat yogurt. If the resulting yogurt cheese falls below 48
ounces, add back enough of the whey (that was strained out from the yogurt) to
make up the difference.
Crust:
4 oz. semi-sweet chocolate, melted
2 tablespoons cocoa powder
8 oz. (1 cup) yogurt cheese (see above)
3/8 cup granulated sugar
1 teaspoon vanilla
2 oz. finely ground All-Bran
Pour this crust mixture into bottom of greased springform pan (9 to 9 1/2
inches) and pre-bake without tub at 300 degrees for 10 minutes, then cool enough
to comfortably touch at least the pan's upper sidewall.
Batter:
4 tablespoons melted or softened butter
1 1/4 cups granulated sugar
1/4 cup all-purpose flour
3 tablespoons arrowroot
40 oz. (5 cups) yogurt cheese (see above)
2 teaspoons vanilla
4 eggs
Cookies:
Chocolate sandwich cookies (with vanilla creme centers), about 2 dozen (Back To
Nature Classic Creme Cookies recommended)
Expect about 7 cups of the resulting batter, but do not add this to the pan all
at once. Rather, this needs to be done in five installments. Wrap the pan in
foil just before adding the first installment. Minimize the foil's disturbance
in order to minimize its leakage risk.
For each of the first four installments, gently scoop about 1 1/2 cups of batter
into the pan. Add about 6 cookies (don't bother breaking them up—keeping
them whole is fine and, in fact, recommended), ensuring that they are fully
coated and—as much as possible—immersed. After adding an
installment, bake the pan with its contents for 15 minutes. For each of the
first three installments, bake at 325 degrees. For the fourth installment,
reduce the temperature and bake at 300 degrees. For all four installments here,
bake with the pan in a tub filled with at least 1/4 to 1/2 inch of boiling
water, but (to reduce spillage risks) do not fill the tub all the way at this
point, because the whole tub-and-pan assembly is going to need to be removed
from the oven (in order to comfortably add contents to the pan) between
installments.
After all this is done, there should be about a cup of batter left, with 60
minutes of baking time reached at this point (15 minutes for each of the first
four installments). Now comes the fifth installment—carefully add the last
of this batter (do not add any more cookies at this point) on top of the pan's
other contents. Try to fully coat the entire surface, especially wherever cookie
pieces may be showing. Next, return the entire pan-and-tub assembly to the oven.
At this point, fill up the tub generously with boiling water. Resume baking at
300 degrees for another 55 minutes (based upon usage of a 9 1/2" pan).
Afterward, shut the oven off, and leave its door slightly ajar, with the
cheesecake still inside—and in the tub—for an hour. Next, remove the
cheesecake from the oven and tub, and—if desired—add a border of
chocolate chips around the edge of this cheesecake. Continue to cool it down at
room temperature for another two hours. After doing so, remove the cheesecake
from pan and refrigerate.
Baked Cookies+Creme Cheesecake—Prototype 10:
3-Cheese Blend (1CT-1NC-4YG):
Prepare ahead of time 32 ounces of yogurt cheese, derived from two 32-ounce
containers (that's 64 ounces altogether) of nonfat yogurt. If the resulting
yogurt cheese falls below 32 ounces, add back enough of the whey (that was
strained out from the yogurt) to make up the difference. To this yogurt cheese
combine 8 ounces of whipped, lowfat cottage cheese and 8 ounces of softened
Neufchatel cheese ("light cream cheese").
Grease a 9 1/2" (or 9") springform pan, but do not wrap foil around it
yet (see below).
Crust:
4 oz. semi-sweet chocolate, melted
3/8 cup granulated sugar
2 tablespoons cocoa powder
8 oz. (1 cup) 3-cheese blend (see above)
1 teaspoon vanilla
2 oz. finely ground All-Bran
Place the resulting mixture in the greased pan and pre-bake without tub at 300
degrees for 5-10 minutes, depending on the mixture's thickness (closer to 10
minutes if thin enough to be fully distributed across the pan's bottom by gentle
shaking, closer to 5 minutes if thick enough to require spreading out this
mixture by pressing on it with a utensil and/or fingers), then cool enough to
comfortably touch at least the pan's upper sidewall.
Batter:
1 1/4 cups granulated sugar
40 oz. (5 cups) 3-cheese blend (see above)
2 teaspoons vanilla
1/4 cup + 1 tablespoon (5 tablespoons altogether) arrowroot
5 eggs
Cookies:
Chocolate sandwich cookies (with vanilla creme centers), about 2 dozen (Back To
Nature Classic Creme Cookies recommended)
Expect about 7 cups of the resulting batter, but do not add this to the pan all
at once. Rather, this needs to be done in five installments. Wrap the pan in
foil just before adding the first installment (to minimize the foil's
disturbance and therefore its leakage risk, do not put it on any earlier).
For each of the first four installments, gently scoop about 1 1/2 cups of batter
into the pan. Add about 6 cookies (don't bother breaking them up—keeping
them whole is fine and, in fact, recommended), ensuring that they are fully
coated and—as much as possible—immersed. After adding an
installment, bake the pan with its contents for 15 minutes. For each of the
first three installments, bake at 325 degrees. For the fourth installment,
reduce the temperature and bake at 300 degrees. For all four installments here,
bake with the pan in a tub filled with at least 1/4 to 1/2 inch of boiling
water, but (to reduce spillage risks) do not fill the tub all the way at this
point, because the whole tub-and-pan assembly is going to need to be removed
from the oven (in order to comfortably add contents to the pan) between
installments.
After all this is done, there should be about a cup of batter left, with 60
minutes of baking time reached at this point (15 minutes for each of the first
four installments). Now comes the fifth installment—carefully add the last
of this batter (do not add any more cookies at this point) on top of the pan's
other contents. Try to fully coat the entire surface, especially wherever cookie
pieces may be showing. Next, return the entire pan-and-tub assembly to the oven.
At this point, fill up the tub generously with boiling water. Resume baking at
300 degrees for another 80 minutes (based upon usage of a 9 1/2" pan).
Afterward, shut the oven off, and leave its door slightly ajar, with the
cheesecake still inside—and in the tub—for an hour. Next, remove the
cheesecake from the oven and tub, and—if desired—add a border of
chocolate chips around the edge of this cheesecake. Continue to cool it down at
room temperature for another two hours. After doing so, remove the cheesecake
from pan and refrigerate.
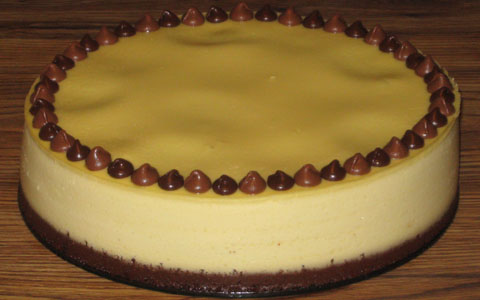
Baked Cookies+Creme Cheesecake—Prototype 11:
3-Cheese Blend (1CT-1NC-1YG):
Prepare ahead of time 16 ounces of yogurt cheese, derived from one 32-ounce
container of nonfat yogurt. If the resulting yogurt cheese falls below 16
ounces, add back enough of the whey (that was strained out from the yogurt) to
make up the difference. To this yogurt cheese combine 16 ounces of whipped,
lowfat cottage cheese and 16 ounces (two 8-ounce packages) of softened
Neufchatel cheese ("light cream cheese").
Grease a 9 1/2" (or 9") springform pan, but do not wrap foil around it
yet (see below).
Crust:
4 oz. semi-sweet chocolate, melted
3/8 cup granulated sugar
2 tablespoons cocoa powder
8 oz. (1 cup) 3-cheese blend (see above)
1 teaspoon vanilla
2 oz. finely ground All-Bran
Place the resulting mixture in the greased pan and pre-bake without tub at 300
degrees for 5-10 minutes, depending on the mixture's thickness (closer to 10
minutes if thin enough to be fully distributed across the pan's bottom by gentle
shaking, closer to 5 minutes if thick enough to require spreading out this
mixture by pressing on it with a utensil and/or fingers), then cool enough to
comfortably touch at least the pan's upper sidewall.
Batter:
1 1/4 cups granulated sugar
40 oz. (5 cups) 3-cheese blend (see above)
2 teaspoons vanilla
1 teaspoon xanthan gum
6 eggs
Cookies:
Chocolate sandwich cookies (with vanilla creme centers), about 2 dozen (Back To
Nature Classic Creme Cookies recommended)
Expect about 7 cups of the resulting batter, but do not add this to the pan all
at once. Rather, this needs to be done in three installments. Wrap the pan in
foil just before adding the first installment (to minimize the foil's
disturbance and therefore its leakage risk, do not put it on any earlier).
Or as an alternative to using foil, place this pan in an
Easy Bath Cheesecake Wrap—and don't bother
waiting for the pan to get comfortably cool to do so.
For each of the first two installments, gently (especially with the second
installment!) scoop about 3 cups of batter into the pan, and add about 12
cookies (don't bother breaking them up—keeping them whole is fine and,
in fact, recommended), ensuring that they are fully coated and—as much
as possible—immersed. After adding the first installment, bake the pan
with its contents for 20 minutes, at 325 degrees. However, after adding the
second installment, bake the pan with its contents, still at 325 degrees,
but only for 15 minutes. Then reduce the temperature to 300 degrees, and
continue baking for another 15 minutes (that's a 30-minute "baking
installment" here—the first 15 minutes at 325 degrees and the
next 15 at 300). For both installments here, bake with the pan in a tub
filled with at least 1/4 to 1/2 inch of boiling water, but (to reduce
spillage risks) do not fill the tub all the way at this point, because the
whole tub-and-pan assembly is going to need to be removed from the oven
(in order to comfortably add contents to the pan) between installments.
After all this is done, there should be about a cup of batter left, with 50
minutes of baking time reached at this point (20 minutes for the first
installment, and 30 for the second one). Now comes the third
installment—carefully add the last of this batter (do not add any more
cookies at this point) on top of the pan's other contents. Try to fully coat
the entire surface, especially wherever cookie pieces may be showing. Next,
return the entire pan-and-tub assembly to the oven. At this point, fill up
the tub generously with boiling water. Resume baking at 300 degrees for
another 60 minutes (based upon usage of a 9 1/2" pan).
Afterward, shut the oven off, and leave its door slightly ajar, with the
cheesecake still inside—and in the tub—for an hour. Next, remove the
cheesecake from the oven and tub, and—if desired—add a border of
chocolate chips around the edge of this cheesecake. Continue to cool it down at
room temperature for another two hours. After doing so, remove the cheesecake
from pan and refrigerate.
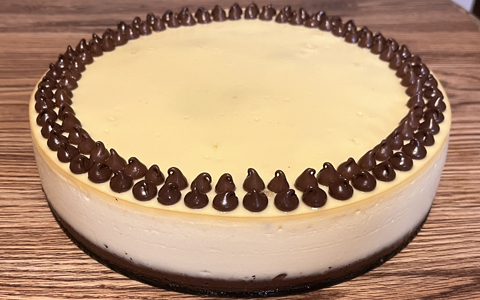
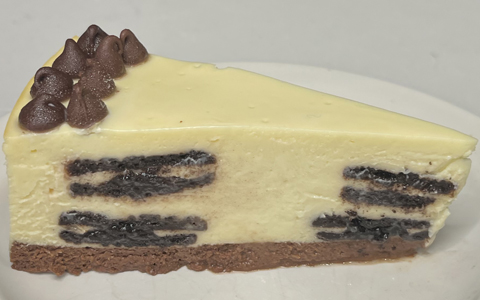
|
-------------------------------------------------------
|
Baked Chocolate Chip Cookie Dough (MBD) Cheesecake—Prototype 1:
(Still plenty of dough left!)
Crust:
4 oz. semi-sweet chocolate, melted
1 1/3 tablespoons cocoa powder
1 cup (8 oz.) lowfat cottage cheese, whipped, no salt added
3/8 cup granulated sugar
1 teaspoon vanilla
2.2 oz. Bran Buds, ground up
Batter:
2 tablespoons melted or softened butter
1/2 cup granulated sugar
1/2 cup skim milk
1 tablespoon lemon juice
1/3 cup flour
1/4 teaspoon salt
2 1/2 cups (20 oz.) lowfat cottage cheese, whipped, no salt added
1 teaspoon vanilla
2 eggs
Take 10 oz. of uncooked chocolate chip cookie dough, and cut it into small
pieces (1/2 inch is perhaps a good maximum size, but don't cut them too
small either—otherwise, it may be difficult to really enjoy the cookie
chunks). Fully immerse these into the batter as—and after—it is gradually
poured into the pan.
Next, wrap some foil onto the pan, and bake all this in a tub at 300 degrees
for about 90 minutes.
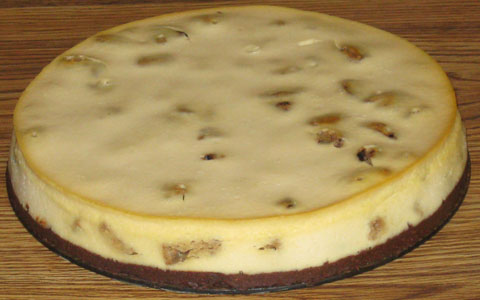
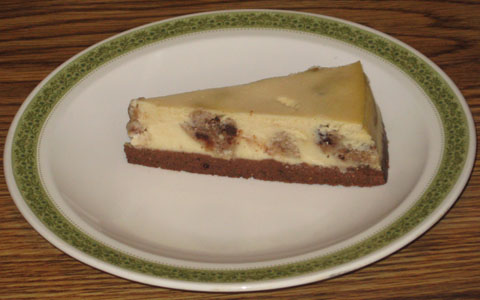
Baked Chocolate Chip Cookie Dough (DMB) Cheesecake—Prototype 2:
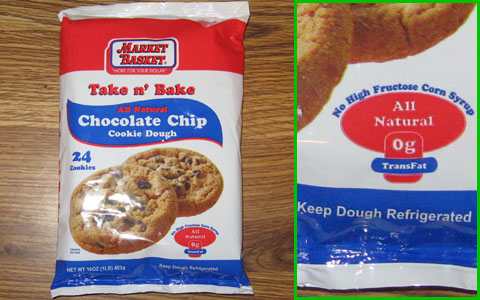
2-to-1 Blend of Yogurt Cheese and Cottage Cheese:
Prepare ahead of time 32 ounces of yogurt cheese, derived from two 32-ounce
containers (that's 64 ounces altogether) of nonfat yogurt. If the resulting
yogurt cheese falls below 32 ounces, add back enough of the whey (that was
strained out from the yogurt) to make up the difference. To this yogurt cheese
combine one 16-ounce container of whipped, lowfat cottage cheese.
Crust:
4 oz. semi-sweet chocolate, melted
1 1/3 tablespoons cocoa powder
8 oz. (1 cup) 2-to-1 blend of yogurt cheese and cottage cheese (see above)
3/8 cup granulated sugar
1 teaspoon vanilla
2.2 oz. finely ground Bran Buds
Place all this into a 9 or 9 1/2 inch springform pan.
Batter:
4 tablespoons melted or softened butter
1 1/4 cups granulated sugar
1/4 cup all-purpose flour
3 tablespoons arrowroot
1/2 teaspoon salt
40 oz. (5 cups) 2-to-1 blend of yogurt cheese and cottage cheese (see above)
2 teaspoons vanilla
4 eggs
Expect the resulting amount of batter to be about 7 cups.
Cookie Dough:
1 16-ounce package of chocolate chip cookie dough.
Cut this uncooked dough into reasonably little (but not too small!) pieces
(perhaps about half-inch-sized).
Pour, on top of the crust, about 1 1/2 cups of the batter. There is no need to
be exact here, but the intent is to ultimately get the dough pieces more evenly
distributed throughout the height of the cheesecake (rather than their floating
all the way to the top or sinking all the way to the bottom).
Next, fully immerse a quarter of the cookie dough into this batter. Then bake
this, in a tub (in order to reduce spillage risks with water,
don't use too much of it at this point, because the whole
tub-and-pan assembly is going to need to be taken out of the oven a few times),
at 325 degrees for 15 minutes.
Afterward, remove the tub-and-pan assembly from the oven and promptly add
(carefully!) about another 1 1/2 cups of batter. Fully immerse the next quarter
of cookie dough as well. Return all this to the oven for another 15 minutes.
Repeat this procedure for the third additions (same sizes as the first two) of
the batter and cookie dough (make sure that there is still some hot water in the
tub—otherwise, add some).
Do likewise with the fourth addition. Upon doing so, there should be about 1 cup
of batter left (and roughly 6 cups already poured into the pan), but all
the cookie dough should be in the pan at this point. However, when the
cheesecake is returned to the oven for this fourth installment of 15 minutes,
lower the temperature to 300 degrees.
After the fourth installment (and 60 minutes of baking time at this point),
remove the assembly from the oven and top off the cheesecake with the remaining
batter (about 1 cup). Try to fully coat the entire surface, especially wherever
cookie pieces may be showing.
Then return all this to the oven, still at 300 degrees. At this point, fill up
the tub generously (with boiling water). Resume baking for another 60 minutes
(based upon usage of a 9 1/2" pan).
Afterward, shut the oven off and let the cheesecake cool down while it is still
in there and in the tub, with the oven's door slightly ajar, for an hour.
Afterwards, remove the cheesecake from the oven and tub, and add a border of
chocolate chips around the edge of this cheesecake. Continue to cool it down at
room temperature for another couple of hours. After cooling, remove the
cheesecake from pan and refrigerate.
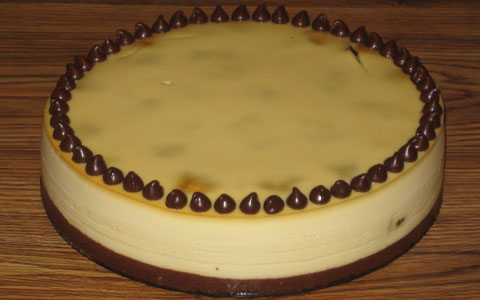
Baked Chocolate Chip Cookie Dough Cheesecake—Prototype 3:
Yogurt Cheese:
Prepare ahead of time 3 pounds of yogurt cheese, derived from three 32-ounce
containers of nonfat yogurt. If the resulting yogurt cheese falls below 48
ounces, add back enough of the whey (that was strained out from the yogurt) to
make up the difference.
Crust:
4 oz. semi-sweet chocolate, melted
2 tablespoons cocoa powder
8 oz. (1 cup) yogurt cheese (see above)
3/8 cup granulated sugar
1 teaspoon vanilla
2 oz. finely ground All-Bran
Place this crust mixture into the bottom of a greased springform pan (9 to 9 1/2
inches) and pre-bake without tub at 300 degrees for 10 minutes, then cool enough
to comfortably touch at least the pan's upper sidewall.
Batter:
4 tablespoons melted or softened butter
1 1/4 cups granulated sugar
1/4 cup all-purpose flour
3 tablespoons arrowroot
40 oz. (5 cups) yogurt cheese (see above)
2 teaspoons vanilla
4 eggs
Cookie Dough:
1 16-ounce package of chocolate chip cookie dough, separated into 24 pieces
(many packages are already like this, i.e., portioned to make 24 cookies).
Expect about 7 cups of the resulting batter (of course, that's before
adding any cookie dough), but do not add this to the pan all
at once. Rather, this needs to be done in five installments. Wrap the pan in
foil just before adding the first installment (no earlier than that—minimize
the foil's disturbance in order to minimize its leakage risk).
For each of the first four installments, gently scoop about 1 1/2 cups of batter
into the pan. Add about 6 cookie dough pieces (don't bother breaking them up—keeping
them whole is fine and, in fact, recommended—but if the pieces have a
tall, chunk-like form, flatten them into cookie-like shapes), ensuring that they
are fully coated and—as much as possible—immersed. After adding an
installment, bake the pan with its contents for 15 minutes. For each of the
first three installments, bake at 325 degrees. For the fourth installment,
reduce the temperature and bake at 300 degrees. For all four installments here,
bake with the pan in a tub filled with at least 1/4 to 1/2 inch of boiling
water, but (to reduce spillage risks) do not fill the tub all the way at this
point, because the whole tub-and-pan assembly is going to need to be removed
from the oven (in order to comfortably add contents to the pan) between
installments.
After all this is done, there should be about a cup of batter left, with 60
minutes of baking time reached at this point (15 minutes for each of the first
four installments). Now comes the fifth installment—carefully add the last
of this batter (do not add any more cookie dough at this point) on top of the
pan's other contents. Try to fully coat the entire surface, especially wherever
cookie dough pieces may be showing. Next, return the entire pan-and-tub assembly
to the oven. At this point, fill up the tub generously with boiling water.
Resume baking at 300 degrees for another 55 minutes (based upon usage of a 9
1/2" pan).
Afterward, shut the oven off, and leave its door slightly ajar, with the
cheesecake still inside—and in the tub—for an hour. Next, remove the
cheesecake from the oven and tub, and—if desired—add a border of
chocolate chips around the edge of this cheesecake. Continue to cool it down at
room temperature for another two hours. After doing so, remove the cheesecake
from pan and refrigerate.

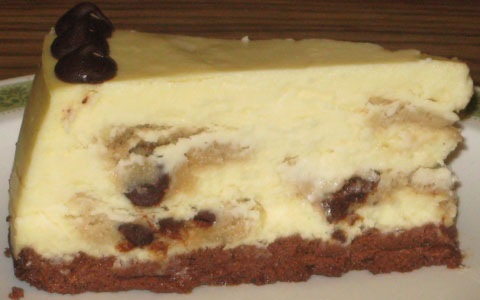
Baked Chocolate Chip Cookie Dough Cheesecake—Prototype 4:
3-Cheese Blend (1CT-1NC-4YG):
Prepare ahead of time 32 ounces of yogurt cheese, derived from two 32-ounce
containers (that's 64 ounces altogether) of nonfat yogurt. If the resulting
yogurt cheese falls below 32 ounces, add back enough of the whey (that was
strained out from the yogurt) to make up the difference. To this yogurt cheese
combine 8 ounces of whipped, lowfat cottage cheese and 8 ounces of softened
Neufchatel cheese ("light cream cheese").
Grease a 9 1/2" (or 9") springform pan, but do not wrap foil around it
yet (see below).
Crust:
4 oz. milk chocolate, melted
3/8 cup granulated sugar
2 tablespoons cocoa powder
8 oz. (1 cup) 3-cheese blend (see above)
1 teaspoon vanilla
2 oz. finely ground All-Bran
Place the resulting mixture in the greased pan and pre-bake without tub at 300
degrees for 5-10 minutes, depending on the mixture's thickness (closer to 10
minutes if thin enough to be fully distributed across the pan's bottom by gentle
shaking, closer to 5 minutes if thick enough to require spreading out this
mixture by pressing on it with a utensil and/or fingers), then cool enough to
comfortably touch at least the pan's upper sidewall.
Batter:
1 1/4 cups granulated sugar
40 oz. (5 cups) 3-cheese blend (see above)
2 teaspoons vanilla
1/4 cup + 1 tablespoon (5 tablespoons altogether) arrowroot
5 eggs
Cookie Dough:
1 16-ounce package of chocolate chip cookie dough, separated into 24 pieces
(many packages are already like this, i.e., portioned to make 24 cookies).
Expect about 7 cups of the resulting batter (not including any cookie dough, of
course), but do not add this to the pan all at once. Rather, this needs to be
done in five installments. Wrap the pan in foil just before adding the first
installment (to minimize the foil's disturbance and therefore its leakage risk,
do not put it on any earlier).
For each of the first four installments, gently scoop about 1 1/2 cups of batter
into the pan. Add about 6 dough pieces (don't bother breaking them up—keeping
them whole is fine and, in fact, recommended—but if the pieces have a
tall, chunk-like form, flatten them into cookie-like shapes), ensuring that they
are fully coated and—as much as possible—immersed. After adding an
installment, bake the pan with its contents for 15 minutes. For each of the
first three installments, bake at 325 degrees. For the fourth installment,
reduce the temperature and bake at 300 degrees. For all four installments here,
bake with the pan in a tub filled with at least 1/4 to 1/2 inch of boiling
water, but (to reduce spillage risks) do not fill the tub all the way at this
point, because the whole tub-and-pan assembly is going to need to be removed
from the oven (in order to comfortably add contents to the pan) between
installments.
After all this is done, there should be about a cup of batter left, with 60
minutes of baking time reached at this point (15 minutes for each of the first
four installments). Now comes the fifth installment—carefully add the last
of this batter (do not add any more cookie dough at this point) on top of the
pan's other contents. Try to fully coat the entire surface, especially wherever
cookie dough pieces may be showing. Next, return the entire pan-and-tub assembly
to the oven. At this point, fill up the tub generously with boiling water.
Resume baking at 300 degrees for another 80 minutes (based upon usage of a 9
1/2" pan).
Afterward, shut the oven off, and leave its door slightly ajar, with the
cheesecake still inside—and in the tub—for an hour. Next, remove the
cheesecake from the oven and tub, and—if desired—add a border of
chocolate chips around the edge of this cheesecake. Continue to cool it down at
room temperature for another two hours. After doing so, remove the cheesecake
from pan and refrigerate.
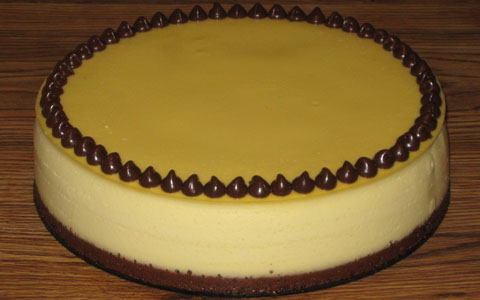
Baked Chocolate Chip Cookie Dough Cheesecake—Prototype 5:
3-Cheese Blend (1CT-1NC-1YG):
Prepare ahead of time 16 ounces of yogurt cheese, derived from one 32-ounce
container of nonfat yogurt. If the resulting yogurt cheese falls below 16
ounces, add back enough of the whey (that was strained out from the yogurt) to
make up the difference. To this yogurt cheese combine 16 ounces of whipped,
lowfat cottage cheese and 16 ounces (two 8-ounce packages) of softened
Neufchatel cheese ("light cream cheese").
Grease a 9 1/2" (or 9") springform pan, but do not wrap foil around it
yet (see below).
Crust:
4 oz. semi-sweet chocolate, melted *
3/8 cup granulated sugar
2 tablespoons cocoa powder
8 oz. (1 cup) 3-cheese blend (see above)
1 teaspoon vanilla
2 oz. finely ground All-Bran
* (white chocolate chips were unintentionally substituted for the brown,
semi-sweet ones here—see comments below for more details)
Place the resulting mixture in the greased pan and pre-bake without tub at 300
degrees for 5-10 minutes, depending on the mixture's thickness (closer to 10
minutes if thin enough to be fully distributed across the pan's bottom by gentle
shaking, closer to 5 minutes if thick enough to require spreading out this
mixture by pressing on it with a utensil and/or fingers), then cool enough to
comfortably touch at least the pan's upper sidewall.
Batter:
1 1/4 cups granulated sugar
40 oz. (5 cups) 3-cheese blend (see above)
2 teaspoons vanilla
1 teaspoon xanthan gum
6 eggs
Cookie Dough:
1 16-ounce package of chocolate chip cookie dough, separated into 24 pieces
(many packages are already like this, i.e., portioned to make 24 cookies).
Expect about 7 cups of the resulting batter, but do not add this to the pan all
at once. Rather, this needs to be done in three installments. Wrap the pan in
foil just before adding the first installment (to minimize the foil's
disturbance and therefore its leakage risk, do not put it on any earlier).
Or as an alternative to using foil, place this pan in an
Easy Bath Cheesecake Wrap—and don't bother
waiting for the pan to get comfortably cool to do so.
For each of the first two installments, gently (especially with the second
installment!) scoop about 3 cups of batter into the pan, and add about 12
dough pieces (don't bother breaking them up—keeping them whole is fine
and, in fact, recommended—but if the pieces have a tall, chunk-like
form, flatten them into cookie-like shapes), ensuring that they are fully
coated and—as much as possible—immersed. After adding the first
installment, bake the pan with its contents for 20 minutes, at 325 degrees.
However, after adding the second installment, bake the pan with its
contents, still at 325 degrees, but only for 15 minutes. Then reduce the
temperature to 300 degrees, and continue baking for another 15 minutes
(that's a 30-minute "baking installment" here—the first 15
minutes at 325 degrees and the next 15 at 300). For both installments here,
bake with the pan in a tub filled with at least 1/4 to 1/2 inch of boiling
water, but (to reduce spillage risks) do not fill the tub all the way at
this point, because the whole tub-and-pan assembly is going to need to be
removed from the oven (in order to comfortably add contents to the pan)
between installments.
After all this is done, there should be about a cup of batter left, with 50
minutes of baking time reached at this point (20 minutes for the first
installment, and 30 for the second one). Now comes the third
installment—carefully add the last of this batter (do not add any more
cookie dough at this point) on top of the pan's other contents. Try to fully
coat the entire surface, especially wherever cookie dough pieces may be showing.
Next, return the entire pan-and-tub assembly to the oven. At this point, fill up
the tub generously with boiling water. Resume baking at 300 degrees for
another 60 minutes (based upon usage of a 9 1/2" pan).
Afterward, shut the oven off, and leave its door slightly ajar, with the
cheesecake still inside—and in the tub—for an hour. Next, remove the
cheesecake from the oven and tub, and—if desired—add a border of
chocolate chips around the edge of this cheesecake. Continue to cool it down at
room temperature for another two hours. After doing so, remove the cheesecake
from pan and refrigerate.
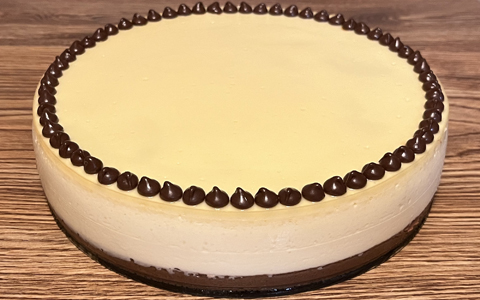
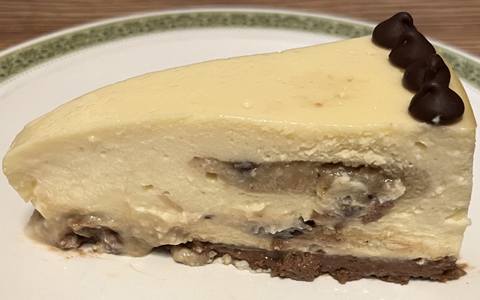
Baked Chocolate Chip Cookie Dough Cheesecake—Prototype 6:
3-Cheese Blend (1CT-1NC-1YG):
Prepare ahead of time 16 ounces of yogurt cheese, derived from one 32-ounce
container of nonfat yogurt. If the resulting yogurt cheese falls below 16
ounces, add back enough of the whey (that was strained out from the yogurt) to
make up the difference. To this yogurt cheese combine 16 ounces of whipped,
lowfat cottage cheese and 16 ounces (two 8-ounce packages) of softened
Neufchatel cheese ("light cream cheese").
Grease a 9 1/2" (or 9") springform pan, but do not wrap foil around it
yet (see below).
Crust:
4 oz. semi-sweet chocolate, melted
3/8 cup granulated sugar
2 tablespoons cocoa powder
8 oz. (1 cup) 3-cheese blend (see above)
1 teaspoon vanilla
2 oz. finely ground All-Bran
Place the resulting mixture in the greased pan and pre-bake without tub at 300
degrees for 30 minutes, then remove from oven and cool down at room temperature
(for at least 30 minutes).
Batter:
1 1/4 cups granulated sugar
40 oz. (5 cups) 3-cheese blend (see above)
2 teaspoons vanilla
1 teaspoon xanthan gum
6 eggs
Cookie Dough:
For a basic approach, use a 16-ounce package of chocolate chip cookie dough,
separated into 24 pieces (many packages are already like this, i.e., portioned
to make 24 cookies). For serious chocolate chip cookie dough fans, a larger
package can be included, but probably no more than 24 ounces should be used
(break the dough into reasonable sizes). Bake the dough pieces per
package instructions (then let them cool at least slightly) before
placing the resulting cookies into the batter (as opposed to adding these
pieces while still raw—pre-baking them helps to provide for better
cheesecake slice stability).
Expect about 7 cups of the resulting batter, but do not add this to the pan all
at once. Rather, this needs to be done in three installments. Wrap the pan in
foil just before adding the first installment (to minimize the foil's
disturbance and therefore its leakage risk, do not put it on any earlier).
Or as an alternative to using foil, place this pan in an
Easy Bath Cheesecake Wrap—and don't bother
waiting for the pan to get comfortably cool to do so.
For each of the first two installments, gently (especially with the second
installment!) scoop about 3 cups of batter into the pan, and add about 1/2
of the cookies (don't bother breaking them up—keeping them whole is
fine and, in fact, recommended), ensuring that they are fully
coated and—as much as possible—immersed. After adding the first
installment, bake the pan with its contents for 20 minutes, at 325 degrees.
However, after adding the second installment, bake the pan with its
contents, still at 325 degrees, but only for 15 minutes. Then reduce the
temperature to 300 degrees, and continue baking for another 15 minutes
(that's a 30-minute "baking installment" here—the first 15
minutes at 325 degrees and the next 15 at 300). For both installments here,
bake with the pan in a tub filled with at least 1/4 to 1/2 inch of boiling
water, but (to reduce spillage risks) do not fill the tub all the way at
this point, because the whole tub-and-pan assembly is going to need to be
removed from the oven (in order to comfortably add contents to the pan)
between installments.
After all this is done, there should be about a cup of batter left, with 50
minutes of baking time reached at this point (20 minutes for the first
installment, and 30 for the second one). Now comes the third
installment—carefully add the last of this batter (do not add any more
cookies at this point) on top of the pan's other contents. Try to fully
coat the entire surface, especially wherever cookie pieces may be showing.
Next, return the entire pan-and-tub assembly to the oven. At this point, fill up
the tub generously with boiling water. Resume baking at 300 degrees for
another 45 minutes (based upon usage of a 9 1/2" pan).
Afterward, shut the oven off, and leave its door slightly ajar, with the
cheesecake still inside—and in the tub—for an hour. Next, remove the
cheesecake from the oven and tub, and—if desired—add a border of
chocolate chips around the edge of this cheesecake. Continue to cool it down at
room temperature for another two hours. After doing so, remove the cheesecake
from pan and refrigerate.
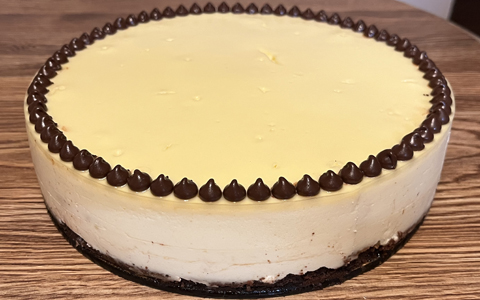
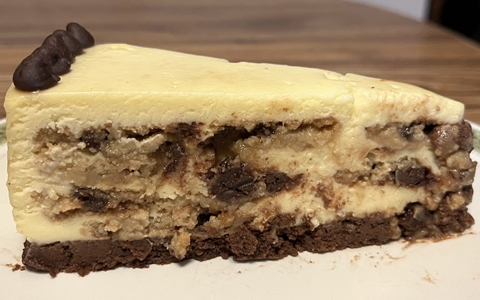
|
-------------------------------------------------------
|
Baked Chocolate Eggnog Cheesecake—Prototype 1:
2-to-1 Blend of Yogurt Cheese and Cottage Cheese:
Prepare ahead of time 32 ounces of yogurt cheese, derived from two 32-ounce
containers (that's 64 ounces altogether) of nonfat yogurt. If the resulting
yogurt cheese falls below 32 ounces, add back enough of the whey (that was
strained out from the yogurt) to make up the difference. To this yogurt cheese
combine one 16-ounce container of whipped, lowfat cottage cheese.
Chocolate Crust:
4 oz. semi-sweet chocolate, melted
1 1/3 tablespoons cocoa powder
8 oz. (1 cup) 2-to-1 blend of yogurt cheese and cottage cheese (see above)
3/8 cup sugar
1 teaspoon vanilla
2.2 oz. finely ground Bran Buds
Place resulting mixture in 9 1/2" (or 9") pan. Chill at least until
firm, perhaps about 30 minutes minimum.
Eggnog Batter:
2 tablespoons butter, softened or melted
2/3 cup sugar
2 1/2 cups (20 oz.) 2-to-1 blend of yogurt cheese and cottage cheese (see above)
2 tablespoons all-purpose flour
3/8 cup arrowroot
1/4 teaspoon salt
1/2 teaspoon nutmeg
1 teaspoon vanilla extract
1 teaspoon rum extract
2 cups light eggnog
2 eggs
Pour this batter on top of the crust, no higher than halfway from the crust's
surface to the top of the pan (if there is any excess batter, use it to make
"cupcakes", baking these at 300 degrees for 50 minutes using a bath
arrangement). Wrap pan in foil and place in tub—filled only about halfway, or
about half an inch, with boiling water. Bake all this at 325 degrees for about 60
minutes. Then take the whole pan-and-tub setup out of the oven, and carefully get it
to a comfortable place. Promptly add the chocolate batter as indicated below.
Chocolate Batter:
2 tablespoons melted or softened butter
3 tablespoons cocoa powder
7/8 cup sugar
20 oz. (2 1/2 cups) 2-to-1 blend of yogurt cheese and cottage cheese (see above)
2 tablespoons all-purpose flour
1 1/3 tablespoons arrowroot
1/4 teaspoon salt
1 teaspoon vanilla
2 eggs
Carefully scoop this on top of the eggnog batter and return the pan-and-tub
setup to oven, this time at only 300 degrees, and add more hot water to the tub (at
this point, go ahead and fill it all the way). Bake for about 120 more minutes.
Turn oven off, leaving cheesecake in it (still in tub as well), with the door
slightly ajar, for another 60 minutes.
Remove cheesecake from oven and tub and let cool in its pan at room temperature
for another 120 minutes.
Afterwards, remove cheesecake from pan and refrigerate.
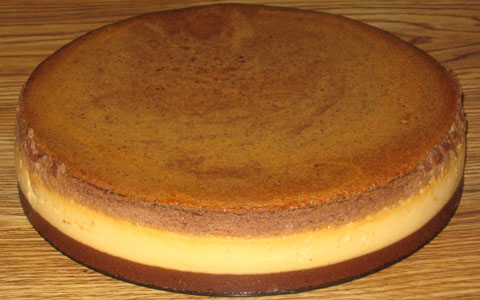
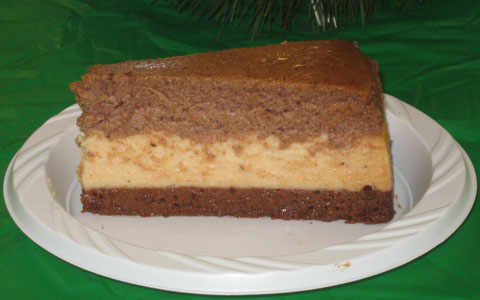
|
-------------------------------------------------------
|
Pecan Pie Filling—Prototype 1:
2 eggs
1 tablespoon sugar
2 tablespoons flour (white whole wheat)
(Tip: blend these three above ingredients first, before adding the other ones
below.)
2 cups corn syrup
1 teaspoon vanilla
1/4 teaspoon salt
4 oz. chopped pecans (about 1 cup, after chopping)
Combine all these ingredients in a saucepan before heating. Stir constantly over
a roughly medium heat, bringing the mixture to a mild boil. Stir and cook
carefully for about another 5 minutes, then remove from heat and let cool to
about room temperature.
Pecan Pie Filling—Prototype 2:
Repeat
Prototype 1,
but replace the whole wheat flour with arrowroot (still
use 2 tablespoons).
|
-------------------------------------------------------
|
Baked Vanilla Cheesecake—Prototype 1:
2-to-1 Blend of Yogurt Cheese and Cottage Cheese:
Prepare ahead of time 16 ounces of yogurt cheese, derived from one 32-ounce
container of nonfat yogurt. If the resulting yogurt cheese falls below 16
ounces, add back enough of the whey (that was strained out from the yogurt) to
make up the difference. To this yogurt cheese combine 8 ounces (1 cup) of
whipped, lowfat cottage cheese.
Crust:
1 oz. melted, white chocolate
4 oz. (1/2 cup) 2-to-1 blend of yogurt cheese and cottage cheese (see above)
2 tablespoons granulated sugar
1 1/2 tablespoons brown sugar
1 teaspoon cinnamon
1/2 teaspoon vanilla
1 oz. Bran Buds, ground up
Pour this crust mixture into pan (9 to 9 1/2 inches) and pre-bake without tub at
300 degrees for 5 minutes, then cool enough to comfortably touch at least the
pan's upper sidewall.
Batter:
2 tablespoons melted or softened butter
5/8 cup granulated sugar
2 tablespoons all-purpose flour
1 1/2 tablespoons arrowroot
20 oz. (2 1/2 cups) 2-to-1 blend of yogurt cheese and cottage cheese (see above)
2 teaspoons vanilla
2 eggs
Pour on top of crust. Then bake in tub at 300 degrees for 60 minutes (if using a
9 1/2" pan), cool (outside of oven and tub) for an hour, remove from pan
and refrigerate.
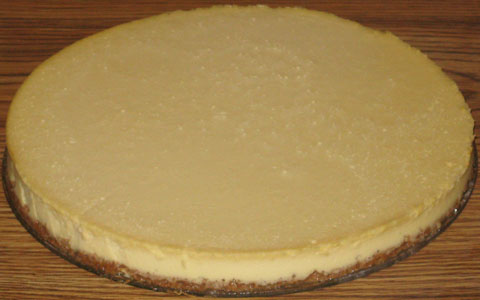
Baked Vanilla Cheesecake—Prototype 2:
Repeat
Prototype 1,
but make these changes:
For the crust, increase the brown sugar by 1/2 tablespoon, to 2 tablespoons
(note the usage here of both brown sugar and regular, i.e., granulated, sugar at
2 tablespoons apiece).
For the batter, increase the granulated sugar by 1/4 cup, to 7/8 cup,
and increase the vanilla by 1 teaspoon, to a full tablespoon.

Baked Vanilla Cheesecake—Prototype 3:
2-to-1 Blend of Yogurt Cheese and Cottage Cheese:
Prepare ahead of time 32 ounces of yogurt cheese, derived from two 32-ounce
containers of nonfat yogurt. If the resulting yogurt cheese falls below 32
ounces, add back enough of the whey (that was strained out from the yogurt) to
make up the difference. To this yogurt cheese combine 16 ounces (2 cups) of
whipped, lowfat cottage cheese.
Crust:
2 oz. melted, white chocolate
8 oz. (1 cup) 2-to-1 blend of yogurt cheese and cottage cheese (see above)
1/4 cup granulated sugar
1/4 cup brown sugar
2 teaspoons cinnamon
1 teaspoon vanilla
2 oz. All-Bran, ground up
Place the resulting mixture in the greased pan and pre-bake without tub at 300
degrees for 5-10 minutes, depending on the mixture's thickness (closer to 10
minutes if thin enough to be fully distributed across the pan's bottom by gentle
shaking, closer to 5 minutes if thick enough to require spreading out this
mixture by pressing on it with a utensil and/or fingers), then cool enough to
comfortably touch at least the pan's upper sidewall.
Batter:
4 tablespoons melted or softened butter
1 3/4 cup granulated sugar
1/4 cup all-purpose flour
3 tablespoons arrowroot
40 oz. (5 cups) 2-to-1 blend of yogurt cheese and cottage cheese (see above)
2 tablespoons vanilla
4 eggs
Wrap the pan in foil just before adding the batter (to minimize the foil's
disturbance and therefore its leakage risk, do not put it on any earlier).
Next, pour the batter over the crust and bake this cheesecake in a hot water tub
at 300 degrees for 100 minutes (if using a 9 1/2" pan). Then cool the
cheesecake down while still in oven (with this oven shut off) and in tub with
door slightly ajar for an hour. Afterwards, remove from oven and tub and
continue to cool down at room temperature for another 100 minutes, then remove
from pan and refrigerate.
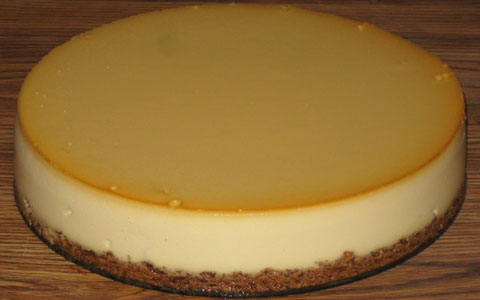
Baked Vanilla Cheesecake—Prototype 4:
3-Cheese Blend (3CT-1NC-2YG):
Prepare ahead of time 16 ounces of yogurt cheese, derived from one 32-ounce
container of nonfat yogurt. If the resulting yogurt cheese falls below 16
ounces, add back enough of the whey (that was strained out from the yogurt) to
make up the difference. To this yogurt cheese combine 24 ounces of whipped,
lowfat cottage cheese and 8 ounces of softened Neufchatel cheese ("light
cream cheese").
Grease a 9 1/2" (or 9") pan, but do not wrap foil around it until just
before the batter is added (spreading the crust in an already wrapped pan can
result in greater disturbance to the foil, thus increasing leakage risks).
Crust:
2 oz. melted, white chocolate
8 oz. (1 cup) 3-cheese blend (see above)
1/4 cup granulated sugar
1/4 cup brown sugar
1 teaspoon cinnamon
1 1/2 teaspoons vanilla
2 oz. All-Bran, ground up
Place the resulting mixture in the greased pan and pre-bake without tub at 300
degrees for 5-10 minutes, depending on the mixture's thickness (closer to 10
minutes if thin enough to be fully distributed across the pan's bottom by gentle
shaking, closer to 5 minutes if thick enough to require spreading out this
mixture by pressing on it with a utensil and/or fingers), then cool enough to
comfortably touch at least the pan's upper sidewall.
Batter:
1 3/4 cups granulated sugar
40 oz. (5 cups) 3-cheese blend (see above)
2 tablespoons vanilla
1 1/2 teaspoons xanthan gum
6 eggs
Wrap the pan in foil at this point. Carefully pour the batter over the crust and
bake this cheesecake in a hot water tub at 300 degrees for 90 minutes (if using
a 9 1/2" pan). Then shut off oven and cool cheesecake down while still in
it (and in tub), with door slightly ajar, for an hour. Afterwards, remove from
oven and tub and continue to cool down at room temperature for another two hours,
then remove from pan and refrigerate.
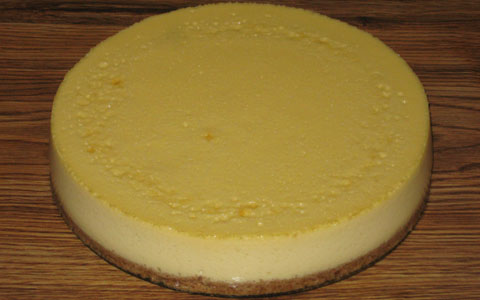
|
-------------------------------------------------------
|
Change of All-Bran product from Bran Buds to regular variety
For
probably about 7 years or perhaps more, I have extensively used Bran
Buds, a high-fiber cereal from Kellogg's All-Bran line, which also
contained the regular, or Original, All-Bran. It was from the Bran
Buds name that I came up with "Bran Buddies". My 21st century
recipe scrapbook was launched from delicious and nutritious food creations
that I somehow made up, using the Bran Buds product.
My food experiments have come a long way since then. In addition to my
quest to making tasty treats that were not too high in fat as well as
containing at least a decent amount of fiber, I have increasingly desired
for all the ingredients utilized to be natural.
Sometime in my earlier Bran Buddies days, the list of ingredients for the
Bran Buds product included high fructose corn syrup. Kellogg's more
recently (to my delight!) replaced it with sugar. But the list still
contained one ingredient that I regarded as an undesirable impediment to
my natural quest: BHT, or butylated hydroxytoluene, an additive
used extensively by food processors to extend freshness.
However, the regular All-Bran contained a very simple list: wheat bran,
sugar, malt flavor and salt, none of which I determined to be artificial.
While this product was also fortified with various vitamins and minerals
(probably at least some of them being "synthetic"), their
presence hardly bothered me.
I felt that the time had come for me to switch to the Original variety.
Bran Buds cereal was a reasonably good start for me. I had to give it credit
for launching this scrapbook. But as the years went by, I even phased out the
"Bran Buddies" name, replacing it with "HiFi Buddies"
at some point. And now, in June of 2013, it was time—again—to
move on.
Some trade-offs need to be noted here. The regular All-Bran (at least as
of this writing) is not as high in fiber as its Bran Buds counterpart. But
the regular version still has plenty of this nutrient. I have also felt
that this version had a somewhat better taste compared to Bran Buds. A
bonus was the Original containing much less sodium.
It is with
Prototype 5 of my orange cheesecake
(the crust, to be
more specific) that my usage of the regular All-Bran has gotten its debut
in this recipe scrapbook. Aside from disputes over added vitamins and
minerals, I now feel that, within reasonable respects, I can think of (at
least) many of my future cheesecakes as being regarded as "all
natural". |
|
-------------------------------------------------------
|
Baked Orange Vanilla (Blended) Cheesecake
(tentatively a.k.a. Baked Orange Xtremesicle Cheesecake)—Prototype 1:
Yogurt Cheese:
Prepare ahead of time 3 pounds of yogurt cheese, derived from three 32-ounce
containers of nonfat yogurt. If the resulting yogurt cheese falls below 48
ounces, add back enough of the whey (that was strained out from the yogurt) to
make up the difference.
Crust:
2 oz. melted, white chocolate
8 oz. (1 cup) yogurt cheese (see above)
1/4 cup granulated sugar
1/4 cup brown sugar
2 teaspoons cinnamon
1 teaspoon vanilla
2 oz. All-Bran, ground up
Gently pour this crust mixture into bottom of pan (9 to 9 1/2 inches) and
pre-bake without tub at 300 degrees for 10 minutes, then cool enough to
comfortably touch at least the pan's upper sidewall.
Batter:
4 tablespoons melted or softened butter
1 1/2 cups + 2 teaspoons granulated sugar
1/4 cup orange juice
2 teaspoons grated orange peel
1/4 cup all-purpose flour
3 tablespoons arrowroot
40 oz. (5 cups) yogurt cheese (see above)
4 teaspoons vanilla
4 eggs
Pour the batter over the crust and bake this cheesecake in a tub at 300 degrees
for 100 minutes (if using a 9 1/2" pan). Then cool the cheesecake down
while still in oven (with this oven shut off) and in tub with door slightly ajar
for an hour. Afterwards, remove from oven and tub and continue to cool down at
room temperature for another 100 minutes, then remove from pan and refrigerate.
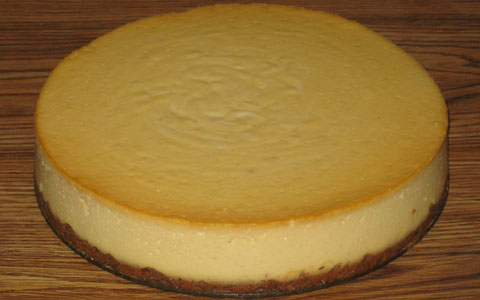
Baked Orange Vanilla Cheesecake—Prototype 2:
2-to-1 Blend of Yogurt Cheese and Cottage Cheese:
Prepare ahead of time 32 ounces of yogurt cheese, derived from two 32-ounce
containers (that's 64 ounces altogether) of nonfat yogurt. If the resulting
yogurt cheese falls below 32 ounces, add back enough of the whey (that was
strained out from the yogurt) to make up the difference. To this yogurt cheese
combine one 16-ounce container of whipped, lowfat cottage cheese.
Crust:
2 oz. melted, white chocolate
8 oz. (1 cup) 2-to-1 blend of yogurt cheese and cottage cheese (see above)
1/4 cup granulated sugar
1/4 cup brown sugar
2 teaspoons cinnamon
1 teaspoon vanilla
2 oz. All-Bran, ground up
Gently pour this crust mixture into bottom of pan (9 to 9 1/2 inches) and
pre-bake without tub at 300 degrees for 10 minutes, then cool enough to
comfortably touch at least the pan's upper sidewall.
Batter:
4 tablespoons melted or softened butter
1 5/8 cups granulated sugar
1/2 cup orange juice
4 teaspoons grated orange peel
1/4 cup all-purpose flour
3 tablespoons arrowroot
40 oz. (5 cups) 2-to-1 blend of yogurt cheese and cottage cheese (see above)
2 tablespoons vanilla
4 eggs
Pour the batter over the crust and bake this cheesecake in a tub at 300 degrees
for 105 minutes (if using a 9 1/2" pan). Then cool the cheesecake down
while still in oven (with this oven shut off) and in tub with door slightly ajar
for an hour. Afterwards, remove from oven and tub and continue to cool down at
room temperature for another 105 minutes, then remove from pan and refrigerate.
Baked Orange Vanilla Cheesecake—Prototype 3:
2-to-1 Blend of Yogurt Cheese and Cottage Cheese:
Prepare ahead of time 32 ounces of yogurt cheese, derived from two 32-ounce
containers (that's 64 ounces altogether) of nonfat yogurt. If the resulting
yogurt cheese falls below 32 ounces, add back enough of the whey (that was
strained out from the yogurt) to make up the difference. To this yogurt cheese
combine one 16-ounce container of whipped, lowfat cottage cheese.
Crust:
2 oz. melted, white chocolate
8 oz. (1 cup) 2-to-1 blend of yogurt cheese and cottage cheese (see above)
1/4 cup granulated sugar
1/4 cup brown sugar
1 teaspoon cinnamon
1 teaspoon grated orange peel
1 teaspoon vanilla
2 oz. All-Bran, ground up
Place the resulting mixture in the greased pan and pre-bake without tub at 300
degrees for 5-10 minutes, depending on the mixture's thickness (closer to 10
minutes if thin enough to be fully distributed across the pan's bottom by gentle
shaking, closer to 5 minutes if thick enough to require spreading out this
mixture by pressing on it with a utensil and/or fingers), then cool enough to
comfortably touch at least the pan's upper sidewall.
Batter:
4 tablespoons melted or softened butter
1 5/8 cups granulated sugar
1/2 cup orange juice
4 teaspoons grated orange peel
1/4 cup all-purpose flour
3 tablespoons arrowroot
40 oz. (5 cups) 2-to-1 blend of yogurt cheese and cottage cheese (see above)
2 tablespoons vanilla
4 eggs
Pour the batter over the crust and bake this cheesecake in a tub at 300 degrees
for 105 minutes (if using a 9 1/2" pan). Then cool the cheesecake down
while still in oven (with this oven shut off) and in tub with door slightly ajar
for an hour. Afterwards, remove from oven and tub and continue to cool down at
room temperature for another 105 minutes, then remove from pan and refrigerate.
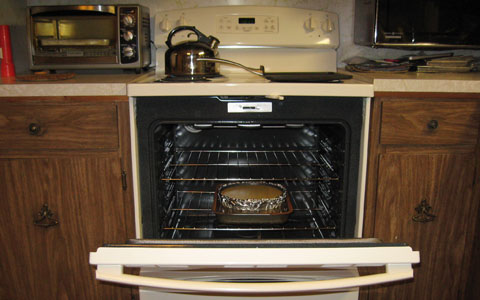
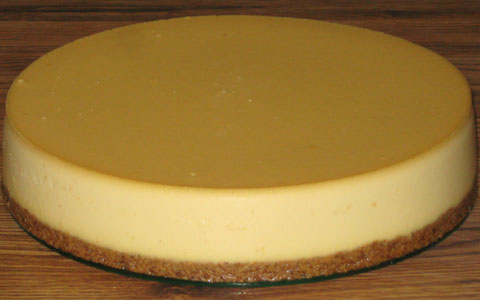
Baked Orange Vanilla Cheesecake—Prototype 4:
3-Cheese Blend (1CT-1NC-1YG):
Prepare ahead of time 16 ounces of yogurt cheese, derived from one 32-ounce
container of nonfat yogurt. If the resulting yogurt cheese falls below 16
ounces, add back enough of the whey (that was strained out from the yogurt) to
make up the difference. To this yogurt cheese combine 16 ounces of whipped,
lowfat cottage cheese and 16 ounces (two 8-ounce packages) of softened
Neufchatel cheese ("light cream cheese").
Grease a 9 1/2" (or 9") springform pan, but do not wrap foil around
it yet (see below).
Crust:
4 oz. melted, white chocolate
8 oz. (1 cup) 3-cheese blend (see above)
1/4 cup granulated sugar
1/4 cup brown sugar
1 teaspoon grated orange zest (peel)
1 teaspoon vanilla
2 oz. All-Bran, ground up
Place the resulting mixture in the greased pan and pre-bake without tub at
300 degrees for 30 minutes, then remove from oven and cool down at room
temperature (for at least 30 minutes).
Batter:
40 oz. (5 cups) 3-cheese blend (see above)
1 5/8 cups granulated sugar
1/2 cup orange juice
4 teaspoons grated orange zest (peel)
2 tablespoons vanilla
1 teaspoon xanthan gum
6 eggs (brown recommended, large)
Wrap the pan in foil just before adding the batter (to minimize the foil's
disturbance and therefore its leakage risk, do not put it on any earlier).
Or as an alternative, place this pan in an Easy Bath Cheesecake Wrap.
Next, pour the batter over the crust and bake this cheesecake in a hot water tub
at 300 degrees for 90 minutes (if using a 9 1/2" pan). Then cool the
cheesecake down while still in oven (with this oven shut off) and in tub with
door slightly ajar for an hour. Afterwards, remove from oven and tub and continue
to cool down at room temperature for another 120 minutes, then remove from pan
and refrigerate.

Baked Orange Vanilla Cheesecake—Prototype 5:
Repeat
Prototype 4,
but boost the batter's xanthan gum to two teaspoons.
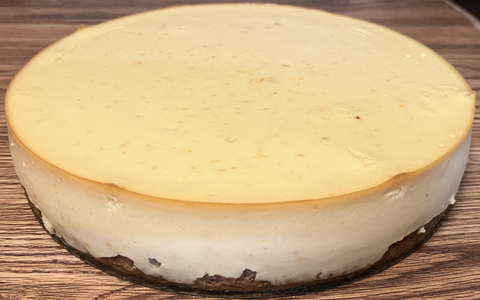
|
-------------------------------------------------------
|
Baked Chocolate Banana Cheesecake—Prototype 1:
2-to-1 Blend of Yogurt Cheese and Cottage Cheese:
Prepare ahead of time 32 ounces of yogurt cheese, derived from two 32-ounce
containers (that's 64 ounces altogether) of nonfat yogurt. If the resulting
yogurt cheese falls below 32 ounces, add back enough of the whey (that was
strained out from the yogurt) to make up the difference. To this yogurt cheese
combine one 16-ounce container of whipped, lowfat cottage cheese.
Grease a 9 1/2" (or 9") pan, but do not wrap any foil around it
yet—see below for that step (spreading the crust in an already wrapped pan can
result in greater disturbance to the foil, thus increasing leakage risks).
Chocolate Crust:
4 oz. semi-sweet chocolate, melted
2 tablespoons cocoa powder
8 oz. (1 cup) 2-to-1 blend of yogurt cheese and cottage cheese (see above)
3/8 cup granulated sugar
1 teaspoon vanilla
2 oz. All-Bran, ground up
Place the resulting mixture into the greased pan. Allow this mixture to get firm
(if needed, chill it for this purpose, perhaps about 30 minutes minimum).
Chocolate Batter:
2 tablespoons melted/softened butter
7/8 cup granulated sugar
3 tablespoons cocoa powder
2 tablespoons all-purpose flour
1 1/2 tablespoons arrowroot
20 oz. (2 1/2 cups) 2-to-1 blend of yogurt cheese and cottage cheese (see above)
1 teaspoon vanilla
2 eggs
Wrap the pan in foil, and carefully pour the chocolate batter on top of the crust.
Then place all this in a tub—filled only about halfway, or about half an inch,
with boiling water. Bake at 325 degrees for about 40 minutes. Afterwards, take the
whole pan-and-tub setup out of the oven, and carefully get it to a comfortable place.
Promptly add the banana batter as indicated below.
Banana Batter:
2 tablespoons melted or softened butter
5/8 cups granulated sugar
8 ounces of banana puree
2 tablespoons all-purpose flour
3 tablespoons arrowroot
20 oz. (2 1/2 cups) 2-to-1 blend of yogurt cheese and cottage cheese (see above)
1 teaspoon vanilla
2 eggs
Carefully scoop this on top of the chocolate batter.
Here is a decorative option for the upper layer at this point. Add some
chocolate syrup (Trader Joe's Organic Midnight Moo is recommended) on
the top surface. Squirt thick, parallel stripes of this syrup, about a couple
of tablespoons altogether (close to 1 1/3 ounces by weight if using TJ's),
throughout the pan (the TJ's syrup, as of this writing, comes in a squeezable
bottle with a squirt nozzle). Then pull a knife in perpendicular directions
through these stripes in the batter (just deeply enough for the upper layer's
surface) in order to produce a wavy, swirl pattern (see photo below for an
example). Do all this as neatly as possible (avoid cutting into the chocolate
layer underneath).
Next, return the pan-and-tub setup to the oven, this time at only 300 degrees, and
add more hot water to the tub (at this point, go ahead and fill it all the way).
Bake for about 80 more minutes.
Turn the oven off, leaving the cheesecake in it (still in its tub as well), with
the door slightly ajar, for another 60 minutes.
Then remove this cheesecake from the oven and tub. At this point, a border of
chocolate chips can be added to the cheesecake's top surface around its outer edge,
if desired (but use care in avoiding burns—the pan's sidewall may still
be hot). Continue letting the cheesecake cool in its pan at room temperature for
another 120 minutes.
Afterwards, remove this cheesecake from its pan and refrigerate.
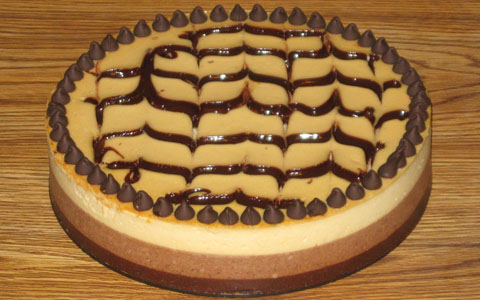
Baked Chocolate Banana Cheesecake—Prototype 2:
3-Cheese Blend (3CT-1NC-2YG):
Prepare ahead of time 16 ounces of yogurt cheese, derived from one 32-ounce
container of nonfat yogurt. If the resulting yogurt cheese falls below 16
ounces, add back enough of the whey (that was strained out from the yogurt) to
make up the difference. To this yogurt cheese combine 24 ounces of whipped,
lowfat cottage cheese and 8 ounces of softened Neufchatel cheese ("light
cream cheese").
Grease a 9 1/2" (or 9") pan, but do not wrap foil around it until just
before the batter is added (spreading the crust in an already wrapped pan can
result in greater disturbance to the foil, thus increasing leakage risks).
Chocolate Crust:
4 oz. semi-sweet chocolate, melted
8 oz. (1 cup) 3-cheese blend (see above)
3/8 cup granulated sugar
2 tablespoons cocoa powder
1 teaspoon vanilla
2 oz. finely ground All-Bran
Place the resulting mixture in the greased pan and pre-bake without tub at 300
degrees for 5-10 minutes, depending on the mixture's thickness (closer to 10
minutes if thin enough to be fully distributed across the pan's bottom by gentle
shaking, closer to 5 minutes if thick enough to require spreading out this
mixture by pressing on it with a utensil and/or fingers), then cool enough to
comfortably touch at least the pan's upper sidewall.
Banana Batter:
20 oz. (2 1/2 cups) 3-cheese blend (see above)
1 teaspoon vanilla
5/8 cup granulated sugar
6 ounces of banana puree (tip: about 9 ounces of whole bananas, i.e., with the
outer peels included—hopefully one large banana—should yield a
sufficient amount of the inner fruit)
1 1/4 teaspoons xanthan gum
3 eggs
Wrap the pan in foil at this point. Carefully pour the banana batter on top of
the crust and bake all this in a hot water tub at 325 degrees for about 50
minutes. Afterwards, take the tub-and-pan assembly out of the oven and promptly
add the chocolate batter indicated below.
Chocolate Batter:
20 oz. (2 1/2 cups) 3-cheese blend (see above)
1 teaspoon vanilla
7/8 cup granulated sugar
3 tablespoons cocoa powder
3/4 teaspoon xanthan gum
3 eggs
Carefully scoop this on top of the banana batter (it is best to do this around
the edge of the pan and let the chocolate batter flow towards the middle) and
return the tub-and-pan assembly to the oven, this time at only 300 degrees. Bake
for about 70 more minutes (if using a 9 1/2" pan). Then shut off the oven
and cool the cheesecake down while still in it (and in tub), with door slightly
ajar, for an hour. Afterwards, remove from oven and tub and (at this point, add
a border of chocolate chips if desired) continue to cool down at room
temperature for another two hours, then remove from pan and refrigerate.
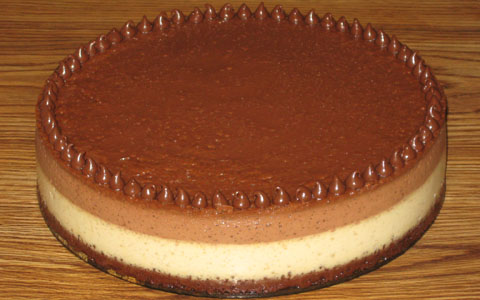
|
-------------------------------------------------------
|
Baked S'mores Cheesecake—Prototype 1:
2-to-1 Blend of Yogurt Cheese and Cottage Cheese:
Prepare ahead of time (allow at least 24 hours) 32 ounces of yogurt cheese,
derived from two 32-ounce containers (that's 64 ounces altogether) of nonfat
yogurt. If the resulting yogurt cheese falls below 32 ounces, add back enough of
the whey (that was strained out from the yogurt) to make up the difference. To
this yogurt cheese combine one 16-ounce container of whipped, lowfat cottage
cheese.
Grease a 9 1/2" (or 9") springform pan, but do not wrap foil around it
until just before the batter is added (spreading the crust in an already wrapped
pan can result in greater disturbance to the foil, thus increasing leakage
risks).
Graham Crust:
2 oz. melted, white chocolate
8 oz. (1 cup) 2-to-1 blend of yogurt cheese and cottage cheese (see above)
1/4 cup granulated sugar
1/4 cup brown sugar
2 teaspoons cinnamon
1/2 teaspoon vanilla
Completely blend the above ingredients first, then continue with the ingredient
below, mixing it in quickly.
3 oz. graham crackers, ground up (Mi-Del 100% Whole Wheat Honey Grahams
recommended)
Note: Because this crust already includes cinnamon in the ingredients shown
above, non-cinnamon graham crackers are strongly recommended. But if cinnamon
grahams are going to be used, omit the 2 teaspoons of cinnamon (also, the sugar
listed above, granulated and/or brown, should probably be somewhat reduced in such
a case).
Place resulting crust mixture into bottom of the springform pan and pre-bake
without tub at 300 degrees for 8 minutes, then cool enough to comfortably touch
at least the pan's upper sidewall.
Chocolate Batter:
4 tablespoons melted/softened butter
3/8 cup cocoa powder
1 3/4 cups granulated sugar
1/4 cup all-purpose flour
3 tablespoons arrowroot
40 ounces (5 cups) 2-to-1 blend of yogurt cheese and cottage cheese (see above)
2 teaspoons vanilla
4 eggs
2 cups miniature marshmallows
Expect about 7 to 7 1/2 cups of the resulting batter, but do not add this to the pan all
at once. Rather, this needs to be done in six installments.
Wrap the pan in foil just before adding the first batter installment.
For each of the first four installments, gently scoop about 1 1/4 cups of batter
into the pan. Add about 1/2 cup of the marshmallows, ensuring that they are
fully coated and—as much as possible—immersed. After adding an
installment, bake the pan with its contents at 325 degrees for 15 minutes, in a
tub filled with at least 1/4 to 1/2 inch of boiling water. To reduce spillage
risks, do not fill the tub all the way at this point, because the whole
tub-and-pan assembly is going to need to be removed from the oven (in order to
comfortably add contents to the pan) between installments.
After all this is done, there should be about 1 to 1 1/2 cups of batter left, with
60 minutes of baking time reached at this point (15 minutes for each of the first
four installments). Now comes the fifth installment—carefully add about half
of this remaining batter (do not add any more marshmallows at this point) on top of the
pan's other contents. Try to fully coat the entire surface, especially wherever
marshmallows may be showing, some of which may keep on floating to the top—but
do not be too concerned about this. Next, return the entire pan-and-tub assembly to the
oven, but with the temperature lowered to 300 degrees, for 15 minutes. Then take this
assembly out and add the last of the batter (the sixth installment),
coating the remaining exposed marshmallows
as much possible. At this point, fill up the tub generously with boiling water. Resume
baking at 300 degrees, for another 60 minutes (based upon usage of a 9 1/2"
pan).
Afterward, shut the oven off, and leave its door slightly ajar, with the
cheesecake still inside—and in the tub—for an hour. Next, remove the
cheesecake from the oven and tub, and add a border of milk chocolate chips
around the edge of this cheesecake (see photo below). Continue to cool it down
at room temperature for another two hours. After doing so, remove the cheesecake
from pan and refrigerate.
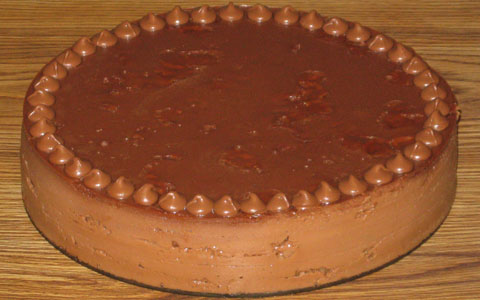
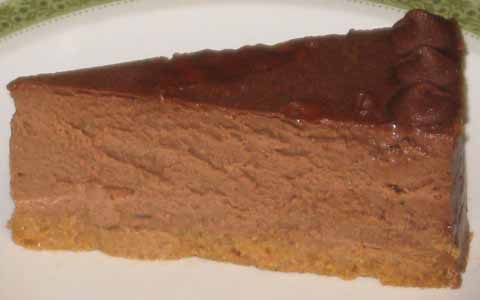
Baked S'mores Cheesecake—Prototype 2:
2-to-1 Blend of Yogurt Cheese and Cottage Cheese:
Prepare ahead of time (allow at least 24 hours) 32 ounces of yogurt cheese,
derived from two 32-ounce containers (that's 64 ounces altogether) of nonfat
yogurt. If the resulting yogurt cheese falls below 32 ounces, add back enough of
the whey (that was strained out from the yogurt) to make up the difference. To
this yogurt cheese combine one 16-ounce container of whipped, lowfat cottage
cheese.
Grease a 9 1/2" (or 9") springform pan, but do not wrap foil around it
until just before the batter is added (spreading the crust in an already wrapped
pan can result in greater disturbance to the foil, thus increasing leakage
risks).
Graham Crust:
2 oz. melted, white chocolate
8 oz. (1 cup) 2-to-1 blend of yogurt cheese and cottage cheese (see above)
1/4 cup granulated sugar
1 tablespoon brown sugar
1/2 teaspoon vanilla
Completely blend the above ingredients first, then continue with the ingredient
below, mixing it in quickly.
3 oz. cinnamon graham crackers, ground up (such as Annie's Cinnamon Grahams)
Place resulting crust mixture into bottom of the springform pan and pre-bake
without tub at 300 degrees for 8 minutes, then cool enough to comfortably touch
at least the pan's upper sidewall.
Chocolate Batter:
4 tablespoons melted/softened butter
3/8 cup cocoa powder
1 3/4 cups granulated sugar
1/4 cup all-purpose flour
3 tablespoons arrowroot
40 ounces (5 cups) 2-to-1 blend of yogurt cheese and cottage cheese (see above)
2 teaspoons vanilla
4 eggs
18 - 20 marshmallows (regular size)
Expect about 7 to 7 1/2 cups of the resulting batter, but do not add this to the pan all
at once. Rather, this needs to be done in four installments.
Wrap the pan in foil just before adding the first batter installment.
For each of the first two installments, gently scoop about 2 1/2 cups of batter
into the pan. Add about 9 or 10 marshmallows, ensuring that they are at least
fully coated (they do not need to be fully immersed). After adding an
installment, bake the pan with its contents at 325 degrees for 25 minutes, in a
tub filled with at least 1/4 to 1/2 inch of boiling water. To reduce spillage
risks, do not fill the tub all the way at this point, because the whole
tub-and-pan assembly is going to need to be removed from the oven (in order to
comfortably add contents to the pan) between installments.
After all this is done, there should be about 1 to 1 1/2 cups of batter left, with
50 minutes of baking time reached at this point (25 minutes for each of the first
two installments). Now comes the third installment—carefully add about half
of this remaining batter (do not add any more marshmallows at this point) on top of the
pan's other contents. Try to fully coat the entire surface, especially wherever
marshmallows may be showing, some of which may keep on floating to the top—but
do not be too concerned about this. Next, return the entire pan-and-tub assembly to the
oven, but with the temperature lowered to 300 degrees, for 15 minutes. Then take this
assembly out and add the last of the batter (the fourth installment),
coating the remaining exposed marshmallows
as much possible. At this point, fill up the tub generously with boiling water. Resume
baking at 300 degrees, for another 60 minutes (based upon usage of a 9 1/2"
pan).
Afterward, shut the oven off, and leave its door slightly ajar, with the
cheesecake still inside—and in the tub—for an hour. Next, remove the
cheesecake from the oven and tub, and add a border of milk chocolate chips
around the edge of this cheesecake (see photo below). Continue to cool it down
at room temperature for another two hours. After doing so, remove the cheesecake
from pan and refrigerate.
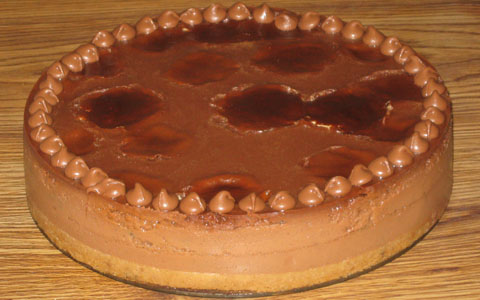
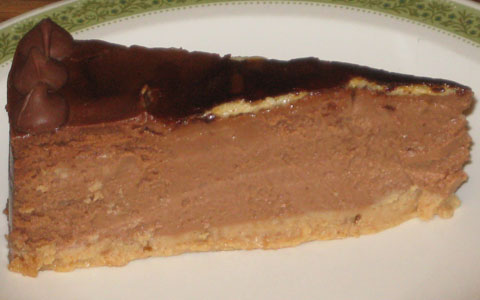
Baked S'mores Cheesecake—Prototype 3:
2-to-1 Blend of Yogurt Cheese and Cottage Cheese:
Prepare ahead of time (allow at least 24 hours) 32 ounces of yogurt cheese,
derived from two 32-ounce containers (that's 64 ounces altogether) of nonfat
yogurt. If the resulting yogurt cheese falls below 32 ounces, add back enough of
the whey (that was strained out from the yogurt) to make up the difference. To
this yogurt cheese combine one 16-ounce container of whipped, lowfat cottage
cheese.
Grease a 9 1/2" (or 9") springform pan, but do not wrap foil around it
until just before the batter is added (spreading the crust in an already wrapped
pan can result in greater disturbance to the foil, thus increasing leakage
risks).
Graham Crust:
2 oz. melted, white chocolate
8 oz. (1 cup) 2-to-1 blend of yogurt cheese and cottage cheese (see above)
1/4 cup granulated sugar
1 tablespoon brown sugar
1/2 teaspoon vanilla
Completely blend the above ingredients first, then continue with the next
ingredient, shown immediately below.
2 cups miniature marshmallows
Fully combine this with the other above ingredients, then continue afterwards
with the last crust ingredient below, mixing it in quickly.
4 oz. cinnamon graham crackers, ground up (such as Annie's Cinnamon Grahams)
Place resulting crust mixture into bottom of the springform pan and pre-bake
without tub at 300 degrees for 10 minutes, then cool enough to comfortably touch
at least the pan's upper sidewall.
Chocolate Batter:
4 tablespoons melted/softened butter
3/8 cup cocoa powder
1 3/4 cups granulated sugar
1/4 cup all-purpose flour
3 tablespoons arrowroot
40 ounces (5 cups) 2-to-1 blend of yogurt cheese and cottage cheese (see above)
2 teaspoons vanilla
4 eggs
Wrap the pan in foil at this point. Carefully pour the batter over the crust and
bake this cheesecake in a hot water tub at 300 degrees for 110 minutes (if using
a 9 1/2" pan). Then shut off oven and cool the cheesecake down while still
in it (and in tub), with door slightly ajar, for an hour. Afterwards, remove
this cheesecake from oven and tub, and add a border of milk chocolate chips
on top, around the cheesecake's edge (see photo below). Continue to cool it down
at room temperature for another 110 minutes. After doing so, remove the cheesecake
from pan and refrigerate.
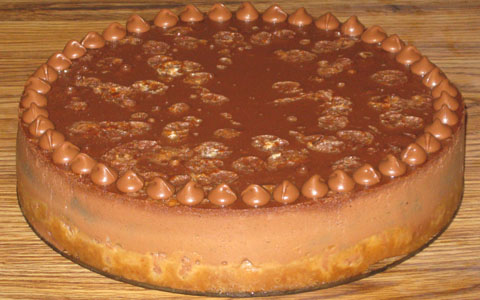
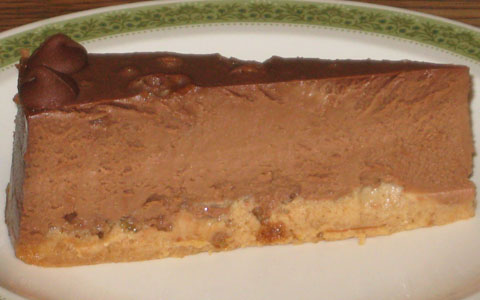
Baked S'mores Cheesecake—Prototype 4:
3-Cheese Blend (1CT-1NC-4YG):
Prepare ahead of time 32 ounces of yogurt cheese, derived from two 32-ounce
containers (that's 64 ounces altogether) of nonfat yogurt. If the resulting
yogurt cheese falls below 32 ounces, add back enough of the whey (that was
strained out from the yogurt) to make up the difference. To this yogurt cheese
combine 8 ounces of whipped, lowfat cottage cheese and 8 ounces of softened
Neufchatel cheese ("light cream cheese").
Grease a 9 1/2" (or 9") springform pan, but do not wrap foil around it
until just before the batter is added (spreading the crust in an already wrapped
pan can result in greater disturbance to the foil, thus increasing leakage
risks).
Graham Crust:
2 oz. melted, white chocolate
8 oz. (1 cup) 3-cheese blend (see above)
1/4 cup granulated sugar
1 tablespoon brown sugar
1/2 teaspoon vanilla
Completely blend the above ingredients first, then continue with the next
one below.
4 oz. cinnamon graham crackers, ground up
Get this fully mixed in (moistened) with the other ingredients above.
Afterwards, promptly add in and fully coat the last crust ingredient below.
2 cups miniature marshmallows
Place resulting crust mixture into bottom of the springform pan and pre-bake
without tub at 300 degrees for 15 minutes, then cool enough to comfortably touch
at least the pan's upper sidewall.
Chocolate Batter:
1 3/4 cups granulated sugar
3/8 cup cocoa powder
40 oz. (5 cups) 3-cheese blend (see above)
1/4 cup + 1 tablespoon (5 tablespoons altogether) arrowroot
2 teaspoons vanilla
5 eggs
Expect about 7 to 7 1/2 cups of the resulting batter, but do not add this to the
pan all at once. Rather, this needs to be done in four installments.
Wrap the pan in foil just before adding the first batter installment.
For each of the first three installments, gently scoop about 1 cup of batter
into the pan while trying to coat—as much as possible—the previous
crust or batter layer below, especially the marshmallows that are still exposed
on top (it's okay if some of them end up not being completely coated at first—the
later a given installment, the more likely that these marshmallows are going to
get fully immersed). After adding an installment, bake the pan with its contents
for 25 minutes—at 325 degrees for the first two installments and at 300
degrees for the third—in a tub filled with at least 1/4 to 1/2 inch of
boiling water. To reduce spillage risks, do not fill the tub all the way at this
point, because the whole tub-and-pan assembly is going to need to be removed
from the oven (in order to comfortably add contents to the pan) between
installments.
After all this is done, there should be close to half of the batter left, with
75 minutes of baking time reached at this point (25 minutes for each of the
first three installments). Now comes the fourth (and last) installment—carefully
add this remaining batter on top of the pan's other contents. Try to fully coat
the entire surface, especially wherever marshmallows may still be showing. Next,
return the entire pan-and-tub assembly to the oven, fill up the tub generously
with boiling water, and resume baking at 300 degrees for another 95 minutes
(based upon usage of a 9 1/2" pan).
Afterward, shut the oven off, and leave its door slightly ajar, with the
cheesecake still inside—and in the tub—for an hour. Next, remove the
cheesecake from the oven and tub, and—if desired—add a border of
milk chocolate chips (or use another variety—but milk chocolate is
recommended for s'mores!) around the edge of this cheesecake. Continue to cool
it down at room temperature for another two hours. After doing so, remove the
cheesecake from pan and refrigerate.
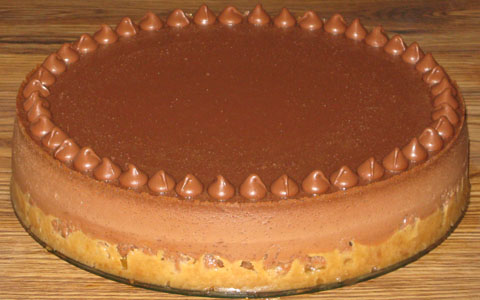
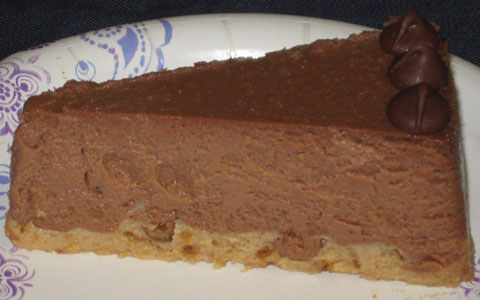
Baked S'mores Cheesecake—Prototype 5:
3-Cheese Blend (3CT-1NC-2YG):
Prepare ahead of time 16 ounces of yogurt cheese, derived from one 32-ounce
container of nonfat yogurt. If the resulting yogurt cheese falls below 16
ounces, add back enough of the whey (that was strained out from the yogurt) to
make up the difference. To this yogurt cheese combine 24 ounces of whipped,
lowfat cottage cheese and 8 ounces of softened Neufchatel cheese ("light
cream cheese").
Grease a 9 1/2" (or 9") springform pan, but do not wrap foil around
it until just before the batter is added above the crust layers (spreading the
crust in an already wrapped pan can result in greater disturbance to the foil,
thus increasing leakage risks).
Graham Crust—First Layer:
2 oz. melted, white chocolate
8 oz. (1 cup) 3-cheese blend (see above)
1/4 cup granulated sugar
1 tablespoon brown sugar
1/2 teaspoon vanilla
Completely blend the above ingredients first, then continue with the next
one below.
4 oz. cinnamon graham crackers, ground up
Get this fully mixed in (moistened) with the other ingredients above.
Afterwards, promptly add in and fully coat the last crust ingredient below.
2 cups miniature marshmallows
Place resulting crust mixture into bottom of the springform pan and pre-bake
without tub at 300 degrees for 15 minutes, then remove from oven and cool at
least slightly.
Chocolate Batter:
1 3/4 cups granulated sugar
3/8 cup cocoa powder
40 oz. (5 cups) 3-cheese blend (see above)
1 1/2 teaspoons xanthan gum
2 teaspoons vanilla
6 eggs
Reserve some of this batter for the second crust layer, as indicated below.
Graham Crust—Second Layer:
1 1/2 cups chocolate batter (see above)
1 tablespoon brown sugar
Completely blend these two ingredients first, then continue with the next
one below.
3 oz. cinnamon graham crackers, ground up
Combine these three crust ingredients and promptly place this mixture into the pan on
top of the first crust layer. Try to conceal, as much as possible, every trace of
marshmallow that is showing through the top of the first layer, then immediately put
the pan back into the oven. Bake this, still without tub, at 300 degrees for another 15
minutes, then cool it enough to comfortably touch at least the pan's upper sidewall.
Next, wrap the pan in foil. Carefully pour the remaining chocolate batter over
the second crust layer and bake this cheesecake in a hot water tub at 300 degrees for
70 minutes (if using a 9 1/2" pan). Afterward, shut the oven off, and leave its
door slightly ajar, with the cheesecake still inside—and in the tub—for an
hour. Next, remove the cheesecake from the oven and tub. Now, for the final chocolate
touch, add a border of chocolate chips (milk chocolate strongly recommended in
keeping with the s'mores tradition!) around the edge of this cheesecake (see photo
below). Continue to cool it down at room temperature for another two hours. After
doing so, remove the cheesecake from pan and refrigerate.

Baked S'mores Cheesecake—Prototype 6:
3-Cheese Blend (1CT-1NC-1YG):
Prepare ahead of time 16 ounces of yogurt cheese, derived from one 32-ounce
container of nonfat yogurt. If the resulting yogurt cheese falls below 16
ounces, add back enough of the whey (that was strained out from the yogurt) to
make up the difference. To this yogurt cheese combine 16 ounces of whipped,
lowfat cottage cheese and 16 ounces (two 8-ounce packages) of softened
Neufchatel cheese ("light cream cheese").
Grease a 9 1/2" (or 9") springform pan, but do not wrap foil around
it until just before the batter is added above the crust layers (spreading the
crust in an already wrapped pan can result in greater disturbance to the foil,
thus increasing leakage risks).
Graham Crust—First Layer:
2 oz. melted, white chocolate
8 oz. (1 cup) 3-cheese blend (see above)
1/4 cup granulated sugar
1 tablespoon brown sugar
1 teaspoon cinnamon
1/2 teaspoon vanilla
Completely blend the above ingredients first, then continue with the next
one below.
4 oz. graham crackers, ground up (if these are cinnamon-flavored, omit the
cinnamon shown above)
Get this fully mixed in (moistened) with the other ingredients above.
Afterwards, promptly add in and fully coat the last crust ingredient below.
2 cups miniature marshmallows
Place resulting crust mixture into bottom of the springform pan and pre-bake
without tub at 300 degrees for 15 minutes, then remove from oven and cool at
least slightly.
Chocolate Batter:
1 3/4 cups granulated sugar
3/8 cup cocoa powder
40 oz. (5 cups) 3-cheese blend (see above)
1 teaspoon xanthan gum
2 teaspoons vanilla
6 eggs
Reserve some of this batter for the second crust layer, as indicated below.
Graham Crust—Second Layer:
1 1/2 cups chocolate batter (see above)
1 tablespoon brown sugar
1 teaspoon cinnamon
Completely blend these three (or two if the cinnamon is excluded) ingredients
first, then continue with the next one below.
3 oz. graham crackers, ground up (if these are cinnamon-flavored, omit the
cinnamon shown above)
Combine these four (or three) crust ingredients and promptly place this mixture into
the pan on top of the first crust layer. Try to conceal, as much as possible, every
trace of marshmallow that is showing through the top of the first layer, then
immediately put the pan back into the oven. Bake this, still without tub, at 300
degrees for another 15 minutes, then cool it enough to comfortably touch at least the
pan's upper sidewall.
Next, wrap the pan in foil. Carefully pour the remaining chocolate batter over
the second crust layer and bake this cheesecake in a hot water tub at 300 degrees for
65 minutes (if using a 9 1/2" pan). Afterward, shut the oven off, and leave its
door slightly ajar, with the cheesecake still inside—and in the tub—for an
hour. Next, remove the cheesecake from the oven and tub. Now, for the final chocolate
touch, add a border of chocolate chips (milk chocolate strongly recommended in
keeping with the s'mores tradition!) around the edge of this cheesecake (see photo
below). Continue to cool it down at room temperature for another two hours. After
doing so, remove the cheesecake from pan and refrigerate.
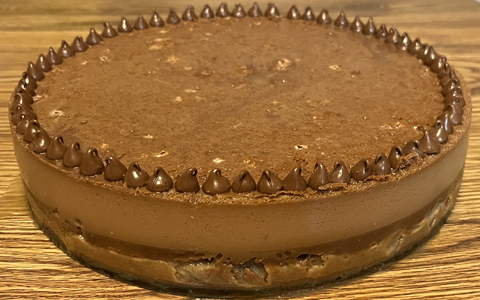
|
-------------------------------------------------------
|
Baked Pumpkin Pecan Cheesecake—Prototype 1:
2-to-1 Blend of Yogurt Cheese and Cottage Cheese:
Prepare ahead of time 2 pounds of yogurt cheese, derived from two 32-ounce
containers of nonfat yogurt. If the resulting yogurt cheese falls below 32
ounces, add back enough of the whey (that was strained out from the yogurt) to
make up the difference. To this yogurt cheese combine 16 ounces (1 pint) of
whipped, lowfat cottage cheese.
Crust:
2 oz. melted, white chocolate
4 oz. pumpkin butter (such as from Trader Joe's)
2 tablespoons granulated sugar
2 tablespoons brown sugar
1/2 teaspoon vanilla
8 oz. (1 cup) 2-to-1 blend of yogurt cheese and cottage cheese (see above)
2 oz. All-Bran, ground up
Pour this crust mixture into pan (9 to 9 1/2 inches) and pre-bake without tub at
300 degrees for 10 minutes, then cool enough to comfortably touch at least the
pan's upper sidewall. Carefully wrap the pan in heavy foil afterwards
(do not wrap it earlier—otherwise, this increases leakage
risks).
Batter:
4 tablespoons melted or softened butter
1 cup granulated sugar
14 oz. pumpkin butter
1/4 cup all-purpose flour
3 tablespoons arrowroot
5 cups (40 oz.) 2-to-1 blend of yogurt cheese and cottage cheese (see above)
2 teaspoons vanilla
4 eggs
Carefully pour about half of this batter on top of the crust. Bake in tub at 325
degrees for 40 minutes (if using a 9 1/2" pan). During this phase of the
baking, prepare the pecan filling for this cheesecake.
Pecan Filling:
2 eggs
1 tablespoon granulated sugar
2 tablespoons all-purpose flour
(Tip: blend these three above ingredients first, before adding the other ones
below.)
2 cups corn syrup
1 teaspoon vanilla
1/4 teaspoon salt
4 oz. chopped pecans (about 1 cup, after chopping)
Combine all these ingredients in a saucepan before heating. Stir constantly
over a roughly medium heat (not high—otherwise the mixture can
easily leave a sticky, burnt residue on the bottom of the pan), bringing the
mixture to a mild boil. Stir and cook carefully for about another 5 minutes,
then remove from heat. Let this mixture sit until it is time to add it to the
cheesecake (at which point the filling should still be at least warm enough that
it spreads very easily).
After the initial 40 minutes of baking, remove the pan-and-tub assembly from the
oven and carefully add just enough of the pecan filling to coat the pumpkin
batter's surface (close to half of the filling—set aside the rest of it for
later, as described below). Next, return the pan-and-tub assembly to the oven
and resume baking at 325 degrees for another 20 minutes.
Afterwards, take this assembly out of the oven and very carefully scoop the
remaining pumpkin batter on top. Then return all this to the oven, with the
temperature reduced to 300 degrees, and bake for another 60 minutes. Then cool
down with the pan still in the oven (with this oven shut off) and in the tub,
with door slightly ajar, for an hour. Afterwards, remove from oven and tub and
continue to cool down at room temperature for another two hours, then remove
cheesecake from pan and refrigerate.
After at least a couple of hours of refrigerating the cheesecake, take the
remaining pecan filling, and ensure that it is not too stiff (this can be
accomplished by warming it up a little with very low heat).
Carefully spread the filling on top of the cheesecake and promptly return
all this to the refrigerator, allowing the filling to get more firm (thus
reducing its runniness)—at least a few additional hours (or overnight)
at this point—before serving this cheesecake.
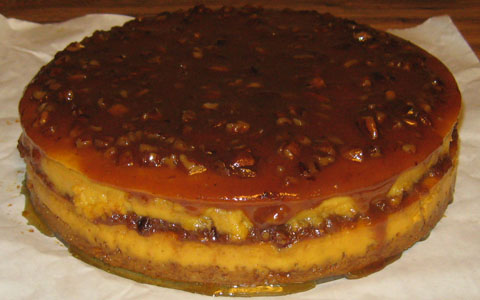
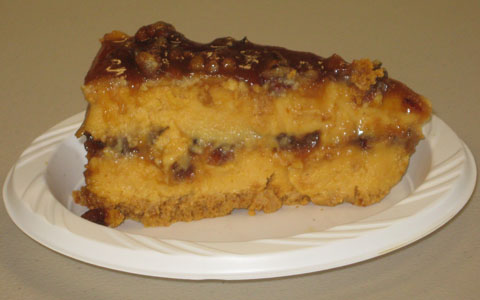
Baked Pumpkin Pecan Cheesecake—Prototype 2:
2-to-1 Blend of Yogurt Cheese and Cottage Cheese:
Prepare ahead of time 2 pounds of yogurt cheese, derived from two 32-ounce
containers of nonfat yogurt. If the resulting yogurt cheese falls below 32
ounces, add back enough of the whey (that was strained out from the yogurt) to
make up the difference. To this yogurt cheese combine 16 ounces (1 pint) of
whipped, lowfat cottage cheese.
Pumpkin Crust:
2 oz. melted, white chocolate
4 oz. pumpkin butter (such as from Trader Joe's)
2 tablespoons granulated sugar
2 tablespoons brown sugar
1/2 teaspoon vanilla
8 oz. (1 cup) 2-to-1 blend of yogurt cheese and cottage cheese (see above)
2 oz. All-Bran, ground up
Pour this crust mixture into pan (9 to 9 1/2 inches) and pre-bake without tub at
300 degrees for 10 minutes, then cool enough to comfortably touch at least the
pan's upper sidewall. Carefully wrap the pan in heavy foil afterwards (do not
wrap it earlier—otherwise, this increases leakage risks).
Pumpkin Batter:
4 tablespoons melted or softened butter
1 cup granulated sugar
14 oz. pumpkin butter
1/4 cup all-purpose flour
3 tablespoons arrowroot
5 cups (40 oz.) 2-to-1 blend of yogurt cheese and cottage cheese (see above)
2 teaspoons vanilla
4 eggs
Carefully pour about half of this batter, less 1/2 cup, on top of the crust.
Bake in tub at 325 degrees for 40 minutes (if using a 9 1/2" pan). During
this phase of the baking, prepare the pecan filling for this cheesecake.
Pecan Filling:
1 tablespoon granulated sugar
2 tablespoons all-purpose flour
1/4 teaspoon salt
1/2 teaspoon xanthan gum
2 eggs
(Tip: blend these five above ingredients first—starting with the first
four, then adding the eggs—before adding the other ones below.)
2 cups corn syrup
1 teaspoon vanilla
4 oz. chopped pecans (about 1 cup, after chopping)
Combine all these ingredients in a saucepan before heating. Stir constantly over
a roughly medium heat (not high—otherwise the mixture can easily leave a
sticky, burnt residue on the bottom of the pan), bringing the mixture to a mild
boil. Stir and cook carefully for about another 5 minutes, then remove from
heat. Let this mixture sit until it is time to add it to the cheesecake (at
which point the filling should still be at least warm enough that it spreads
very easily).
After the initial 40 minutes of baking, remove the pan-and-tub assembly from the
oven. Mix about half of the pecan filling (set aside the rest of it for later,
as described below) and about 1 cup of the remaining pumpkin batter. Carefully
add this mixture on top of, and fully coat, the pumpkin batter's surface. Next,
return the pan-and-tub assembly to the oven and resume baking at 325 degrees for
another 20 minutes.
Afterwards, take this assembly out of the oven and very carefully scoop the rest
of the pumpkin batter on top. Then return all this to the oven, with the
temperature reduced to 300 degrees, and bake for another 60 minutes. Then cool
down with the pan still in the oven (with this oven shut off) and in the tub,
with door slightly ajar, for an hour.
Due to this cheesecake needing to be more stable (see comments below),
turn the oven back on, with the temperature set at 300 degrees, and close the
oven door. Bake for another 20 minutes (this includes the time for the oven to
reach 300). Then shut the oven off and leave the door slightly ajar for 30
minutes. Next, turn the oven on yet again at 300 degrees and bake with the door
shut for another 10 minutes (again, this includes the warmup for the oven to get
to 300). After this, shut the oven off and leave the door slightly ajar for yet
another 20 minutes.
Afterwards (at last!), remove the cheesecake (still in its wrapped springform
pan) from the oven and the tub and continue to cool it down at room temperature
for another two and a half hours. Then (the foil/wrappers can be removed at this
point) take the remaining pecan filling, and ensure that it is not too stiff
(this can be accomplished by warming it up a little with very low heat).
Carefully spread this filling on top of the cheesecake. Next, with the
cheesecake still in its pan, refrigerate until firm (overnight is a helpful
suggestion). Remove from pan before serving.
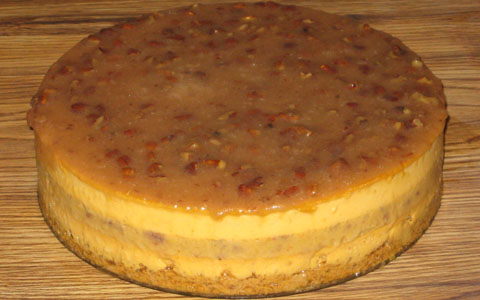
|
-------------------------------------------------------
|
Baked Whoopie Pie Cheesecake—Prototype 1:
Yogurt Cheese:
Prepare ahead of time 3 pounds of yogurt cheese, derived from three 32-ounce
containers of nonfat yogurt. If the resulting yogurt cheese falls below 48
ounces, add back enough of the whey (that was strained out from the yogurt) to
make up the difference.
Lower-tart alternative:
Substitute this 2-to-1 blend of yogurt cheese and cottage cheese for the
aforementioned all-yogurt cheese. Prepare ahead of time only 2 pounds of
yogurt cheese, derived from two 32-ounce containers of nonfat yogurt. If the
resulting yogurt cheese falls below 32 ounces, add back enough of the whey (that
was strained out from the yogurt) to make up the difference. To this yogurt
cheese combine 16 ounces (1 pint) of whipped, lowfat cottage cheese.
Crust:
4 oz. semi-sweet chocolate, melted
2 tablespoons cocoa powder
8 oz. (1 cup) yogurt cheese (see above)
3/8 cup granulated sugar
1 teaspoon vanilla
2 oz. finely ground All-Bran
Pour this crust mixture into bottom of greased springform pan (9 to 9 1/2
inches) and pre-bake without tub at 300 degrees for 10 minutes, then cool enough
to comfortably touch at least the pan's upper sidewall.
Batter:
4 tablespoons melted or softened butter
1 1/4 cups granulated sugar
1/4 cup all-purpose flour
3 tablespoons arrowroot
40 oz. (5 cups) yogurt cheese (see above)
2 teaspoons vanilla
4 eggs
4 small whoopie pies (each about 2 1/2 to 3 inches in diameter, such as from
Trader Joe's).
Vertically cut each of these whoopie pies into 6 "slices" (not
horizontally—in other words, each "slice" should contain two
chocolate "outsides" and cream in between them).
Expect about 7 cups of the resulting batter, but do not add this to the pan all
at once. Rather, this needs to be done in three installments. Wrap the pan in
foil just before adding the first installment (minimize the foil's disturbance
in order to minimize its leakage risk).
For each of the first two installments, gently scoop about 3 cups of batter into
the pan. Add the pieces from 2 whoopie pies, ensuring that they are fully coated
and—as much as possible—immersed (this is likely not readily doable
on the first installment, but it should be on the second). After adding an
installment, bake the pan with its contents for 30 minutes. For the first
installment, bake at 325 degrees. For the second installment, reduce the
temperature and bake at 300 degrees. For both installments here, bake with the
pan in a tub filled with at least 1/4 to 1/2 inch of boiling water, but (to
reduce spillage risks) do not fill the tub all the way at this point, because
the whole tub-and-pan assembly is going to need to be removed from the oven (in
order to comfortably add contents to the pan) between installments.
After all this is done, there should be about a cup of batter left, with 60
minutes of baking time reached at this point (30 minutes for each of the first
two installments). Now comes the third installment—carefully add the last
of this batter (do not add any more whoopie pies at this point) on top of the
pan's other contents. Try to fully coat the entire surface, especially wherever
whoopie pie pieces may be showing. Next, return the entire pan-and-tub assembly
to the oven. At this point, fill up the tub generously with boiling water.
Resume baking at 300 degrees for another 55 minutes (based upon usage of a 9
1/2" pan).
Afterward, shut the oven off, and leave its door slightly ajar, with the
cheesecake still inside—and in the tub—for an hour. Next, remove the
cheesecake from the oven and tub (then immediately add a border of chocolate
chips around the edge of this cheesecake, if desired). Continue to cool it down
at room temperature for another two hours. After doing so, remove the cheesecake
from pan and refrigerate.
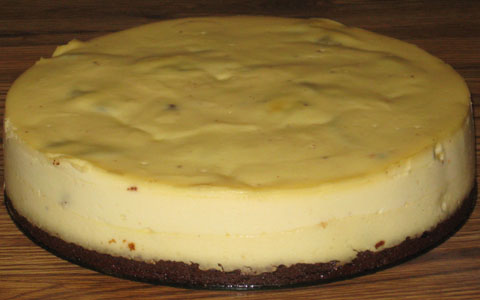
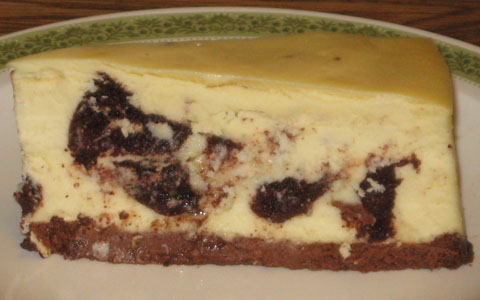
Baked Whoopie Pie Cheesecake—Prototype 2:
3-Cheese Blend (1CT-1NC-4YG):
Prepare ahead of time 32 ounces of yogurt cheese, derived from two 32-ounce
containers (that's 64 ounces altogether) of nonfat yogurt. If the resulting
yogurt cheese falls below 32 ounces, add back enough of the whey (that was
strained out from the yogurt) to make up the difference. To this yogurt cheese
combine 8 ounces of whipped, lowfat cottage cheese and 8 ounces of softened
Neufchatel cheese ("light cream cheese").
Grease a 9 1/2" (or 9") pan, but do not wrap foil around it until just
before the batter is added (spreading the crust in an already wrapped pan can
result in greater disturbance to the foil, thus increasing leakage risks).
Crust:
4 oz. semi-sweet chocolate, melted
8 oz. (1 cup) 3-cheese blend (see above)
3/8 cup granulated sugar
2 tablespoons cocoa powder
1 teaspoon vanilla
2 oz. finely ground All-Bran
Place the resulting mixture in the greased pan and pre-bake without tub at 300
degrees for 5-10 minutes, depending on the mixture's thickness (closer to 10
minutes if thin enough to be fully distributed across the pan's bottom by gentle
shaking, closer to 5 minutes if thick enough to require spreading out this
mixture by pressing on it with a utensil and/or fingers), then cool enough to
comfortably touch at least the pan's upper sidewall.
Batter:
1 1/4 cups granulated sugar
40 oz. (5 cups) 3-cheese blend (see above)
1/4 cup + 1 tablespoon (5 tablespoons altogether) arrowroot
2 teaspoons vanilla
5 eggs
4 small whoopie pies (each about 2 1/2 to 3 inches in diameter, such as from
Trader Joe's).
Vertically cut each of these whoopie pies into 6 "slices" (not
horizontally—in other words, each "slice" should contain two
chocolate "outsides" and cream in between them).
Expect about 7 cups of the resulting batter, but do not add this to the pan all
at once. Rather, this needs to be done in three installments. Wrap the pan in
foil just before adding the first installment.
For each of the first two installments, gently scoop about 3 cups of batter into
the pan. Add the pieces from 2 whoopie pies, ensuring that they are fully coated
and—as much as possible—immersed (this is likely not readily doable
on the first installment, but it should be on the second). After adding an
installment, bake the pan with its contents for 30 minutes. For the first
installment, bake at 325 degrees. For the second installment, reduce the
temperature and bake at 300 degrees. For both installments here, bake with the
pan in a tub filled with at least 1/4 to 1/2 inch of boiling water, but (to
reduce spillage risks) do not fill the tub all the way at this point, because
the whole tub-and-pan assembly is going to need to be removed from the oven (in
order to comfortably add contents to the pan) between installments.
After all this is done, there should be about a cup of batter left, with 60
minutes of baking time reached at this point (30 minutes for each of the first
two installments). Now comes the third installment—carefully add the last
of this batter (do not add any more whoopie pies at this point) on top of the
pan's other contents. Try to fully coat the entire surface, especially wherever
whoopie pie pieces may be showing. Next, return the entire pan-and-tub assembly
to the oven. At this point, fill up the tub generously with boiling water.
Resume baking at 300 degrees for another 80 minutes (based upon usage of a 9
1/2" pan).
Afterward, shut the oven off, and leave its door slightly ajar, with the
cheesecake still inside—and in the tub—for an hour. Next, remove the
cheesecake from the oven and tub (then immediately add a border of chocolate
chips around the edge of this cheesecake, if desired). Continue to cool it down
at room temperature for another two hours. After doing so, remove the cheesecake
from pan and refrigerate.
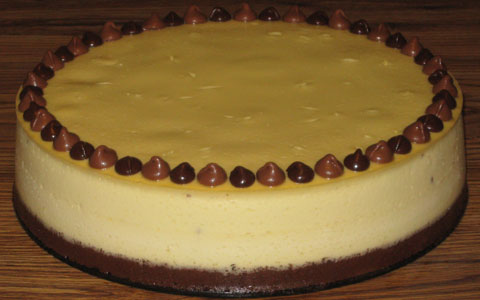
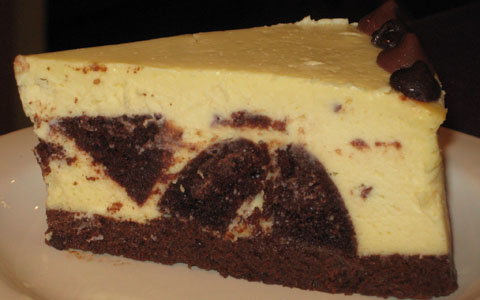
|
-------------------------------------------------------
|
Baked Pecan Cheesecake—Prototype 1:
2-to-1 Blend of Yogurt Cheese and Cottage Cheese:
Prepare ahead of time 2 pounds of yogurt cheese, derived from two 32-ounce
containers of nonfat yogurt. If the resulting yogurt cheese falls below 32
ounces, add back enough of the whey (that was strained out from the yogurt) to
make up the difference. To this yogurt cheese combine 16 ounces (1 pint) of
whipped, lowfat cottage cheese.
Pecan Filling:
1 tablespoon granulated sugar
2 tablespoons all-purpose flour
1/4 teaspoon salt
1/2 teaspoon xanthan gum
2 eggs
(Tip: blend these five above ingredients first—starting with the first
four, then adding the eggs—before adding the other ones below.)
2 cups corn syrup
1 teaspoon vanilla
4 oz. chopped pecans (about 1 cup, after chopping)
Combine all the pecan filling ingredients in a saucepan before heating. Stir
constantly over a roughly medium heat (not high—otherwise the mixture can
easily leave a sticky, burnt residue on the bottom of the pan), bringing the
mixture to a mild boil. Stir and cook carefully for about another 5 minutes,
then remove from heat. Let this mixture sit until it is time to add it to the
cheesecake batter (at which point the filling should still be at least warm
enough that it spreads very easily).
Crust:
2 oz. melted, white chocolate
1/4 cup granulated sugar
3 tablespoons brown sugar
2 teaspoons cinnamon
1/2 teaspoon vanilla
8 oz. (1 cup) 2-to-1 blend of yogurt cheese and cottage cheese (see above)
2 oz. All-Bran, ground up
Pour this crust mixture into pan (9 to 9 1/2 inches) and pre-bake without tub at
300 degrees for 10 minutes, then cool enough to comfortably touch at least the
pan's upper sidewall. Carefully wrap the pan in heavy foil afterwards (do not
wrap it earlier—otherwise, this increases leakage risks).
Batter:
4 tablespoons melted or softened butter
1 cup granulated sugar
1/4 cup all-purpose flour
3 tablespoons arrowroot
5 cups (40 oz.) 2-to-1 blend of yogurt cheese and cottage cheese (see above)
2 teaspoons vanilla
4 eggs
pecan filling (see above), prepared and slightly cooled (mix this in last, doing
so just until thoroughly blended)
Pour on top of crust. Bake in tub at 300 degrees for 105 minutes (if using a 9
1/2" pan). Then cool down while still in oven (with this oven shut off) and
in tub with door slightly ajar for an hour. Afterwards, remove from oven and tub
and continue to cool down at room temperature for another 105 minutes, then
remove from pan and refrigerate.

Baked Pecan Cheesecake—Prototype 2:
2-to-1 Blend of Yogurt Cheese and Cottage Cheese:
Prepare ahead of time 2 pounds of yogurt cheese, derived from two 32-ounce
containers of nonfat yogurt. If the resulting yogurt cheese falls below 32
ounces, add back enough of the whey (that was strained out from the yogurt) to
make up the difference. To this yogurt cheese combine 16 ounces (1 pint) of
whipped, lowfat cottage cheese.
Pecan Filling:
1 tablespoon granulated sugar
2 tablespoons all-purpose flour
1/4 teaspoon salt
1 teaspoon xanthan gum
2 eggs
(Tip: blend these five above ingredients first—starting with the first
four, then adding the eggs—before adding the other ones below.)
2 cups corn syrup
1 teaspoon vanilla
4 oz. chopped pecans (about 1 cup, after chopping)
Combine all the pecan filling ingredients in a saucepan before heating. Stir
constantly over a roughly medium heat (not high—otherwise the mixture can
easily leave a sticky, burnt residue on the bottom of the pan), bringing the
mixture to a mild boil. Stir and cook carefully for about another 5 minutes,
then remove from heat. Let this mixture sit until it is time to add it to the
cheesecake batter (at which point the filling should still be at least warm
enough that it spreads very easily).
Crust:
2 oz. melted, white chocolate
1/4 cup granulated sugar
3 tablespoons brown sugar
1 teaspoon cinnamon
1/2 teaspoon vanilla
8 oz. (1 cup) 2-to-1 blend of yogurt cheese and cottage cheese (see above)
2 oz. All-Bran, ground up
Pour this crust mixture into pan (9 to 9 1/2 inches) and pre-bake without tub at
300 degrees for 10 minutes, then cool enough to comfortably touch at least the
pan's upper sidewall. Carefully wrap the pan in heavy foil afterwards (do not
wrap it earlier—otherwise, this increases leakage risks).
Batter:
4 tablespoons melted or softened butter
1 cup granulated sugar
1/4 cup all-purpose flour
1/2 cup arrowroot
5 cups (40 oz.) 2-to-1 blend of yogurt cheese and cottage cheese (see above)
2 teaspoons vanilla
4 eggs
pecan filling (see above), prepared and slightly cooled (mix this in last, doing
so just until thoroughly blended)
Pour on top of crust. Bake in tub at 300 degrees for 90 minutes (if using a 9
1/2" pan). Then cool down while still in oven (with this oven shut off) and
in tub with door slightly ajar for 90 minutes. Afterwards, remove from oven and tub
and continue to cool down at room temperature for another 2 hours, then
remove from pan and refrigerate.
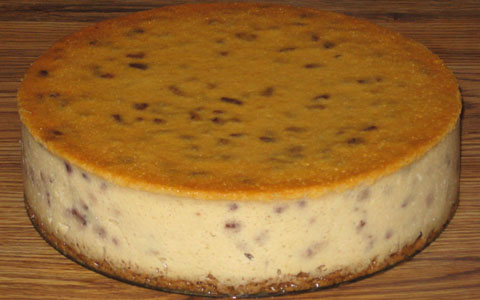
|
-------------------------------------------------------
|
Baked Marshmallow Fluff Cheesecake—Prototype 1:
2-to-1 Blend of Yogurt Cheese and Cottage Cheese:
Prepare ahead of time 2 pounds of yogurt cheese, derived from two 32-ounce
containers of nonfat yogurt. If the resulting yogurt cheese falls below 32
ounces, add back enough of the whey (that was strained out from the yogurt) to
make up the difference. To this yogurt cheese combine 16 ounces (1 pint) of
whipped, lowfat cottage cheese.
Crust:
2 oz. melted, white chocolate
1/4 cup granulated sugar
2 tablespoons brown sugar
1 teaspoon cinnamon
1/2 teaspoon vanilla
8 oz. (1 cup) 2-to-1 blend of yogurt cheese and cottage cheese (see above)
2 oz. All-Bran, ground up
Pour this crust mixture into pan (9 to 9 1/2 inches) and pre-bake without tub at
300 degrees for 10 minutes, then cool enough to comfortably touch at least the
pan's upper sidewall. Carefully wrap the pan in heavy foil afterwards (do not
wrap it earlier—otherwise, this increases leakage risks).
Batter:
4 tablespoons melted or softened butter
1 cup granulated sugar
1/4 cup all-purpose flour
3 tablespoons arrowroot
5 cups (40 oz.) 2-to-1 blend of yogurt cheese and cottage cheese (see above)
2 teaspoons vanilla
8 oz. Marshmallow Fluff (or other brand of marshmallow cream, if the Fluff brand
is not available)—gradually mix this in and blend completely, before adding
any ingredients below.
4 eggs
Pour on top of crust. Bake in tub at 300 degrees for 105 minutes (if using a 9
1/2" pan). Then cool down while still in oven (with this oven shut off) and
in tub with door slightly ajar for an hour. Afterwards, remove from oven and tub
and continue to cool down at room temperature for another 105 minutes, then
remove from pan and refrigerate.
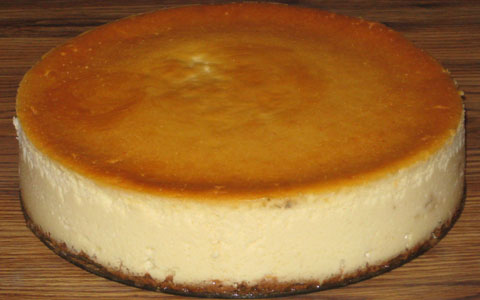
|
-------------------------------------------------------
|
Baked Cherry Cheesecake—Prototype 6:
2-to-1 Blend of Yogurt Cheese and Cottage Cheese:
Prepare ahead of time 2 pounds of yogurt cheese, derived from two 32-ounce
containers of nonfat yogurt. If the resulting yogurt cheese falls below 32
ounces, add back enough of the whey (that was strained out from the yogurt) to
make up the difference. To this yogurt cheese combine 16 ounces (1 pint) of
whipped, lowfat cottage cheese.
Crust:
2 oz. melted, white chocolate
1/4 cup granulated sugar
2 tablespoons brown sugar
1 teaspoon cinnamon
1/2 teaspoon vanilla
8 oz. (1 cup) 2-to-1 blend of yogurt cheese and cottage cheese (see above)
2 oz. All-Bran, ground up
Pour this crust mixture into pan (9 to 9 1/2 inches) and pre-bake without tub at
300 degrees for 10 minutes, then cool enough to comfortably touch at least the
pan's upper sidewall. Carefully wrap the pan in heavy foil afterwards (do not
wrap it earlier—otherwise, this increases leakage risks).
Batter:
4 tablespoons melted or softened butter
1 cup granulated sugar
1/4 cup all-purpose flour
1/2 cup arrowroot
5 cups (40 oz.) 2-to-1 blend of yogurt cheese and cottage cheese (see above)
2 teaspoons vanilla
13 oz. cherry preserves—if pits are (or might) be present,
try to filter them out through a strainer (also, see comments below)
2 teaspoons xanthan gum
4 eggs
Expect almost 8 cups of the resulting batter, but do not add this to the pan all
at once. Rather, this needs to be done in four installments (this is so that the
cheesecake can be baked long enough to help get it reasonably firm, yet without
overcooking its top surface).
For each of these four installments, gently scoop about 1 3/4 to 2 cups of batter
into the pan. After adding an installment, bake the pan with its contents for 15
minutes, at 325 degrees. For the first three installments here, bake with the
pan in a tub filled with at least 1/4 to 1/2 inch of boiling water, but (to
reduce spillage risks) do not fill the tub all the way at this point, because
the whole tub-and-pan assembly is going to need to be removed from the oven (in
order to comfortably add more batter to the pan) between installments. For the
fourth (and final) installment, fill up the tub more generously (or nearly full)
with boiling water.
After all this is done, there should be 60 minutes of baking time, at 325
degrees, reached at this point (15 minutes for each of these four installments).
Now, with the cheesecake remaining in the oven, reduce the temperature to 300
degrees and continue baking this cheesecake for another 75 minutes (based upon
usage of a 9 1/2" pan). Then cool it down while it is still in the oven
(with this oven shut off) and in the tub with the oven's door slightly ajar for
60 minutes. Afterwards, remove from oven and tub and continue to cool down in
pan at room temperature for another 2 hours, then remove from pan and
refrigerate.
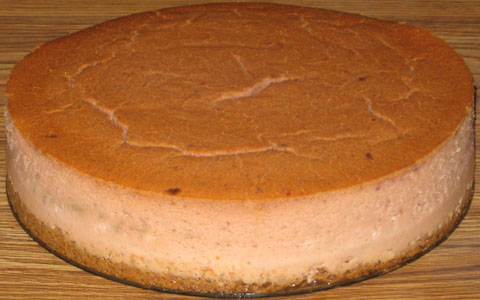
Baked Cherry Cheesecake—Prototype 7:
2-to-1 Blend of Yogurt Cheese and Cottage Cheese:
Prepare ahead of time 2 pounds of yogurt cheese, derived from two 32-ounce
containers of nonfat yogurt. If the resulting yogurt cheese falls below 32
ounces, add back enough of the whey (that was strained out from the yogurt) to
make up the difference. To this yogurt cheese combine 16 ounces (1 pint) of
whipped, lowfat cottage cheese.
Crust:
2 oz. melted, white chocolate
1/4 cup granulated sugar
2 tablespoons brown sugar
1 teaspoon cinnamon
1/2 teaspoon vanilla
8 oz. (1 cup) 2-to-1 blend of yogurt cheese and cottage cheese (see above)
2 oz. All-Bran, ground up
Pour this crust mixture into pan (9 to 9 1/2 inches) and pre-bake without tub at
300 degrees for 10 minutes, then cool enough to comfortably touch at least the
pan's upper sidewall. Carefully wrap the pan in heavy foil afterwards (do not
wrap it earlier—otherwise, this increases leakage risks).
Batter:
4 tablespoons melted or softened butter
7/16 cup (3/8 cup + 1 tablespoon) Cherry Kool-Aid (pre-sweetened) mix (about the
same amount of mix that would be needed as if to make 1 quart of the drink
itself, but do NOT rely on the package's enclosed scoop)
1 cup granulated sugar
1/4 cup all-purpose flour
3 tablespoons arrowroot
5 cups (40 oz.) 2-to-1 blend of yogurt cheese and cottage cheese (see above)
2 teaspoons vanilla
4 eggs
Wrap the pan in foil at this point. Carefully pour the batter over the crust and
bake this cheesecake in a hot water tub at 300 degrees for 105 minutes (if using
a 9 1/2" pan). Then shut off oven and cool cheesecake down while still in
it (and in tub), with door slightly ajar, for an hour. Afterwards, remove from
oven and tub and continue to cool down at room temperature for another 105
minutes, then remove from pan and refrigerate.
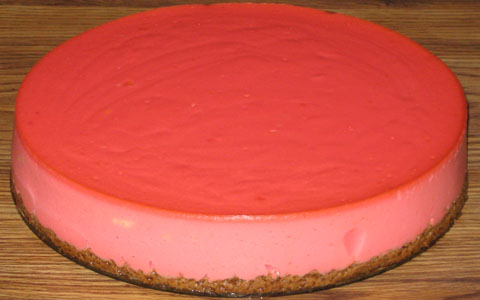
|
-------------------------------------------------------
|
Baked Fluffernutter (Marshmallow Peanut Butter) Cheesecake—Prototype 1:
2-to-1 Blend of Yogurt Cheese and Cottage Cheese:
Prepare ahead of time 32 ounces of yogurt cheese, derived from two 32-ounce
containers (that's 64 ounces altogether) of nonfat yogurt. If the resulting
yogurt cheese falls below 32 ounces, add back enough of the whey (that was
strained out from the yogurt) to make up the difference. To this yogurt cheese
combine one 16-ounce container of whipped, lowfat cottage cheese.
Crust:
2 oz. melted, white chocolate
1/4 cup granulated sugar
2 tablespoons brown sugar
1 teaspoon cinnamon
1/2 teaspoon vanilla
8 oz. (1 cup) 2-to-1 blend of yogurt cheese and cottage cheese (see above)
2 oz. All-Bran, ground up
Place the resulting crust mixture into the bottom of a greased 9 1/2" (or
9") springform pan and pre-bake without tub at 300 degrees for 10 minutes,
then cool enough to comfortably touch at least the pan's upper sidewall. Carefully
wrap the pan in heavy foil afterwards (do not wrap it earlier—otherwise,
the foil is likely to be more disturbed, thus increasing leakage risks).
Marshmallow Batter:
2 tablespoons melted butter (unsalted recommended)
2 tablespoons all-purpose flour
1 1/2 tablespoons arrowroot
20 oz. (2 1/2 cups) 2-to-1 blend of yogurt cheese and cottage cheese (see above)
1 teaspoon vanilla
8 oz. Marshmallow Fluff (or other brand of marshmallow cream, if the Fluff brand
is not available)—gradually mix this in and blend completely, before
adding any ingredients below.
2 eggs
Carefully pour the batter on top of the crust and bake all this in a hot water
tub at 325 degrees for about 40 minutes. Afterwards, take the tub-and-pan
assembly out of the oven.
Add about 10 regular-sized marshmallows on top.
Return all this to the oven and continue baking at 325 degrees for another 20
minutes. After this is done, remove the tub-and-pan assembly from the oven and
promptly add the batter indicated below.
Peanut Butter Batter:
2 tablespoons melted butter (unsalted recommended)
4 oz. peanut butter (unsalted recommended)
3/4 cup granulated sugar
2 tablespoons all-purpose flour
1 1/2 tablespoons arrowroot
20 oz. (2 1/2 cups) 2-to-1 blend of yogurt cheese and cottage cheese (see above)
2 eggs
Carefully scoop all of this batter, except for about 1 1/2 cups, on top of the
marshmallow surface (it is best to do this around the edge of the pan and on top
of the regular marshmallows and let the peanut butter batter flow to the
surface's other areas) and return the tub-and-pan assembly to the oven, this
time at only 300 degrees. Resume baking for about 15 minutes.
Next, remove the tub-and-pan assembly from the oven and carefully add the
remaining peanut butter batter (try to coat whatever marshmallows float to the
surface). Return all this to the oven, still at 300 degrees, and bake for about
60 more minutes (if using a 9 1/2" pan). Then shut off the oven and cool
the cheesecake down while still in it (and in tub), with the oven door slightly
ajar, for about an hour. Afterwards, remove the cheesecake (still in its
springform pan) from the oven and tub and continue to cool it down at room
temperature for another 2 hours.
After that, remove the cheesecake from its pan and refrigerate.

|
-------------------------------------------------------
|
Baked Dulce De Leche Cheesecake—Prototype 1:
2-to-1 Blend of Yogurt Cheese and Cottage Cheese:
Prepare ahead of time 2 pounds of yogurt cheese, derived from two 32-ounce
containers of nonfat yogurt. If the resulting yogurt cheese falls below 32
ounces, add back enough of the whey (that was strained out from the yogurt) to
make up the difference. To this yogurt cheese combine 16 ounces (1 pint) of
whipped, lowfat cottage cheese.
Caramel Sauce:
Empty a 14-ounce can of sweetened condensed milk (nonfat recommended) into a
container to be used for heating (warning: do not use the can itself for
heating, due to the possibility of the high heat causing the can's inner
material to react with—or somehow adversely affect—the milk). There
is more than one way to heat this sweetened milk until it turns brown. One of
them is to microwave the milk at medium power for a few minutes, then cut the
power to medium-low and microwave for a few more minutes. Stir the contents
frequently while heating. Another option (which takes more time) is to place the
container on top of another one which itself contains boiling water. Simmer all
this on a stove for about an hour or so, stirring often. Alternatively, put it
into an oven at about 400 to 425 degrees—but tightly cover the milk's
container (just that one, not the container with the hot water) with foil—and
bake about one to two hours, or until the mixture is brown enough.
Crust:
2 oz. melted, white chocolate
1 cup (8 oz.) 2-to-1 blend of yogurt cheese and cottage cheese (see above)
1/4 cup granulated sugar
3 tablespoons brown sugar
2 teaspoons cinnamon
1/2 teaspoon vanilla
2 oz. All-Bran, ground up
Pour this crust mixture into pan (9 to 9 1/2 inches) and pre-bake without tub at
300 degrees for 10 minutes, then cool enough to comfortably touch at least the
pan's upper sidewall.
Batter:
4 tablespoons melted or softened butter
1 cup granulated sugar
5 cups (40 oz.) 2-to-1 blend of yogurt cheese and cottage cheese (see above)
2 teaspoons vanilla
1/4 cup all-purpose flour
3 tablespoons arrowroot
Caramel sauce from 14 oz. can of sweetened condensed milk (see above)—note
that this gets blended into the batter (tip: the warmer the caramel sauce is, the
softer it is, thus the easier it is to get it blended in)
4 eggs
Pour on top of crust. Bake in tub at 300 degrees for 105 minutes (if using a 9
1/2" pan). Then cool down while still in oven (with this oven shut off) and
in tub with door slightly ajar for an hour. Afterwards, remove from oven and tub
and continue to cool down at room temperature for another 105 minutes, then
remove from pan and refrigerate.
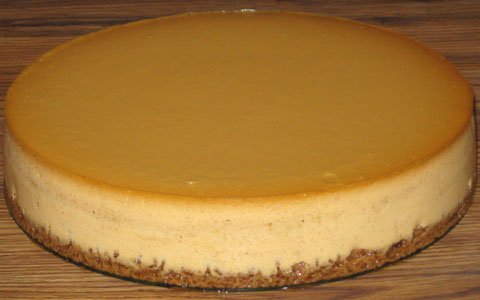
Baked Dulce De Leche Cheesecake—Prototype 2:
2-to-1 Blend of Yogurt Cheese and Cottage Cheese:
Prepare ahead of time 2 pounds of yogurt cheese, derived from two 32-ounce
containers of nonfat yogurt. If the resulting yogurt cheese falls below 32
ounces, add back enough of the whey (that was strained out from the yogurt) to
make up the difference. To this yogurt cheese combine 16 ounces (1 pint) of
whipped, lowfat cottage cheese.
Caramel Sauce:
Empty two 14-ounce cans of sweetened condensed milk (nonfat recommended) into a
container to be used for heating (warning: do not use the cans themselves for
heating, due to the possibility of the high heat causing the cans' inner
material to react with—or somehow adversely affect—the milk). There
is more than one way to heat this sweetened milk until it turns brown. One of
them is to microwave the milk at medium power for a few minutes, then cut the
power to medium-low and microwave for a few more minutes. Stir the contents
frequently while heating. Another option (which takes more time) is to place the
container on top of another one which itself contains boiling water. Simmer all
this on a stove for about an hour or so, stirring often. Alternatively, put it
into an oven at about 400 to 425 degrees—but tightly cover the milk's
container (just that one, not the container with the hot water) with foil—and
bake about one to two hours, or until the mixture is brown enough.
Crust:
2 oz. melted, white chocolate
1 cup (8 oz.) 2-to-1 blend of yogurt cheese and cottage cheese (see above)
1/4 cup granulated sugar
2 tablespoons brown sugar
1 teaspoon cinnamon
1/2 teaspoon vanilla
2 oz. All-Bran, ground up
Pour this crust mixture into pan (9 to 9 1/2 inches) and pre-bake without tub at
300 degrees for 10 minutes, then cool enough to comfortably touch at least the
pan's upper sidewall.
Batter:
4 tablespoons melted or softened butter
1 cup granulated sugar
5 cups (40 oz.) 2-to-1 blend of yogurt cheese and cottage cheese (see above)
2 teaspoons vanilla
1/4 cup all-purpose flour
3 tablespoons arrowroot
Caramel sauce from two 14 oz. cans of sweetened condensed milk (see above)—note
that this gets blended into the batter (tip: the warmer the caramel sauce is, the
softer it is, thus the easier it is to get it blended in)
4 eggs
Pour on top of crust. Bake in tub at 300 degrees for 115 minutes (if using a 9
1/2" pan). Then cool down while still in oven (with this oven shut off) and
in tub with door slightly ajar for an hour. Afterwards, remove from oven and tub
and continue to cool down at room temperature for another 115 minutes, then
remove from pan and refrigerate.
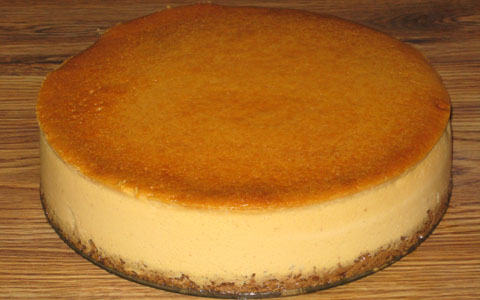
Baked Dulce De Leche Cheesecake—Prototype 3:
2-to-1 Blend of Yogurt Cheese and Cottage Cheese:
Prepare ahead of time 2 pounds of yogurt cheese, derived from two 32-ounce
containers of nonfat yogurt. If the resulting yogurt cheese falls below 32
ounces, add back enough of the whey (that was strained out from the yogurt) to
make up the difference. To this yogurt cheese combine 16 ounces (1 pint) of
whipped, lowfat cottage cheese.
Caramel Sauce:
Empty two 14-ounce cans of sweetened condensed milk (nonfat recommended) into a
container to be used for heating (warning: do not use the cans themselves for
heating, due to the possibility of the high heat causing the cans' inner
material to react with—or somehow adversely affect—the milk). There
is more than one way to heat this sweetened milk until it turns brown. One of
them is to microwave the milk at medium power for a few minutes, then cut the
power to medium-low and microwave for a few more minutes. Stir the contents
frequently while heating. Another option (which takes more time) is to place the
container on top of another one which itself contains boiling water. Simmer all
this on a stove for about a couple of hours or so (or until the contents are
noticeably thick and/or show a light brown or caramel-like color), stirring
often. Alternatively, put it into an oven at about 400 to 425 degrees—but
tightly cover the milk's container (just that one, not the container with the
hot water) with foil—and bake about one to two hours, or until the mixture
is brown enough.
Crust:
2 oz. melted, white chocolate
1 cup (8 oz.) 2-to-1 blend of yogurt cheese and cottage cheese (see above)
1/4 cup granulated sugar
2 tablespoons brown sugar
1 teaspoon cinnamon
1/2 teaspoon vanilla
2 oz. All-Bran, ground up
Place the resulting mixture in the greased pan and pre-bake without tub at 300
degrees for 5-10 minutes, depending on the mixture's thickness (closer to 10
minutes if thin enough to be fully distributed across the pan's bottom by gentle
shaking, closer to 5 minutes if thick enough to require spreading out this
mixture by pressing on it with a utensil and/or fingers), then cool enough to
comfortably touch at least the pan's upper sidewall.
Batter:
4 tablespoons melted or softened butter
1 1/4 cups sugar
1/4 cup all-purpose flour
3 tablespoons arrowroot
40 oz. (5 cups) 2-to-1 blend of yogurt cheese and cottage cheese (see above)
2 teaspoons vanilla
4 eggs
Expect about 7 cups of the resulting batter (of course, that's before adding any
caramel sauce), but do not add this to the pan all at once. Rather, this needs
to be done in five installments. Wrap the pan in foil just before adding the
first installment (no earlier than that—the goal here is to minimize the
foil's disturbance in order to minimize its leakage risk).
For each of the first four installments, gently scoop about 1 1/2 cups of batter
into the pan. Spoon about 1/4 of the caramel sauce in scattered areas on top of
the batter. Then swirl this sauce with a knife—carefully (try to keep its
tip from going below the batter installment being added at that point). After
adding an installment, bake the pan with its contents for 15 minutes. For each
of the first three installments, bake at 325 degrees. For the fourth
installment, reduce the temperature and bake at 300 degrees. For all four
installments here, bake with the pan in a tub filled with at least 1/4 to 1/2
inch of boiling water, but (to reduce spillage risks) do not fill the tub all
the way at this point, because the whole tub-and-pan assembly is going to need
to be removed from the oven (in order to comfortably add contents to the pan)
between installments.
After all this is done, there should be about a cup of batter left, with 60
minutes of baking time reached at this point (15 minutes for each of the first
four installments). Now comes the fifth installment—carefully add the last
of this batter (do not add any more caramel sauce at this point) on top of the
pan's other contents. Try to fully coat the entire surface, especially wherever
any caramel sauce may be showing. Next, return the entire pan-and-tub assembly
to the oven. At this point, fill up the tub generously with boiling water.
Resume baking at 300 degrees for another 55 minutes (based upon usage of a 9
1/2" pan).
Afterward, shut the oven off, and leave its door slightly ajar, with the
cheesecake still inside—and in the tub—for an hour. Next, remove the
cheesecake from the oven and tub, and—for a bit of a "turtle
effect", if desired—add a border of chocolate chips around the edge
of this cheesecake. Continue to cool it down at room temperature for another two
hours. After doing so, remove the cheesecake from pan and refrigerate.
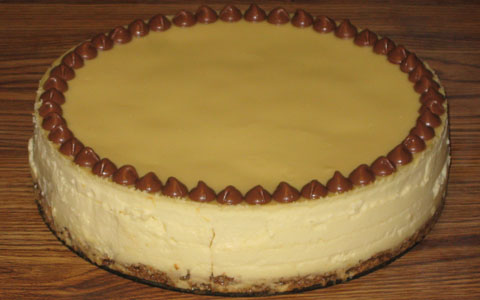
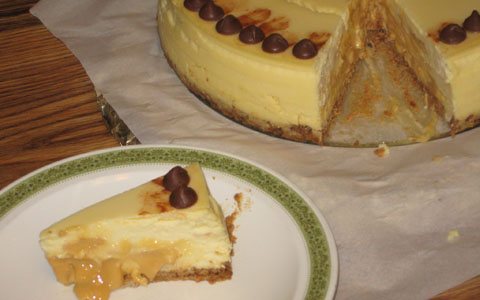
|
-------------------------------------------------------
|
Baked Chocolate Cherry Cheesecake—Prototype 3:
2-to-1 Blend of Yogurt Cheese and Cottage Cheese:
Prepare ahead of time 32 ounces of yogurt cheese, derived from two 32-ounce
containers (that's 64 ounces altogether) of nonfat yogurt. If the resulting
yogurt cheese falls below 32 ounces, add back enough of the whey (that was
strained out from the yogurt) to make up the difference. To this yogurt cheese
combine one 16-ounce container of whipped, lowfat cottage cheese.
Grease a 9 1/2" (or 9") pan, but do not wrap foil around it until just
before the batter is added (spreading the crust in an already wrapped pan can
result in greater disturbance to the foil, thus increasing leakage risks).
Chocolate Crust:
4 oz. semi-sweet chocolate, melted
2 tablespoons cocoa powder
8 oz. (1 cup) 2-to-1 blend of yogurt cheese and cottage cheese (see above)
3/8 cup granulated sugar
1 teaspoon vanilla
2 oz. finely ground All-Bran
Place the resulting mixture in the greased pan and pre-bake without tub at
300 degrees for 5-10 minutes, depending on the mixture's thickness (closer to 10
minutes if thin enough to be fully distributed across the pan's bottom by gentle
shaking, closer to 5 minutes if thick enough to require spreading out this
mixture by pressing on it with a utensil and/or fingers), then cool enough to
comfortably touch at least the pan's upper sidewall.
Cherry Batter:
2 tablespoons melted/softened butter (unsalted recommended)
3 1/2 tablespoons (1/4 cup, less 1/2 tablespoon) Cherry Kool-Aid (pre-sweetened)
mix (about the same amount of mix that would be needed as if to make 1/2 quart
of the drink itself, but do NOT rely on the package's enclosed scoop)
1/2 cup granulated sugar
2 tablespoons all-purpose flour
1 1/2 tablespoons arrowroot
20 oz. (2 1/2 cups) 2-to-1 blend of yogurt cheese and cottage cheese (see above)
1 teaspoon vanilla
2 eggs
Wrap the pan in foil at this point. Carefully pour the batter on top of the
crust and bake all this in a hot water tub at 325 degrees for about 40 minutes.
Afterwards, take the tub-and-pan assembly out of the oven and promptly add the
batter indicated below.
Chocolate Batter:
2 tablespoons melted/softened butter (unsalted recommended)
3 tablespoons cocoa powder
7/8 cup granulated sugar
2 tablespoons all-purpose flour
1 1/2 tablespoons arrowroot
20 oz. (2 1/2 cups) 2-to-1 blend of yogurt cheese and cottage cheese (see above)
1 teaspoon vanilla
2 eggs
Carefully scoop this on top of the cherry batter (it is best to do this around
the edge of the pan and let the chocolate batter flow towards the middle) and
return the tub-and-pan assembly to the oven, this time at only 300 degrees. Bake
for about 90 more minutes (if using a 9 1/2" pan). Then shut off the oven
and cool the cheesecake down while still in it (and in tub), with the oven door
slightly ajar, for about an hour. Afterwards, remove the cheesecake (still in
its springform pan) from the oven and tub and continue to cool it down at room
temperature for another two hours.
After cooling down at room temperature, remove the cheesecake from its pan and
refrigerate.
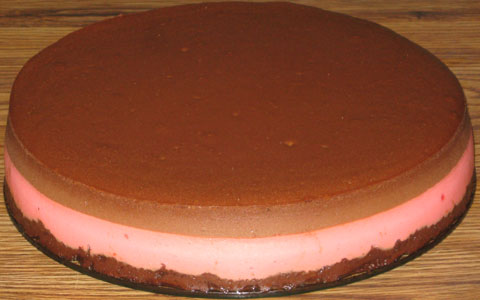
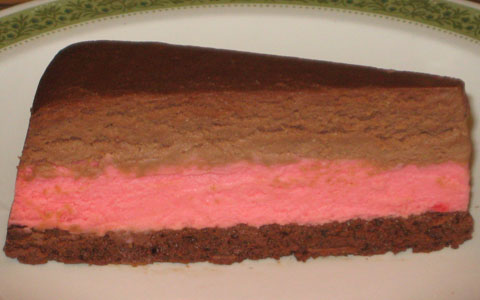
|
-------------------------------------------------------
|
Baked Strawberry Cheesecake—Prototype 1:
Yogurt Cheese:
Prepare ahead of time 3 pounds of yogurt cheese, derived from three 32-ounce
containers of nonfat yogurt. If the resulting yogurt cheese falls below 48
ounces, add back enough of the whey (that was strained out from the yogurt) to
make up the difference.
Grease a 9 1/2" (or 9") pan, but do not wrap foil around it until just
before the batter is added (spreading the crust in an already wrapped pan can
result in greater disturbance to the foil, thus increasing leakage risks).
Crust:
2 oz. melted, white chocolate
8 oz. (1 cup) yogurt cheese (see above)
1/4 cup granulated sugar
2 tablespoons brown sugar
1 teaspoon cinnamon
1/2 teaspoon vanilla
2 oz. All-Bran, ground up
Place the resulting mixture in the greased pan and pre-bake without tub at 300
degrees for 5-10 minutes, depending on the mixture's thickness (closer to 10
minutes if thin enough to be fully distributed across the pan's bottom by gentle
shaking, closer to 5 minutes if thick enough to require spreading out this
mixture by pressing on it with a utensil and/or fingers), then cool enough to
comfortably touch at least the pan's upper sidewall.
Batter:
4 tablespoons melted or softened butter
1 cup granulated sugar
14 oz. strawberry conserves (such as from
Whole Foods Market)
1/4 cup all-purpose flour
3 tablespoons arrowroot
5 cups (40 oz.) yogurt cheese (see above)
2 teaspoons vanilla
4 eggs
Wrap the pan in foil, and carefully pour the batter on top of the crust. Bake
all this in a tub at 300 degrees for 105 minutes (if using a 9 1/2" pan).
Then cool down while still in oven (with this oven shut off) and in tub with
door slightly ajar for an hour. Afterwards, remove from oven and tub and
continue to cool down at room temperature for another 105 minutes, then remove
from pan and refrigerate.
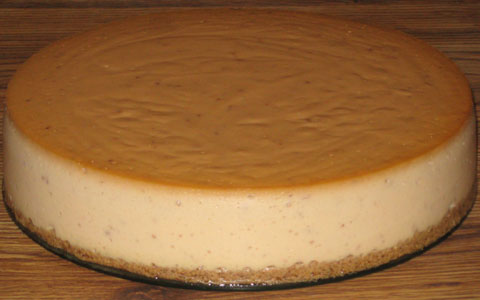
Baked Strawberry Cheesecake—Prototype 2:
Repeat
Prototype 1,
but replace the batter's 14 ounces of strawberry
conserves with 20 ounces of strawberry fruit spread (which seemed reasonably
close to strawberry conserves).
Also, increase the baking time from 105 minutes to 2 hours (keep the
in-oven-with-door-ajar cooling time at 1 hour). Likewise, increase the cooling
time at room temperature (i.e., outside the oven) from 105 minutes to
2 hours.
Baked Strawberry Cheesecake—Prototype 3:
3-Cheese Blend (1CT-1NC-4YG):
Prepare ahead of time 32 ounces of yogurt cheese, derived from two 32-ounce
containers (that's 64 ounces altogether) of nonfat yogurt. If the resulting
yogurt cheese falls below 32 ounces, add back enough of the whey (that was
strained out from the yogurt) to make up the difference. To this yogurt cheese
combine 8 ounces of whipped, lowfat cottage cheese and 8 ounces of softened
Neufchatel cheese ("light cream cheese").
Crust:
2 oz. melted, white chocolate
8 oz. (1 cup) 3-cheese blend (see above)
1/4 cup granulated sugar
2 tablespoons brown sugar
1 teaspoon cinnamon
1/2 teaspoon vanilla
2 oz. All-Bran, ground up
Place the resulting mixture in the greased pan and pre-bake without tub at 300
degrees for 5-10 minutes, depending on the mixture's thickness (closer to 10
minutes if thin enough to be fully distributed across the pan's bottom by gentle
shaking, closer to 5 minutes if thick enough to require spreading out this
mixture by pressing on it with a utensil and/or fingers), then cool enough to
comfortably touch at least the pan's upper sidewall.
Batter:
1 1/4 cups granulated sugar
40 oz. (5 cups) 3-cheese blend (see above)
2 teaspoons vanilla
12 ounces of strawberry puree
1/2 cup arrowroot
5 eggs
Wrap the pan in foil just before adding the batter (to minimize the foil's
disturbance and therefore its leakage risk, do not put it on any earlier).
Next, pour the batter over the crust and bake this cheesecake in a hot water tub
at 300 degrees for 120 minutes (if using a 9 1/2" pan). Then cool the
cheesecake down while still in oven (with this oven shut off) and in tub with
door slightly ajar for an hour. Afterwards, remove from oven and tub and
continue to cool down at room temperature for another 120 minutes, then remove
from pan and refrigerate.
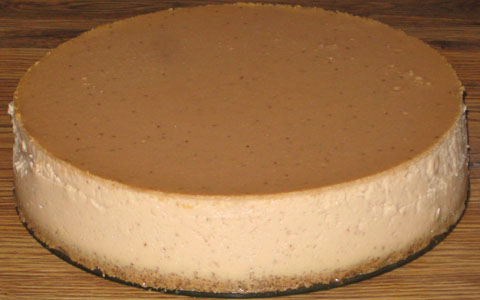
Baked Strawberry Cheesecake—Prototype 4:
Repeat
Prototype 3,
but make this change for the batter:
Boost arrowroot by 1/4 cup, to 3/4 cup (thus adding more stability).
Baked Strawberry Cheesecake—Prototype 5:
3-Cheese Blend (1CT-1NC-4YG):
Prepare ahead of time 32 ounces of yogurt cheese, derived from two 32-ounce
containers (that's 64 ounces altogether) of nonfat yogurt. If the resulting
yogurt cheese falls below 32 ounces, add back enough of the whey (that was
strained out from the yogurt) to make up the difference. To this yogurt cheese
combine 8 ounces of whipped, lowfat cottage cheese and 8 ounces of softened
Neufchatel cheese ("light cream cheese").
Crust:
2 ounces of strawberry puree
2 oz. melted, white chocolate
8 oz. (1 cup) 3-cheese blend (see above)
1/4 cup granulated sugar
2 tablespoons brown sugar
1 teaspoon cinnamon
1/2 teaspoon vanilla
2 oz. All-Bran, ground up
Place the resulting mixture in the greased pan and pre-bake without tub at 300
degrees for 5-10 minutes, depending on the mixture's thickness (closer to 10
minutes if thin enough to be fully distributed across the pan's bottom by gentle
shaking, closer to 5 minutes if thick enough to require spreading out this
mixture by pressing on it with a utensil and/or fingers), then cool enough to
comfortably touch at least the pan's upper sidewall.
Batter:
1 1/4 cups granulated sugar
40 oz. (5 cups) 3-cheese blend (see above)
2 teaspoons vanilla
12 ounces of strawberry puree
1/2 cup arrowroot
5 eggs
Expect close to 8 1/2 cups of the resulting batter, but do not add this to
the pan all at once. Rather, this needs to be done in four installments. Wrap
the pan in foil just before adding the first batter installment (to minimize the
foil's disturbance and therefore its leakage risk, do not put it on any
earlier).
For each of the first three installments, gently scoop about 2 1/3 cups of
batter into the pan, fully covering the surface (here's a tip—scoop small
amounts of batter around the edge of the pan, letting this batter flow towards
the middle on its own), and then bake this pan with its contents for 25 minutes,
at 325 degrees. For these three installments here, bake with the pan in a tub
filled with at least 1/4 to 1/2 inch of boiling water, but (to reduce spillage
risks) do not fill the tub all the way at this point, because the whole
tub-and-pan assembly is going to need to be removed from the oven (in order to
comfortably add contents to the pan) between installments.
After these first three installments are done, there should be about 1 to 1 1/2
cups of batter left, with 75 minutes of baking time reached at this point (25
minutes for each of the first three installments). Now comes the fourth
installment—carefully add the last of this batter on top of the pan's
earlier installments, fully coating the entire surface. Next, return the entire
pan-and-tub assembly to the oven, this time with the temperature reduced to 300
degrees. At this point, fill up the tub generously with boiling water. Resume
baking for another 120 minutes (based upon usage of a 9 1/2" pan).
Afterward, shut the oven off, and leave its door slightly ajar, with the
cheesecake still inside—and in the tub—for an hour. Next, remove the
cheesecake from the oven and tub. Continue to cool it down at room temperature
for another two hours. After doing so, remove the cheesecake from pan and
refrigerate.
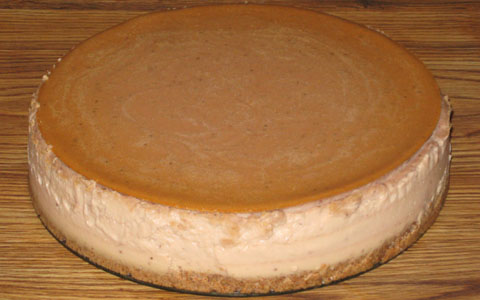
Baked Strawberry Cheesecake—Prototype 6:
3-Cheese Blend (1CT-1NC-4YG):
Prepare ahead of time 32 ounces of yogurt cheese, derived from two 32-ounce
containers (that's 64 ounces altogether) of nonfat yogurt. If the resulting
yogurt cheese falls below 32 ounces, add back enough of the whey (that was
strained out from the yogurt) to make up the difference. To this yogurt cheese
combine 8 ounces of whipped, lowfat cottage cheese and 8 ounces of softened
Neufchatel cheese ("light cream cheese").
Crust:
2 oz. melted, white chocolate
8 oz. (1 cup) 3-cheese blend (see above)
1/4 cup granulated sugar
3 tablespoons brown sugar
2 teaspoons cinnamon
1/2 teaspoon vanilla
2 oz. All-Bran, ground up
Place the resulting mixture in the greased pan and pre-bake without tub at 300
degrees for 5-10 minutes, depending on the mixture's thickness (closer to 10
minutes if thin enough to be fully distributed across the pan's bottom by gentle
shaking, closer to 5 minutes if thick enough to require spreading out this
mixture by pressing on it with a utensil and/or fingers), then cool enough to
comfortably touch at least the pan's upper sidewall.
Batter:
1 cup granulated sugar
1/2 cup Nestlé Strawberry Nesquik drink mix (the same amount of mix that
would be needed as if to make 1 quart of the drink itself)
40 oz. (5 cups) 3-cheese blend (see above)
2 teaspoons vanilla
1/4 cup + 1 tablespoon (5 tablespoons altogether) arrowroot
5 eggs
Wrap the pan in foil at this point. Carefully pour the batter over the crust and
bake this cheesecake in a hot water tub at 300 degrees for 105 minutes (if using
a 9 1/2" pan). Then shut off oven and cool cheesecake down while still in
it (and in tub), with door slightly ajar, for an hour. Afterwards, remove from
oven and tub and continue to cool down at room temperature for another 105
minutes, then remove from pan and refrigerate.
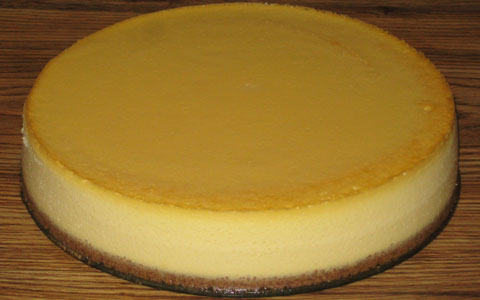
Baked Strawberry Cheesecake—Prototype 7:
Repeat
Prototype 6,
but make these changes for the batter:
Boost Nestlé Strawberry Nesquik drink mix by 1/2 cup, to 1 full cup (this
revised amount of mix being what would be needed as if to make 2 quarts of
the drink itself).
Reduce granulated sugar by 1/8 cup (2 tablespoons), to 7/8 cup.

Baked Strawberry Cheesecake—Prototype 8:
3-Cheese Blend (3CT-1NC-2YG):
Prepare ahead of time 16 ounces of yogurt cheese, derived from one 32-ounce
container of nonfat yogurt. If the resulting yogurt cheese falls below 16
ounces, add back enough of the whey (that was strained out from the yogurt) to
make up the difference. To this yogurt cheese combine 24 ounces of whipped,
lowfat cottage cheese and 8 ounces of softened Neufchatel cheese ("light
cream cheese").
Grease a 9 1/2" (or 9") pan, but do not wrap foil around it until just
before the batter is added (spreading the crust in an already wrapped pan can
result in greater disturbance to the foil, thus increasing leakage risks).
Crust:
2 oz. melted, white chocolate
8 oz. (1 cup) 3-cheese blend (see above)
1/4 cup granulated sugar
1/4 cup brown sugar
1/2 teaspoon vanilla
2 oz. All-Bran, ground up
Place the resulting mixture in the greased pan and pre-bake without tub at 300
degrees for 5-10 minutes, depending on the mixture's thickness (closer to 10
minutes if thin enough to be fully distributed across the pan's bottom by gentle
shaking, closer to 5 minutes if thick enough to require spreading out this
mixture by pressing on it with a utensil and/or fingers), then cool enough to
comfortably touch at least the pan's upper sidewall.
Batter:
7/8 cup granulated sugar
1 cup Nestlé Strawberry Nesquik drink mix (the same amount of mix that
would be needed as if to make 2 quarts of the drink itself)
40 oz. (5 cups) 3-cheese blend (see above)
2 teaspoons vanilla
1 1/2 teaspoons xanthan gum
6 eggs
Optional: 3/8 teaspoon heat-resistant red food coloring (see comments
above)
Wrap the pan in foil at this point. Carefully pour the batter over the crust and
bake this cheesecake in a hot water tub at 300 degrees for 80 minutes (if using
a 9 1/2" pan). Then shut off oven and cool cheesecake down while still in
it (and in tub), with door slightly ajar, for an hour. Afterwards, remove from
oven and tub and continue to cool down at room temperature for another two hours,
then remove from pan and refrigerate.
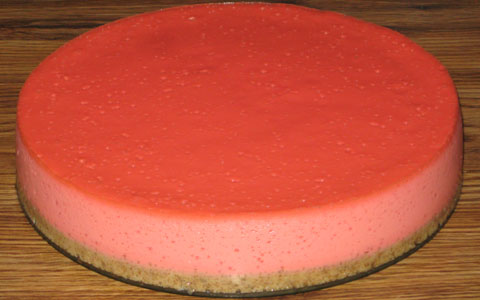
|
-------------------------------------------------------
|
Changes to basic cheesecake batter composition, mid-2015
When
I started making lower-fat cheesecakes back in the 1980's, I utilized
a recipe inside a cookbook from the American Heart Association. That
recipe's batter contained the following ingredients:
Lowfat cottage cheese
Margarine—which I later replaced with butter
Eggs
Granulated sugar
Skim milk
Flour
Salt
Lemon juice
Lemon rind (peel)
When I resumed making cheesecakes—which was around
2009—I was no longer using lemon peel as a base ingredient (I still
used this one for lemon cheesecakes). As the next few years went by,
I also removed lemon juice as a base ingredient, due primarily to my
starting to use a new cheese ingredient—yogurt cheese—which,
like lemon juice, had tart characteristics. I also eliminated skim milk at
some point. The salt was, somewhere along these years, removed as well. So
these changes left the following remaining "original"
ingredients:
Lowfat cottage cheese
Butter (formerly margarine)
Eggs
Granulated sugar
Flour—of which I used various types, such as whole wheat and, more
recently, unbleached all-purpose
New additions to the base ingredient list, based largely on my plain
cheesecakes, were—within the past few years:
Yogurt cheese
Vanilla
Arrowroot
The "cheese base" in particular had undergone changes. This used
to be only cottage cheese. More recently, yogurt cheese has taken over
this slot, although I would use a blend of both yogurt and cottage cheeses
for cheesecake flavors that I felt should not be highly tart. For plain
and citrus flavors, I would go solely with yogurt cheese. A cookbook from
Health Valley, Cooking Without Fat by George Mateljan, turned me on
to this ingredient as well as arrowroot.
However, after my somehow losing some satisfaction over a number of my
latest cheesecakes, including Prototype 12 of my plain-flavored ones, I
felt that another update was warranted.
I have come a long way since that initial American Heart Association
recipe. Over the last few years, I have researched a number of more
conventional, traditional, full-fat, cream-cheese-based cheesecake
recipes. What I have found was a typical, popular base set of ingredients
among them:
Cream cheese
Eggs
Granulated sugar
Vanilla
Of particular importance was that cream cheese generally contained
stabilizers and/or thickeners such as:
Xanthan gum
Locust bean gum
Guar gum
I myself tried using xanthan gum in a number of recipes, but often with
unsatisfactory results (maybe I used too much?).
Lately, I saw potential in more closely paralleling my lower-fat cheesecakes
with their higher-fat counterparts. The basic batter list that I had been
working with in recent times consisted of the following:
Yogurt cheese (sometimes also with cottage cheese)
Butter
Eggs
Granulated sugar
Flour (such as all-purpose)
Vanilla
Arrowroot
So I reasoned that eliminating the butter would bring my list more in parallel
with the conventional, higher-fat lineup. However, the two cheeses—cottage
and yogurt—did not have enough stability like typical cream cheese.
Hence this called for ingredients like all-purpose flour and arrowroot.
But I felt that instead of using both of these two items, I would go
solely with the Health-Valley-recommended arrowroot, which seemed to be a
more efficient (and hopefully better-tasting) stabilizer than all-purpose flour.
The resulting list for my new batter base would be:
Yogurt/cottage cheese
Arrowroot (to help stabilize the cheese)
Eggs
Granulated sugar
Vanilla
Compare the conventional list:
Cream cheese (with its own stabilizers)
Eggs
Granulated sugar
Vanilla
So my new composition was down to 5 simple ingredients. It was with
Prototype 13 of my plain cheesecake—the batter, to be more specific—that
my usage of this lineup has gotten its debut in this recipe scrapbook series
(I added more cooking time as well with this prototype).
I continued making changes in my plain cheesecakes by simply adding
another egg for
Prototype 14.
Not only would this return the
egg-to-cheese-base ratio to what it was in earlier days, but also
make the cheesecake more stable (hopefully) and
contribute further to simplification: 1 egg (as well as 1 tablespoon of
arrowroot) for every 8 ounces of cheese base.
However, I made a fairly bold move with
Prototype 15!
Okay, I admit that I have seeking to bake lower-fat alternatives to cream
cheese cakes. However, there were times when the cheese cultures from
the cottage and yogurt cheeses still did not seem to quite work out well
enough. So I thought that I would include at least some cream cheese
in the mix. More specifically, I decided to take a chance with Neufchatel
cheese—often referred to as "light cream cheese". Due to
the lighter nature of this cheese, the fat would not surge too much (keep
in mind that butter was no longer being used in the batter base
ingredients at this point).
With this move, Prototype 15 would actually get three kinds of
cheese—yogurt, cottage and Neufchatel (yogurt would still dominate
over the two others). The goal was to attain the right balance of sweetness,
tartness and "cheese-iness".
I wanted to ensure more firmness, so I added still more baking time as
well. |
|
-------------------------------------------------------
|
Changes to basic cheesecake batter composition, mid-2017
My
experiencing a very delicious cheesecake from Trader Joe's back
around early June of 2017 prompted me to give further consideration to
overhauling the basics of my cheesecake recipes. The efforts began with
Prototype 17 of my plain cheesecakes
and ended with
Prototype 21.
Earlier in these updates I did a little tweaking with the crust. But the far
more important changes throughout the updates would involve the batter.
I felt that I should cut back on the tartness of the cheesecake's batter,
so I replaced half of the yogurt cheese with additional cottage cheese. In
other words, the cheese base's cottage-Neufchatel-yogurt ratio went from
1:1:4 to 3:1:2. It seemed like this helped enhance the taste somewhat, but
I still wasn't satisfied.
But the most significant change affected the stabilizer.
My cheesecake history began with what has probably been the most popular
stabilizer in baking—wheat-type flour. I used different kinds of
this flour, such as all-purpose and whole white.
As the years went by, I started bringing arrowroot on board (this
stabilizer getting its debut very likely in mid-2012), earlier to
supplement the wheat-based flour and later to replace it. It was probably
around mid-2015 when I outright retired the wheat-based flour, so the
arrowroot was on its own at that point. It seemed to have considerably
more stabilization strength compared to its wheat-oriented predecessor.
Recently, I tried a rather risky experiment. I made a cheesecake with no
stabilizer added. That was
Prototype 18.
This wasn't the first time that I had done this. I also made
Prototype 8
this way, and that one was exceptionally delicious. But it was also
exceptionally soft. But Prototype 8 contained only yogurt cheese for the
cheese base. Prototype 18, on the other hand, also contained cottage
cheese and Neufchatel cheese, and these two products already had some
stabilizers in them, particularly xanthan gum—an industrial
staple.
Fortunately, Prototype 18 was not an unstable disaster (a little sloppy,
yes, but not so runny). And its taste was really terrific, pretty much
like Prototype 8's and Trader Joe's. This outcome put arrowroot in the
crosshairs.
But what would be a superior alternative to arrowroot? I was looking for
sufficient stability, but I was also in the hunt for a really great taste,
just like I would enjoy with a more typical, fat-laden cheesecake.
The time had come to give xanthan gum—an ingredient available for retail
sale, at least in recent years from Bob's Red Mill—a try.
This stabilizer has been put to
extensive use in the food industry—and particularly in cream cheese
(often in conjunction with guar and/or locust/carob bean gum here)! But I
didn't think that xanthan gum had been embraced anywhere nearly as much in
homes. Maybe one of the reasons was the difficulty in using it. I myself
have incurred a number of failures in the past with this ingredient—often
by using too much of what I found out the hard way to be an overwhelmingly
powerful stabilizer!
")
But how much, then, should I use? I Googled around and was led to start
off small—very small—with this potent ingredient. So I
carefully put xanthan gum to work in
Prototype 19,
and the results worked
out reasonably well. The batter tasted awesome, but I wanted to tweak the
stability. This adjustment, which included the amount of baking time, as
well as how much xanthan gum to use, would ultimately lead up to Prototype
21, with which I would close out this basic overhaul of 2017.
So the resulting basic cheesecake batter would now involve these
ingredients:
Cheese base (such as cottage/Neufchatel/yogurt)
Xanthan gum (supplementing whatever stabilizers were already included in
the cheese base ingredients)
Eggs
Granulated sugar
Vanilla
Compare and contrast the conventional list:
Cream cheese (with a sufficient amount of its own stabilizers,
particularly xanthan gum)
Eggs
Granulated sugar
Vanilla
Now that's very close!
In early October, not long after my overhaul efforts with my plain
prototypes, I furthermore decided to try an "egg-speriment"
(or, "eggs-experiment") with
Prototype 7 of my maple cheesecakes.
I added one
egg on top of what I primarily had been using for nearly the past two
years, i.e., I went from five eggs to six. While "one egg for every
eight ounces of cheese base" seemed to be mathematically convenient,
using a half-dozen eggs per cheesecake had a couple of advantages. One
would make my grocery shopping easier, because of the way eggs have been
packaged—typically in multiples of six (I scarcely have been using
this ingredient for any other purpose). The other would be beneficial for
the cheesecake's firmness and texture. The outcome of the maple cheesecake
itself was great, so I decided at this point to utilize the sixth egg on
a regular basis. |
|
-------------------------------------------------------
|
Baked Almond Cheesecake—Prototype 1:
3-Cheese Blend (3CT-1NC-2YG):
Prepare ahead of time 16 ounces of yogurt cheese, derived from one 32-ounce
container of nonfat yogurt. If the resulting yogurt cheese falls below 16
ounces, add back enough of the whey (that was strained out from the yogurt) to
make up the difference. To this yogurt cheese combine 24 ounces of whipped,
lowfat cottage cheese and 8 ounces of softened Neufchatel cheese ("light
cream cheese").
Grease a 9 1/2" (or 9") springform pan, but do not wrap foil around
it yet (see below).
Crust:
2 oz. melted, white chocolate
8 oz. (1 cup) 3-cheese blend (see above)
1/4 cup granulated sugar
1/4 cup brown sugar
1 teaspoon cinnamon
1/2 teaspoon vanilla
2 oz. All-Bran, ground up
Place the resulting mixture in the greased pan and pre-bake without tub at 300
degrees for 5-10 minutes, depending on the mixture's thickness (closer to 10
minutes if thin enough to be fully distributed across the pan's bottom by gentle
shaking, closer to 5 minutes if thick enough to require spreading out this
mixture by pressing on it with a utensil and/or fingers), then cool enough to
comfortably touch at least the pan's upper sidewall.
Batter:
1 1/4 cups granulated sugar
40 oz. (5 cups) 3-cheese blend (see above)
2 teaspoons vanilla
7 oz. almond paste
1 1/2 teaspoons xanthan gum
6 eggs
Wrap the pan in foil just before adding the batter (to minimize the foil's
disturbance and therefore its leakage risk, do not put it on any earlier).
Next, pour the batter over the crust and bake this cheesecake in a hot water tub
at 300 degrees for 90 minutes (if using a 9 1/2" pan). Then cool the
cheesecake down while still in oven (with this oven shut off) and in tub with
door slightly ajar for an hour. Afterwards, remove from oven and tub and
continue to cool down at room temperature for another 120 minutes, then remove
from pan and refrigerate.
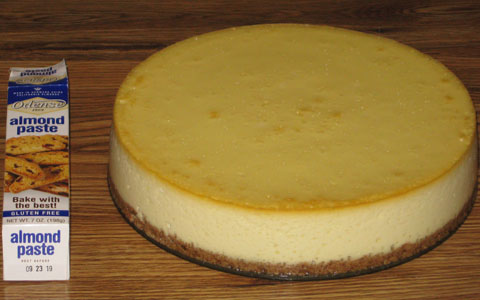
Baked Almond Cheesecake—Prototype 2:
3-Cheese Blend (3CT-1NC-2YG):
Prepare ahead of time 16 ounces of yogurt cheese, derived from one 32-ounce
container of nonfat yogurt. If the resulting yogurt cheese falls below 16
ounces, add back enough of the whey (that was strained out from the yogurt) to
make up the difference. To this yogurt cheese combine 24 ounces of whipped,
lowfat cottage cheese and 8 ounces of softened Neufchatel cheese ("light
cream cheese").
Grease a 9 1/2" (or 9") springform pan, but do not wrap foil around
it yet (see below).
Crust:
2 oz. melted, white chocolate
8 oz. (1 cup) 3-cheese blend (see above)
1/4 cup granulated sugar
1/4 cup brown sugar
1 teaspoon cinnamon
1 teaspoon almond extract
2 oz. All-Bran, ground up
Place the resulting mixture in the greased pan and pre-bake without tub at 300
degrees for 5-10 minutes, depending on the mixture's thickness (closer to 10
minutes if thin enough to be fully distributed across the pan's bottom by gentle
shaking, closer to 5 minutes if thick enough to require spreading out this
mixture by pressing on it with a utensil and/or fingers), then cool enough to
comfortably touch at least the pan's upper sidewall.
Batter:
1 1/4 cups granulated sugar
40 oz. (5 cups) 3-cheese blend (see above)
2 teaspoons almond extract
7 oz. almond paste
1 1/2 teaspoons xanthan gum
6 eggs
Wrap the pan in foil just before adding the batter (to minimize the foil's
disturbance and therefore its leakage risk, do not put it on any earlier).
Next, pour the batter over the crust and bake this cheesecake in a hot water tub
at 300 degrees for 90 minutes (if using a 9 1/2" pan). Then cool the
cheesecake down while still in oven (with this oven shut off) and in tub with
door slightly ajar for an hour. Afterwards, remove from oven and tub and
continue to cool down at room temperature for another 120 minutes, then remove
from pan and refrigerate.
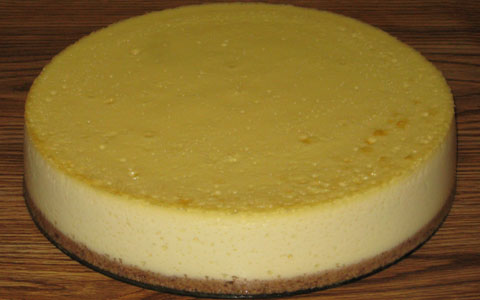
|
-------------------------------------------------------
|
Baked Chocolate Strawberry Cheesecake—Prototype 1:
3-Cheese Blend (3CT-1NC-2YG):
Prepare ahead of time 16 ounces of yogurt cheese, derived from one 32-ounce
container of nonfat yogurt. If the resulting yogurt cheese falls below 16
ounces, add back enough of the whey (that was strained out from the yogurt) to
make up the difference. To this yogurt cheese combine 24 ounces of whipped,
lowfat cottage cheese and 8 ounces of softened Neufchatel cheese ("light
cream cheese").
Grease a 9 1/2" (or 9") pan, but do not wrap foil around it until just
before the batter is added (spreading the crust in an already wrapped pan can
result in greater disturbance to the foil, thus increasing leakage risks).
Chocolate Crust:
4 oz. semi-sweet chocolate, melted
3/8 cup granulated sugar
2 tablespoons cocoa powder
8 oz. (1 cup) 3-cheese blend (see above)
1 teaspoon vanilla
2 oz. finely ground All-Bran
Place the resulting mixture in the greased pan and pre-bake without tub at 300
degrees for 5-10 minutes, depending on the mixture's thickness (closer to 10
minutes if thin enough to be fully distributed across the pan's bottom by gentle
shaking, closer to 5 minutes if thick enough to require spreading out this
mixture by pressing on it with a utensil and/or fingers), then cool enough to
comfortably touch at least the pan's upper sidewall.
Strawberry Batter:
7 tablespoons (7/16 cup) granulated sugar
1/2 cup Nestlé Strawberry Nesquik drink mix (the same amount of mix that
would be needed as if to make 1 quart of the drink itself)
20 oz. (2 1/2 cups) 3-cheese blend (see above)
1 teaspoon vanilla
3/4 teaspoon xanthan gum
3 eggs
Wrap the pan in foil at this point. Carefully pour the batter on top of the
crust and bake all this in a hot water tub at 325 degrees for about 30 minutes.
Afterwards, take the tub-and-pan assembly out of the oven and promptly add the
batter indicated below.
Chocolate Batter:
7/8 cup granulated sugar
3 tablespoons cocoa powder
20 oz. (2 1/2 cups) 3-cheese blend (see above)
1 teaspoon vanilla
3/4 teaspoon xanthan gum
3 eggs
Carefully scoop this on top of the strawberry batter (it is best to do this around
the edge of the pan and let the chocolate batter flow towards the middle) and
return the tub-and-pan assembly to the oven, this time at only 300 degrees. Bake
for about 70 more minutes (if using a 9 1/2" pan). Then shut off the oven
and cool the cheesecake down while still in it (and in tub), with the oven door
slightly ajar, for about an hour. Afterwards, remove the cheesecake (still in
its springform pan) from the oven and tub and continue to cool it down at room
temperature for another two hours.
After cooling down at room temperature, remove the cheesecake from its pan and
refrigerate.
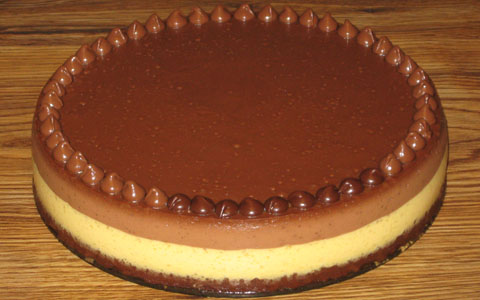
|
-------------------------------------------------------
|
Baked Chocolate Almond Cheesecake—Prototype 1:
3-Cheese Blend (3CT-1NC-2YG):
Prepare ahead of time 16 ounces of yogurt cheese, derived from one 32-ounce
container of nonfat yogurt. If the resulting yogurt cheese falls below 16
ounces, add back enough of the whey (that was strained out from the yogurt) to
make up the difference. To this yogurt cheese combine 24 ounces of whipped,
lowfat cottage cheese and 8 ounces of softened Neufchatel cheese ("light
cream cheese").
Grease a 9 1/2" (or 9") pan, but do not wrap foil around it until just
before the batter is added (spreading the crust in an already wrapped pan can
result in greater disturbance to the foil, thus increasing leakage risks).
Chocolate Crust:
4 oz. semi-sweet chocolate, melted
3/8 cup granulated sugar
2 tablespoons cocoa powder
8 oz. (1 cup) 3-cheese blend (see above)
1 teaspoon vanilla or almond extract
2 oz. finely ground All-Bran
Place the resulting mixture in the greased pan and pre-bake without tub at 300
degrees for 5-10 minutes, depending on the mixture's thickness (closer to 10
minutes if thin enough to be fully distributed across the pan's bottom by gentle
shaking, closer to 5 minutes if thick enough to require spreading out this
mixture by pressing on it with a utensil and/or fingers), then cool enough to
comfortably touch at least the pan's upper sidewall.
Almond Batter:
5/8 cup granulated sugar
20 oz. (2 1/2 cups) 3-cheese blend (see above)
1 teaspoon almond extract
3.5 oz. almond paste
3/4 teaspoon xanthan gum
3 eggs
Wrap the pan in foil at this point. Carefully pour the batter on top of the
crust and bake all this in a hot water tub at 325 degrees for about 30 minutes.
Afterwards, take the tub-and-pan assembly out of the oven and promptly add the
batter indicated below.
Chocolate Batter:
7/8 cup granulated sugar
3 tablespoons cocoa powder
20 oz. (2 1/2 cups) 3-cheese blend (see above)
1 teaspoon vanilla
3/4 teaspoon xanthan gum
3 eggs
Carefully scoop this on top of the almond batter (it is best to do this around
the edge of the pan and let the chocolate batter flow towards the middle) and
return the tub-and-pan assembly to the oven, this time at only 300 degrees. Bake
for about 70 more minutes (if using a 9 1/2" pan). Then shut off the oven
and cool the cheesecake down while still in it (and in tub), with the oven door
slightly ajar, for about an hour. Afterwards, remove the cheesecake (still in
its springform pan) from the oven and tub and continue to cool it down at room
temperature for another two hours.
After cooling down at room temperature, remove the cheesecake from its pan and
refrigerate.
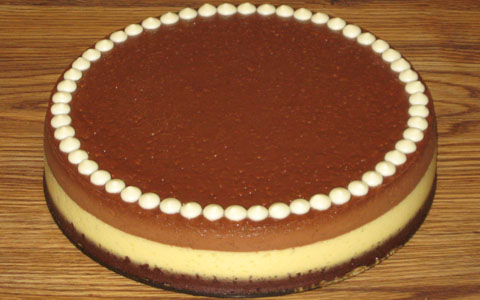
|
-------------------------------------------------------
|
Baked Neapolitan Cheesecake—Prototype 1:
3-Cheese Blend (3CT-1NC-2YG):
Prepare ahead of time 16 ounces of yogurt cheese, derived from one 32-ounce
container of nonfat yogurt. If the resulting yogurt cheese falls below 16
ounces, add back enough of the whey (that was strained out from the yogurt) to
make up the difference. To this yogurt cheese combine 24 ounces of whipped,
lowfat cottage cheese and 8 ounces of softened Neufchatel cheese ("light
cream cheese").
Grease a 9 1/2" (or 9") pan, but do not wrap foil around it until just
before the batter is added (spreading the crust in an already wrapped pan can
result in greater disturbance to the foil, thus increasing leakage risks).
Crust:
2 oz. melted, white chocolate
8 oz. (1 cup) 3-cheese blend (see above)
1/4 cup granulated sugar
1/4 cup brown sugar
1 teaspoon cinnamon
1/2 teaspoon vanilla
2 oz. finely ground All-Bran
Place the resulting mixture in the greased pan and pre-bake without tub at 300
degrees for 5-10 minutes, depending on the mixture's thickness (closer to 10
minutes if thin enough to be fully distributed across the pan's bottom by gentle
shaking, closer to 5 minutes if thick enough to require spreading out this
mixture by pressing on it with a utensil and/or fingers), then cool enough to
comfortably touch at least the pan's upper sidewall.
Vanilla Batter:
1/2 cup + 1 tablespoon + 1 teaspoon (7/12 cup) granulated sugar
13 1/3 oz. (1 2/3 cups) 3-cheese blend (see above)
2 teaspoons vanilla
1/2 teaspoon xanthan gum
2 eggs
Wrap the pan in foil at this point. Carefully pour the batter on top of the
crust and bake all this in a hot water tub at 325 degrees for about 30 minutes.
Afterwards, take the tub-and-pan assembly out of the oven and promptly add the
next batter indicated below.
Strawberry Batter:
1/4 cup + 2 teaspoons granulated sugar
1/3 cup Nestlé Strawberry Nesquik drink mix (the same amount of mix that
would be needed as if to make 2/3 quart of the drink itself)
13 1/3 oz. (1 2/3 cups) 3-cheese blend (see above)
2/3 teaspoon (or 3/4 teaspoon—see comments below) vanilla
1/2 teaspoon xanthan gum
2 eggs
Carefully scoop this on top of the vanilla batter (it is best to do this around
the edge of the pan and let the strawberry batter flow towards the middle) and
return the tub-and-pan assembly to the oven, still at 325 degrees. Resume baking
for about another 30 minutes (if using a 9 1/2" pan). Afterwards, take the
tub-and-pan assembly out of the oven and promptly add the final batter shown
below.
Chocolate Batter:
1/2 cup + 1 tablespoon + 1 teaspoon (7/12 cup) granulated sugar
2 tablespoons cocoa powder
13 1/3 oz. (1 2/3 cups) 3-cheese blend (see above)
2/3 teaspoon (or 3/4 teaspoon—see comments below) vanilla
1/2 teaspoon xanthan gum
2 eggs
Carefully scoop this on top of the strawberry batter (again, it is best to do
this around the edge of the pan and let the chocolate batter flow towards the
middle) and return the tub-and-pan assembly to the oven, this time at only 300
degrees. Bake for about 65 more minutes (if using a 9 1/2" pan). Then shut
off the oven and cool the cheesecake down while still in it (and in tub), with
the oven door slightly ajar, for about an hour. Afterwards, remove the
cheesecake (still in its springform pan) from the oven and tub and continue to
cool it down at room temperature for another two hours.
After cooling down at room temperature, remove the cheesecake from its pan and
refrigerate.
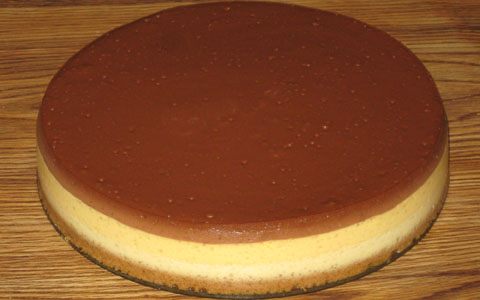
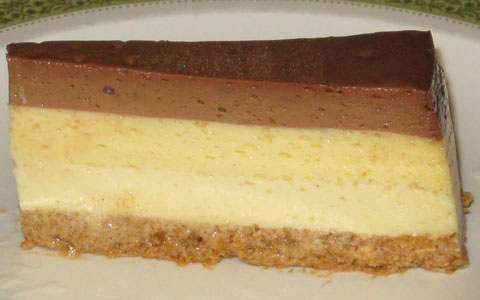
Baked Neapolitan Cheesecake—Prototype 2:
3-Cheese Blend (3CT-1NC-2YG):
Prepare ahead of time 16 ounces of yogurt cheese, derived from one 32-ounce
container of nonfat yogurt. If the resulting yogurt cheese falls below 16
ounces, add back enough of the whey (that was strained out from the yogurt) to
make up the difference. To this yogurt cheese combine 24 ounces of whipped,
lowfat cottage cheese and 8 ounces of softened Neufchatel cheese ("light
cream cheese").
Grease a 9 1/2" (or 9") pan, but do not wrap foil around it until just
before the batter is added (spreading the crust in an already wrapped pan can
result in greater disturbance to the foil, thus increasing leakage risks).
Crust:
2 oz. melted, white chocolate
8 oz. (1 cup) 3-cheese blend (see above)
1/4 cup granulated sugar
1/4 cup brown sugar
1/4 teaspoon cinnamon
1/2 teaspoon vanilla
2 oz. finely ground All-Bran
Place the resulting mixture in the greased pan and pre-bake without tub at 300
degrees for 10-15 minutes, depending on the mixture's thickness (closer to 15
minutes if thin enough to be fully distributed across the pan's bottom by gentle
shaking, closer to 10 minutes if thick enough to require spreading out this
mixture by pressing on it with a utensil and/or fingers), then cool enough to
comfortably touch at least the pan's upper sidewall.
Vanilla Batter:
1/2 cup + 1 tablespoon + 1 teaspoon (7/12 cup) granulated sugar
13 1/3 oz. (1 2/3 cups) 3-cheese blend (see above)
2 teaspoons vanilla
1/2 teaspoon xanthan gum
2 eggs
Wrap the pan in foil at this point. Carefully pour the batter on top of the
crust and bake all this in a hot water tub at 325 degrees for about 30 minutes.
Afterwards, take the tub-and-pan assembly out of the oven and promptly add the
next batter indicated below.
Strawberry Batter:
1/4 cup + 2 teaspoons granulated sugar
1/3 cup Nestlé Strawberry Nesquik drink mix (the same amount of mix that
would be needed as if to make 2/3 quart of the drink itself)
13 1/3 oz. (1 2/3 cups) 3-cheese blend (see above)
2/3 to 3/4 teaspoon vanilla
1/8 teaspoon heat-resistant red food coloring
1/2 teaspoon xanthan gum
2 eggs
Carefully scoop this on top of the vanilla batter (it is best to do this around
the edge of the pan and let the strawberry batter flow towards the middle) and
return the tub-and-pan assembly to the oven, still at 325 degrees. Resume baking
for about another 30 minutes (if using a 9 1/2" pan). Afterwards, take the
tub-and-pan assembly out of the oven and promptly add the final batter shown
below.
Chocolate Batter:
1/2 cup + 1 tablespoon + 1 teaspoon (7/12 cup) granulated sugar
2 tablespoons cocoa powder
13 1/3 oz. (1 2/3 cups) 3-cheese blend (see above)
2/3 to 3/4 teaspoon vanilla
1/2 teaspoon xanthan gum
2 eggs
Carefully scoop this on top of the strawberry batter (again, it is best to do
this around the edge of the pan and let the chocolate batter flow towards the
middle) and return the tub-and-pan assembly to the oven, this time at only 300
degrees. Bake for about 65 more minutes (if using a 9 1/2" pan). Then shut
off the oven and cool the cheesecake down while still in it (and in tub), with
the oven door slightly ajar, for about an hour. Afterwards, remove the
cheesecake (still in its springform pan) from the oven and tub and continue to
cool it down at room temperature for another two hours.
After cooling down at room temperature, remove the cheesecake from its pan and
refrigerate.
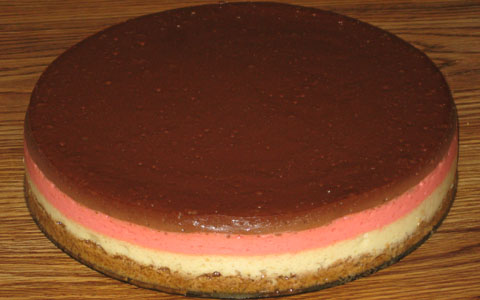

Baked Neapolitan Cheesecake—Prototype 3:
3-Cheese Blend (1CT-1NC-1YG):
Prepare ahead of time 16 ounces of yogurt cheese, derived from one 32-ounce
container of nonfat yogurt. If the resulting yogurt cheese falls below 16
ounces, add back enough of the whey (that was strained out from the yogurt) to
make up the difference. To this yogurt cheese combine 16 ounces of whipped,
lowfat cottage cheese and 16 ounces (two 8-ounce packages) of softened
Neufchatel cheese ("light cream cheese").
Grease a 9 1/2" (or 9") pan, but do not wrap foil around it until just
before the batter is added (spreading the crust in an already wrapped pan can
result in greater disturbance to the foil, thus increasing leakage risks).
Crust:
2 oz. melted, white chocolate
8 oz. (1 cup) 3-cheese blend (see above)
1/4 cup granulated sugar
1/4 cup brown sugar
1/4 teaspoon cinnamon
1/2 teaspoon vanilla
2 oz. finely ground All-Bran
Place the resulting mixture in the greased pan and pre-bake without tub at 300
degrees for 20 minutes, then cool enough to comfortably touch at least the pan's
upper sidewall.
Vanilla Batter:
1/2 cup + 1 tablespoon + 1 teaspoon (7/12 cup) granulated sugar
13 1/3 oz. (1 2/3 cups) 3-cheese blend (see above)
2 teaspoons vanilla
1/2 teaspoon xanthan gum
2 eggs (brown recommended, large)
Wrap the pan in foil at this point. Carefully pour the batter on top of the
crust and bake all this in a hot water tub at 325 degrees for about 30 minutes.
Afterwards, take the tub-and-pan assembly out of the oven and promptly add the
next batter indicated below.
Strawberry Batter:
1/4 cup + 2 teaspoons granulated sugar
1/3 cup Nestlé Strawberry Nesquik drink mix (the same amount of mix that
would be needed as if to make 2/3 quart of the drink itself)
13 1/3 oz. (1 2/3 cups) 3-cheese blend (see above)
2/3 to 3/4 teaspoon vanilla
1/8 teaspoon heat-resistant red food coloring
1/2 teaspoon xanthan gum
2 eggs (brown recommended, large)
Carefully scoop this on top of the vanilla batter (it is best to do this around
the edge of the pan and let the strawberry batter flow towards the middle) and
return the tub-and-pan assembly to the oven, still at 325 degrees. Resume baking
for about another 30 minutes (if using a 9 1/2" pan). Afterwards, take the
tub-and-pan assembly out of the oven and promptly add the final batter shown
below.
Chocolate Batter:
1/2 cup + 1 tablespoon + 1 teaspoon (7/12 cup) granulated sugar
2 tablespoons cocoa powder
13 1/3 oz. (1 2/3 cups) 3-cheese blend (see above)
2/3 to 3/4 teaspoon vanilla
1/2 teaspoon xanthan gum
2 eggs (brown recommended, large)
Carefully scoop this on top of the strawberry batter (again, it is best to do
this around the edge of the pan and let the chocolate batter flow towards the
middle) and return the tub-and-pan assembly to the oven, this time at only 300
degrees. Bake for about 65 more minutes (if using a 9 1/2" pan). Then shut
off the oven and cool the cheesecake down while still in it (and in tub), with
the oven door slightly ajar, for about an hour. Afterwards, remove the
cheesecake (still in its springform pan) from the oven and tub and continue to
cool it down at room temperature for another two hours.
After cooling down at room temperature, remove the cheesecake from its pan and
refrigerate.
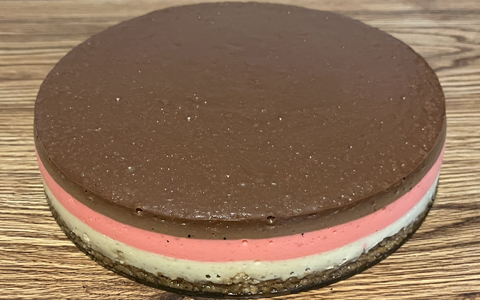
Baked Neapolitan Cheesecake—Prototype 4:
3-Cheese Blend (1CT-1NC-1YG):
Prepare ahead of time 16 ounces of yogurt cheese, derived from one 32-ounce
container of nonfat yogurt. If the resulting yogurt cheese falls below 16
ounces, add back enough of the whey (that was strained out from the yogurt) to
make up the difference. To this yogurt cheese combine 16 ounces of whipped,
lowfat cottage cheese and 16 ounces (two 8-ounce packages) of softened
Neufchatel cheese ("light cream cheese").
Grease a 9 1/2" (or 9") pan, but do not wrap foil around it until just
before the batter is added (spreading the crust in an already wrapped pan can
result in greater disturbance to the foil, thus increasing leakage risks).
Crust:
2 oz. melted, white chocolate
8 oz. (1 cup) 3-cheese blend (see above)
1/4 cup granulated sugar
1/4 cup brown sugar
1/2 teaspoon vanilla
2 oz. finely ground All-Bran
Place the resulting mixture in the greased pan and pre-bake without tub at 300
degrees for 20 minutes, then cool enough to comfortably touch at least the pan's
upper sidewall.
Vanilla Batter:
1/2 cup + 1 tablespoon + 1 teaspoon (7/12 cup) granulated sugar
13 1/3 oz. (1 2/3 cups) 3-cheese blend (see above)
2 teaspoons vanilla
3/8 teaspoon xanthan gum
2 eggs (brown recommended, large)
Wrap the pan in foil at this point. Carefully pour the batter on top of the
crust and bake all this in a hot water tub at 325 degrees for about 30 minutes.
Afterwards, take the tub-and-pan assembly out of the oven and promptly add the
next batter indicated below.
Strawberry Batter:
1/4 cup + 2 teaspoons granulated sugar
1/3 cup Nestlé Strawberry Nesquik drink mix (the same amount of mix that
would be needed as if to make 2/3 quart of the drink itself)
13 1/3 oz. (1 2/3 cups) 3-cheese blend (see above)
2/3 to 3/4 teaspoon vanilla
1/8 teaspoon heat-resistant red food coloring
3/8 teaspoon xanthan gum
2 eggs (brown recommended, large)
Carefully scoop this on top of the vanilla batter (it is best to do this around
the edge of the pan and let the strawberry batter flow towards the middle) and
return the tub-and-pan assembly to the oven, still at 325 degrees. Resume baking
for about another 30 minutes (if using a 9 1/2" pan). Afterwards, take the
tub-and-pan assembly out of the oven and promptly add the final batter shown
below.
Chocolate Batter:
1/2 cup + 1 tablespoon + 1 teaspoon (7/12 cup) granulated sugar
2 tablespoons cocoa powder
13 1/3 oz. (1 2/3 cups) 3-cheese blend (see above)
2/3 to 3/4 teaspoon vanilla
3/8 teaspoon xanthan gum
2 eggs (brown recommended, large)
Carefully scoop this on top of the strawberry batter (again, it is best to do
this around the edge of the pan and let the chocolate batter flow towards the
middle) and return the tub-and-pan assembly to the oven, this time at only 300
degrees. Bake for about 65 more minutes (if using a 9 1/2" pan). Then shut
off the oven and cool the cheesecake down while still in it (and in tub), with
the oven door slightly ajar, for about an hour. Afterwards, remove the
cheesecake (still in its springform pan) from the oven and tub and continue to
cool it down at room temperature for another two hours.
After cooling down at room temperature, remove the cheesecake from its pan and
refrigerate.
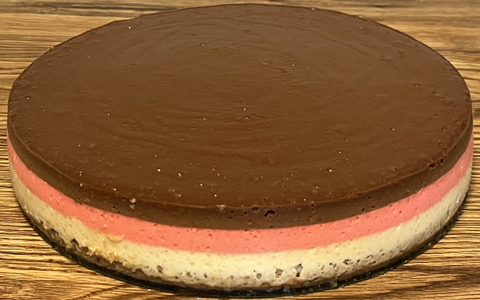
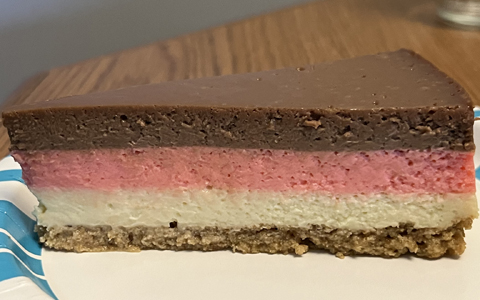
Baked Neapolitan Cheesecake—Prototype 5:
3-Cheese Blend (1CT-1NC-1YG):
Prepare ahead of time 16 ounces of yogurt cheese, derived from one 32-ounce
container of nonfat yogurt. If the resulting yogurt cheese falls below 16
ounces, add back enough of the whey (that was strained out from the yogurt) to
make up the difference. To this yogurt cheese combine 16 ounces of whipped,
lowfat cottage cheese and 16 ounces (two 8-ounce packages) of softened
Neufchatel cheese ("light cream cheese").
Grease a 9 1/2" (or 9") pan, but do not wrap foil around it until just
before the batter is added (spreading the crust in an already wrapped pan can
result in greater disturbance to the foil, thus increasing leakage risks).
Crust:
4 oz. melted, white chocolate
8 oz. (1 cup) 3-cheese blend (see above)
1/4 cup granulated sugar
1/4 cup brown sugar
1/2 teaspoon vanilla
2 oz. finely ground All-Bran
Place the resulting mixture in the greased pan and pre-bake without tub at 300
degrees for 20 to 30 minutes (see comments below), then cool enough to
comfortably touch at least the pan's upper sidewall.
Vanilla Batter:
1/2 cup + 1 tablespoon + 1 teaspoon (7/12 cup) granulated sugar
13 1/3 oz. (1 2/3 cups) 3-cheese blend (see above)
2 teaspoons vanilla
3/8 teaspoon xanthan gum
2 eggs (brown recommended, large)
Wrap the pan in foil at this point. Carefully pour the batter on top of the
crust and bake all this in a hot water tub at 325 degrees for about 30 minutes.
Afterwards, take the tub-and-pan assembly out of the oven and promptly add the
next batter indicated below.
Strawberry Batter:
1/4 cup + 2 teaspoons granulated sugar
1/3 cup Nestlé Strawberry Nesquik drink mix (the same amount of mix that
would be needed as if to make 2/3 quart of the drink itself)
13 1/3 oz. (1 2/3 cups) 3-cheese blend (see above)
2/3 to 3/4 teaspoon vanilla
1/8 teaspoon heat-resistant red food coloring
3/8 teaspoon xanthan gum
2 eggs (brown recommended, large)
Carefully scoop this on top of the vanilla batter (it is best to do this around
the edge of the pan and let the strawberry batter flow towards the middle) and
return the tub-and-pan assembly to the oven, still at 325 degrees. Resume baking
for about another 30 minutes (if using a 9 1/2" pan). Afterwards, take the
tub-and-pan assembly out of the oven and promptly add the final batter shown
below.
Chocolate Batter:
1/2 cup + 1 tablespoon + 1 teaspoon (7/12 cup) granulated sugar
2 tablespoons cocoa powder
13 1/3 oz. (1 2/3 cups) 3-cheese blend (see above)
2/3 to 3/4 teaspoon vanilla
3/8 teaspoon xanthan gum
2 eggs (brown recommended, large)
Carefully scoop this on top of the strawberry batter (again, it is best to do
this around the edge of the pan and let the chocolate batter flow towards the
middle) and return the tub-and-pan assembly to the oven, this time at only 300
degrees. Bake for about 65 more minutes (if using a 9 1/2" pan). Then shut
off the oven and cool the cheesecake down while still in it (and in tub), with
the oven door slightly ajar, for about an hour. Afterwards, remove the
cheesecake (still in its springform pan) from the oven and tub and continue to
cool it down at room temperature for another two hours.
After cooling down at room temperature, remove the cheesecake from its pan and
refrigerate.
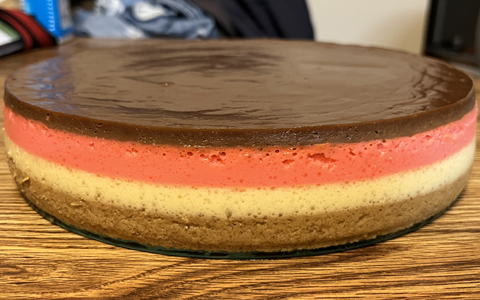
|
-------------------------------------------------------
|
Baked Triple-Plus Chocolate Chip Cookie Dough Cheesecake—Prototype 1:
3-Cheese Blend (3CT-1NC-2YG):
Prepare ahead of time 16 ounces of yogurt cheese, derived from one 32-ounce
container of nonfat yogurt. If the resulting yogurt cheese falls below 16
ounces, add back enough of the whey (that was strained out from the yogurt) to
make up the difference. To this yogurt cheese combine 24 ounces of whipped,
lowfat cottage cheese and 8 ounces of softened Neufchatel cheese ("light
cream cheese").
Grease a 9 1/2" (or 9") pan, but do not wrap foil around it until just
before the batter is added (spreading the crust in an already wrapped pan can
result in greater disturbance to the foil, thus increasing leakage risks).
Chocolate Crust:
4 oz. semi-sweet chocolate, melted
3/8 cup granulated sugar
2 tablespoons cocoa powder
8 oz. (1 cup) 3-cheese blend (see above)
1 teaspoon vanilla
2 oz. finely ground All-Bran
Place the resulting mixture in the greased pan and pre-bake without tub at 300
degrees for 5-10 minutes, depending on the mixture's thickness (closer to 10
minutes if thin enough to be fully distributed across the pan's bottom by gentle
shaking, closer to 5 minutes if thick enough to require spreading out this
mixture by pressing on it with a utensil and/or fingers), then cool enough to
comfortably touch at least the pan's upper sidewall.
Chocolate Batter:
1 3/4 cups granulated sugar
3/8 cup cocoa powder
40 oz. (5 cups) 3-cheese blend (see above)
1 1/2 teaspoons xanthan gum
2 teaspoons vanilla
6 eggs
Cookie Dough:
1 package of double chocolate chip cookie dough (close to 14-16 ounces),
separated and formed into 24 round, flat "cookie" shapes (if the dough
is too hard to work with, let it get to around room temperature first—this
should soften the dough up a bit)
Expect just over 7 cups of the resulting chocolate batter, but do not add this to
the pan all at once. Rather, this needs to be done in two installments. Wrap the
pan in foil just before adding the first installment. Minimize the foil's
disturbance in order to minimize its leakage risk.
For the first installment, start off by gently scooping some batter into the
pan just until the crust is fully coated. Afterwards, lay flat about 6 cookie dough
pieces onto this batter. Then add more batter, coating these cookies well. Lay flat
another 6 cookies, but try to place them such that they are not overlapping any
of the first layer of cookies. Coat this second layer as well with additional
batter. Next, add a third layer of about 6 cookies, laying them flat also. Try
to avoid overlapping the second layer. However, it is okay (and encouraged) if
they are directly above the first layer of cookies. Add more batter, coating the
third layer. Finally, add a fourth layer of about 6 cookies—laying these
flat too—and try to avoid overlap with the third layer cookies, but feel
free to position the fourth layer's directly above those of the second. Fully
coat this final cookie layer, and—with the rest of the batter less
roughly 1 1/2 to 2 cups—try to make the top surface of the batter
reasonably level within the pan (it's okay if some of the cookies float upward
and protrude a bit, but make sure that they are still lying horizontally).
After this is done, bake the pan with its contents at 325 degrees for 30
minutes, in a tub filled with at least about 1/2 inch of boiling water. To
reduce spillage risks, do not fill the tub all the way at this point, because
the whole tub-and-pan assembly is going to need to be removed from the oven (in
order to comfortably add contents to the pan) for the next installment.
For that second (final) installment, gently add the remaining 1 1/2 to 2 cups of
batter to the pan (no additional cookie dough pieces at this point).
After this last installment is in place, return the entire pan-and-tub assembly
to the oven. At this point, fill up the tub more generously with boiling water.
Resume baking, but with the oven temperature lowered to 300 degrees, for about
another 75 minutes (based upon usage of a 9 1/2" pan).
Afterward, shut the oven off, and leave its door slightly ajar, with the
cheesecake still inside—and in the tub—for an hour. Next, remove the
cheesecake from the oven and tub. Now, for the final chocolate touch, add a
border of chocolate chips, such as milk chocolate, around the edge of this
cheesecake (see photo below). Continue to cool it down at room temperature for
another two hours. After doing so, remove the cheesecake from pan and
refrigerate.
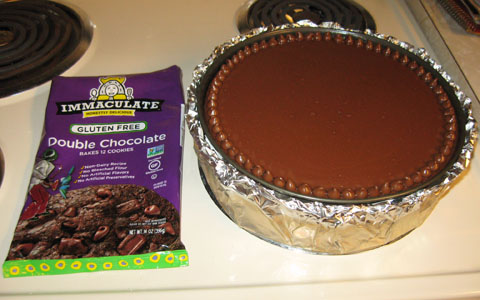
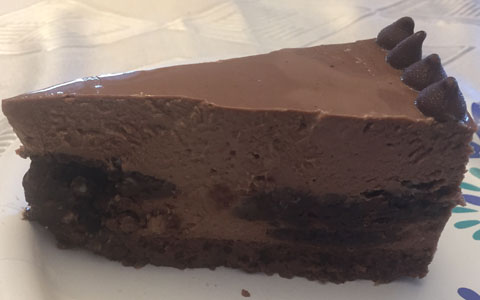
|
-------------------------------------------------------
|
Baked Blueberry Cheesecake—Prototype 1:
3-Cheese Blend (1CT-1NC-1YG):
Prepare ahead of time 16 ounces of yogurt cheese, derived from one 32-ounce
container of nonfat yogurt. If the resulting yogurt cheese falls below 16
ounces, add back enough of the whey (that was strained out from the yogurt) to
make up the difference. To this yogurt cheese combine 16 ounces of whipped,
lowfat cottage cheese and 16 ounces (two 8-ounce packages) of softened
Neufchatel cheese ("light cream cheese").
Grease a 9 1/2" (or 9") springform pan, but do not wrap foil around
it yet (see below).
Crust:
2 oz. melted, white chocolate
8 oz. (1 cup) 3-cheese blend (see above)
1/4 cup granulated sugar
1/4 cup brown sugar
1/2 teaspoon vanilla
2 oz. All-Bran, ground up
Place the resulting mixture in the greased pan and pre-bake without tub at 300
degrees for 20 minutes, then cool enough to comfortably touch at least the pan's
upper sidewall.
Batter:
1 1/4 cups granulated sugar
40 oz. (5 cups) 3-cheese blend (see above)
2 teaspoons vanilla
12 ounces of blueberries, pureed
1 1/2 teaspoons xanthan gum
6 eggs (brown recommended, large)
Optional: 3/8 teaspoon heat-resistant blue food coloring
Expect close to 8 1/2 cups of the resulting batter, but do not add this to
the pan all at once. Rather, this needs to be done in four installments.
Wrap the pan in foil just before adding the first batter installment (to minimize
the foil's disturbance and therefore its leakage risk, do not put it on any
earlier).
For each of the first three installments, gently scoop about 2 1/2 cups of
batter into the pan, fully covering the surface (here's a tip—scoop small
amounts of batter around the edge of the pan, letting this batter flow towards
the middle on its own), and then bake this pan with its contents for 25 minutes,
at 325 degrees. However, at the end of the third installment's 25 minutes, add
on another 30 minutes of baking time, but only at 300 degrees (that's a 55
minute "baking installment"—the first 25 minutes at 325 degrees
and the next 30 at 300). For these three installments here, bake with the pan in
a tub filled with at least 1/4 to 1/2 inch of boiling water, but (to reduce
spillage risks) do not fill the tub all the way at this point, because the whole
tub-and-pan assembly is going to need to be removed from the oven (in order to
comfortably add contents to the pan) between installments.
After these first three installments are done, there should be about 1 cup of
batter left, with 105 minutes of baking time reached at this point (25 minutes
for each of the first two installments, and 55 for the third one). Now comes the
fourth installment—carefully add the last of this batter on top of the
pan's earlier installments, fully coating the entire surface. Next, return the
entire pan-and-tub assembly to the oven, with the temperature remaining at 300
degrees. At this point, fill up the tub generously with boiling water. Resume
baking for another 105 minutes (based upon usage of a 9 1/2" pan).
Afterward, shut the oven off, and leave its door slightly ajar, with the
cheesecake still inside—and in the tub—for an hour. Next, remove the
cheesecake from the oven and tub. Continue to cool it down at room temperature
for another two hours. After doing so, remove the cheesecake from pan and
refrigerate.
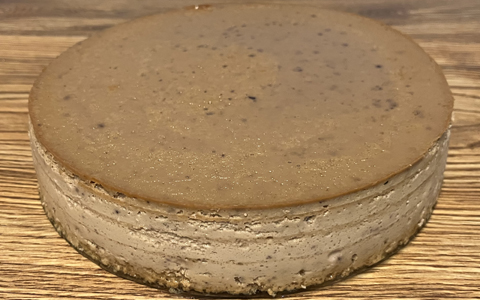
Baked Blueberry Cheesecake—Prototype 2:
3-Cheese Blend (1CT-1NC-1YG):
Prepare ahead of time 16 ounces of yogurt cheese, derived from one 32-ounce
container of nonfat yogurt. If the resulting yogurt cheese falls below 16
ounces, add back enough of the whey (that was strained out from the yogurt) to
make up the difference. To this yogurt cheese combine 16 ounces of whipped,
lowfat cottage cheese and 16 ounces (two 8-ounce packages) of softened
Neufchatel cheese ("light cream cheese").
Blueberry Concentrate:
Puree about 3 half-pint containers (or close to 18 ounces) of fresh
blueberries, then put into a pan and cook over very low heat, until nearly
1/3 of the puree's weight has evaporated. Let the resulting concentrate
(which should now be close to 12 ounces) cool slightly before using.
Grease a 9 1/2" (or 9") springform pan, but do not wrap foil around
it yet (see below).
Crust:
2 oz. melted, white chocolate
8 oz. (1 cup) 3-cheese blend (see above)
1/4 cup granulated sugar
1/4 cup brown sugar
1/2 teaspoon vanilla
2 oz. All-Bran, ground up
Place the resulting mixture in the greased pan and pre-bake without tub at 300
degrees for 20 minutes, then cool enough to comfortably touch at least the pan's
upper sidewall.
Batter:
1 1/4 cups + 3 tablespoons granulated sugar
40 oz. (5 cups) 3-cheese blend (see above)
2 teaspoons vanilla
12 oz. (approximate) blueberry concentrate (full recipe, see above)
1 tablespoon xanthan gum
6 eggs (brown recommended, large)
Optional: heat-resistant blue and red food colorings (see comments above)
Expect close to 8 1/2 cups of the resulting batter, but do not add this to
the pan all at once. Rather, this needs to be done in six installments.
Wrap the pan in foil just before adding the first batter installment (to minimize
the foil's disturbance and therefore its leakage risk, do not put it on any
earlier).
For each of the first five installments, gently scoop about 1 5/12 cups (or
between 1 1/3 and 1 1/2 cups) of batter into the pan, fully covering the surface
(here's a tip—scoop small amounts of batter around the edge of the pan,
letting this batter flow towards the middle on its own), and then bake this pan
with its contents for 25 minutes, at 325 degrees. For these five installments
here, bake with the pan in a tub filled with at least 1/4 to 1/2 inch of boiling
water, but (to reduce spillage risks) do not fill the tub all the way at this
point, because the whole tub-and-pan assembly is going to need to be removed
from the oven (in order to comfortably add contents to the pan) between
installments.
After these first five installments are done, there should be about 1 5/12 cups
(or between 1 1/3 and 1 1/2 cups) of batter left, with 125 minutes of baking time
reached at this point. Now comes the sixth installment—carefully add the
last of this batter on top of the pan's earlier installments, fully coating the
entire surface. Next, return the entire pan-and-tub assembly to the oven, with
the temperature reduced to 300 degrees. At this point, fill up the tub generously
with boiling water. Resume baking for another 60 minutes (based upon usage of a
9 1/2" pan).
Afterward, shut the oven off, and leave its door slightly ajar, with the
cheesecake still inside—and in the tub—for an hour. Next, remove the
cheesecake from the oven and tub. Continue to cool it down at room temperature
for another two hours. After doing so, remove the cheesecake from pan and
refrigerate.
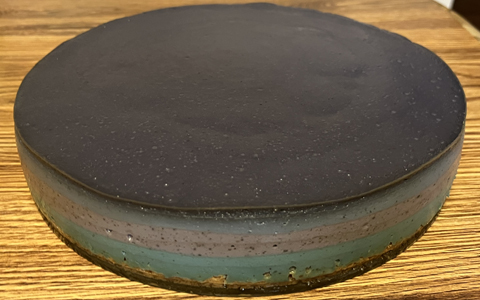
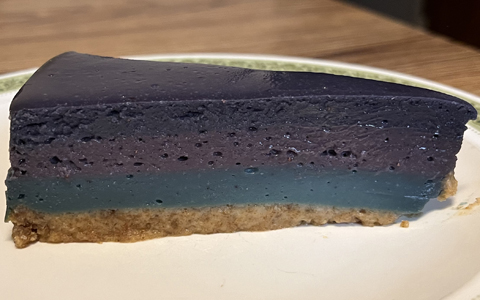
|
-------------------------------------------------------
|
Baked Patriotic (Red, White and Blue) Cheesecake—Prototype 1:
3-Cheese Blend (1CT-1NC-1YG):
Prepare ahead of time 16 ounces of yogurt cheese, derived from one 32-ounce
container of nonfat yogurt. If the resulting yogurt cheese falls below 16
ounces, add back enough of the whey (that was strained out from the yogurt) to
make up the difference. To this yogurt cheese combine 16 ounces of whipped,
lowfat cottage cheese and 16 ounces (two 8-ounce packages) of softened
Neufchatel cheese ("light cream cheese").
Blueberry Concentrate:
Puree about 1/2 pint (or close to 6 ounces) of fresh blueberries, then put into
a pan and cook over very low heat, until nearly 1/3 of the puree's weight has
evaporated. Let the resulting concentrate (which should now be close to 4
ounces) cool slightly before using.
Grease a 9 1/2" (or 9") springform pan, but do not wrap foil around
it yet (see below).
Crust:
2 oz. melted, white chocolate
8 oz. (1 cup) 3-cheese blend (see above)
1/4 cup granulated sugar
1/4 cup brown sugar
1/4 teaspoon cinnamon
1/2 teaspoon vanilla
2 oz. All-Bran, ground up
Place the resulting mixture in the greased pan and pre-bake without tub at 300
degrees for 20 minutes, then cool enough to comfortably touch at least the pan's
upper sidewall.
Blueberry Batter:
1/3 cup + 1 tablespoon + 1 teaspoon (5/12 cup) granulated sugar
13 1/3 oz. (1 2/3 cups) 3-cheese blend (see above)
3/4 teaspoon vanilla
4 oz. (approximate) blueberry concentrate (full recipe, see above)
1/2 teaspoon heat-resistant blue food coloring
1 teaspoon xanthan gum
2 eggs (brown recommended, large)
Expect close to 3 cups of the resulting batter, but do not add this to the pan
all at once. Rather, the blueberry batter needs to be added in two
installments. Wrap the pan in foil just before pouring in the first
installment. For this installment, gently scoop about half the batter (about
1 1/2 cups) into the pan, fully covering the crust (here's a tip—scoop
small amounts of batter around the edge of the pan, letting this batter flow
towards the middle on its own), and then bake this pan with its contents in a
hot water tub for about 30 minutes (if using a 9 1/2" pan), at 325
degrees.
Afterwards, take the tub-and-pan assembly out of the oven and promptly add the
remaining blueberry batter. Gently scoop it on top of the first installment and
return the tub-and-pan assembly to the oven, still at 325 degrees. Resume baking
for about another 30 minutes (if using a 9 1/2" pan).
After this is done, take the tub-and-pan assembly out of the oven and promptly
add the next batter indicated below.
Vanilla Batter:
1/2 cup + 1 tablespoon + 1 teaspoon (7/12 cup) granulated sugar
13 1/3 oz. (1 2/3 cups) 3-cheese blend (see above)
2 teaspoons vanilla
3/8 teaspoon xanthan gum
2 eggs (brown recommended, large)
Carefully scoop this (in its entirety here—the vanilla batter is added in
only one installment) on top of the blueberry batter (it is best to do this
around the edge of the pan and let the vanilla batter flow towards the middle) and
return the tub-and-pan assembly to the oven, still at 325 degrees. Resume baking
for about another 30 minutes (if using a 9 1/2" pan). Afterwards, take the
tub-and-pan assembly out of the oven and promptly add the final batter shown
below.
Strawberry Batter:
1/4 cup + 2 teaspoons granulated sugar
1/3 cup Nestlé Strawberry Nesquik drink mix (the same amount of mix that
would be needed as if to make 2/3 quart of the drink itself)
13 1/3 oz. (1 2/3 cups) 3-cheese blend (see above)
3/4 teaspoon vanilla
1/2 teaspoon heat-resistant red food coloring
3/8 teaspoon xanthan gum
2 eggs (brown recommended, large)
Carefully scoop this on top of the vanilla batter (again, it is best to do
this around the edge of the pan and let the strawberry batter flow towards the
middle; furthermore, the strawberry batter is added in its entirety here)
and return the tub-and-pan assembly to the oven, this time at only 300
degrees. Bake for about 65 more minutes (if using a 9 1/2" pan). Then shut
off the oven and cool the cheesecake down while still in it (and in tub), with
the oven door slightly ajar, for about an hour. Afterwards, remove the
cheesecake (still in its springform pan) from the oven and tub and continue to
cool it down at room temperature for another two hours.
After cooling down at room temperature, remove the cheesecake from its pan and
refrigerate.
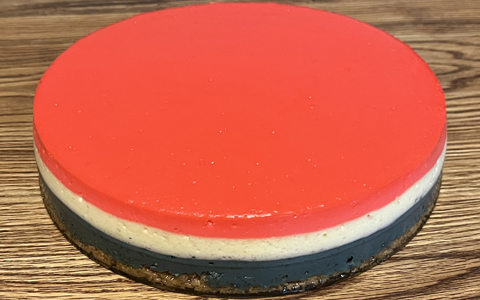
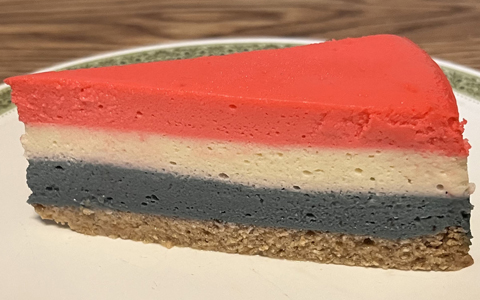
Baked Patriotic (Red, White and Blue) Cheesecake—Prototype 2:
3-Cheese Blend (1CT-1NC-1YG):
Prepare ahead of time 16 ounces of yogurt cheese, derived from one 32-ounce
container of nonfat yogurt. If the resulting yogurt cheese falls below 16
ounces, add back enough of the whey (that was strained out from the yogurt) to
make up the difference. To this yogurt cheese combine 16 ounces of whipped,
lowfat cottage cheese and 16 ounces (two 8-ounce packages) of softened
Neufchatel cheese ("light cream cheese").
Blueberry Concentrate:
Puree about 1/2 pint (or close to 6 ounces) of fresh blueberries, then put into
a pan and cook over very low heat, until nearly 1/3 of the puree's weight has
evaporated. Let the resulting concentrate (which should now be close to 4
ounces) cool slightly before using.
Grease a 9 1/2" (or 9") springform pan, but do not wrap foil around
it yet (see below).
Crust:
2 oz. melted, white chocolate
8 oz. (1 cup) 3-cheese blend (see above)
1/4 cup granulated sugar
1/4 cup brown sugar
1/4 teaspoon cinnamon
1/2 teaspoon vanilla
2 oz. All-Bran, ground up
Place the resulting mixture in the greased pan and pre-bake without tub at 300
degrees for 30 minutes, then cool enough to comfortably touch at least the pan's
upper sidewall.
Blueberry Batter:
1/2 cup granulated sugar
13 1/3 oz. (1 2/3 cups) 3-cheese blend (see above)
3/4 teaspoon vanilla
4 oz. (approximate) blueberry concentrate (full recipe, see above)
3/8 teaspoon heat-resistant blue food coloring
1/8 teaspoon heat-resistant red food coloring
1 teaspoon xanthan gum
2 eggs (brown recommended, large)
Expect close to 3 cups of the resulting batter, but do not add this to the pan
all at once. Rather, the blueberry batter needs to be added in two
installments. Wrap the pan in foil just before pouring in the first
installment. For this installment, gently scoop about half the batter (about
1 1/2 cups) into the pan, fully covering the crust (here's a tip—scoop
small amounts of batter around the edge of the pan, letting this batter flow
towards the middle on its own), and then bake this pan with its contents in a
hot water tub for about 30 minutes (if using a 9 1/2" pan), at 325
degrees.
Afterwards, take the tub-and-pan assembly out of the oven and promptly add the
remaining blueberry batter. Gently scoop it on top of the first installment and
return the tub-and-pan assembly to the oven, still at 325 degrees. Resume baking
for about another 30 minutes (if using a 9 1/2" pan).
After this is done, take the tub-and-pan assembly out of the oven and promptly
add the next batter indicated below.
Vanilla Batter:
1/2 cup + 1 tablespoon + 1 teaspoon (7/12 cup) granulated sugar
13 1/3 oz. (1 2/3 cups) 3-cheese blend (see above)
2 teaspoons vanilla
3/8 teaspoon xanthan gum
2 eggs (brown recommended, large)
Carefully scoop this (in its entirety here—the vanilla batter is added in
only one installment) on top of the blueberry batter (it is best to do this
around the edge of the pan and let the vanilla batter flow towards the middle) and
return the tub-and-pan assembly to the oven, still at 325 degrees. Resume baking
for about another 30 minutes (if using a 9 1/2" pan). Afterwards, take the
tub-and-pan assembly out of the oven and promptly add the final batter shown
below.
Strawberry Batter:
1/4 cup + 2 teaspoons granulated sugar
1/3 cup Nestlé Strawberry Nesquik drink mix (the same amount of mix that
would be needed as if to make 2/3 quart of the drink itself)
13 1/3 oz. (1 2/3 cups) 3-cheese blend (see above)
3/4 teaspoon vanilla
1/2 teaspoon heat-resistant red food coloring
3/8 teaspoon xanthan gum
2 eggs (brown recommended, large)
Carefully scoop this on top of the vanilla batter (again, it is best to do
this around the edge of the pan and let the strawberry batter flow towards the
middle; furthermore, the strawberry batter is added in its entirety here)
and return the tub-and-pan assembly to the oven, this time at only 300
degrees. Bake for about 65 more minutes (if using a 9 1/2" pan). Then shut
off the oven and cool the cheesecake down while still in it (and in tub), with
the oven door slightly ajar, for about an hour. Afterwards, remove the
cheesecake (still in its springform pan) from the oven and tub and continue to
cool it down at room temperature for another two hours.
After cooling down at room temperature, remove the cheesecake from its pan and
refrigerate.
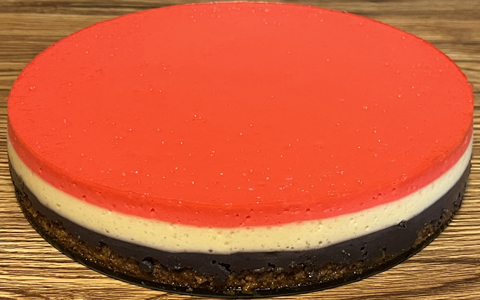
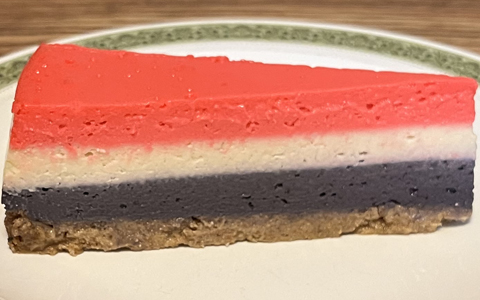
Baked Patriotic (Red, White and Blue) Cheesecake—Prototype 3:
3-Cheese Blend (1CT-1NC-1YG):
Prepare ahead of time 16 ounces of yogurt cheese, derived from one 32-ounce
container of nonfat yogurt. If the resulting yogurt cheese falls below 16
ounces, add back enough of the whey (that was strained out from the yogurt) to
make up the difference. To this yogurt cheese combine 16 ounces of whipped,
lowfat cottage cheese and 16 ounces (two 8-ounce packages) of softened
Neufchatel cheese ("light cream cheese").
Blueberry Concentrate:
Puree about 1/2 pint (or close to 6 ounces) of fresh blueberries, then put into
a pan and cook over very low heat, until nearly 1/3 of the puree's weight has
evaporated. Let the resulting concentrate (which should now be close to 4
ounces) cool slightly before using.
Grease a 9 1/2" (or 9") springform pan, but do not wrap foil around
it yet (see below).
Crust:
4 oz. melted, white chocolate
8 oz. (1 cup) 3-cheese blend (see above)
1/4 cup granulated sugar
1/4 cup brown sugar
1/4 teaspoon cinnamon
1/2 teaspoon vanilla
2 oz. All-Bran, ground up
Place the resulting mixture in the greased pan and pre-bake without tub at 300
degrees for 30 minutes, then cool enough to comfortably touch at least the pan's
upper sidewall.
Blueberry Batter:
1/3 cup + 2 tablespoons (11/24 cup) granulated sugar
13 1/3 oz. (1 2/3 cups) 3-cheese blend (see above)
3/4 teaspoon vanilla
4 oz. (approximate) blueberry concentrate (full recipe, see above)
1/4 teaspoon heat-resistant blue food coloring
1 teaspoon xanthan gum
2 eggs (brown recommended, large)
Expect close to 3 cups of the resulting batter, but do not add this to the pan
all at once. Rather, the blueberry batter needs to be added in two
installments. Wrap the pan in foil just before pouring in the first
installment. Or as an alternative to using foil, place this pan in an
Easy Bath Cheesecake Wrap—and don't bother
waiting for the pan to get comfortably cool to do so.
For this installment, gently scoop about half the batter (about
1 1/2 cups) into the pan, fully covering the crust (here's a tip—scoop
small amounts of batter around the edge of the pan, letting this batter flow
towards the middle on its own), and then bake this pan with its contents in a
hot water tub for about 30 minutes (if using a 9 1/2" pan), at 325
degrees.
Afterwards, take the tub-and-pan assembly out of the oven and promptly add the
remaining blueberry batter. Gently scoop it on top of the first installment and
return the tub-and-pan assembly to the oven, still at 325 degrees. Resume baking
for about another 30 minutes (if using a 9 1/2" pan).
After this is done, take the tub-and-pan assembly out of the oven and promptly
add the next batter indicated below.
Vanilla Batter:
1/2 cup + 1 tablespoon + 1 teaspoon (7/12 cup) granulated sugar
13 1/3 oz. (1 2/3 cups) 3-cheese blend (see above)
2 teaspoons vanilla
3/8 teaspoon xanthan gum
2 eggs (brown recommended, large)
Carefully scoop this (in its entirety here—the vanilla batter is added in
only one installment) on top of the blueberry batter (it is best to do this
around the edge of the pan and let the vanilla batter flow towards the middle) and
return the tub-and-pan assembly to the oven, still at 325 degrees. Resume baking
for about another 30 minutes (if using a 9 1/2" pan). Afterwards, take the
tub-and-pan assembly out of the oven and promptly add the final batter shown
below.
Strawberry Batter:
1/4 cup + 2 teaspoons granulated sugar
1/3 cup Nestlé Strawberry Nesquik drink mix (the same amount of mix that
would be needed as if to make 2/3 quart of the drink itself)
13 1/3 oz. (1 2/3 cups) 3-cheese blend (see above)
3/4 teaspoon vanilla
1/2 teaspoon heat-resistant red food coloring
3/8 teaspoon xanthan gum
2 eggs (brown recommended, large)
Carefully scoop this on top of the vanilla batter (again, it is best to do
this around the edge of the pan and let the strawberry batter flow towards the
middle; furthermore, the strawberry batter is added in its entirety here)
and return the tub-and-pan assembly to the oven, this time at only 300
degrees. Bake for about 65 more minutes (if using a 9 1/2" pan). Then shut
off the oven and cool the cheesecake down while still in it (and in tub), with
the oven door slightly ajar, for about an hour. Afterwards, remove the
cheesecake (still in its springform pan) from the oven and tub and continue to
cool it down at room temperature for another two hours.
After cooling down at room temperature, remove the cheesecake from its pan and
refrigerate.
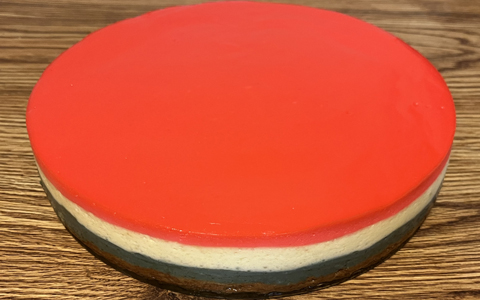
Baked Patriotic (Red, White and Blue) Cheesecake—Prototype 4:
3-Cheese Blend (1CT-1NC-1YG):
Prepare ahead of time 16 ounces of yogurt cheese, derived from one 32-ounce
container of nonfat yogurt. If the resulting yogurt cheese falls below 16
ounces, add back enough of the whey (that was strained out from the yogurt) to
make up the difference. To this yogurt cheese combine 16 ounces of whipped,
lowfat cottage cheese and 16 ounces (two 8-ounce packages) of softened
Neufchatel cheese ("light cream cheese").
Blueberry Concentrate:
Puree about 8 ounces (or close to 1/2 pint) of fresh blueberries, then put
into a pan and cook over very low heat, until nearly 1/2 of the puree's weight
has evaporated. Let the resulting concentrate (which should now be close to 4
ounces) cool slightly before using.
Grease a 9 1/2" (or 9") springform pan, but do not wrap foil around
it yet (see below).
Crust:
4 oz. melted, white chocolate
8 oz. (1 cup) 3-cheese blend (see above)
1/4 cup granulated sugar
1/4 cup brown sugar
1/4 teaspoon cinnamon
1/2 teaspoon vanilla
2 oz. All-Bran, ground up
Place the resulting mixture in the greased pan and pre-bake without tub at
300 degrees for 30 minutes, then remove from oven and cool down at room
temperature (for at least 30 minutes).
Blueberry Batter:
1/3 cup + 2 tablespoons (11/24 cup) granulated sugar
13 1/3 oz. (1 2/3 cups) 3-cheese blend (see above)
3/4 teaspoon vanilla
4 oz. (approximate) blueberry concentrate (full recipe, see above)
1/8 teaspoon heat-resistant blue food coloring
1 teaspoon xanthan gum
2 eggs (brown recommended, large)
Expect close to 3 cups of the resulting batter, but do not add this to the pan
all at once. Rather, the blueberry batter needs to be added in two
installments. Wrap the pan in foil just before pouring in the first
installment. Or as an alternative to using foil, place this pan in an
Easy Bath Cheesecake Wrap.
For this installment, gently scoop about half the batter (about
1 1/2 cups) into the pan, fully covering the crust (here's a tip—scoop
small amounts of batter around the edge of the pan, letting this batter flow
towards the middle on its own), and then bake this pan with its contents in a
hot water tub for about 30 minutes (if using a 9 1/2" pan), at 325
degrees.
Afterwards, take the tub-and-pan assembly out of the oven and promptly add the
remaining blueberry batter. Gently scoop it on top of the first installment and
return the tub-and-pan assembly to the oven, still at 325 degrees. Resume baking
for about another 30 minutes (if using a 9 1/2" pan).
After this is done, take the tub-and-pan assembly out of the oven and promptly
add the next batter indicated below.
Vanilla Batter:
1/2 cup + 1 tablespoon + 1 teaspoon (7/12 cup) granulated sugar
13 1/3 oz. (1 2/3 cups) 3-cheese blend (see above)
2 teaspoons vanilla
3/8 teaspoon xanthan gum
2 eggs (brown recommended, large)
Carefully scoop this (in its entirety here—the vanilla batter is added in
only one installment) on top of the blueberry batter (it is best to do this
around the edge of the pan and let the vanilla batter flow towards the middle) and
return the tub-and-pan assembly to the oven, still at 325 degrees. Resume baking
for about another 30 minutes (if using a 9 1/2" pan). Afterwards, take the
tub-and-pan assembly out of the oven and promptly add the final batter shown
below.
Strawberry Batter:
1/4 cup + 2 teaspoons granulated sugar
1/3 cup Nestlé Strawberry Nesquik drink mix (the same amount of mix that
would be needed as if to make 2/3 quart of the drink itself)
13 1/3 oz. (1 2/3 cups) 3-cheese blend (see above)
3/4 teaspoon vanilla
1/2 teaspoon heat-resistant red food coloring
3/8 teaspoon xanthan gum
2 eggs (brown recommended, large)
Carefully scoop this on top of the vanilla batter (again, it is best to do
this around the edge of the pan and let the strawberry batter flow towards the
middle; furthermore, the strawberry batter is added in its entirety here)
and return the tub-and-pan assembly to the oven, this time at only 300
degrees. Bake for about 65 more minutes (if using a 9 1/2" pan). Then shut
off the oven and cool the cheesecake down while still in it (and in tub), with
the oven door slightly ajar, for about an hour. Afterwards, remove the
cheesecake (still in its springform pan) from the oven and tub and continue to
cool it down at room temperature for another two hours.
After cooling down at room temperature, remove the cheesecake from its pan and
refrigerate.
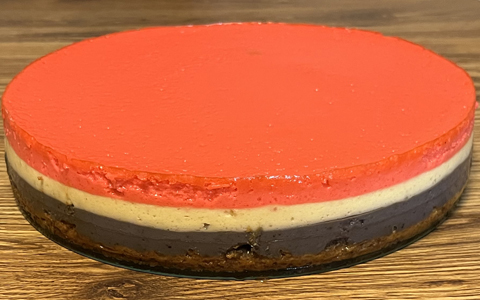
|
-------------------------------------------------------
|
Baked Key Lime Cheesecake—Prototype 1:
3-Cheese Blend (1CT-1NC-1YG):
Prepare ahead of time 16 ounces of yogurt cheese, derived from one 32-ounce
container of nonfat yogurt. If the resulting yogurt cheese falls below 16
ounces, add back enough of the whey (that was strained out from the yogurt) to
make up the difference. To this yogurt cheese combine 16 ounces of whipped,
lowfat cottage cheese and 16 ounces (two 8-ounce packages) of softened
Neufchatel cheese ("light cream cheese").
Grease a 9 1/2" (or 9") springform pan, but do not wrap foil around
it yet (see below).
Crust:
2 oz. melted, white chocolate
8 oz. (1 cup) 3-cheese blend (see above)
1/4 cup granulated sugar
1/4 cup brown sugar
1/2 teaspoon vanilla
2 oz. All-Bran, ground up
Place the resulting mixture in the greased pan and pre-bake without tub at 300
degrees for 20 minutes, then cool enough to comfortably touch at least the pan's
upper sidewall.
Batter:
1 5/8 cups granulated sugar
40 oz. (5 cups) 3-cheese blend (see above)
2 teaspoons vanilla
3 tablespoons key lime juice
2 teaspoons grated key lime zest (peel)
1 teaspoon xanthan gum
6 eggs (brown recommended, large)
Wrap the pan in foil at this point. Carefully pour the batter over the crust and
bake this cheesecake in a hot water tub at 300 degrees for 105 minutes (if using
a 9 1/2" pan). Then shut off oven and cool cheesecake down while still in
it (and in tub), with door slightly ajar, for an hour. Afterwards, remove from
oven and tub and continue to cool down at room temperature for another two
hours, then remove from pan and refrigerate.

Baked Key Lime Cheesecake—Prototype 2:
3-Cheese Blend (1CT-1NC-1YG):
Prepare ahead of time 16 ounces of yogurt cheese, derived from one 32-ounce
container of nonfat yogurt. If the resulting yogurt cheese falls below 16
ounces, add back enough of the whey (that was strained out from the yogurt) to
make up the difference. To this yogurt cheese combine 16 ounces of whipped,
lowfat cottage cheese and 16 ounces (two 8-ounce packages) of softened
Neufchatel cheese ("light cream cheese").
Grease a 9 1/2" (or 9") springform pan, but do not wrap foil around
it yet (see below).
Crust:
2 oz. melted, white chocolate
8 oz. (1 cup) 3-cheese blend (see above)
1/4 cup granulated sugar
1/4 cup brown sugar
1/2 teaspoon vanilla
2 oz. All-Bran, ground up
Place the resulting mixture in the greased pan and pre-bake without tub at 300
degrees for 30 minutes, then cool enough to comfortably touch at least the pan's
upper sidewall.
Batter:
1 1/4 cups granulated sugar
40 oz. (5 cups) 3-cheese blend (see above)
2 teaspoons vanilla
1/3 cup key lime juice
1 tablespoon grated key lime zest (peel)
14-ounce can of sweetened condensed milk
2 teaspoons xanthan gum
6 eggs (brown recommended, large)
Expect close to 8 1/2 cups of the resulting batter, but do not add this to
the pan all at once. Rather, this needs to be done in four installments.
Wrap the pan in foil just before adding the first batter installment (to minimize
the foil's disturbance and therefore its leakage risk, do not put it on any
earlier).
For each of the first three installments, gently scoop about 2 1/2 cups of
batter into the pan, fully covering the surface (here's a tip—scoop small
amounts of batter around the edge of the pan, letting this batter flow towards
the middle on its own), and then bake this pan with its contents for 25 minutes,
at 325 degrees. However, at the end of the third installment's 25 minutes, add
on another 10 minutes of baking time, but only at 300 degrees (that's a 35
minute "baking installment"—the first 25 minutes at 325 degrees
and the next 10 at 300). For these three installments here, bake with the pan in
a tub filled with at least 1/4 to 1/2 inch of boiling water, but (to reduce
spillage risks) do not fill the tub all the way at this point, because the whole
tub-and-pan assembly is going to need to be removed from the oven (in order to
comfortably add contents to the pan) between installments.
After these first three installments are done, there should be about 1 cup of
batter left, with 85 minutes of baking time reached at this point (25 minutes
for each of the first two installments, and 35 for the third one). Now comes the
fourth installment—carefully add the last of this batter on top of the
pan's earlier installments, fully coating the entire surface. Next, return the
entire pan-and-tub assembly to the oven, with the temperature remaining at 300
degrees. At this point, fill up the tub generously with boiling water. Resume
baking for another 75 minutes (based upon usage of a 9 1/2" pan).
Afterward, shut the oven off, and leave its door slightly ajar, with the
cheesecake still inside—and in the tub—for an hour. Next, remove the
cheesecake from the oven and tub. Continue to cool it down at room temperature
for another two hours. After doing so, remove the cheesecake from pan and
refrigerate.
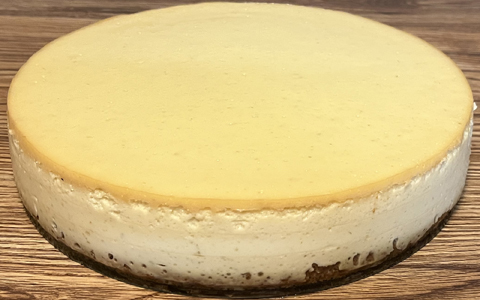
Baked Key Lime Cheesecake—Prototype 3:
3-Cheese Blend (1CT-1NC-1YG):
Prepare ahead of time 16 ounces of yogurt cheese, derived from one 32-ounce
container of nonfat yogurt. If the resulting yogurt cheese falls below 16
ounces, add back enough of the whey (that was strained out from the yogurt) to
make up the difference. To this yogurt cheese combine 16 ounces of whipped,
lowfat cottage cheese and 16 ounces (two 8-ounce packages) of softened
Neufchatel cheese ("light cream cheese").
Grease a 9 1/2" (or 9") springform pan, but do not wrap foil around
it yet (see below).
Crust:
4 oz. melted, white chocolate
8 oz. (1 cup) 3-cheese blend (see above)
1/4 cup granulated sugar
1/4 cup brown sugar
1/2 teaspoon vanilla
2 oz. All-Bran, ground up
Place the resulting mixture in the greased pan and pre-bake without tub at 300
degrees for 30 minutes, then cool enough to comfortably touch at least the pan's
upper sidewall.
Batter:
1 1/4 cups granulated sugar
40 oz. (5 cups) 3-cheese blend (see above)
2 teaspoons vanilla
1/3 cup key lime juice
1 tablespoon grated key lime zest (peel)
14-ounce can of sweetened condensed milk
2 1/4 teaspoons xanthan gum
6 eggs (brown recommended, large)
Expect close to 8 1/2 cups of the resulting batter, but do not add this to
the pan all at once. Rather, this needs to be done in four installments.
Wrap the pan in foil just before adding the first batter installment (to minimize
the foil's disturbance and therefore its leakage risk, do not put it on any
earlier). Or as an alternative to using foil, place this pan in an
Easy Bath Cheesecake Wrap—and don't bother
waiting for the pan to get comfortably cool to do so.
For each of the first three installments, gently scoop about 2 1/2 cups of
batter into the pan, fully covering the surface (here's a tip—scoop small
amounts of batter around the edge of the pan, letting this batter flow towards
the middle on its own), and then bake this pan with its contents for 30 minutes,
at 325 degrees. However, at the end of the third installment's 30 minutes, add
on another 25 minutes of baking time, but only at 300 degrees (that's a 55
minute "baking installment"—the first 30 minutes at 325 degrees
and the next 25 at 300). For these three installments here, bake with the pan in
a tub filled with at least 1/4 to 1/2 inch of boiling water, but (to reduce
spillage risks) do not fill the tub all the way at this point, because the whole
tub-and-pan assembly is going to need to be removed from the oven (in order to
comfortably add contents to the pan) between installments.
After these first three installments are done, there should be about 1 cup of
batter left, with 115 minutes of baking time reached at this point (30 minutes
for each of the first two installments, and 55 for the third one). Now comes the
fourth installment—carefully add the last of this batter on top of the
pan's earlier installments, fully coating the entire surface. Next, return the
entire pan-and-tub assembly to the oven, with the temperature remaining at 300
degrees. At this point, fill up the tub generously with boiling water. Resume
baking for another 75 minutes (based upon usage of a 9 1/2" pan).
Afterward, shut the oven off, and leave its door slightly ajar, with the
cheesecake still inside—and in the tub—for an hour. Next, remove the
cheesecake from the oven and tub. Continue to cool it down at room temperature
for another two hours. After doing so, remove the cheesecake from pan and
refrigerate.
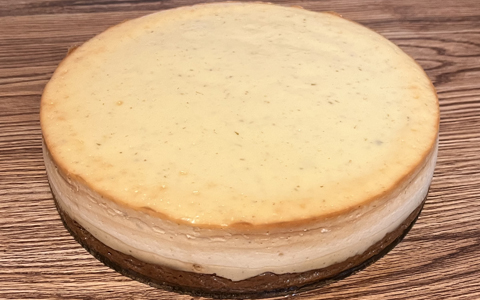
Baked Key Lime Cheesecake—Prototype 4:
3-Cheese Blend (1CT-1NC-1YG):
Prepare ahead of time 16 ounces of yogurt cheese, derived from one 32-ounce
container of nonfat yogurt. If the resulting yogurt cheese falls below 16
ounces, add back enough of the whey (that was strained out from the yogurt) to
make up the difference. To this yogurt cheese combine 16 ounces of whipped,
lowfat cottage cheese and 16 ounces (two 8-ounce packages) of softened
Neufchatel cheese ("light cream cheese").
Grease a 9 1/2" (or 9") springform pan, but do not wrap foil around
it yet (see below).
Crust:
4 oz. melted, white chocolate
8 oz. (1 cup) 3-cheese blend (see above)
1/4 cup granulated sugar
1 tablespoon brown sugar
1/2 teaspoon vanilla
3 oz. graham crackers, ground up ("Original" Nabisco Grahams
recommended)
Place the resulting mixture in the greased pan and pre-bake without tub at
300 degrees for 30 minutes, then remove from oven and cool down at room
temperature (for at least 30 minutes).
Batter:
1 1/4 cups granulated sugar
40 oz. (5 cups) 3-cheese blend (see above)
2 teaspoons vanilla
1/3 cup key lime juice
1 tablespoon grated key lime zest (peel)
14-ounce can of sweetened condensed milk
2 1/4 teaspoons xanthan gum
6 eggs (brown recommended, large)
Expect close to 8 1/2 cups of the resulting batter, but do not add this to
the pan all at once. Rather, this needs to be done in four installments.
Wrap the pan in foil just before adding the first batter installment (to minimize
the foil's disturbance and therefore its leakage risk, do not put it on any
earlier). Or as an alternative to using foil, place this pan in an
Easy Bath Cheesecake Wrap.
For each of the first three installments, gently scoop about 2 1/2 cups of
batter into the pan, fully covering the surface (here's a tip—scoop small
amounts of batter around the edge of the pan, letting this batter flow towards
the middle on its own), and then bake this pan with its contents for 30 minutes,
at 325 degrees. However, at the end of the third installment's 30 minutes, add
on another 25 minutes of baking time, but only at 300 degrees (that's a 55
minute "baking installment"—the first 30 minutes at 325 degrees
and the next 25 at 300). For these three installments here, bake with the pan in
a tub filled with at least 1/4 to 1/2 inch of boiling water, but (to reduce
spillage risks) do not fill the tub all the way at this point, because the whole
tub-and-pan assembly is going to need to be removed from the oven (in order to
comfortably add contents to the pan) between installments.
After these first three installments are done, there should be about 1 cup of
batter left, with 115 minutes of baking time reached at this point (30 minutes
for each of the first two installments, and 55 for the third one). Now comes the
fourth installment—carefully add the last of this batter on top of the
pan's earlier installments, fully coating the entire surface. Next, return the
entire pan-and-tub assembly to the oven, with the temperature remaining at 300
degrees. At this point, fill up the tub generously with boiling water. Resume
baking for another 75 minutes (based upon usage of a 9 1/2" pan).
Afterward, shut the oven off, and leave its door slightly ajar, with the
cheesecake still inside—and in the tub—for an hour. Next, remove the
cheesecake from the oven and tub. Continue to cool it down at room temperature
for another two hours. After doing so, remove the cheesecake from pan and
refrigerate.

|
-------------------------------------------------------
|
Baked Cookies+Creme ("Oreo") / Chocolate Peanut Butter
("Reese's") [aka "OReesEO"]
Cheesecake—Prototype 1:
3-Cheese Blend (1CT-1NC-1YG):
Prepare ahead of time 16 ounces of yogurt cheese, derived from one 32-ounce
container of nonfat yogurt. If the resulting yogurt cheese falls below 16
ounces, add back enough of the whey (that was strained out from the yogurt) to
make up the difference. To this yogurt cheese combine 16 ounces of whipped,
lowfat cottage cheese and 16 ounces (two 8-ounce packages) of softened
Neufchatel cheese ("light cream cheese").
Grease a 9 1/2" (or 9") springform pan, but do not wrap foil around
it yet (see below).
Chocolate/Peanut Butter Crust:
2 oz. semi-sweet chocolate, melted
2 oz. peanut butter chips, melted
3/8 cup granulated sugar
2 tablespoons cocoa powder
8 oz. (1 cup) 3-cheese blend (see above)
1 teaspoon vanilla
2 oz. finely ground All-Bran
Place the resulting mixture in the greased pan and pre-bake without tub at 300
degrees for 10 minutes, then remove from oven and cool down at room temperature
(for at least 30 minutes).
Chocolate Batter:
7/8 cup granulated sugar
3 tablespoons cocoa powder
20 oz. (2 1/2 cups) 3-cheese blend (see above)
1 teaspoon vanilla
1/2 teaspoon xanthan gum
3 eggs
Cookies for this chocolate batter:
Oreo (recommended, regular kind with vanilla creme centers) or other chocolate
sandwich cookies, about 12
Wrap the pan in foil at this point (to minimize the foil's disturbance and
therefore its leakage risk, do not put it on any earlier). Or as an
alternative to using foil, place this pan in an
Easy Bath Cheesecake Wrap.
Carefully pour the batter on top of the crust, and add the aforementioned 12
cookies (don't bother breaking them up—keeping them whole is fine and,
in fact, recommended).

Place some batter over these cookies, ensuring that they are fully coated
and—as much as possible—immersed. After doing so, bake all this in
a hot water tub at 325 degrees for about 30 minutes. Afterwards, take the
tub-and-pan assembly out of the oven and promptly add the batter and additional
cookies indicated below.
Peanut Butter Batter:
3/4 cup granulated sugar
4 oz. unsalted peanut butter
20 oz. (2 1/2 cups) 3-cheese blend (see above)
3/8 teaspoon xanthan gum
3 eggs
Cookies for this peanut butter batter:
Oreo (recommended, with Reese's peanut butter creme centers) or other chocolate
sandwich cookies (with, preferably, peanut butter creme centers—otherwise,
stick with vanilla), about 12
Expect close to 3 3/4 cups of the resulting peanut butter batter, but do
not add it to the pan all at once. Rather, this batter needs to be added in
two installments. For this installment, gently scoop about 2 3/4 cups of
the batter (more specifically, reserve one cup of it for the next
installment) on top of the chocolate batter (it is best to do this around the
edge of the pan and let the peanut butter batter flow towards the middle).
Next, add the cookies for the peanut butter batter.

Do so in the same way as for the chocolate one (including thorough coating of
the cookies—but be careful so as not to break the top surface of the
chocolate batter), and then continue to bake this pan with its contents for
about 25 minutes, but this time only at 300 degrees.
Afterwards, take the tub-and-pan assembly out of the oven and promptly add the
remaining peanut butter batter, gently scooping it on top of the pan's other
contents. Try to fully coat the entire surface, especially wherever cookie
pieces may be showing. Next, return the entire pan-and-tub assembly to the oven.
At this point, fill up the tub generously with boiling water. Resume baking at
300 degrees for another 40 minutes.
After this is done, shut off the oven and cool the cheesecake down while still
in it (and in tub), with the oven door slightly ajar, for about an hour.
Afterwards, remove the cheesecake (still in its springform pan) from the oven
and tub and continue to cool it down at room temperature for another two hours.
As an option, immediately after removal from the oven, decorate this cheesecake
with chocolate and/or peanut butter chips (or peanut butter cup candies such as
morsel-sized cups or broken pieces of larger cups) around its edge. Another
variation is to use miniature versions of Reese's Peanut Butter Cups (Oreo
cookie crumbs version recommended)—but wait until the cooldown at room
temperature has reached at least one hour before doing so (otherwise, these
cups may melt into "hats" from the still-excessive heat).
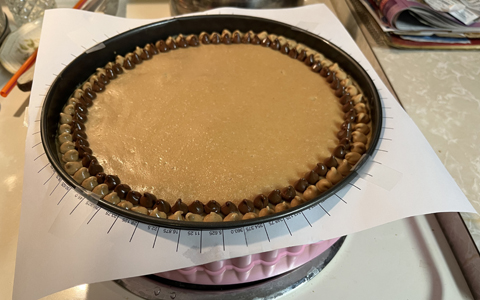
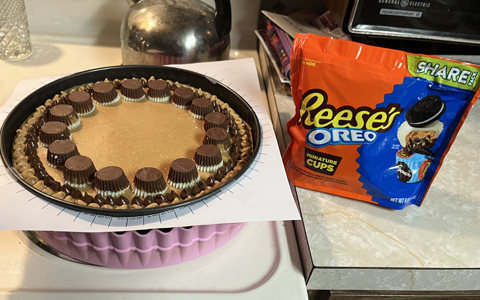
After these two hours of cooling down at room temperature, remove the
cheesecake from its pan and refrigerate.


Baked Cookies+Creme ("Oreo") / Chocolate Peanut Butter
("Reese's") [aka "OReesEO"]
Cheesecake—Prototype 2:
3-Cheese Blend (1CT-1NC-1YG):
Prepare ahead of time 16 ounces of yogurt cheese, derived from one 32-ounce
container of nonfat yogurt. If the resulting yogurt cheese falls below 16
ounces, add back enough of the whey (that was strained out from the yogurt) to
make up the difference. To this yogurt cheese combine 16 ounces of whipped,
lowfat cottage cheese and 16 ounces (two 8-ounce packages) of softened
Neufchatel cheese ("light cream cheese").
Grease a 9 1/2" (or 9") springform pan, but do not wrap foil around
it yet (see below).
Chocolate/Peanut Butter Crust:
2 oz. semi-sweet chocolate, melted
2 oz. peanut butter chips, melted
3/8 cup granulated sugar
2 tablespoons cocoa powder
8 oz. (1 cup) 3-cheese blend (see above)
1 teaspoon vanilla
2 oz. finely ground All-Bran
Place the resulting mixture in the greased pan and pre-bake without tub at 300
degrees for 20 minutes, then remove from oven and cool down at room temperature
(for at least 30 minutes).
Chocolate Batter:
7/8 cup granulated sugar
3 tablespoons cocoa powder
20 oz. (2 1/2 cups) 3-cheese blend (see above)
1 teaspoon vanilla
1/2 teaspoon xanthan gum
3 eggs
Cookies for this chocolate batter:
Oreo (recommended, regular kind with vanilla creme centers) or other chocolate
sandwich cookies, about 13
Wrap the pan in foil at this point (to minimize the foil's disturbance and
therefore its leakage risk, do not put it on any earlier). Or as an
alternative to using foil, place this pan in an
Easy Bath Cheesecake Wrap.
Carefully pour the batter on top of the crust, and add the aforementioned 13
cookies (don't bother breaking them up—keeping them whole is fine and,
in fact, recommended).
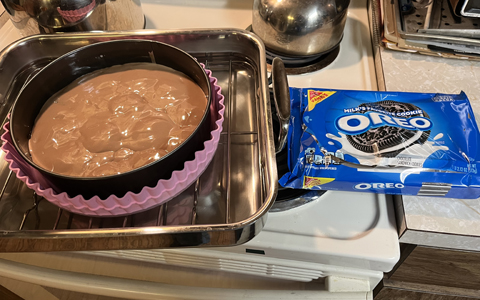
Place some batter over these cookies, ensuring that they are fully coated
and—as much as possible—immersed. After doing so, bake all this in
a hot water tub at 325 degrees for about 30 minutes. Afterwards, take the
tub-and-pan assembly out of the oven and promptly add the batter and additional
cookies indicated below.
Peanut Butter Batter:
3/4 cup granulated sugar
4 oz. unsalted peanut butter
20 oz. (2 1/2 cups) 3-cheese blend (see above)
1/4 teaspoon xanthan gum
3 eggs
Cookies for this peanut butter batter:
Oreo (recommended, with Reese's peanut butter creme centers) or other chocolate
sandwich cookies (with, preferably, peanut butter creme centers—otherwise,
stick with vanilla), about 13
Expect close to 3 3/4 cups of the resulting peanut butter batter, but do
not add it to the pan all at once. Rather, this batter needs to be added in
two installments. For this installment, gently scoop about 2 1/2 to 2
3/4 cups of the batter (more specifically, reserve about 1 to 1 1/4 cups
of it for the next installment) on top of the chocolate batter (it is
best to do this around the edge of the pan and let the peanut butter batter
flow towards the middle). Next, add the cookies for the peanut butter
batter.
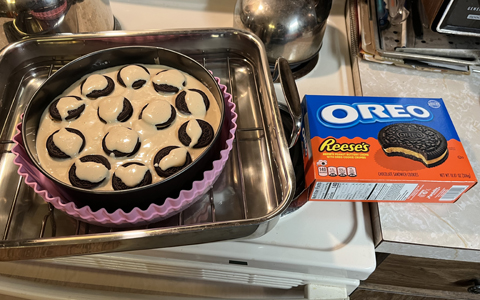
Do so in the same way as for the chocolate one (including thorough coating of
the cookies—but be careful so as not to break the top surface of the
chocolate batter), and then continue to bake this pan with its contents for
about 30 minutes (but see comments below), but this time only at 300
degrees.
Afterwards, take the tub-and-pan assembly out of the oven and promptly add the
remaining peanut butter batter, gently scooping it on top of the pan's other
contents. Try to fully coat the entire surface, especially wherever cookie
pieces may be showing. Next, return the entire pan-and-tub assembly to the oven.
At this point, fill up the tub generously with boiling water. Resume baking at
300 degrees for another 50 minutes (but see comments below).
After this is done, shut off the oven and cool the cheesecake down while still
in it (and in tub), with the oven door slightly ajar, for about an hour.
Afterwards, remove the cheesecake (still in its springform pan) from the oven
and tub and continue to cool it down at room temperature for another two hours.
As an option, immediately after removal from the oven, decorate this cheesecake
with chocolate and/or peanut butter chips (or peanut butter cup candies such as
morsel-sized cups or broken pieces of larger cups) around its edge. Another
variation is to use miniature versions of Reese's Peanut Butter Cups (Oreo
cookie crumbs version recommended)—but do not add these yet (see
immediately below)!
After cooling down at room temperature, remove the cheesecake from its pan.
After this is done, the miniature peanut butter cups can now be placed on
the cheesecake (should this option be used, let the cheesecake sit at room
temperature for about another 15 minutes after placing these mini
cups).
Next, refrigerate the cheesecake.
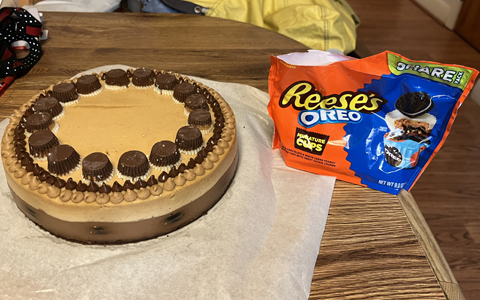
|
-------------------------------------------------------
|
An update since the COVID-19 (coronavirus) outbreak, late-2021
My
cheesecake baking took a big hiatus in 2020—and continued through
most of 2021. The last time I baked a cheesecake before this long break was
probably in late December of 2019 or sometime in January of 2020. The reason
for this stoppage was a breakout of a worldwide pandemic called COVID-19,
or the coronavirus. This extremely infamous disease resulted in massive
disruptions, including cancellations of numerous events at which I would
normally serve my well-appreciated dessert. Even when such events
resumed—or other events somehow continued on—there remained
restrictions that still hindered my bringing these cheesecakes. And I was
reluctant to make a whole cheesecake to be eaten by myself only (too many
calories on my own!).
With the upcoming Rosh HaShanah lunch in early September of 2021 at my
cousin Joanne's place marking my first time eating there since Thanksgiving
of 2019, I finally baked my very first cheesecake in nearly
20 months—Chocolate, Prototype 24.
How good it was to get back, at long
last, into making my sweet specialty this side of COVID-19! This "Head
of the Year" meal at her house would include my "Head of the
(hopefully) Post-COVID Era" cheesecakes.
During this extensive down time, I made a decision to implement a small
change, largely out of simplification, to my "cheese base". This
would now consist of equal amounts of cottage, Neufchatel and yogurt
cheeses (no other closely-related changes, such as adjusting the amount of
xanthan gum—but for which I would end up having rubbery regrets
here—would be made). Among other things, this resulted in using
one whole 16-ounce container of cottage cheese, unlike the past, when I
used one and a half containers of this for a single recipe—which
meant putting a half-used container back in the refrigerator, for some
other (hopefully near-future!) purpose. Under this latest modification,
yogurt cheese would remain at 16 ounces, but Neufchatel would be doubled,
from 8 to 16 ounces. The aforementioned chocolate prototype, rather than a
plain one, would be the debut cheesecake for this new
formulation. |
|
-------------------------------------------------------
|
Pumpkin Cream Cheese Spread:
12 ounces cream cheese spread
3 ounces pumpkin butter (from Trader Joe's)
1/4-3/8 teaspoon xanthan gum
Combine all these ingredients and mix thoroughly. Then chill until
firm.
|
|
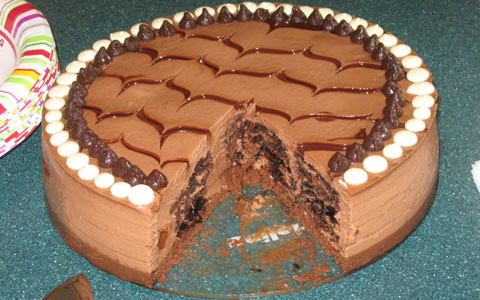
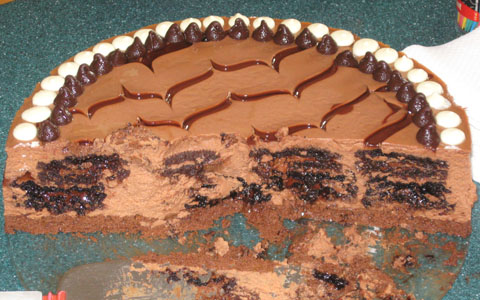
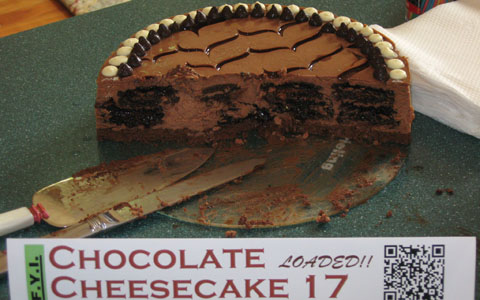
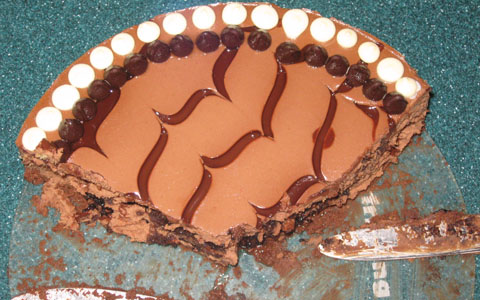

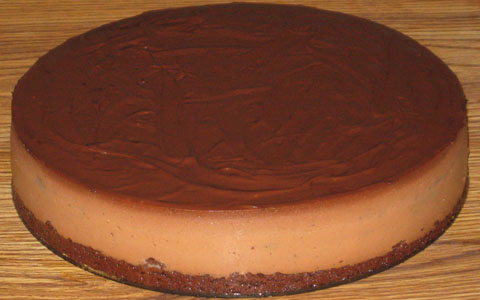
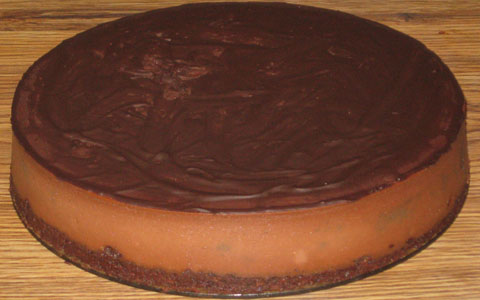
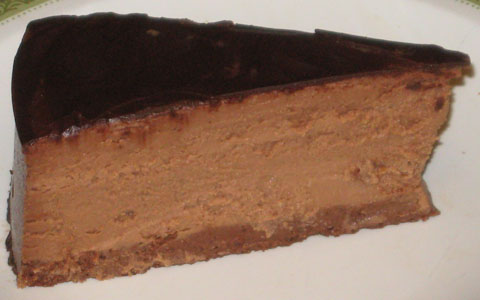
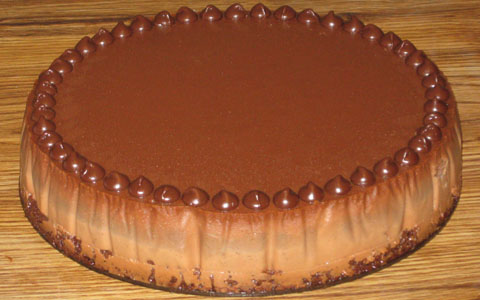
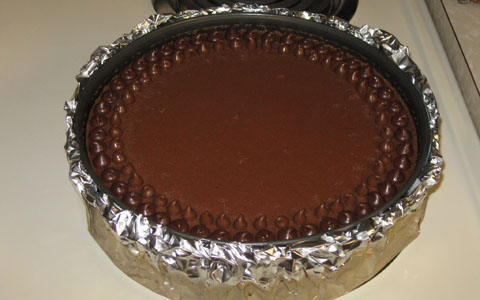
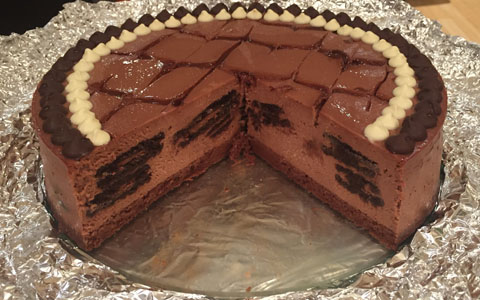
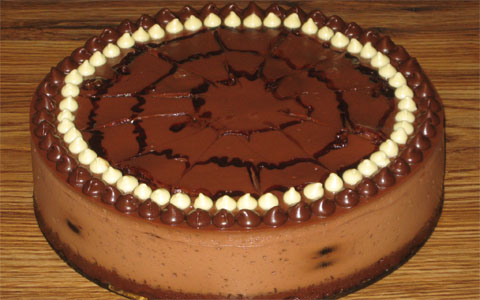

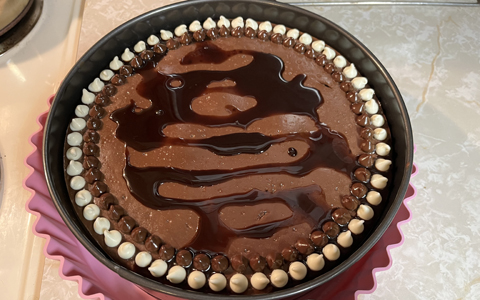
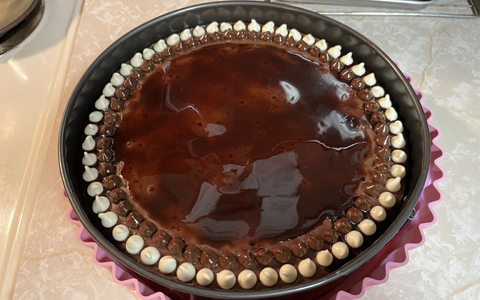
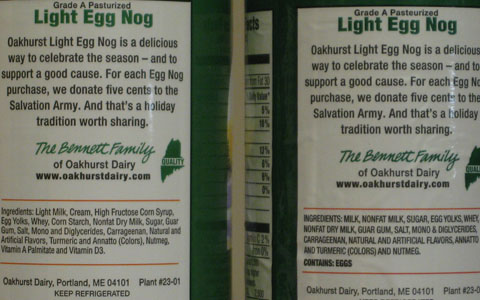
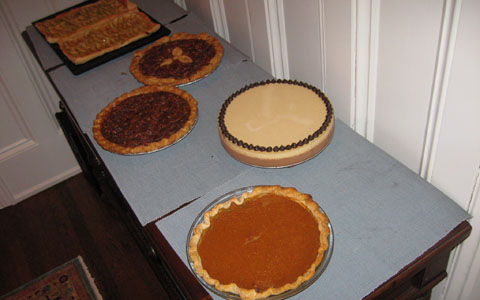

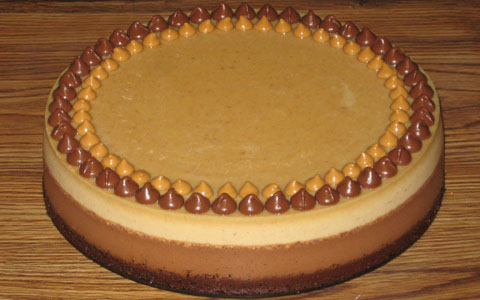

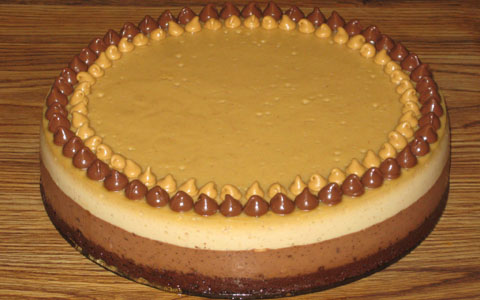
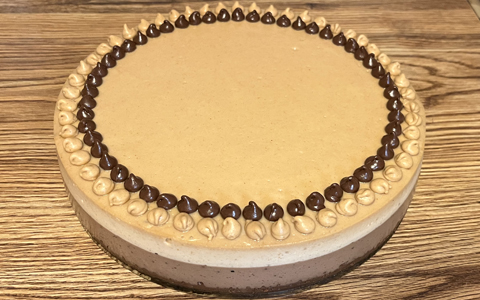


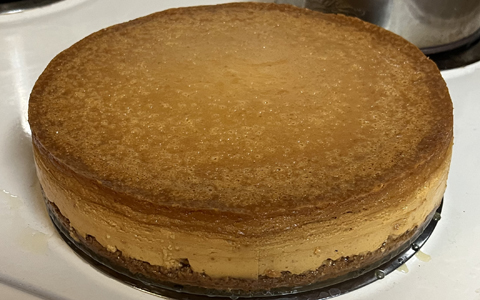
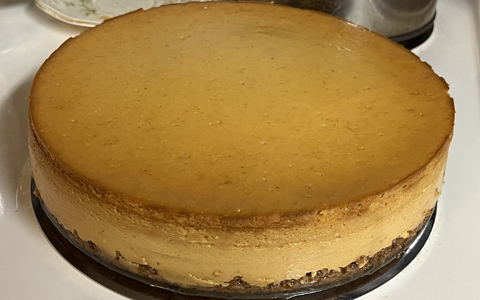
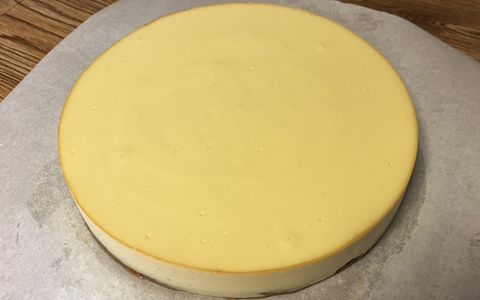
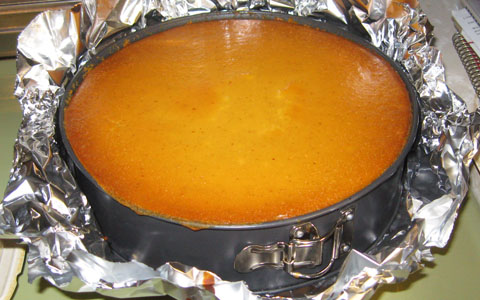
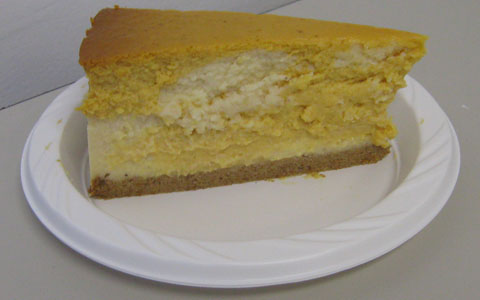
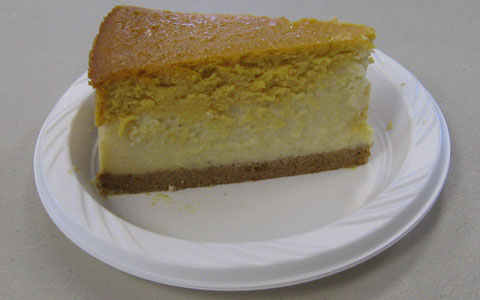
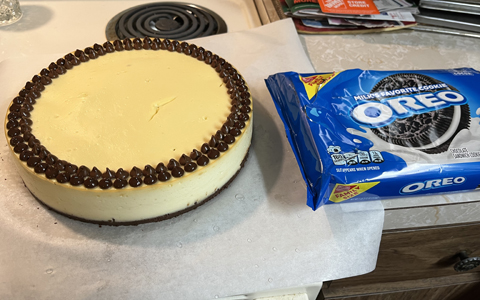
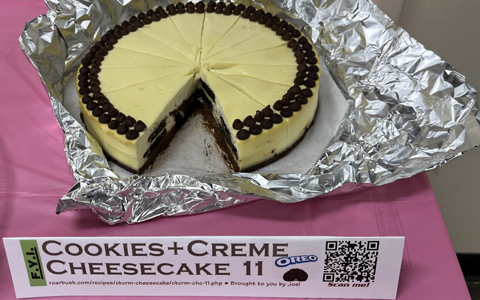
")
")


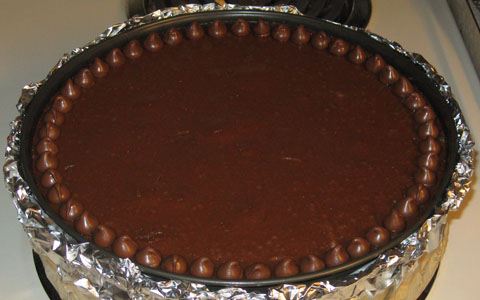
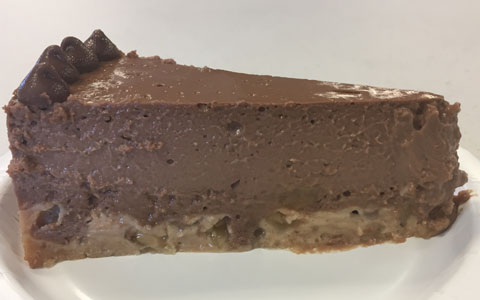
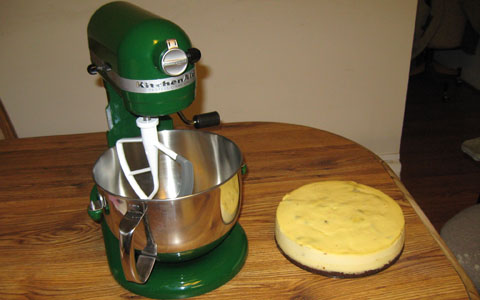
")
")