|
|
 |
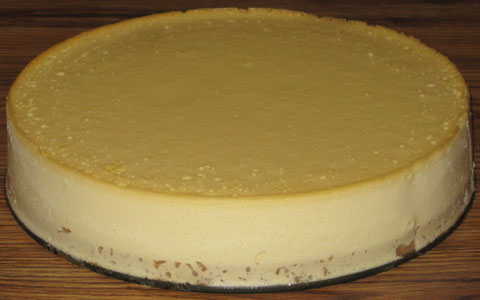
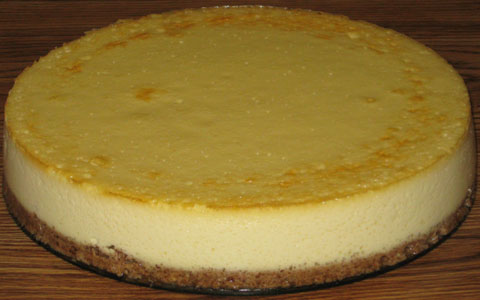
Baked Plain Cheesecake—Prototype 4:
Crust:
1.5 oz. melted, white chocolate
8 oz. lowfat cottage cheese, whipped, no salt added
1 teaspoon lemon juice
3 tablespoons granulated sugar
3 tablespoons brown sugar
2 teaspoons cinnamon
1/2 teaspoon vanilla
2.2 oz. Bran Buds, ground up
Batter:
2 tablespoons melted or softened butter
1/2 cup granulated sugar
1/2 cup skim milk
1 tablespoon lemon juice
1/3 cup flour
1/4 teaspoon salt
2 1/2 cups (20 oz.) lowfat cottage cheese, whipped, no salt added
1 teaspoon vanilla
2 eggs
Bake at 300 degrees for about 100 minutes (i.e., with a 9" pan—but
if using a 9 1/2" pan, make that about 90 minutes), or until cake tester
comes clean (use a tub).
Baked Plain Cheesecake—Prototype 5:
Crust:
1.5 oz. melted, white chocolate
8 oz. lowfat yogurt cheese
3 tablespoons granulated sugar
3 tablespoons brown sugar
2 teaspoons cinnamon
1/2 teaspoon vanilla
2.2 oz. Bran Buds, ground up
Batter:
2 tablespoons melted or softened butter
1/2 cup granulated sugar
1/2 cup skim milk
1 1/4 tablespoons arrowroot
1/3 cup flour
1/4 teaspoon salt
20 oz. lowfat yogurt cheese
1 teaspoon vanilla
2 eggs
Remember, no lemon juice is needed. The tartness is provided here by
the yogurt cheese.
Bake at 300 degrees for about 85 minutes (if using a 9 1/2" pan), in a
tub.
Baked Plain Cheesecake—Prototype 6:
Repeat Prototype 5, but replace the yogurt cheese with regular ("full
fat") cream cheese (both crust and batter). Bake the same way as well
(i.e., 300 degrees, about 85 minutes, with a 9 1/2" pan and a tub).
Baked Plain Cheesecake—Prototype 7:
Repeat Prototype 6, but make these changes:
For the crust, boost the granulated sugar by 1 tablespoon, to 1/4 cup.
For the batter, boost the granulated sugar by 1/4 cup, to 3/4 cup, and increase the
arrowroot by 1/4 teaspoon (1/12 tablespoon) to 4 teaspoons (1 1/3
tablespoons).
Also, for both the crust and the batter, switch back to yogurt cheese,
directly replacing all of the cream cheese. Furthermore, use a half-half
combination of lowfat and nonfat yogurt. This means using 4 ounces of lowfat
and 4 ounces of nonfat yogurt cheese for the crust, and 10 ounces of lowfat
and 10 ounces of nonfat yogurt cheese for the batter.
Bake all this only for about 60 minutes.
Baked Plain Cheesecake—Prototype 8:
Repeat Prototype 7's batter only (omit the crust), but make these changes:
Fully exclude the flour, milk and arrowroot. Use only nonfat yogurt cheese at
this point, and (out of simplification here) cut it by 4 ounces, to 16. More
specifically, start with 32 ounces of nonfat yogurt, and strain it for at least
24 hours. If less than 16 ounces remains, add back enough of the whey strained
out to make up the difference.
The resulting new ingredient list for the batter follows:
2 tablespoons melted or softened butter
3/4 cup granulated sugar
1/4 teaspoon salt
16 oz. nonfat yogurt cheese
1 teaspoon vanilla
2 eggs
Bake in a tub at 300 degrees for 90 minutes, cool in oven (and still in tub as
well, of course) with heat shut off and door slightly ajar for another 60
minutes, then cool outside of oven (and tub) for 60 more minutes before
refrigerating.
Baked Plain Cheesecake—Prototype 9:
50/50 Cheese Blend:
Start with 32 ounces of nonfat yogurt, and strain it for at least 24 hours, thus
producing yogurt cheese. The goal here is to attain 16 ounces of this cheese. If
less than 16 ounces of it remains, add back enough of the whey strained out to
make up the difference. If, however, more than 16 ounces remains, exclude the
extra remaining cheese. Combine the 16-ounce yogurt cheese result with 16 ounces
of whipped, lowfat cottage cheese.
Only 28 ounces of this blend is required for what follows, so save the extra 4
ounces for another purpose (alternatively, you could combine 14 ounces of yogurt
cheese with 14 ounces of cottage cheese, depending on what you have available).
Crust:
1.5 oz. melted, white chocolate
8 oz. 50/50 cheese blend
1/4 cup granulated sugar
3 tablespoons brown sugar
2 teaspoons cinnamon
1/2 teaspoon vanilla
2.2 oz. Bran Buds, ground up
Pour this crust mixture into pan and pre-bake without tub at 300 degrees for 10
minutes, then cool enough to comfortably touch at least the pan's upper
sidewall.
Batter:
2 tablespoons melted or softened butter
3/4 cup granulated sugar
1/3 cup all-purpose flour
1/4 teaspoon salt
20 oz. 50/50 cheese blend
1 teaspoon vanilla
2 eggs
Bake in tub at 300 degrees for 60 minutes (if using a 9 1/2" pan), cool
(outside of oven and tub) for an hour, remove from pan and refrigerate.
Baked Plain Cheesecake—Prototype 10:
2-to-1 Blend of Yogurt Cheese and Cottage Cheese:
Prepare ahead of time 16 ounces of yogurt cheese, derived from one 32-ounce
container of nonfat yogurt. If the resulting yogurt cheese falls below 16
ounces, add back enough of the whey (that was strained out from the yogurt) to
make up the difference. To this yogurt cheese combine 8 ounces (1 cup) of
whipped, lowfat cottage cheese.
Crust:
1 oz. melted, white chocolate
4 oz. (1/2 cup) 2-to-1 blend of yogurt cheese and cottage cheese (see above)
2 tablespoons granulated sugar
1 1/3 tablespoons brown sugar
1 teaspoon cinnamon
1/4 teaspoon vanilla
1.1 oz. Bran Buds, ground up
Pour this crust mixture into pan (9 to 9 1/2 inches) and pre-bake without tub at
300 degrees for 5 minutes, then cool enough to comfortably touch at least the
pan's upper sidewall.
Batter:
2 tablespoons melted or softened butter
5/8 cup granulated sugar
2 tablespoons all-purpose flour
1 1/3 tablespoons arrowroot
1/4 teaspoon salt
20 oz. (2 1/2 cups) 2-to-1 blend of yogurt cheese and cottage cheese (see above)
1 teaspoon vanilla
2 eggs
Pour on top of crust. Then bake in tub at 300 degrees for 60 minutes (if using a
9 1/2" pan), cool (outside of oven and tub) for an hour, remove from pan
and refrigerate.
Baked Plain Cheesecake—Prototype 11:
Yogurt Cheese:
Prepare ahead of time 3 pounds of yogurt cheese, derived from three 32-ounce
containers of nonfat yogurt. If the resulting yogurt cheese falls below 48
ounces, add back enough of the whey (that was strained out from the yogurt) to
make up the difference.
Crust:
2 oz. melted, white chocolate
8 oz. (1 cup) yogurt cheese (see above)
1/4 cup granulated sugar
3 tablespoons brown sugar
2 teaspoons cinnamon
1/2 teaspoon vanilla
2.2 oz. Bran Buds, ground up
Pour this crust mixture into bottom of pan (9 to 9 1/2 inches), spreading the
crust evenly (no pre-baking is needed with this one).
Batter:
4 tablespoons melted or softened butter
1 1/4 cups granulated sugar
1/4 cup all-purpose flour
3 tablespoons arrowroot
1/2 teaspoon salt
40 oz. (5 cups) yogurt cheese (see above)
2 teaspoons vanilla
4 eggs
Pour the batter over the crust and bake this cheesecake in a tub at 300 degrees
for 100 minutes (if using a 9 1/2" pan). Then cool the cheesecake down
while still in oven (with this oven shut off) and in tub with door slightly ajar
for an hour. Afterwards, remove from oven and tub and continue to cool down at
room temperature for another 100 minutes, then remove from pan and refrigerate.
Baked Plain Cheesecake—Prototype 12:
Yogurt Cheese:
Prepare ahead of time 3 pounds of yogurt cheese, derived from three 32-ounce
containers of nonfat yogurt. If the resulting yogurt cheese falls below 48
ounces, add back enough of the whey (that was strained out from the yogurt) to
make up the difference.
Crust:
2 oz. melted, white chocolate
8 oz. (1 cup) yogurt cheese (see above)
1/4 cup granulated sugar
3 tablespoons brown sugar
2 teaspoons cinnamon
1/2 teaspoon vanilla
2 oz. All-Bran, ground up
Place this crust mixture into the bottom of a greased springform pan (9 to
9 1/2 inches), spreading the crust evenly (no pre-baking is needed with
this one).
Batter:
4 tablespoons melted or softened butter
1 1/4 cups granulated sugar
40 oz. (5 cups) yogurt cheese (see above)
2 teaspoons vanilla
1/4 cup all-purpose flour
3 tablespoons arrowroot
4 eggs
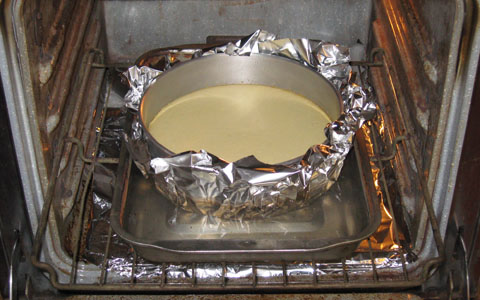
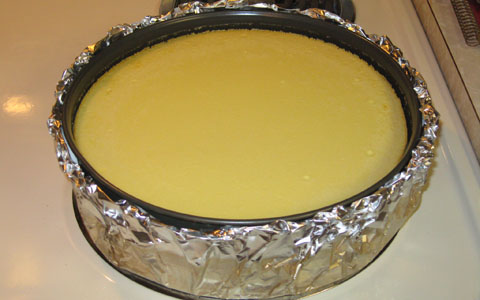
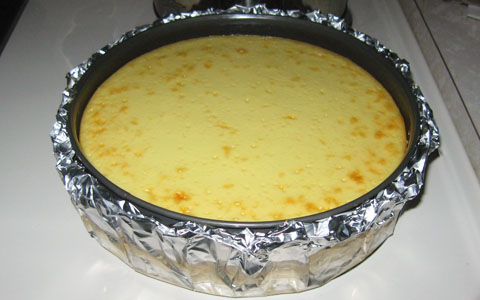
Wrap the pan in foil just before adding the batter (to minimize the foil's
disturbance and therefore its leakage risk, do not put it on any earlier).
Next, pour the batter over the crust and bake this cheesecake in a hot water tub at
300 degrees for 100 minutes (if using a 9 1/2" pan). Then cool the cheesecake
down while still in oven (with this oven shut off) and in tub with door slightly ajar
for an hour. Afterwards, remove from oven and tub and continue to cool down at
room temperature for another 100 minutes, then remove from pan and refrigerate.
Baked Plain Cheesecake—Prototype 13:
Yogurt Cheese:
Prepare ahead of time 3 pounds of yogurt cheese, derived from three 32-ounce
containers of nonfat yogurt. If the resulting yogurt cheese falls below 48
ounces, add back enough of the whey (that was strained out from the yogurt) to
make up the difference.
Crust:
2 oz. melted, white chocolate
8 oz. (1 cup) yogurt cheese (see above)
1/4 cup granulated sugar
3 tablespoons brown sugar
2 teaspoons cinnamon
1/2 teaspoon vanilla (but see comments below)
2 oz. All-Bran, ground up
Place the resulting mixture in the greased pan and pre-bake without tub at 300
degrees for 5-10 minutes, depending on the mixture's thickness (closer to 10
minutes if thin enough to be fully distributed across the pan's bottom by gentle
shaking, closer to 5 minutes if thick enough to require spreading out this
mixture by pressing on it with a utensil and/or fingers), then cool enough to
comfortably touch at least the pan's upper sidewall.
Batter:
1 1/4 cups granulated sugar
40 oz. (5 cups) yogurt cheese (see above)
2 teaspoons vanilla
1/4 cup + 1 tablespoon (5 tablespoons altogether) arrowroot
4 eggs
Wrap the pan in foil just before adding the batter (to minimize the foil's
disturbance and therefore its leakage risk, do not put it on any earlier).
Next, pour the batter over the crust and bake this cheesecake in a hot water tub
at 300 degrees for 110 minutes (if using a 9 1/2" pan). Then cool the
cheesecake down while still in oven (with this oven shut off) and in tub with
door slightly ajar for an hour. Afterwards, remove from oven and tub and
continue to cool down at room temperature for another 110 minutes, then remove
from pan and refrigerate.
Baked Plain Cheesecake—Prototype 14:
Yogurt Cheese:
Prepare ahead of time 3 pounds of yogurt cheese, derived from three 32-ounce
containers of nonfat yogurt. If the resulting yogurt cheese falls below 48
ounces, add back enough of the whey (that was strained out from the yogurt) to
make up the difference.
Crust:
2 oz. melted, white chocolate
8 oz. (1 cup) yogurt cheese (see above)
1/4 cup granulated sugar
3 tablespoons brown sugar
2 teaspoons cinnamon
1/2 teaspoon vanilla
2 oz. All-Bran, ground up
Place the resulting mixture in the greased pan and pre-bake without tub at 300
degrees for 5-10 minutes, depending on the mixture's thickness (closer to 10
minutes if thin enough to be fully distributed across the pan's bottom by gentle
shaking, closer to 5 minutes if thick enough to require spreading out this
mixture by pressing on it with a utensil and/or fingers), then cool enough to
comfortably touch at least the pan's upper sidewall.
Batter:
1 1/4 cups granulated sugar
40 oz. (5 cups) yogurt cheese (see above)
2 teaspoons vanilla
1/4 cup + 1 tablespoon (5 tablespoons altogether) arrowroot
5 eggs
Wrap the pan in foil just before adding the batter (to minimize the foil's
disturbance and therefore its leakage risk, do not put it on any earlier).
Next, pour the batter over the crust and bake this cheesecake in a hot water tub
at 300 degrees for 110 minutes (if using a 9 1/2" pan). Then cool the
cheesecake down while still in oven (with this oven shut off) and in tub with
door slightly ajar for an hour. Afterwards, remove from oven and tub and
continue to cool down at room temperature for another 110 minutes, then remove
from pan and refrigerate.
Baked Plain Cheesecake—Prototype 15:
3-Cheese Blend (1CT-1NC-4YG):
Prepare ahead of time 32 ounces of yogurt cheese, derived from two 32-ounce
containers (that's 64 ounces altogether) of nonfat yogurt. If the resulting
yogurt cheese falls below 32 ounces, add back enough of the whey (that was
strained out from the yogurt) to make up the difference. To this yogurt cheese
combine 8 ounces of whipped, lowfat cottage cheese and 8 ounces of softened
Neufchatel cheese ("light cream cheese").
Crust:
2 oz. melted, white chocolate
8 oz. (1 cup) 3-cheese blend (see above)
1/4 cup granulated sugar
3 tablespoons brown sugar
2 teaspoons cinnamon
1/2 teaspoon vanilla
2 oz. All-Bran, ground up
Place the resulting mixture in the greased pan and pre-bake without tub at 300
degrees for 5-10 minutes, depending on the mixture's thickness (closer to 10
minutes if thin enough to be fully distributed across the pan's bottom by gentle
shaking, closer to 5 minutes if thick enough to require spreading out this
mixture by pressing on it with a utensil and/or fingers), then cool enough to
comfortably touch at least the pan's upper sidewall.
Batter:
1 1/4 cups granulated sugar
40 oz. (5 cups) 3-cheese blend (see above)
2 teaspoons vanilla
1/4 cup + 1 tablespoon (5 tablespoons altogether) arrowroot
5 eggs
Wrap the pan in foil just before adding the batter (to minimize the foil's
disturbance and therefore its leakage risk, do not put it on any earlier).
Next, pour the batter over the crust and bake this cheesecake in a hot water tub
at 300 degrees for 120 minutes (if using a 9 1/2" pan). Then cool the
cheesecake down while still in oven (with this oven shut off) and in tub with
door slightly ajar for an hour. Afterwards, remove from oven and tub and
continue to cool down at room temperature for another 120 minutes, then remove
from pan and refrigerate.
Baked Plain Cheesecake—Prototype 16:
3-Cheese Blend (1CT-1NC-4YG):
Prepare ahead of time 32 ounces of yogurt cheese, derived from two 32-ounce
containers (that's 64 ounces altogether) of nonfat yogurt. If the resulting
yogurt cheese falls below 32 ounces, add back enough of the whey (that was
strained out from the yogurt) to make up the difference. To this yogurt cheese
combine 8 ounces of whipped, lowfat cottage cheese and 8 ounces of softened
Neufchatel cheese ("light cream cheese").
Grease a 9 1/2" (or 9") springform pan, but do not wrap foil around it
yet (see below).
Graham Crust:
2 oz. melted, white chocolate
8 oz. (1 cup) 3-cheese blend (see above)
1/4 cup granulated sugar
1 tablespoon brown sugar
1/2 teaspoon vanilla
Completely blend the above ingredients first, then continue with the last one
below.
4 oz. cinnamon graham crackers, ground up
Place resulting crust mixture into bottom of the springform pan and pre-bake
without tub at 300 degrees for 15 minutes, then cool enough to comfortably touch
at least the pan's upper sidewall.
Batter:
1 1/4 cups granulated sugar
40 oz. (5 cups) 3-cheese blend (see above)
2 teaspoons vanilla
1/4 cup + 1 tablespoon (5 tablespoons altogether) arrowroot
5 eggs
Wrap the pan in foil just before adding the batter (to minimize the foil's
disturbance and therefore its leakage risk, do not put it on any earlier).
Next, pour the batter over the crust and bake this cheesecake in a hot water tub
at 300 degrees for 115 minutes (if using a 9 1/2" pan). Then cool the
cheesecake down while still in oven (with this oven shut off) and in tub with
door slightly ajar for an hour. Afterwards, remove from oven and tub and
continue to cool down at room temperature for another 115 minutes, then remove
from pan and refrigerate.
Baked Plain Cheesecake—Prototype 17:
3-Cheese Blend (3CT-1NC-2YG [3 parts cottage cheese, 1 part Neufchatel
cheese, 2 parts yogurt cheese]):
Prepare ahead of time 16 ounces of yogurt cheese, derived from one 32-ounce
container of nonfat yogurt. If the resulting yogurt cheese falls below 16
ounces, add back enough of the whey (that was strained out from the yogurt) to
make up the difference. To this yogurt cheese combine 24 ounces of whipped,
lowfat cottage cheese and 8 ounces of softened Neufchatel cheese ("light
cream cheese").
Grease a 9 1/2" (or 9") springform pan, but do not wrap foil around
it yet (see below).
Crust:
2 oz. melted, white chocolate
8 oz. (1 cup) 3-cheese blend (see above)
1/4 cup granulated sugar
1/4 cup brown sugar
1 teaspoon cinnamon
1/2 teaspoon vanilla
2 oz. All-Bran, ground up
Place the resulting mixture in the greased pan and pre-bake without tub at 300
degrees for 5-10 minutes, depending on the mixture's thickness (closer to 10
minutes if thin enough to be fully distributed across the pan's bottom by gentle
shaking, closer to 5 minutes if thick enough to require spreading out this
mixture by pressing on it with a utensil and/or fingers), then cool enough to
comfortably touch at least the pan's upper sidewall.
Batter:
1 1/4 cups granulated sugar
40 oz. (5 cups) 3-cheese blend (see above)
2 teaspoons vanilla
1/4 cup + 1 tablespoon (5 tablespoons altogether) arrowroot
5 eggs
Wrap the pan in foil just before adding the batter (to minimize the foil's
disturbance and therefore its leakage risk, do not put it on any earlier).
Next, pour the batter over the crust and bake this cheesecake in a hot water tub
at 300 degrees for 120 minutes (if using a 9 1/2" pan). Then cool the
cheesecake down while still in oven (with this oven shut off) and in tub with
door slightly ajar for an hour. Afterwards, remove from oven and tub and
continue to cool down at room temperature for another 120 minutes, then remove
from pan and refrigerate.
Baked Plain Cheesecake—Prototype 18:
3-Cheese Blend (3CT-1NC-2YG):
Prepare ahead of time 16 ounces of yogurt cheese, derived from one 32-ounce
container of nonfat yogurt. If the resulting yogurt cheese falls below 16
ounces, add back enough of the whey (that was strained out from the yogurt) to
make up the difference. To this yogurt cheese combine 24 ounces of whipped,
lowfat cottage cheese and 8 ounces of softened Neufchatel cheese ("light
cream cheese").
Batter:
1 1/4 cups granulated sugar
40 oz. (5 cups)* 3-cheese blend (see above)
2 teaspoons vanilla
5 eggs
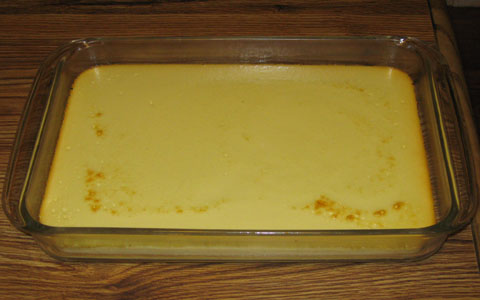
Pour the batter into a greased 13" x 9" glass ("Pyrex") pan
and bake this cheesecake in a hot water tub at 300 degrees for 100 minutes. Then
cool the cheesecake down while still in oven (with this oven shut off) and in
tub with door slightly ajar for an hour. Afterwards, remove pan containing
cheesecake from tub and oven and let cool down at room temperature for another
100 minutes, then (with cheesecake still in pan) refrigerate.
* Find some other use for the roughly 8 ounces of leftover cheese blend—or
otherwise discard (but also see comments below).
Baked Plain Cheesecake—Prototype 19:
3-Cheese Blend (3CT-1NC-2YG):
Prepare ahead of time 16 ounces of yogurt cheese, derived from one 32-ounce
container of nonfat yogurt. If the resulting yogurt cheese falls below 16
ounces, add back enough of the whey (that was strained out from the yogurt) to
make up the difference. To this yogurt cheese combine 24 ounces of whipped,
lowfat cottage cheese and 8 ounces of softened Neufchatel cheese ("light
cream cheese").
Grease a 9 1/2" (or 9") springform pan, but do not wrap foil around
it yet (see below).
Crust:
2 oz. melted, white chocolate
8 oz. (1 cup) 3-cheese blend (see above)
1/4 cup granulated sugar
1/4 cup brown sugar
1 teaspoon cinnamon
1/2 teaspoon vanilla
2 oz. All-Bran, ground up
Place the resulting mixture in the greased pan and pre-bake without tub at 300
degrees for 5-10 minutes, depending on the mixture's thickness (closer to 10
minutes if thin enough to be fully distributed across the pan's bottom by gentle
shaking, closer to 5 minutes if thick enough to require spreading out this
mixture by pressing on it with a utensil and/or fingers), then cool enough to
comfortably touch at least the pan's upper sidewall.
Batter:
1 1/4 cups granulated sugar
40 oz. (5 cups) 3-cheese blend (see above)
2 teaspoons vanilla
1 1/4 teaspoons xanthan gum
5 eggs
Wrap the pan in foil just before adding the batter (to minimize the foil's
disturbance and therefore its leakage risk, do not put it on any earlier).
Next, pour the batter over the crust and bake this cheesecake in a hot water tub
at 300 degrees for 120 minutes (if using a 9 1/2" pan). Then cool the
cheesecake down while still in oven (with this oven shut off) and in tub with
door slightly ajar for an hour. Afterwards, remove from oven and tub and
continue to cool down at room temperature for another 120 minutes, then remove
from pan and refrigerate.
Baked Plain Cheesecake—Prototype 20:
Repeat
Prototype 19,
but for the batter, boost the xanthan gum by 1/2
teaspoon, to 1 3/4 teaspoons.
Also, bake this cheesecake in tub for only about 110 minutes, rather than 120
(if using a 9 1/2" pan). Then cool it down in the oven (shut off at this
point), door slightly ajar, for an hour—just like the previous prototype.
Afterwards, remove from oven and tub and continue to cool down at room
temperature. But do this for 120 minutes (instead of only 110), then remove from
pan and refrigerate.
Baked Plain Cheesecake—Prototype 21:
Repeat
Prototype 20,
but for the batter, reduce the xanthan gum by 1/4
teaspoon, to 1 1/2 teaspoons.
Also, bake this cheesecake in tub for only about 90 minutes, rather than 110
(if using a 9 1/2" pan). Then cool it down in the oven (shut off at this
point), door slightly ajar, for an hour—just like the previous prototype.
Afterwards, remove from oven and tub and continue to cool down at room
temperature, doing so for 120 minutes (not 90), then remove from
pan and refrigerate.
Baked Plain Cheesecake—Prototype 22:
3-Cheese Blend (3CT-1NC-2YG):
Prepare ahead of time 16 ounces of yogurt cheese, derived from one 32-ounce
container of nonfat yogurt. If the resulting yogurt cheese falls below 16
ounces, add back enough of the whey (that was strained out from the yogurt) to
make up the difference. To this yogurt cheese combine 24 ounces of whipped,
lowfat cottage cheese and 8 ounces of softened Neufchatel cheese ("light
cream cheese").
Grease a 9 1/2" (or 9") springform pan, but do not wrap foil around
it yet (see below).
Crust:
2 oz. melted, white chocolate
8 oz. (1 cup) 3-cheese blend (see above)
1/4 cup granulated sugar
1/4 cup brown sugar
1 teaspoon cinnamon
1/2 teaspoon vanilla
2 oz. All-Bran, ground up
Place the resulting mixture in the greased pan and pre-bake without tub at 300
degrees for 10-15 minutes, depending on the mixture's thickness (closer to 15
minutes if thin enough to be fully distributed across the pan's bottom by gentle
shaking, closer to 10 minutes if thick enough to require spreading out this
mixture by pressing on it with a utensil and/or fingers), then cool enough to
comfortably touch at least the pan's upper sidewall.
Batter:
1 1/4 cups granulated sugar
40 oz. (5 cups) 3-cheese blend (see above)
2 teaspoons vanilla
1 1/2 teaspoons xanthan gum
6 eggs
Wrap the pan in foil just before adding the batter (to minimize the foil's
disturbance and therefore its leakage risk, do not put it on any earlier).
Next, pour the batter over the crust and bake this cheesecake in a hot water tub
at 300 degrees for 90 minutes (if using a 9 1/2" pan). Then cool the
cheesecake down while still in oven (with this oven shut off) and in tub with
door slightly ajar for an hour. Afterwards, remove from oven and tub and
continue to cool down at room temperature for another 120 minutes, then remove
from pan and refrigerate.
Baked Plain Cheesecake—Prototype 23:
3-Cheese Blend (1CT-1NC-1YG):
Prepare ahead of time 16 ounces of yogurt cheese, derived from one 32-ounce
container of nonfat yogurt. If the resulting yogurt cheese falls below 16
ounces, add back enough of the whey (that was strained out from the yogurt) to
make up the difference. To this yogurt cheese combine 16 ounces of whipped,
lowfat cottage cheese and 16 ounces (two 8-ounce packages) of softened
Neufchatel cheese ("light cream cheese").
Grease a 9 1/2" (or 9") springform pan, but do not wrap foil around
it yet (see below).
Crust:
2 oz. melted, white chocolate
8 oz. (1 cup) 3-cheese blend (see above)
1/4 cup granulated sugar
1/4 cup brown sugar
1 teaspoon cinnamon
1/2 teaspoon vanilla
2 oz. All-Bran, ground up
Place the resulting mixture in the greased pan and pre-bake without tub at 300
degrees for 20 minutes, then cool enough to comfortably touch at least the pan's
upper sidewall.
Batter:
1 1/4 cups granulated sugar
40 oz. (5 cups) 3-cheese blend (see above)
2 teaspoons vanilla
1 teaspoon xanthan gum
6 eggs
Wrap the pan in foil just before adding the batter (to minimize the foil's
disturbance and therefore its leakage risk, do not put it on any earlier).
Next, pour the batter over the crust and bake this cheesecake in a hot water tub
at 300 degrees for 90 minutes (if using a 9 1/2" pan). Then cool the
cheesecake down while still in oven (with this oven shut off) and in tub with
door slightly ajar for an hour. Afterwards, remove from oven and tub and
continue to cool down at room temperature for another 120 minutes, then remove
from pan and refrigerate.
Baked Plain Cheesecake—Prototype 24:
3-Cheese Blend (1CT-1NC-1YG):
Prepare ahead of time 16 ounces of yogurt cheese, derived from one 32-ounce
container of nonfat yogurt. If the resulting yogurt cheese falls below 16
ounces, add back enough of the whey (that was strained out from the yogurt) to
make up the difference. To this yogurt cheese combine 16 ounces of whipped,
lowfat cottage cheese and 16 ounces (two 8-ounce packages) of softened
Neufchatel cheese ("light cream cheese").
Grease a 9 1/2" (or 9") springform pan, but do not wrap foil around
it yet (see below).
Crust:
4 oz. melted, white chocolate
8 oz. (1 cup) 3-cheese blend (see above)
1/4 cup granulated sugar
1/4 cup brown sugar
1 teaspoon cinnamon
1/2 teaspoon vanilla
2 oz. All-Bran, ground up
Place the resulting mixture in the greased pan and pre-bake without tub at 300
degrees for 20 to 30 minutes (see comments below), then cool enough to
comfortably touch at least the pan's upper sidewall.
Batter:
1 1/4 cups granulated sugar
40 oz. (5 cups) 3-cheese blend (see above)
2 teaspoons vanilla
1 teaspoon xanthan gum
6 eggs
Wrap the pan in foil just before adding the batter (to minimize the foil's
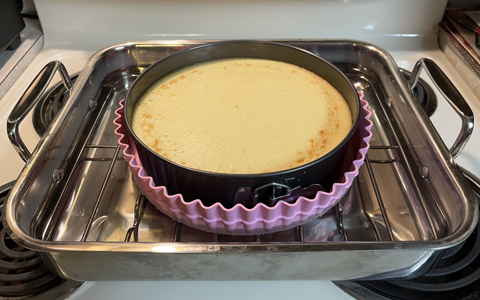
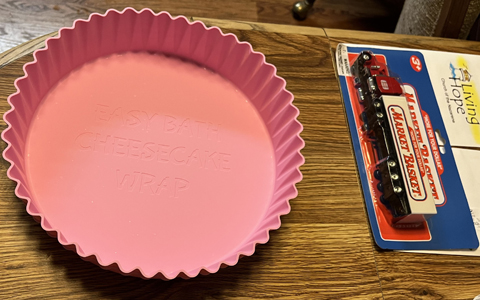
disturbance and therefore its leakage risk, do not put it on any earlier). Or as
an alternative, place this pan in an Easy Bath Cheesecake Wrap (see comments
above)—and don't bother waiting for the pan to get comfortably cool to do
so.
Next, pour the batter over the crust and bake this cheesecake in a hot water tub
at 300 degrees for 85 to 90 minutes (if using a 9 1/2" pan—also see
comments below). Then cool the cheesecake down while still in oven (with this
oven shut off) and in tub with door slightly ajar for an hour. Afterwards,
remove from oven and tub and continue to cool down at room temperature for
another 120 minutes, then remove from pan and refrigerate.
|
|

|