|
|
 |
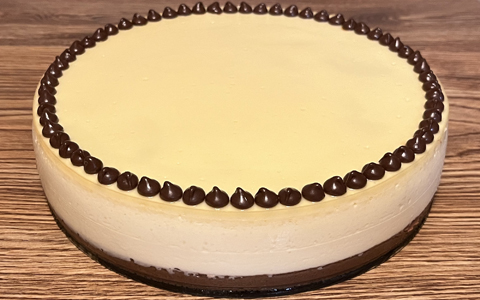
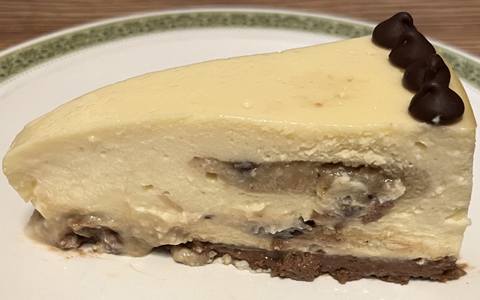
Baked Chocolate Chip Cookie Dough Cheesecake—Prototype 5:
3-Cheese Blend (1CT-1NC-1YG):
Prepare ahead of time 16 ounces of yogurt cheese, derived from one 32-ounce
container of nonfat yogurt. If the resulting yogurt cheese falls below 16
ounces, add back enough of the whey (that was strained out from the yogurt) to
make up the difference. To this yogurt cheese combine 16 ounces of whipped,
lowfat cottage cheese and 16 ounces (two 8-ounce packages) of softened
Neufchatel cheese ("light cream cheese").
Grease a 9 1/2" (or 9") springform pan, but do not wrap foil around it
yet (see below).
Crust:
4 oz. semi-sweet chocolate, melted *
3/8 cup granulated sugar
2 tablespoons cocoa powder
8 oz. (1 cup) 3-cheese blend (see above)
1 teaspoon vanilla
2 oz. finely ground All-Bran
* (white chocolate chips were unintentionally substituted for the brown,
semi-sweet ones here—see comments below for more details)
Place the resulting mixture in the greased pan and pre-bake without tub at 300
degrees for 5-10 minutes, depending on the mixture's thickness (closer to 10
minutes if thin enough to be fully distributed across the pan's bottom by gentle
shaking, closer to 5 minutes if thick enough to require spreading out this
mixture by pressing on it with a utensil and/or fingers), then cool enough to
comfortably touch at least the pan's upper sidewall.
Batter:
1 1/4 cups granulated sugar
40 oz. (5 cups) 3-cheese blend (see above)
2 teaspoons vanilla
1 teaspoon xanthan gum
6 eggs
Cookie Dough:
1 16-ounce package of chocolate chip cookie dough, separated into 24 pieces
(many packages are already like this, i.e., portioned to make 24 cookies).
Expect about 7 cups of the resulting batter, but do not add this to the pan all
at once. Rather, this needs to be done in three installments. Wrap the pan in
foil just before adding the first installment (to minimize the foil's
disturbance and therefore its leakage risk, do not put it on any earlier).
Or as an alternative to using foil, place this pan in an
Easy Bath Cheesecake Wrap—and don't bother
waiting for the pan to get comfortably cool to do so.
For each of the first two installments, gently (especially with the second
installment!) scoop about 3 cups of batter into the pan, and add about 12
dough pieces (don't bother breaking them up—keeping them whole is fine
and, in fact, recommended—but if the pieces have a tall, chunk-like
form, flatten them into cookie-like shapes), ensuring that they are fully
coated and—as much as possible—immersed. After adding the first
installment, bake the pan with its contents for 20 minutes, at 325 degrees.
However, after adding the second installment, bake the pan with its
contents, still at 325 degrees, but only for 15 minutes. Then reduce the
temperature to 300 degrees, and continue baking for another 15 minutes
(that's a 30-minute "baking installment" here—the first 15
minutes at 325 degrees and the next 15 at 300). For both installments here,
bake with the pan in a tub filled with at least 1/4 to 1/2 inch of boiling
water, but (to reduce spillage risks) do not fill the tub all the way at
this point, because the whole tub-and-pan assembly is going to need to be
removed from the oven (in order to comfortably add contents to the pan)
between installments.
After all this is done, there should be about a cup of batter left, with 50
minutes of baking time reached at this point (20 minutes for the first
installment, and 30 for the second one). Now comes the third
installment—carefully add the last of this batter (do not add any more
cookie dough at this point) on top of the pan's other contents. Try to fully
coat the entire surface, especially wherever cookie dough pieces may be showing.
Next, return the entire pan-and-tub assembly to the oven. At this point, fill up
the tub generously with boiling water. Resume baking at 300 degrees for
another 60 minutes (based upon usage of a 9 1/2" pan).
Afterward, shut the oven off, and leave its door slightly ajar, with the
cheesecake still inside—and in the tub—for an hour. Next, remove the
cheesecake from the oven and tub, and—if desired—add a border of
chocolate chips around the edge of this cheesecake. Continue to cool it down at
room temperature for another two hours. After doing so, remove the cheesecake
from pan and refrigerate.
|
|

|