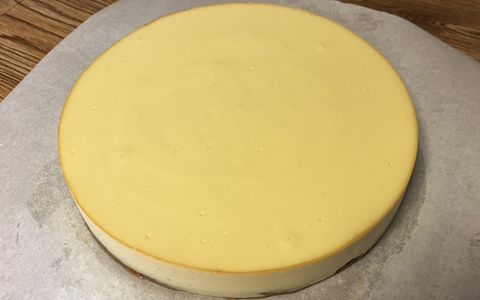
Baked Plain Cheesecake—Prototype 24:
 
At times I have had problems with the crust being too soft or mushy. Perhaps this was especially an issue whenever I would serve a cheesecake at my workplace, The Home Depot (Prototype 6 of my s'mores cheesecakes being a disappointing example). After all, the cheesecake would be sitting out at room temperature for a long time. Typically, when including a chocolate crust—such as for my chocolate cheesecakes—I would use 4 ounces of chips, rather than 2, and the crust's firmness would be hopefully at least half-decent. In light of this, I decided to increase the white chips to 4 ounces for this latest plain cheesecake. Furthermore, I would pre-bake the crust for 30 minutes.

With this cheesecake, a new baking aid would make its debut here—Easy Bath Cheesecake Wrap, an easy-to-use, in-tub replacement for disposable wraps such as foil and parchment paper! (Note: I got mine through Amazon. But searching for it there could be difficult. I tried this direct link from a Google search, which—hopefully—worked as of October 2023, around when I made this dessert: www.amazon.com/dp/B07ZN7JYJS/.)
 
3-Cheese Blend (1CT-1NC-1YG):
Prepare ahead of time 16 ounces of yogurt cheese, derived from one 32-ounce container of nonfat yogurt. If the resulting yogurt cheese falls below 16 ounces, add back enough of the whey (that was strained out from the yogurt) to make up the difference. To this yogurt cheese combine 16 ounces of whipped, lowfat cottage cheese and 16 ounces (two 8-ounce packages) of softened Neufchatel cheese ("light cream cheese").

Grease a 9 1/2" (or 9") springform pan, but do not wrap foil around it yet (see below).

Crust:
4 oz. melted, white chocolate
8 oz. (1 cup) 3-cheese blend (see above)
1/4 cup granulated sugar
1/4 cup brown sugar
1 teaspoon cinnamon
1/2 teaspoon vanilla
2 oz. All-Bran, ground up

Place the resulting mixture in the greased pan and pre-bake without tub at 300 degrees for 20 to 30 minutes (see comments below), then cool enough to comfortably touch at least the pan's upper sidewall.

Batter:
1 1/4 cups granulated sugar
40 oz. (5 cups) 3-cheese blend (see above)
2 teaspoons vanilla
1 teaspoon xanthan gum
6 eggs

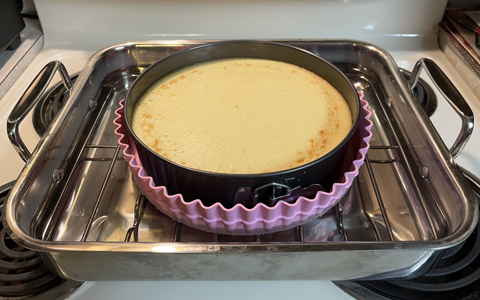
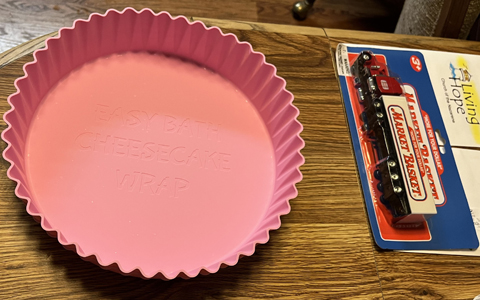
Wrap the pan in foil just before adding the batter (to minimize the foil's disturbance and therefore its leakage risk, do not put it on any earlier). Or as an alternative, place this pan in an Easy Bath Cheesecake Wrap (see comments above)—and don't bother waiting for the pan to get comfortably cool to do so.

Next, pour the batter over the crust and bake this cheesecake in a hot water tub at 300 degrees for 85 to 90 minutes (if using a 9 1/2" pan—also see comments below). Then cool the cheesecake down while still in oven (with this oven shut off) and in tub with door slightly ajar for an hour. Afterwards, remove from oven and tub and continue to cool down at room temperature for another 120 minutes, then remove from pan and refrigerate.

Plain Cheesecake—Prototype 24 New bath liner

This cheesecake, like many others before it, was served in the break area to my fellow associates at The Home Depot. If I remember correctly, I baked this one for about 90 minutes (doing so around mid-October of 2023). But the main purpose of this prototype was a room-temperature crust test. I checked on this a few hours later, and the crust seemed to be considerably less mushy compared to earlier versions (I pre-baked it for about 30 minutes in this case). I saw a firmness that was, as I was hoping, at least half-decent. And much of the cheesecake was already gone (down to two slices after about 2 1/2 hours). I myself felt that the boost in the white chocolate chips not only made the crust more stable—but tastier as well. Also, the newly-used Easy Bath Cheesecake Wrap worked out successfully!

In August of 2024, I repeated this prototype, and this effort marked the first time a brought a cheesecake to my favorite alma mater, Hampshire Country School, nearly half of a century after I had produced quite a few sheet cakes as a volunteering student in the kitchen there. However, I reduced the baking time to 85 minutes for the sake of a better batter appearance on top (I still kept the crust's pre-baking time to 30 minutes). Of course, I made the cheesecake at my own house and then brought it to this school for an alumni cookout. This dessert ended up being a great success, even with what I felt was a rather small turnout at this event. Over 3/4 of this treat was gone before the tables were cleared, and at least one person took a slice afterward. I ended up taking back home less than 2 slices (that's less than 1/8 of the whole cheesecake). What a terrific—and very encouraging—debut at HCS!

Plain Cheesecake—Prototype 24 (better appearance)

Just a few days later after making this cheesecake for my old school, I made another one for a cookout at my church, Living Hope. I repeated the 85-minute baking time for the cheesecake. However, due to the crust coming out somewhat too puffy in my earlier pre-baking efforts, I cut back that time to 20 minutes. For this cookout however, not much more than 1/4 of this one was gone before I took back home what was left. I suspected that there was a very big spread of desserts at this event, which probably gave my cheesecake too much competition. However, when I later on headed to work at The Home Depot, I brought the leftover slices there for my co-workers, and this cheesecake was gone in probably under 2 1/2 hours. Now that's a happy ending!
 

Back to my bushy homepage