Red Velvet Preliminary Research Project:
 
This one had been on my radar screen for quite a few months. A red velvet cheesecake was in my dreams, and others have expressed a considerable interest for this one upon my mentioning it. But this presented a special challenge. I did not want to use a bunch of artificial red food coloring. I sought natural alternatives, with Internet research leading me to giving red beets a try. But instead of wasting a full-fledged cheesecake recipe on something that was probably going to require an excessive number of tries, I felt that I would start off by downsizing to crust-only experiments and conducting taste tests on a significant number of people (not just myself). I made up a flyer (click here to download) for this purpose.

This crust would be the same as that used in my more recent chocolate-containing cheesecake prototypes (such as cookies+creme, chocolate chip cookie dough and plain chocolate itself), but with two exceptions. Lemon juice would be added for increased acidity (reportedly helpful for obtaining a redder outcome). And, of course, red beet puree would be used.

For this experiment, four sampling batches would be made up. However, each one would have a different amount of beet puree in it.
 
Prepare four batches—"samples"—of crust:
4 oz. semi-sweet chocolate, melted
1 1/3 tablespoons cocoa powder
1 cup (8 oz.) lowfat cottage cheese, whipped, no salt added
3/8 cup sugar
1 teaspoon vanilla
1 teaspoon lemon juice
2.2 oz. Bran Buds, ground up

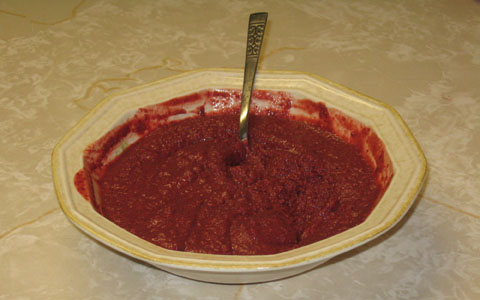
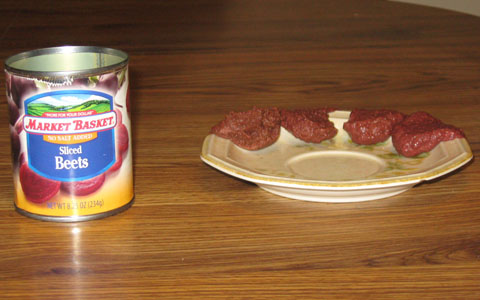
Prepare beet puree (such as in a blender) by using a can or cans of no-salt-added red beets (such as sliced). Use the entire contents, including the water. To each of the above samples, add this puree, as follows:
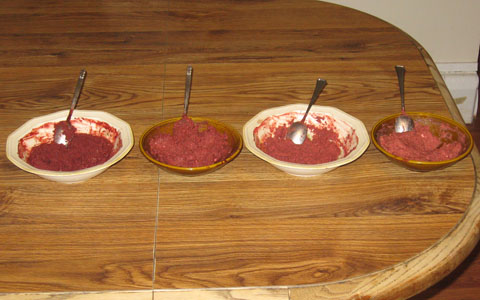
Sample 1: 1/4 cup
Sample 2: 1/2 cup
Sample 3: 3/4 cup
Sample 4: 1 cup

Recommended: Add this puree, before the Bran Buds, into each of these batches.

Bake at 350 degrees for the approximate durations as follows:
Sample 1: 20 minutes.
Sample 2: 25 minutes.
Sample 3: 30 minutes.
Sample 4: 35 minutes.

Red Velvet Preliminary Research Project (bowls) Red Velvet Preliminary Research Project (beets can and samples)
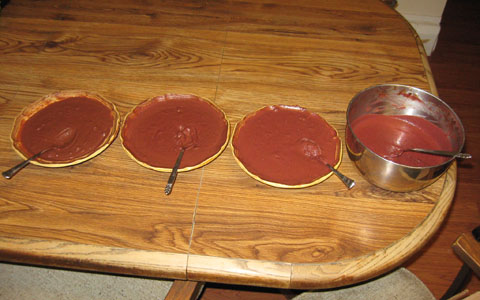
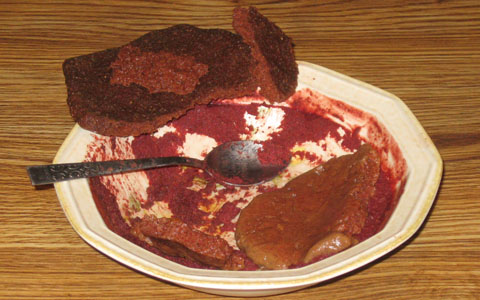
(Crust mixtures shown left-to-right in ascending order, i.e., from Sample 1 to Sample 4)

Samples 3 and 4 came out so soggy that I further cooked each of them by broiling them in the oven for at least about 10 minutes.

But what a project this has been! So what were the reactions of my taste testers at Living Hope Church (on Super Bowl Sunday 2012) like? I did not want to disclose the red beet puree before the tests were completed. I felt that otherwise, such anticipations by these tasters would psychologically mess up the experiments. I did inform participants that this "secret" red ingredient was either a fruit, vegetable or grain. As I conducted these tests, I had most of the participants start with Sample 1, then progress towards Sample 4 (only a few performed the sequence in the descending direction).

For quite a few, the response was "increasing fruitiness", from Sample 1 to Sample 4. For another it was "increasing weirdness" (this respondent liked Sample 1 the best and Sample 4 the least). While Sample 4 was generally the least liked ("kind of bland" according to at least a couple of tasters, one of which mentioned "soy" on Sample 2 and, surprisingly, liked Sample 3 the most), some did like this one the best ("raisin" commented a respondent, who also remarked, for Sample 2, "squash"). "Chocolaty" was a major response for Sample 1. There were also responses of decreasing "chocolaty" descriptions progressing from Sample 1 to Sample 4. One taster who liked Sample 1 the best could, nevertheless, hardly detect "increasing fruitiness" while ascending through the samples. Other remarks: "fudge", "marshmallow" (texture description here, as opposed to what I wanted tasters to really focus on—flavor!), "cherry".

After I revealed the "beet secret" to a young girl who was eagerly curious, she—or another girl—told me about her guessing "bananas" (somewhat to my surprise) as the mystery ingredient.

So what were my own reactions like? I actually tasted these samples in "raw" form, i.e., before baking. All of them had a beet presence in the taste, from "barely" in Sample 1 to "substantial" in Sample 4. In light of this, I ended up deciding to exclude these raw versions from the taste tests, retaining only their baked counterparts (this would cut the total number of different samples from 8—as originally indicated in my flyer—to 4). But—to my surprise—the beet flavor was greatly diminished after baking. I was unable, from what I best recall, to detect any beets even in Sample 4 (!) upon tasting the samples after a little cooling down. I still easily tasted the chocolate in all 4 samples. In the morning that followed, however (this was when I was conducting the tests with the tasters at the church), I detected a very faint beet aftertaste in Sample 3 and a more pronounced such aftertaste in Sample 4.

Overall, I felt that the tastes were somehow satisfactory.

In the evening of the Monday that followed the church tests, I conducted some additional tests among Lesa's dart group, which had switched its home venue from the Sports Page to the Italian Community Center for the Spring 2012 season. I did not get nearly as many taste testers, but whoever participated gave me feedback that in many ways was similar to Living Hope's. One of the participants could not eat any of my samples due to food allergy issues, but she could still do smelling tests. She gave extensive details, from "mocha, very rich cocoa" for Sample 1, to "very acidic, heavy mocha, almost coffee, no berries at all" for Sample 4. Her remarks for the intermediate samples included comments such as "berries", "attractive wood scent" and "merlot wine". She liked Sample 3 the best. Remarks I got from other guests (one of which also liked Sample 3 the best) included "jello cake" (Sample 1), "a little too intense/heavy" (Sample 4), "bland, but smells of merlot" (Sample 3, from perhaps the only person in this dart group who liked this sample the least) and "cherry" (higher samples).

So that's the report in regard to how the samples tasted. As for the color, that was another story.

Before baking, the samples were, generally, too brown. Sample 4 did have sort of a half-decent reddish brown color to it, but it was still way short of the redness that I had hoped for, based upon red velvet cake batter photos that I looked at on the Internet ("Did somebody use Adobe Photoshop to redden the batter's appearance?" I suspected). Sample 1, at the other end, easily reminded me of a well-known shipping company with the slogan, "What can Brown do for you". I had hoped that the baking process would cause chemical reactions that would produce redder results. Unfortunately, even Sample 4 turned out about as brown as a United Parcel Service delivery truck. This was not what I wanted "Brown" to do for me (Sorry, UPS)!

I sought solutions. I saw recipes on the Internet which used buttermilk and vinegar. According to what I read on Wikipedia, red velvet cake might have gotten its name from reddish looks that resulted due to acidic reactions, supposedly during the baking process, between the cocoa powder and buttermilk. In the late evening on that Sunday, a really terrific idea entered my head: Swap out at least some of the melted,
semi-sweet chocolate for white! What a bright, white idea!! Next question: How much?
 
Red Velvet Secondary Research Project:
 
Let's review this base starting point (note: to conserve ingredients, I actually produced 1/4-sized batches):
 
4 oz. semi-sweet chocolate
1 1/3 tablespoons cocoa powder
1 cup (8 oz.) cottage cheese
3/8 cup sugar
1 teaspoon lemon juice
1 teaspoon vanilla
2.2 oz. Bran Buds
 
I brought on board a couple of new ingredients—buttermilk and white vinegar. Working with the aforementioned base formulation in combination with 1/2 cup of buttermilk, I made up the following four variants, as follows:
1) 1/2 cup beet puree, 2 teaspoons vinegar.
2) 3/4 cup beet puree, 2 teaspoons vinegar.
3) 1/2 cup beet puree, 4 teaspoons* vinegar.
4) 3/4 cup beet puree, 4 teaspoons* vinegar.
*I originally intended to use 3 teaspoons of vinegar—but inadvertently ended up using 4 in the two latter variants.

Furthermore, I cut the cottage cheese in half. In other words, while keeping half of it, the other half was replaced by an equal amount of buttermilk (result: 1/2 cup each of cottage cheese and buttermilk).

Upon baking these for 25 minutes at about 350 degrees (from what I best recall), I picked up a pleasant red velvet aroma. Unfortunately:
1) I could not taste this flavor after the baking.
2) All samples were still stubbornly brown.

Having credited the buttermilk for producing the red velvet aroma, I replaced the remaining cottage cheese with an equal amount of buttermilk (which would now be at 1 cup). I then repeated the process with this new variant:
5) 1/2 cup beet puree, 3 teaspoons (got it as intended this time!) vinegar.

But, in my quest to chase that "brown clown outa town", I also swapped out half of the semi-sweet chocolate, replacing it with an equal amount of white chocolate!

Did it work?

Nope!

Still too brown.

Okay, let's do this one again, but replace the rest of the semi-sweet with more white chocolate—in equal quantity, of course (thus bringing the white chocolate to the 4-ounce point).

The result?

We finally got some red here!

That's the good news—although I sought more red.

The bad news: this stuff tasted way too fruity—it hardly tasted chocolaty anymore (and absolutely no sign whatsoever of red velvet taste)—it reminded me of a fruit roll-up snack (this 6th variant came out very thin).

Making matters worse, no matter which of these variants I made, baking them always diminished the redness. Was there some kind of alkalinity secretly lurking somewhere among the ingredients, turning the mixture browner?

Things weren't looking so good at this point.

However, I have come to notice a certain characteristic about the red velvet cake (not frosting) taste, based on (at least) a couple of red velvet treats that I have recently bought for my enjoyment. One of them was Ben & Jerry's Red Velvet Cake Ice Cream—which I strongly suspected to be all-natural (no artificial red #40 here—and I have found this ice cream being sold even at Whole Foods Market, a natural/organic, green-oriented company that has been very strict about the ingredients used in all foods carried by this grocery chain). The other was Market Basket Red Velvet Cake Roll—very delicious (even despite the red #40 in this one). The "chocolatiness" of these two products was not all that strong, or considerably not as strong as I had the tendency in the past to perceive it. In fact, I was alerted by a visitor's posting on Ben & Jerry's web site that the list of ingredients for its red velvet ice cream did
not contain any cocoa powder! I looked at this list beforehand, but the absence of this ingredient did not capture my attention at that point. So I was caught by surprise. Did the "natural flavor" in this list perhaps contain any chocolate? I did not know. So just what was that red velvet cake flavor like anyway??

It seemed to have (at least to me) some kind of a somewhat tangy, dairy taste, likely with buttery and "cream cheesey" hints (no wonder I could pick up the "red velvet aroma" at least with my nose when the first four variants were baking—because I was then using some cottage cheese).

But perhaps it was time to shift gears in the chocolate department—big time!! In fact, a major overall shakeup for the research samples was on my mind.

This would bring about a new starting list:
3 tablespoons cocoa powder
1 cup cottage cheese
1 cup buttermilk
3/4 cup sugar
2 tablespoons lemon juice
1 tablespoon vinegar
1 teaspoon vanilla

Let's break this down. The semi-sweet chocolate was deleted (no white replacement), but the cocoa powder got a big boost. Instead of "budgeting" only one cup between the cottage cheese and the buttermilk, both of them would now get one cup apiece. The sugar, to start, would get extended beyond 3/8 cup (18 teaspoons), first by 10 teaspoons to compensate for the increases in cocoa powder and lemon juice, then by another 3 teaspoons to compensate for the increase in Bran Buds (I would later want to designate 4 teaspoons of sugar in association with these additional Bran Buds). Finally, kick in another 5 teaspoons to help compensate for the beets (I would later want to designate 4 teaspoons of sugar for this one). Result: 36 teaspoons—which amounts to a relatively simple 3/4 cup. Crank up the lemon juice in efforts to produce a sour-cream-like effect when combined with the cottage cheese. One tablespoon seemed like a good choice to go with on the vinegar, based on my prior efforts. The vanilla has remained unchanged.

And now, for four variants (all baked at 350 degrees), picking up from the previous numbering:
7) 1/2 cup beet puree, 1 1/2 cups (8.8 ounces) ground-up Bran Buds, bake 20 minutes.
8) 3/4 cup beet puree, 1 1/2 cups (8.8 ounces) ground-up Bran Buds, bake 20 minutes.
9) 1/2 cup beet puree, 2 cups whole white wheat flour, 4(?)
additional teaspoons sugar, bake 25 minutes.
10) 3/4 cup beet puree, 2 cups whole white wheat flour, 4(?)
additional teaspoons sugar, bake 25 minutes.
Note: I might have used more than 4 additional teaspoons of sugar in the two flour variants (I could not remember). The ratios I sought were 3 parts flour to 1 part sugar—as well as 6 parts Bran Buds (since these already had some sweetness) to 1 part sugar.

Notice the really large increase for the Bran Buds, because the earlier variants were too thin, and the totals for the liquids were being greatly increased in these more recent variants.

So what happened?

My very high hopes were miserably dashed. Still too brown (perhaps not quite as much as the earliest variants, but still too "un-red" for me to want to apply the "
red velvet" name). Somewhat fruity taste (barely chocolaty, if at all) in all of them. Boooooooooooo!
 
Red velvet samples (variants 7, 8, 9 and 10)
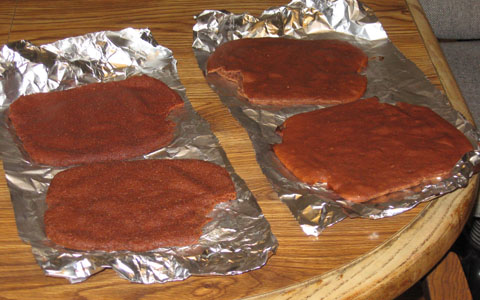
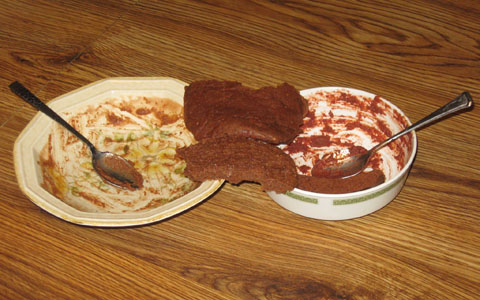
(Note: If these samples appear red enough, that's due to camera and/or video display issues—don't let that fool you. In real life these crust variants were much browner. Perhaps the cause of this photographically red bias is the same thing leading to "red-eye" problems with digital cameras? This picture was taken with a Canon PowerShot A570 IS, and I did not bother using Adobe Photoshop to manipulate the colors. I will have to admit, however, that the colors of these samples were surprisingly close to those of dark red bricks on my house's extrerior.)

I then came up with a formulation, which I initially started as a "duel" between the beet puree and the cocoa powder:
1 tablespoon beet puree
1/2 teaspoon cocoa powder
1/2 cup buttermilk
1 tablespoon sugar
1 ounce melted white chocolate
1/2 cup cottage cheese
3/4 teaspoon vinegar
1 1/2 teaspoons lemon juice

The result was a very pink liquid. I combined a random small amount of it with enough whole white wheat flour to produce a decent thick consistency to my liking. I then baked this for about 10 minutes at 350 degrees. However, the outcome was a light brown color after baking, no longer pink or other shade of red. I then came up with the idea of trying the same experiment with Trader Joe's Buttermilk Pancake & All Purpose Baking Mix, due to this product having a set of ingredients that just might have made a difference (in other words, what I did with the whole white wheat flour, I did similarly with the TJ's pancake mix, adding some of the above formulation to it for the right consistency and then baking). But this was also to no avail, as I still got that light brown color on the post-bake outcome. So much for variants 11 and 12!

Because I did not boost the sugar in these two variants in order to compensate for the wheat flour or pancake mix, the samples here had a relatively bland taste. But it was the color that I was really concerned about at this point, not nearly as much the flavor.

I finally tried a "delete the beet" experiment: Repeat the 7th or 8th variant, but with the beet puree omitted (it doesn't matter which of these two variants is selected, as the amount of the deleted ingredient is the only difference here) and with the sugar cut from 3/4 of a cup to 2/3 of a cup. (I actually made a 1/8 batch here.)

As I somewhat suspected beforehand, the taste of this 13th variant was still barely fruity (even despite the beet's absence). But it was also slightly chocolaty. Was I perhaps using too much lemon juice?

Among the things that I have observed along the way when using the Market Basket canned, sliced beets for the puree was that I got a color that was a lot more purple than red. No matter what phase of a sample preparation I was doing, I simply could not come even close to getting a bright, red color that I had been longing for (and somehow had been expecting, based on a lot of research).

Let's go back and revisit the 6th variant—after all, it was one of the redder batches:
4 oz. white chocolate
1 1/3 tablespoons cocoa powder
1 cup buttermilk
3/8 cup sugar
1 teaspoon lemon juice
1 teaspoon vanilla
1 tablespoon vinegar
1/2 cup beet puree
2.2 oz. Bran Buds

But that was way too thin. This time, I increased the Bran Buds to 8.8 ounces, and boosted the sugar to 9/16 of a cup (to compensate for the additional Bran Buds)—but I allowed the fruitiness to persist, for now. This was baked at 350 degrees for 25 minutes.

To my surprise, however, this 14th variant did not taste as fruity as I anticipated. In fact, I picked up some unexpected chocolate hints. So the taste was not as bad as I was expecting, although the color was now about as brown as many of my other most recent variants (7, 8, 9, 10, 13).

For the 15th variant, I repeated the 14th one, except that I eliminated the lemon juice, boosted the cocoa powder to 3 tablespoons and raised the sugar to 2/3 of a cup (to compensate for the additional cocoa). The resulting color after baking hardly differed from the 14th variant's. The difference in taste was nearly insignificant.

Well, the Passover break was approaching, and red velvet had become so popular that Manischewitz, a leading Jewish/kosher foods manufacturer, has actually released a Kosher-for-Passover cake mix in this variety. Say "Shalom!" (Hello!) to...k'teefah adomah (I think that's the correct Hebrew for "red velvet"—Google's translation utility has rendered the un-pointed lettering as
"k'teefah adomah")!

Manischewitz red velvet Passover cake mix

Okay, I took about perhaps a few weeks break. I had contemplated giving up on my red velvet efforts, but perhaps what I really needed was a little break. But I did some more research at that point, visiting some new pages on the Internet. At least one source convinced me to switch from canned beets to fresh. This wasn't quite as convenient to me in the sense that I would have to do some guesswork in regard to how much water to add to fresh beets if I wanted to sufficiently puree them. At least the canned version already had some liquid, and this was enough to easily get its contents pureed in a blender. The simplicity here was in my being spared the guesswork of how much water to add. All I did was dump the entire can's contents into the blender, both the beets and the water in which they were packed. With fresh beets, however, pureeing them alone, without adding any water, would prove too difficult. So I added water in small installments until I could get a puree to my satisfaction.

Next, I repeated the 7th variant. Here it is again, the ingredient list in its entirety:
3 tablespoons cocoa powder
1 cup cottage cheese
1 cup buttermilk
3/4 cup sugar
2 tablespoons lemon juice
1 tablespoon vinegar
1 teaspoon vanilla
1/2 cup beet puree
8.8 oz. ground-up Bran Buds
(To save on ingredients, I actually made a quarter batch.)
Bake time: 20 minutes.
Oven temp: 350 degrees.

There was just one difference, of course. I used fresh beets instead of the canned. This was enough of a difference for me to cite this "new 7th" variant as the 16th.

And how "sweet 16" it was! The pre-baked mixture had a very encouraging, bright red to it. But what about the dreaded baking part?

Not too bad!

Sure, there was still that browning trend. But...the resulting color had a considerably redder hue than Variant 7! In fact, the color seemed to have a dark, somewhat maroon appearance to it. The taste was still sort of fruity/beety, which I somehow expected anyway. But I felt that I was starting to see the "red light" at the end of the tunnel.

I repeated this new variant by baking it for 20 minutes, just like before, but this time I reduced the heat to 300 degrees. After all, this was the primary temperature for baking my cheesecakes. This resulting 17th variant ended up being very barely redder than the 16th. I also baked a small sample at this lower temperature after I mixed in a little arbitrary amount of butter. But this 18th variant seemed to hardly differ in appearance at all from the 17th.

Next, I baked, still at 300 degrees, the 17th and 18th variants for an
additional 5 minutes. The resulting appearances became almost indistinguishable from the 16th. As for taste, the 17th tasted more beety than the 16th or 18th. So it seemed like butter, as well as enough heat, could decrease the beet flavor.

In my research, I have read about beets containing some kind of substance called
betanin (somehow associated with betalain), which is supposed to provide a red coloring effect in this produce. Unfortunately, I was also told about betanin not being so heat-friendly in regard to color retention. Turn up the heat on this substance and you get brown (this somehow reminds me of red blood, when drying up on a bandage, also turning brown). So a lot of research was in order to try resolving this heat issue. Things seemed to be: "The more the heat, the lesser the beet"—in taste, yes, but also in red color. Upon a closer look, the hue of beets seemed to actually be somewhat on the "purple" or magenta side of red, before cooking. The heat, perhaps at least if it was dry enough, could shift the hue towards orange. Darken the orange color and what do you get? Brown!

But at least I have learned that swapping canned beets for fresh ones could make a reasonable difference. It was now time to work on the taste while retaining—and (hopefully) perhaps even further increasing—the red color (the hue being particularly crucial, but the brightness being a plus).

That would mean bringing on another couple of new ingredients: sour cream (at least for acidity, but perhaps also for taste) and
cream cheese (for taste)—yes, that's right—cream cheese, although I picked up a reduced-fat ("1/3 less fat"/"Neufchâtel") version (I also did likewise with the sour cream).

The 17th and 18th variants got darker than 16th after being at least a few hours in the refrigerator. I finished off the small amount of 18 (which looked so much like 17) rather quickly, but I still had other samples for later comparisons.

Time for some new variants! Repeat Variant 16, but replace 1/2 cup of the buttermilk with an equal amount of lowfat sour cream. Furthermore, for these two latest variants:
19) Replace 1/2 cup (or 4 ounces) of the cottage cheese with an equal amount of cream cheese.
20) Replace the entire cottage cheese with an equal amount (8 ounces) of cream cheese.
And bake these variants for 25 minutes at 300 degrees (I actually scaled the batches to 1/4 or 1/8 size, probably the latter).

Both samples ended up nearly identical in appearance and taste. They had a dark, red look but still tasted too fruity and slightly beety. They looked very much like Variant 16 at first, but after at least a few hours of refrigeration they looked a lot more like 17.
 
Red velvet samples (6 variants)
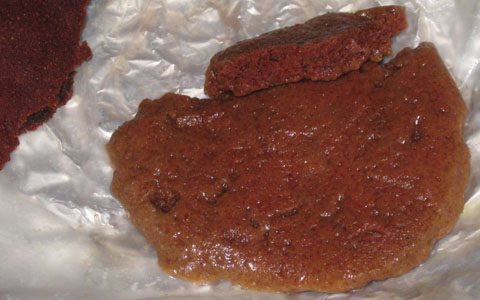
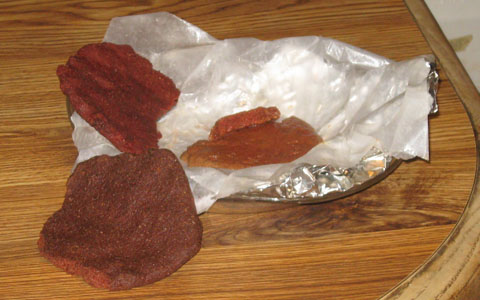
Variants pictured clockwise, starting from upper-left: 7 (very remote chance this might have been 8), 16, 19 (still warm, with tiny corresponding unbaked sample to its upper-right), 20 (still warm, with tiny corresponding unbaked sample to its upper-right), 17, 8 (very remote chance this might have been 7).

In assessing the latest samples in chilled form, it seemed that Variant 16 looked somewhat brighter, but with more of an orange/brown hue, than Variants 17-20 (these four showing a darker, redder hue). My conclusion at this point: better stick to 300 degrees (and the extra 5 minutes on top of the first 20 seemed to be okay).

The table below describes my next four variants (all baked at 300 degrees for about 25 minutes):

Ingredients: Variants and brief descriptions:
21,
high cocoa,
4-dairy blend
22,
high cocoa,
cream-cheese-
oriented
23,
high dairy,
4-dairy blend
24,
high dairy,
cream-cheese-
oriented
Dairy
group
Lowfat cottage cheese 1/2 cup none 1 cup none
Buttermilk 1/2 cup none 1 cup none
Lowfat sour cream 1/2 cup none 1 cup none
1/3 less fat cream cheese 4 ounces 16 ounces 8 ounces 32 ounces
Color /
flavor
group
Lemon juice 2 tablespoons
Vinegar 1 tablespoon
Vanilla 1 teaspoon
Beet puree 1/2 cup
Cocoa powder 6 tablespoons 3 tablespoons
Support
group
Sugar 1 cup 1 1/2 cups
Ground Bran Buds 8.8 ounces 17.6 ounces
Water none 1 cup none 2 cups

The 19th variant was my starting point. From there, I either doubled up on the dairy group or doubled up on the cocoa. Within each such doubling, I took a 4-dairy-ingredients approach as well as going all the way with cream cheese on the dairy. I made adjustments to the support group to best match the modifications, including the addition of water, because going all the way with cream cheese had too much of a thickening influence on the mixture. Of course, I prepared only fractionally-sized batches of the formulations shown in the above table.
 
Red velvet samples (4 variants, before baking)
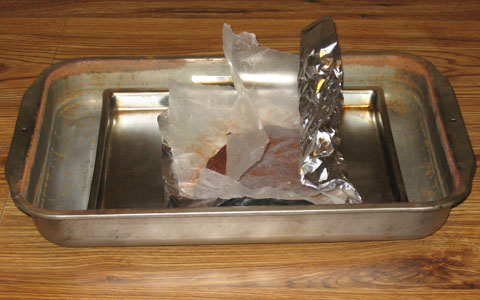
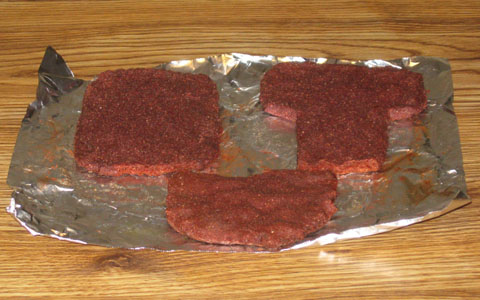
Variants pictured left-to-right: 21, 22, 23, 24—all before baking.

Red velvet samples (4 variants, after baking)
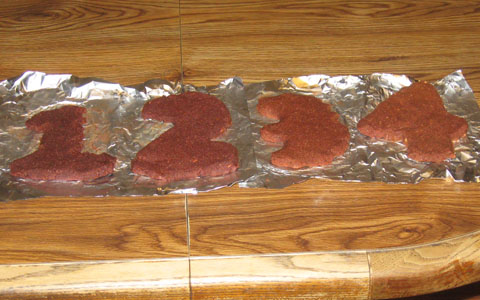
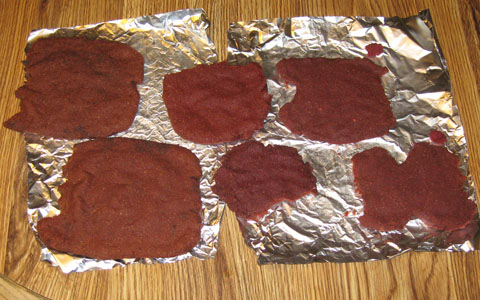
Variants pictured left-to-right: 21, 22, 23, 24—all after baking. Note that in order to keep better track of my variants, I have shaped each of them into a numeral. In this case, each of these denotes the
units (rightmost) digit of its corresponding variant number.

I felt that the taste was slightly better (but only slightly) in the cream-cheese-oriented versions.

In tasting these four samples a few days later, my taste preferences went mainly with Variant 22, of which I could hardly pick up the beets, but I could pick up some chocolate. As for the color, I now liked Variant 16's the best (not only more than Variants 21-24, but more than Variants 17-20 also). Perhaps aging had some kind of effect on it, or maybe I was viewing my samples under some kind of fluorescent lighting that somehow favored 16.

At this point, I felt that it was high time to deal more closely with the heating issue. Why were the colors of my samples still getting clobbered by baking (even despite stepped-up acidic efforts)?!

Further Internet research would lead me to additional considerations, such as oxidation, water and metal.

I went back to Variant 16. Cite this latest one Variant 25. But the cooking method this time was far different than for any sample or variant that I had done so far up to this point in my red velvet research projects. For all those previous efforts, I always put the mixture on a piece of aluminum foil (typically greased with butter). I then placed this into a small, metal pan and put the whole thing right into the oven. That was it.

This was not the way I baked my more recent cheesecakes. I was very aware of that. But in light of the betanin being so vulnerable to heat, along with the bath approach being more gentle with cheesecakes, I felt that it was time to "tub" the red velvet mixtures. But that's not all I did.

Red velvet unbaked mixture Red velvet sample with wax paper and aluminum foil
Unbaked mixture and how a sample got wrapped.

First, I put the mixture on greased wax paper, instead of foil. Next, I furthermore wrapped the wax paper over the top of the flat sample. This was because I read about some metals, as well as air, contributing to the betanin's degradation. Hence the wax paper and the covering of both of the sample's sides, not just its bottom. With the wax paper in place, I surrounded all this with foil. Next, I put all this into a small metal pan. Here comes the really good part—I then placed this pan into a larger one filled with hot water. All this got put into the oven, at 300 degrees, just like my for my cheesecakes.

25 minutes passed. A darker red, yes, but not by much. Another 25 minutes in the oven. Barely darker, but still encouraging. Another 40 minutes (that's 90 altogether so far, about the same amount of time required for many of my cheesecakes, so this is crucial!) and...and...and...("c'mon, you can do it!")...

Nope, not gonna make it! The thing got substantially darker and browner, at least more so than many of my other relatively recent variants. But that was on the outside, top and edges. However, on the bottom and inside, it was brighter. Perhaps future usage of cheesecake batter could, better than wax paper, protect this crust's top from oxidation. But the sample's hue here was a little orangey, about as much as Variants 23 and 24. The beets could easily be detected in the taste—no chocolate noticed.

Would refrigeration make a difference? Hardly.

My next move was to take additional raw mixture from this same batch (which then had become a little dried up after sitting in the refrigerator for nearly 18 hours) and sort of "boil" it with water in a 300-degree oven for 90 minutes. I reasoned that this was a close "simulation" of baking a full cheesecake, crust and all..

Boiled red velvet sample

The resulting look of this now 26th variant was considerably more encouraging, with the interior's appearance getting fairly close to that of the uncooked mixture (yay!).

Red velvet samples—25 vs. 26 vs. raw Red velvet samples—16 vs. 25 vs. 26
Pieces of Variant 25 (outer top edge of bowl) and 26 (in bowl) vs. their raw counterpart. In second photo, Variants 16 (upper left) and 25 (lower left) get compared to the soggy, but bright, 26 (center).

As for the taste, "and the beet goes on," of course.

Well, that was the next hurdle. While the look was now a lot more promising at this point, I still had a very long way to go in making the taste decent.

Another ingredient was brought on the scene—cream of tarter, something I don't recall ever using in my entire culinary life. I have read about this ingredient being acidic—I guess that puts the "tart" in "cream of tarter".

Before doing a flavor chase, I wanted to perform a couple more color-oriented experiments. One of them was a repetition of Variant 16—350 degrees, 20 minutes and all—but I wanted to know if the beets, which were pureed close to a week ago at this point—and therefore had plenty of air exposure while sitting in the refrigerator—would cause a different outcome this time around. Because of my spotting dark traces of this aged puree, I was suspicious of a darker outcome than the earlier Variant 16, even with my reasonable efforts to steer clear of these dark, dehydrated "puree crumbs".

The actual outcome of what I decided to call Variant 27 (instead of 16, because of the aged beet puree) was very slightly darker, but also very slightly redder, than Variant 16.

The other experiment was identical to Variant 27 with one exception: Add 1 teaspoon of cream of tarter. So Variant 28 ended up being the very first sample with this latest ingredient. Its color and taste (easy beet presence, hardly any chocolate detection) were, to my surprise, hardly distinguishable from Variant 27.

Red velvet samples—27 vs. 28 vs. 16
Variants 27 (upper left), 28 (upper right) and 16 (bottom).

I also noted that Variant 16 was now nearly a week old, and I considered the possibility of its color being affected by sitting all that time in the refrigerator. But I still thought that this was not too significant at this point.

Next, I "cut to the (flavor) chase". My looking around on the Internet led me to reason that I was using way too little sugar. For the latest variant, I made a few other adjustments as well. The new starting point:

1/2 cup lowfat cottage cheese
1/2 cup buttermilk
1/2 cup lowfat sour cream
4 ounces 1/3 less fat cream cheese
3 tablespoons cocoa powder
2 tablespoons lemon juice
2 tablespoons vinegar
1 tablespoon vanilla
1 teaspoon cream of tartar
8.8 ounces (1 1/2 cups) ground Bran Buds

For Variant 29...also include 1 1/4 cups of sugar, but completely omit the beet puree.
For Variant 30...also include 1 5/16(?*) cups of sugar and 1/8(?*) cup beet puree (I actually wanted to do 1/2 cup of beet puree, along with 1 1/2 cups of sugar to match, but I did not have enough beet puree left, so I scaled back). *(from what I best recall)

Of course, I actually made small-scale batches for these variants.

Bake Variant 29 the normal, dry way, on foil, for 20 minutes (not 25) at 300 degrees.
Bake Variant 30 using the same kind of "boiling" technique as was used for Variant 26—same 90 minutes, same 300 degrees.

Red velvet samples—29 and 30, with their bowls
Bowls for Variant 29 (left) and 30 (right). Samples hung on the bowls' edges are Variant 29 (bottom) and 30 (top).

The baking hardly changed the color for Variant 29, but cooking Variant 30 seemed to fully wipe out the beet's coloring influence. In fact, this variant's color and brightness were nearly identical to those of Variant 29. At least the taste was a noticeable improvement for both variants—although I was still hard-pressed to find the chocolate, as these variants showed a tart (and fruity!), yet sweet, taste. So I still felt the need to improve on the flavor. On a positive note, I could not detect the beet's presence in Variant 30.

For the next variants, I felt that it was time to bring on another new ingredient: Yogurt cheese. Yo! What's that? It's a really cool alternative to regular cream cheese, particularly if you want to slash the fat. It has seemed to be almost a best-kept secret. So how does one get it? Is it available in grocery stores? Probably not. This is a home-made one. Here is how it's done. Take some plain yogurt (without guar gum or other thickening agents or stabilizers). It can even be nonfat! I chose lowfat (1 1/2% milkfat) for a somewhat richer outcome (but still low in fat). Set up a bowl with a strainer on top of it. Put a coffee filter (or cheesecloth, although I prefer a coffee filter) in it. Then put the yogurt into this filter. Then let all this sit in the refrigerator for about 24 hours. And there you have it—yogurt cheese! Its weight will have decreased likely by half (maybe even lower). The yellowish liquid—whey—which has drained out from the strainer and filter can be used for some other purpose or discarded. I should add that if you were to strain the yogurt for a much shorter time (maybe just a few hours), you would still get an extra-thick kind of yogurt which many have referred to as...Greek yogurt (hey, you may even be able to find this one at your local grocery store and use that to get a "head start" on your yogurt cheese production).

Base ingredient set for Variants 31-34 (no cottage cheese or sour cream used here):
1 2/3 cups sugar
16 ounces yogurt cheese
1/3 cup cocoa powder
1 tablespoon lemon juice
1 tablespoon vanilla
1 teaspoon cream of tartar
8.8 ounces (1 1/2 cups) ground Bran Buds

Add-ons:
Variant 31: 1/4 cup beet puree, 1/2 cup buttermilk, 1 tablespoon vinegar
Variant 32: 1/4 cup beet puree, 1/2 cup buttermilk, 2 tablespoons vinegar
Variant 33: 1/2 cup beet puree, 5/8 cup buttermilk, 1 tablespoon vinegar
Variant 34: 1/2 cup beet puree, 5/8 cup buttermilk, 2 tablespoons vinegar

Bake all these using the "bath"/"boiling" approach (just like Variants 26 and 30) at 300 degrees for 90 minutes (as usual, I downscaled the ingredients).

Results:
The varied amount of vinegar did not seem to have a noticeable difference in taste or look (i.e., negligible difference between Variants 31 and 32, as well as between 33 and 34). The beets were readily detected in all of them as well. Variants 33 and 34 presented a somewhat "beetier" taste, as well as a slightly redder hue, than 31 and 32. Sadly, it was tough to detect chocolate in Variants 33 and 34. I could only barely taste it in 31 and 32. I felt that the overall taste remained unappealing in all four of these latest variants (they still seemed too "ho-hum" tart).

Next wave, please. Cut the tart. Drop the lemon juice and cream of tarter. Slash the beets. The starting lineup here:

1 1/3 cups sugar
16 ounces yogurt cheese
1/2 cup buttermilk
3 tablespoons cocoa powder
1 tablespoon vanilla
8.8 ounces (1 1/2 cups) ground Bran Buds

Add-ons:
Variant 35: none
Variant 36: 1 tablespoon vinegar
Variant 37: 1/8 cup beet puree
Variant 38: 1/8 cup beet puree and 1 tablespoon vinegar

Tastiness was a big goal for this set. That's why I outright deleted the beets for two of the variants here. I wanted to find out if this veggie was simply being a discouraging hindrance in my quest for a decent taste (note the small amount of beet usage in the other variants). I also wanted to know more about the flavor impact of vinegar as well.

These variants (downscaled, of course) got the 300-degree, 90-minute bath, just like the recent, previous ones.

Results:
The pre-baked taste of these was rather encouraging, for a change. There was a little tartness, but it had a decent tanginess. Post-bake, I felt that the taste might have been slightly, but not substantially, inferior (a little of the "ho-hum" type of tartness). The flavor was almost identical across these variants (I could hardly even pick up the beets themselves in Variants 37 and 38). I was still hard-pressed to sense the chocolate. I furthermore still got some kind of fruitiness effect (despite no lemon juice). Was this perhaps caused by the yogurt culture? The yogurt cheese itself seemed to be considerably less tart than regular yogurt.

The red hue died out—all four variants had just about the same, light brown color.

At this point, I reasoned that I at least had a "half-decent" taste that had to be at least as good as many somewhat bland crusts often used in fruit pies. I also felt that I would conduct some further tests related to betanin's survival. What could I do to stop the poor red thing from dropping brown-dead on me (I felt that acidity wasn't being helpful enough)?

Something needed to be done about that heat. Was there a way that I could cut it down (enough for the betanin's redness to survive) and still end up with a satisfactorily-baked batter?

I turned my attention to betanin survival. In doing so, I felt that I would begin with Variant 38's formulation and raise the cocoa, beet and sugar—hence a new formulation (downscaled to reduce waste) with different cooking applications:

1 2/3 cups sugar
16 ounces yogurt cheese
1/2 cup buttermilk
1/3 cup cocoa powder
1 tablespoon vinegar
3 tablespoons beet puree
1 tablespoon vanilla
8.8 ounces (1 1/2 cups) ground Bran Buds

Bake at 300 degrees as follows:
Variant 39: 20 minutes, no bath
Variant 40: 50 minutes, with bath
Variant 41: 70 minutes, with bath
Variant 42: 90 minutes, with bath

The taste for all of these was hardly beety, a little fruity, but somewhat more chocolaty. However, this taste was still nothing to get enthusiastic about, at least to me (perhaps much more sugar was needed?). The hues were still too brown. As for the 39th variant not being bathed, that was due to a curiosity on my part.

Okay, let's repeat the last four variants, but raise the sugar to 2 full cups, and the beet puree to 1/4 cup. So we now have Variants 43, 44, 45 and 46, baked the same way as before—43 at 20 minutes, 44 at 50, 45 at 70 and 46 at 90, bath for all except 43.

The tastes and colors among these latest variants hardly differed, except that Variant 43 seemed to be more on the chocolaty side, while the others remained more "ho-hum" fruity-oriented. The differences in color were, generally speaking, almost negligible compared to Variants 39-42, although some hue improvement could be found in the 20-minutes-unbathed (43 slightly better than 39) and the 50-minutes-bathed (44 slightly better than 40) comparisons.

At this point, I tried to redo Sample 1 of my Red Velvet Preliminary Research Project, primarily for the sake of comparing colors. Unfortunately, I had too little beet puree available, so I used up whatever I still had left. Beginning with Variant 31, from what I can best remember, I began to combine a little buttermilk with the beets, because I needed a liquid to sufficiently puree the beets, but I did not want to use water. I preferred a liquid that I was already using in my experiments. Therefore, the beet puree that I worked with was a 2:1 mix of beets to buttermilk. Because of this, I compensated by, of course, reducing the remaining buttermilk that would have to be added. For example, If Variant 39 (or 40 or 41 or 42 for that matter) called for 8 tablespoons (i.e., 1/2 cup) of buttermilk and 3 tablespoons (i.e., 3/16 cup) of beet puree, I would use 4 1/2 tablespoons of the 2:1 mixture (containing 3 tablespoons of beet puree and 1 1/2 tablespoons of buttermilk). Since the buttermilk would already get a "head start" of 1 1/2 tablespoons, the remaining addition of this ingredient could be reduced, i.e., by this same 1 1/2 tablespoons, from 8 tablespoons to 6 1/2 tablespoons.

I was initially planning to use 3/8 of a cup of this 2:1 mixture, which would reflect the 1/4 cup of beets used in Sample 1. I also reasoned that the 1/8 cup of buttermilk—which Sample 1 did not have at all—would not have too much of an impact here. Due to limitations of what I had available, I would estimate that close to only 1/4 cup of this mixture actually got used.

In baking this modified "Sample 1" at 300 degrees:
Variant 47: 20 minutes, no bath
Variant 48: 50 minutes, with bath
(I did not bother with longer times here)

Of course, the taste was terrific on both of them.

But my big question was this:

Have the color gotten considerably better over the variants leading up to Variant 46 (was the hue at least considerably redder than my regular, non-beet-containing chocolate crust, or considerably redder than this modified "Sample 1", reasonably represented here by Variants 47 and 48)?

My concluding answer: A big, resounding NO!

In fact, I might have been seeing more red hue (although darker color) in the chocolate-chip-containing Variants 47 and 48 than in a variant such as 46. It was hard to tell. Bottom line: This betanin has been a disastrous wimp! This stuff just could not hold on to its redness in the heat, even if it was relatively gentle (such as with a bath).

Regretfully, I felt that working with red beets, even if they were fresh, was largely a lost cause.

[Down the road: Canola oil (taste, color protection??)? Purple carrots (taste, color retention)? Purple carrots too difficult to find—got purple?].

GOT PURPLE CARROTS?????

:-(
 

Back to my bushy homepage