|
|
 |
Helpful Cheesecake Tips
What does it take to make a great cheesecake? Throughout the years, I have
refined my involvement in this art, having come a long way since the 1980's,
when I started off with a recipe out of a book from the American Heart
Association. I loved cheesecake, but I also had a quest to cut down the fat
while still maintaining an enjoyable taste. This has not always been easy. It
was because of my experimenting with recipes and making so many adjustments that
I more or less came up with the word "prototype" in regard to my
cheesecake baking projects.
I am happy to provide helpful information here, which goes into more detail
about how my cheesecakes are done. Included are specific methods for some steps
of the cheesecake making process, as well as recommended ingredients.
The Big Cheese
Let's start with the primary ingredient for cheesecakes in general. Traditional
ones have often used cream cheese, but I wanted to find a suitable alternative
that had less fat and furthermore was not compromised with artificial
ingredients. Taste, of course, was still important as well. In my earlier days,
I started off with lowfat cottage cheese, my being led to this one by the
aforementioned American Heart Association cookbook. For a completely smooth
texture, however, I would generally use a blender to beat out the curds.
In more recent times, I have been making extensive use of another kind of
ingredient hardly found in stores. This ingredient is yogurt cheese (I
was led to this one largely by another recipe book, Cooking Without Fat
by George Mateljan, founder of Health Valley Foods). Regular yogurt has easily
been available in supermarkets, which in more recent times have been carrying a
thicker version, often called Greek yogurt. Yogurt cheese seems somewhat
like a "close cousin" to it, but there is an important difference.
Yogurt cheese is even thicker than Greek yogurt.
If the more common kind of yogurt (i.e., regular) is strained for perhaps an
hour or two (but this can also depend on the amount of the yogurt and the size
of the strainer), one ends up with, as far as I know, Greek yogurt. But what if
the yogurt were to be strained much longer than that? How about—at
least—24 hours? The result would be a yogurt with a more solid texture
somewhat resembling cream cheese. This result is yogurt cheese.
More specifically, how is all this done? First, you need to start off with a
really good yogurt, one well suited for this purpose. Do not use "just
any" yogurt. The right kind needs to be chosen. I recommend a plain,
nonfat, all-natural yogurt. That's a reasonable start, but some additional
characteristics need to be met, and those are dependent upon the ingredients
that a given yogurt contains. Let's take a deeper look into this.
There are some yogurts out there that contain thickeners. These need to be
avoided, because these thickeners can hinder the straining process. Examples
of thickeners include gelatin, pectin, cornstarch, arrowroot, flour and any kind
of gum (e.g. locust bean, guar, xanthan). (To avoid some confusion here, I
should also mention that it is common for my cheesecakes to include a thickener
such as arrowroot, but that is added later in the recipe
preparation—well after the yogurt straining process.)
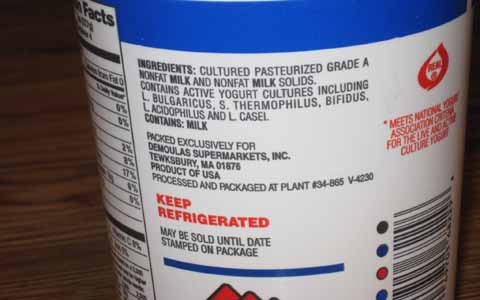
I have not been sure about which yogurt cultures may also interfere with
straining. Maybe none do. At least I have not been aware of that. On the other
hand, I have felt that a particular five-culture combination works well for
straining purposes. These cultures are Lactobacillus Bulgaricus, Streptococcus
Thermophilus, Bifidus, Lactobacillus Acidophilus and Lactobacillus Casei. At
times you may find at least some of these rather long names abbreviated in
ingredient lists on yogurt containers. The private brand of yogurt from
Market Basket (aka "DeMoulas"),
a Massachusetts-based grocery chain—of
"More For Your Dollar" fame—has been
my personal favorite, but not everybody has easy access to this particular
grocer. I would advise shopping carefully for a decently-straining yogurt that
will work well for you. Do remember to steer clear of added thickeners.
Once you have found a decent yogurt to work with, you will need to allow time
for it to strain—no less than 24 hours—closer to 48 hours would be a
plus. Whey, a yellowish liquid, is what gets strained out from the rest of the
yogurt, leaving behind what becomes yogurt cheese. If you strain out too much
whey, don't worry. As long as it falls into a clean container, you can always
add some of it back to the cheese to get the amount or consistency that you
want. The rest of the whey can be used for non-cheesecake purposes (or
discarded).
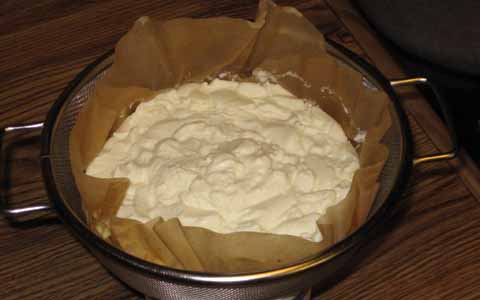
Set up a straining system. For this, a large enough strainer (I like using a
metal screen mesh) to hold the yogurt and a container to catch the whey are
needed. Also, you will need to place inside the strainer some straining
material. The yogurt gets placed on top of this. Cheesecloth and coffee filters
(paper ones) are popular for such use. I personally like to use coffee filters—it
is strongly recommended that the basket type be used here, not the cone type.
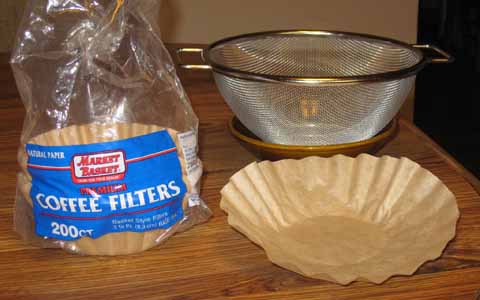
Carefully lay out the coffee filters within the strainer. Due to each filter
being smaller than the strainer, place the filters in scattered layers such that
they cover the entire "bowl" of the strainer.
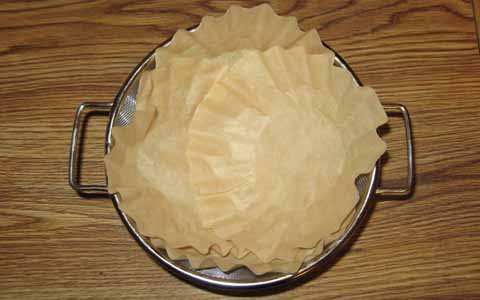
As for the topmost filter, try to get it centered as much as possible.
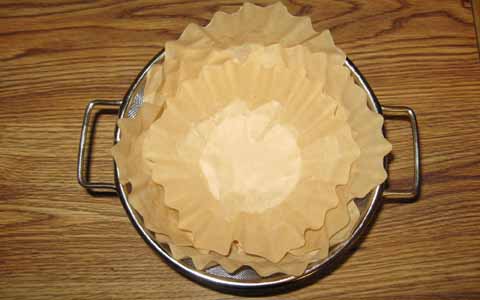
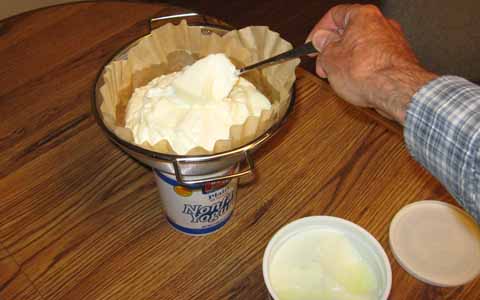
Next, start spooning in the yogurt. Do not throw it "just
anywhere"! Make an effort to drop the yogurt into the middle of
the centered, topmost filter.
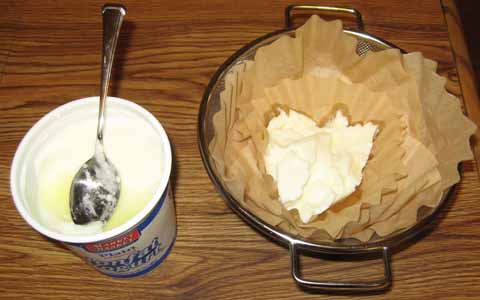
By spooning the yogurt this way, it will more evenly push out the sides
of the filters, particularly the one on top.
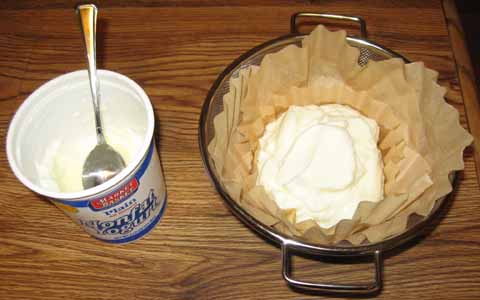
This method of spooning helps to prevent the yogurt from getting in between
the filter layers. The ideal goal here is for all of the yogurt to rest above
all of the filter papers. If the "peak" of the yogurt "pile"
gets too high, use the spoon to gently push the yogurt down in the middle.
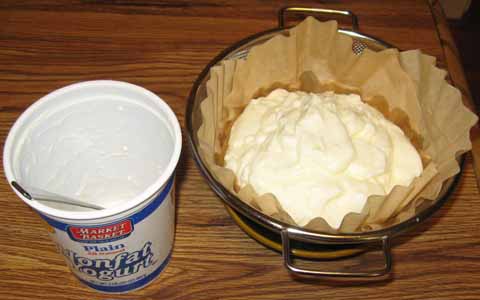
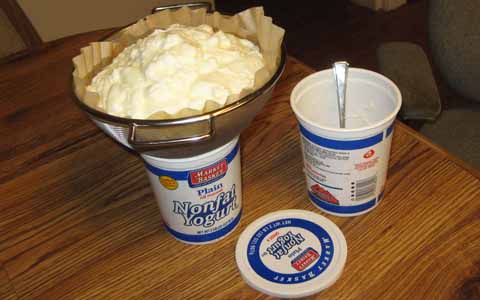
The whey should now be dripping slowly through the bottom of the straining
setup. I myself have found that the drainage is slow enough and the dripping is
confined enough to the bottom of the strainer (due to adequate adhesion of the
liquid) that I can confidently transfer the strainer and its contents to the top
of the yogurt container that I just fully scraped out.
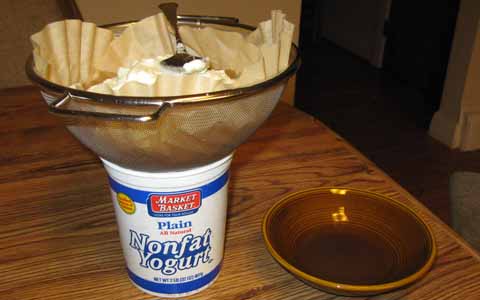
If there is any additional yogurt to be strained, add it on top of that which
was spooned from the first yogurt container. Keep aiming for the middle.
As a reminder, make sure that you are using a large enough strainer to begin
with.
When all the yogurt is done being added to the strainer, place the entire setup
in the refrigerator. If using a yogurt container to catch the whey, allow about
an hour of straining time, during which close to 50% of the whey to be
strained out should drip into the container below (the yogurt container should
be about halfway filled if using two such containers of yogurt to begin with, or
close to 3/4 filled if using three). Then carefully remove the straining
assembly from the refrigerator (try not to tip it over).
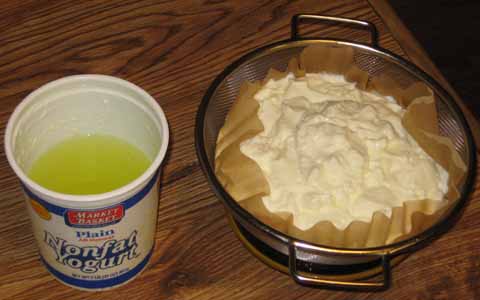
To prevent overflow problems with the yogurt container, empty out this
recently-strained whey. Then return the straining assembly (with the strainer
placed back over the container used for catching the whey) to the refrigerator.
The straining at this point is now going to be much slower. Allow at least
roughly 24 hours at this point. Closer to 48 hours would be even better,
particularly for a large amount of yogurt (e.g., 3 quarts before straining).
When all this straining is done, the resulting yogurt cheese (at least as I have
found) should be close to half the weight of the yogurt that you started with.
If the amount falls below your goal due to straining too long, add back to it
some of the whey collected in the container at this point. Use the remaining
whey for some other purpose (or discard it).
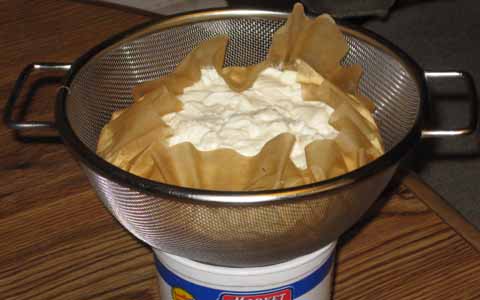
And there you have it! When you are ready to use this yogurt cheese (keep it
refrigerated until then), carefully separate it from the coffee filters, which
should be easy at this point to peel away.
Take A Better Bath
Do you want your cheesecake to have that more "professional" touch?
Then take a bath! A really good cheesecake is baked in a water-filled tub, which
causes the cheesecake to bake more gently (some use the term bain marie
in reference to this approach).
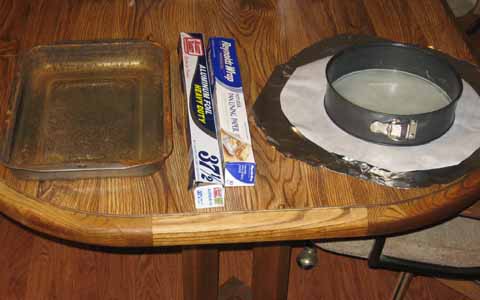
A particular challenge is preventing the water from leaking into the
cheesecake's springform pan. A popular way to prevent such leakage is to wrap
the cheesecake's pan in foil before placing it into the tub. In many cases,
however, some water has still gotten through the crumply foil. How can such a
problem be solved?
For starters, do not wrap the foil onto the pan too soon. The pan
can be greased and the crust placed inside it without the foil being put
on yet. Some may consider wrapping the pan beforehand to get that step over
with. But the foil then ends up being greatly disturbed. So hold off that foil
until you begin to add the batter to the pan! The foil can wait until then—thus
resulting in much less disturbance (and leakage risks) to it.
If you want even better protection, you could use two pieces of foil. Another
consideration is using a turkey cooking bag. But I have found a product that works
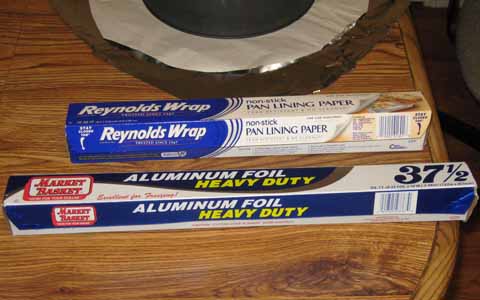
very nicely—pan lining paper, such as Reynolds. It features foil on one
side and parchment paper on the other. It can be difficult to keep this paper
folded on the springform pan, however. So I add an outer sheet of just foil
(heavy duty aluminum), which not only helps to keep the pan lining paper up
against the cheesecake pan's sidewall, but this foil also supplements the lining
paper as an additional defender against water leaks.
Prepare a couple of wrapping "disks", one of foil, the other of pan
lining paper (if you cannot get this paper, parchment-only paper might work).
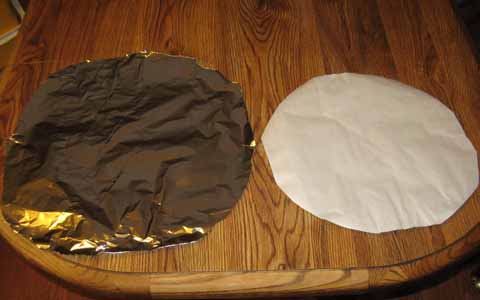
The diameter of these disks should be (at least) large enough to cover the
bottom of the springform pan and up its sidewall (or at least high enough that
they are above the water line when the tub containing this pan is filled).
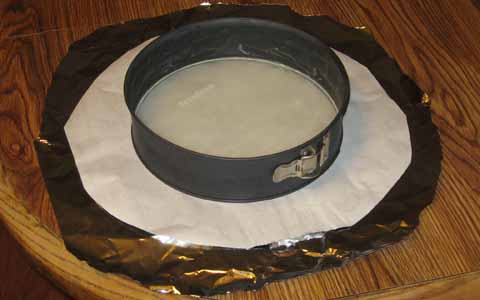
You can use the cheesecake's springform pan to check the sizes of these disks, but
do not wrap them onto the pan yet. First, you must grease this pan and place
the crust in it. Pre-bake the crust as needed (of course, the water tub is not
yet utilized at this point—this crust-only baking is done with the pan
directly on the rack inside the oven).
Once you are ready to add the batter to the pan, go ahead and carefully wrap it.
Pour a little boiling water into the tub, enough to cover its bottom, but not so
much that the pan without the batter is apt to float around inside the tub. Then
carefully place the now-wrapped springform pan into it.
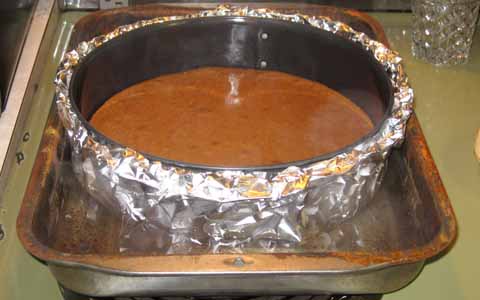
Next, add the batter to the pan as needed. Now that the pan has more weight to
suppress floating at this point, additional water can be added to the tub as
appropriate. Then place the whole tub-and-pan assembly into the oven and start
baking!
Update: An Even Better Way To Wrap A Pan
As of 2023, it seemed like the pan lining paper from Reynolds had been long
discontinued. I tried to make the best of what I still had of this wrap leading
up to then. However, I recently discovered a superior product,
Easy Bath Cheesecake Wrap, a reusable wrapper made of
"food grade" silicone, designed to fit around a cheesecake's
springform pan (available in a few different sizes, including 10 inches, which
I ordered from Amazon).

Far more convenient than using (and then eventually throwing away) foil or
paper, this waterproof covering could readily be slipped onto the pan and was
easily washable after use.

I highly recommend it!
Measuring Half Of An Egg
There are a number of different ways to measure half of an egg—here is one
of them. Simply take a small container and weigh it. Note this container-only
weight. Place the contents of one egg into it, both the white and the yolk. Then
weigh the container again, this time with the egg contents included. Afterward,
from this combined weight, subtract the weight of the container only. The
resulting difference is the weight of the egg contents. Divide this weight by 2
(i.e., in half), and spoon this resulting amount—after thoroughly blending
the white and yolk together—out of the container (i.e., until the weight
left behind is that of the container plus half of the egg contents' weight). At
this point, the amount spooned out is half of an egg. The other half is still in
the container.
Meet The Ingredients
What specific ingredients have I been using in my cheesecakes? I have strived
to go all-natural. Some of these ingredients are even organic. Shown below is
a reasonable representation of what I have used.
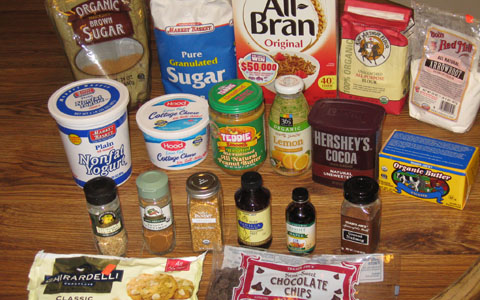
Some of the ingredients shown here might be an extra challenge to get. As
long as all-natural is preferred, these can include lemon juice and maple
flavoring, but I was able to find both of these at
Whole
Foods Market (for the lemon juice to be organic was a plus). Another
ingredient that may cause concern is arrowroot, because some stores may only
carry a small bottle of it (e.g., McCormick) at a high cost.
Try looking around instead for Bob's
Red Mill, which offers a good-sized bag of arrowroot at a small fraction of
the per-ounce cost (I found this brand at Whole Foods and some Market Basket
locations).
|
|

|