|
|
 |
Baked Chocolate Peanut Butter Cheesecake—Prototype 3 (introduction):
Repeat Prototype 2, but...
Make these changes for each of the two batters:
Boost lemon juice by 2 teaspoons, to 1 tablespoon.
Boost flour by 2 teaspoons, to 3/8 cup.
And make this change for the peanut butter batter only:
Boost peanut butter by 1 oz., to 4 oz.
And carefully follow these steps below, many of which are new:
Pour/press the crust mixture into the bottom of a lightly buttered 9"
cheesecake pan.
Next, add the chocolate (not peanut butter!) batter on top of this crust.
Then carefully wrap foil around this pan.
Next, place this pan into a tub of boiling hot water, and put this into an
oven, preheated to 325 degrees (not 300 at this point).
Bake this only for about 30 minutes.
Now comes the tricky part! WARNING: Use plenty of caution at this
point, due to the pan being very hot! Carefully place the peanut
butter batter on top of the chocolate one. How?? Instead of dumping the
whole thing all at once on the chocolate, try this delicate approach. Start
off by scooping small amounts of the peanut butter batter out of its bowl
(or whatever container is being used). A small measuring cup (1/2-cup size
is good) or ladle is useful here. Pour these small amounts around the
edge of the pan, not the middle (but rather allow the batter to flow
there on its own, if possible). This should reduce the likelihood of the
peanut butter batter breaching the chocolate one. When the bowl of the
peanut butter batter is almost empty, it is probably safe to more directly
dump the rest of this right onto what just got poured, which itself should
be deep enough by then. Still, it is a good idea to do this gently enough to
avoid the chocolate breach.
Next, reduce the temperature to 300 degrees, and return the pan to
the oven. Resume baking for about 80 minutes (or until cake tester comes out
clean).
The usage of the oven isn't done yet! Now, turn off the oven, but keep the
cheesecake in it (along with its tub), with the oven's door slightly ajar.
Allow one hour for this gradual cooldown. Afterwards, take the cheesecake
out of the oven and out of the tub, but keep the cheesecake in its 9"
pan.
Next, cool the cheesecake off, at room temperature, for another two hours.
Finally, remove it from its pan and refrigerate.
Baked Chocolate Peanut Butter Cheesecake—Prototype 3 (full recipe
presentation):
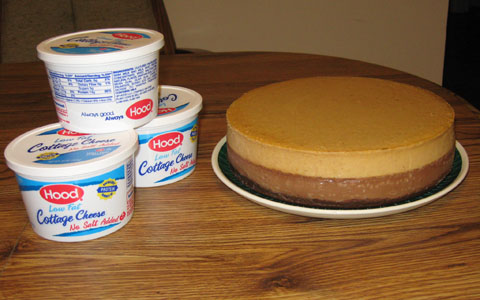
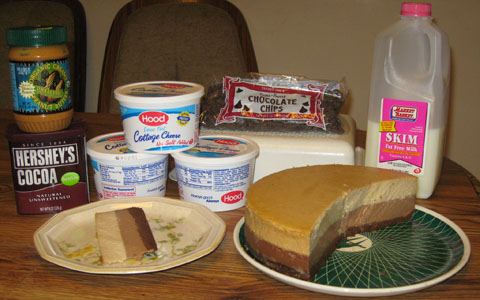
For the cottage cheese, no-salt-added is recommended.
Chocolate Crust:
4 oz. semi-sweet chocolate, melted
1 1/3 tablespoons cocoa powder
1 cup (8 oz.) lowfat cottage cheese, whipped
3/8 cup sugar
1 teaspoon vanilla (next to last ingredient here)
2.2 oz. finely ground Bran Buds
Promptly pour/press this crust mixture into the bottom of a lightly buttered
9" cheesecake pan.
Chocolate Batter:
1/2 cup skim milk
2 tablespoons melted or softened butter
3 tablespoons cocoa powder
7/8 cup sugar
1 tablespoon lemon juice
3/8 cup flour
1/4 teaspoon salt
2 1/2 cups (20 oz.) lowfat cottage cheese, whipped
1 teaspoon vanilla
2 eggs
Pour this chocolate batter on top of the crust. Carefully wrap foil around
the pan afterwards. Remember to not put the foil on any earlier
than this! The goal is to disturb it as little as possible, as a
preventative measure against water leakage. Then place the wrapped pan
into a tub of boiling hot water, and bake all this at 325 degrees (make sure
oven is preheated) for about 40 minutes only.
Peanut Butter Batter:
2 tablespoons melted or softened butter
4 oz. unsalted peanut butter
1 tablespoon lemon juice
1/2 cup skim milk
3/4 cup sugar
3/8 cup flour
1/4 teaspoon salt
2 1/2 cups (20 oz.) lowfat cottage cheese, whipped
2 eggs
After the initial baking is done with the chocolate crust and batter,
carefully place the peanut butter batter on top by scooping small amounts
of it around the edge of the pan (try to let this batter flow towards
the middle on its own), in order to minimize the likelihood of breaching the
chocolate batter below.
Lower the oven temperature to 300 degrees, and resume baking for
about 80 minutes.
Afterwards, turn the oven off, but keep the cheesecake in it (along with its
tub), with the door slightly ajar. Allow one hour for this gradual cooldown.
Next, take the cheesecake out of the oven and out of the tub, but keep the
cheesecake in its 9" pan.
Cool the cheesecake off, at room temperature, for another two hours.
Finally, remove it from its pan and refrigerate.
|
|

|