|
|
 |
Baked Chocolate Cheesecake—Prototype 10.1:
Crust:
2 oz. melted, semi-sweet chocolate
4 teaspoons skim milk, heated
4 teaspoons cocoa powder. Fully dissolve this in the chocolate and milk,
then gradually blend in...
5 oz. whipped, lowfat cottage cheese. Then add...
3/8 cup granulated sugar. Blend thoroughly, then add...
1 teaspoon vanilla (next to last ingredient here). Blend this in, then
finally mix in (quickly and vigorously, all at once)...
2.9 oz. finely ground Bran Buds
Press this crust mixture into the bottom of a lightly buttered 9"
cheesecake pan (such as removable-bottom or spring-form). There is no need
to press the crust up the pan's sidewall.
Batter:
2 cups lowfat cottage cheese
2 tablespoons melted or softened butter
2 eggs
7/8 cup granulated sugar
1/2 cup skim milk
1/4 cup flour
1/2 teaspoon salt
3 tablespoons cocoa powder
Blend all these ingredients together thoroughly, particularly the butter and
eggs (an electric mixer or food processor may be needed for this), then pour
this batter into the pan (on top of the crust, of course). Promptly place
this into the oven—preheated at 300 degrees—and bake for 100 minutes (or
until cake tester comes out clean). Remove from oven, cool down to about
room temperature, carefully remove from pan, and refrigerate (perhaps at
least three hours is a good suggestion at this last step).
Baked Chocolate Cheesecake—Prototype 10.2:
Crust:
3 oz. semi-sweet chocolate. Heat only until it just becomes fully melted,
then mix in...
1 tablespoon cocoa powder. Heat this mixture a little more, then blend in,
as thoroughly as possible...
1 tablespoon skim milk. Heat this mixture a little more, mix it more
thoroughly, then gradually combine...
4 oz. lowfat cottage cheese, whipped. Then add...
1/4 cup plus 1 tablespoon granulated sugar. Blend thoroughly, then add...
1 teaspoon vanilla (next to last ingredient here). Blend this in, then
finally mix in...
2.2 oz. finely ground Bran Buds. Mix quickly with vigor.
Press this crust mixture into the bottom of a lightly buttered 9"
cheesecake pan (such as removable-bottom or spring-form).
Batter:
1/2 cup skim milk
2 tablespoons melted butter
3 tablespoons cocoa powder
7/8 cup granulated sugar
1/4 cup flour
1/2 teaspoon salt
2 cups lowfat cottage cheese
1 teaspoon vanilla
2 eggs
Blend all these ingredients together thoroughly and pour into pan. Promptly
place into 300-degree oven (preheated), and bake for 100 minutes (or until
cake tester comes out clean). Remove from oven, cool down to about room
temperature, carefully remove from pan, and refrigerate.
Baked Chocolate Cheesecake—Prototype 10.3:
Repeat the previous version, but make these changes for the crust:
Boost semi-sweet chocolate by 1 ounce, to 4 ounces.
Boost skim milk by 1 tablespoon, to 2 tablespoons.
Baked Chocolate Cheesecake—Prototype 10.4:
Repeat the previous version, but boost the crust's skim milk by 2
tablespoons, to 1/4 cup. Tip: Immediately after adding the Bran Buds to the
crust's other ingredients, act real fast! Get the Bran Buds soaked and mix
quickly, yet thoroughly. The resulting crust mixture should have a thick,
liquid texture. But this is not going to stay this runny for long. So
before it hardens, dump it into the bottom of the pan, and tilt this pan in
various directions until the mixture has coated the entire bottom. If
necessary, carefully spread this mixture (using something small, such as a
finger) to close any remaining gaps, but be as quick as possible. Give the
pan a slight shake as needed to help level out the crust.
Baked Chocolate Cheesecake—Prototype 10.5:
The quest is still on for crust improvement! Repeat the previous version,
but boost the crust's skim milk, by 4 teaspoons, to 1/3 cup. Increase the
granulated sugar as well, by a tablespoon, to 3/8 cup for a tastier crust. Finally, use
the bath approach for this cheesecake (i.e., wrap foil around the pan, and
place it in a hot "tub"—see Baked Eggnog Cheesecake,
Prototypes 8 and 9, below, for more info).
Baked Chocolate Cheesecake—Prototype 11:
Repeat Prototype 10.5, but...
For the crust, boost cocoa powder by 1 teaspoon, to 1 1/3 tablespoons.
For the batter, reduce salt by 1/4 teaspoon, to 1/4 teaspoon.
The latest update for the ingredient lists...
Crust:
4 oz. semi-sweet chocolate, melted
1 1/3 tablespoons cocoa powder
1/3 cup skim milk
4 oz. lowfat cottage cheese, whipped (no-salt-added recommended)
3/8 cup granulated sugar
1 teaspoon vanilla (next to last ingredient here)
2.2 oz. finely ground Bran Buds
Batter:
1/2 cup skim milk
2 tablespoons melted butter
3 tablespoons cocoa powder
7/8 cup granulated sugar
1/4 cup flour
1/4 teaspoon salt
2 cups lowfat cottage cheese, whipped (no-salt-added recommended)
1 teaspoon vanilla
2 eggs
Baked Chocolate Cheesecake—Prototype 12:
Repeat Prototype 11, but...
For the crust, eliminate the skim milk, and boost the whipped cottage cheese
by 4 oz., to 8 oz.
Baked Chocolate Cheesecake—Prototype 13:
Repeat Prototype 12, but make these changes for the batter:
Boost whipped cottage cheese by 4 ounces (1/2 cup), to 20 ounces (2 1/2
cups).
Boost flour by 4 teaspoons (1/12 cup), to 1/3 cup.
Add 1 tablespoon of lemon juice.
Bake this cheesecake for two hours (at 300 degrees, with hot water
bath), then remove from oven, and allow about two hours for cooling before
removing from pan. NOTE: If using a 9 1/2" pan (instead of 9"),
cut this baking time to 110 minutes.
Baked Chocolate Cheesecake—Prototype 14:
Batter only:
4 tablespoons melted/softened butter
6 tablespoons cocoa powder
1 3/4 cups granulated sugar
1/2 cup all-purpose flour
1/2 teaspoon salt
32 ounces nonfat yogurt cheese
2 teaspoons vanilla
4 eggs
Pour into buttered 9-inch springform pan, place into hot bath and bake for the
first 30 minutes at 325 degrees. Then lower temperature to 300 degrees and bake
for 45 more minutes. Cool outside of oven and bath for about 1 1/4 hours, then
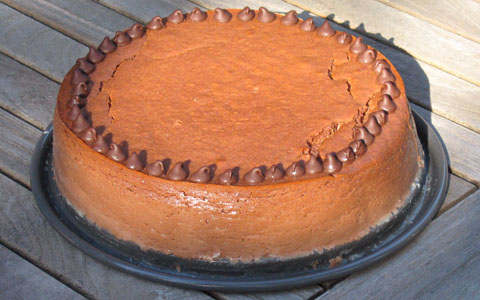
refrigerate. For a nicer touch, place semi-sweet chocolate chips,
flat-side-down, in a circle around the cheesecake's top surface at its outer
edge shortly after removal from the oven (avoid burns—be careful not to touch
the pan's hot sidewall while placing the chocolate chips).
Baked Chocolate Cheesecake—Prototype 15:
2-to-1 Blend of Yogurt Cheese and Cottage Cheese:
Prepare ahead of time 32 ounces of yogurt cheese, derived from two 32-ounce
containers (that's 64 ounces altogether) of nonfat yogurt. If the resulting
yogurt cheese falls below 32 ounces, add back enough of the whey (that was
strained out from the yogurt) to make up the difference. To this yogurt cheese
combine one 16-ounce container of whipped, lowfat cottage cheese.
Grease a 9 1/2" (or 9") pan, but do not wrap foil around it until just
before the batter is added (spreading the crust in an already wrapped pan can
result in greater disturbance to the foil, thus increasing leakage risks).
Chocolate Crust:
4 oz. semi-sweet chocolate, melted
1 1/3 tablespoons cocoa powder
8 oz. (1 cup) 2-to-1 blend of yogurt cheese and cottage cheese (see above)
3/8 cup granulated sugar
1 teaspoon vanilla
2.2 oz. finely ground Bran Buds
Place resulting mixture in 9 1/2" (or 9") pan.
Chocolate Batter:
4 tablespoons melted/softened butter
3/8 cup cocoa powder
1 3/4 cups granulated sugar
1/4 cup all-purpose flour
3 tablespoons arrowroot
1/2 teaspoon salt
40 ounces (5 cups) 2-to-1 blend of yogurt cheese and cottage cheese (see above)
2 teaspoons vanilla
4 eggs
Pour the batter over the crust and bake this cheesecake in a hot water tub at
300 degrees for 100 minutes (if using a 9 1/2" pan). Then shut off oven and
cool cheesecake down while still in it (and in tub), with door slightly ajar,
for an hour. Afterwards, remove from oven and tub and (a border of chocolate
chips can be added at this point) continue to cool down at room temperature for
another 100 minutes, then remove from pan and refrigerate.
Baked Chocolate Cheesecake—Prototype 16:
2-to-1 Blend of Yogurt Cheese and Cottage Cheese:
Prepare ahead of time 32 ounces of yogurt cheese, derived from two 32-ounce
containers (that's 64 ounces altogether) of nonfat yogurt. If the resulting
yogurt cheese falls below 32 ounces, add back enough of the whey (that was
strained out from the yogurt) to make up the difference. To this yogurt cheese
combine one 16-ounce container of whipped, lowfat cottage cheese.
Grease a 9 1/2" (or 9") pan, but do not wrap foil around it until just
before the batter is added (spreading the crust in an already wrapped pan can
result in greater disturbance to the foil, thus increasing leakage risks).
Chocolate Crust:
4 oz. semi-sweet chocolate, melted
2 tablespoons cocoa powder
8 oz. (1 cup) 2-to-1 blend of yogurt cheese and cottage cheese (see above)
3/8 cup granulated sugar
1 teaspoon vanilla
2 oz. finely ground Bran Buds
Place resulting mixture in 9 1/2" (or 9") pan.
Chocolate Batter:
4 tablespoons melted/softened butter
3/8 cup cocoa powder
1 3/4 cups granulated sugar
1/4 cup all-purpose flour
3 tablespoons arrowroot
1/2 teaspoon salt
40 ounces (5 cups) 2-to-1 blend of yogurt cheese and cottage cheese (see above)
2 teaspoons vanilla
4 eggs
Chocolate syrup (Trader
Joe's Organic Midnight Moo recommended), about 1/2 cup (8 tablespoons) altogether
Expect more than 7 cups of the resulting batter, but do not add this to the pan
all at once (otherwise, the syrup, which is also added here, may end up
floating—or perhaps sinking—too much to a single level, due to
density differences). Rather, this needs to be done in four installments. Wrap
the pan in foil just before adding the first installment. Minimize the foil's
disturbance in order to minimize its leakage risk.
For each of the first three installments, scoop about 1 3/4 to 2 cups of batter
into the pan. Then add about 2 tablespoons of chocolate syrup (close to 1 1/3
ounces by weight if using the TJ's brand recommended above). The best way to do
this is to squirt some thick, parallel stripes of it throughout the pan (the
TJ's syrup, as of this writing, comes in a squeezable bottle with a squirt
nozzle). Then pull a knife in perpendicular directions through these stripes in
the batter (just deeply enough for the installment being added) in order to
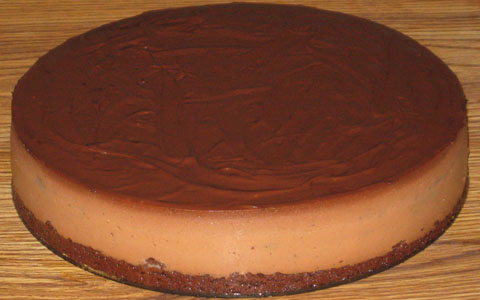
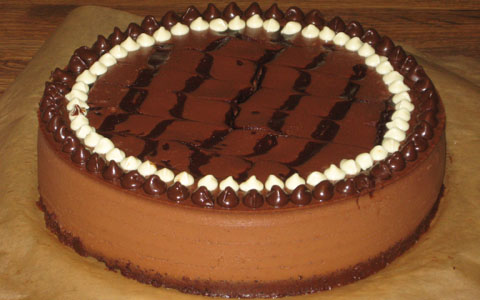
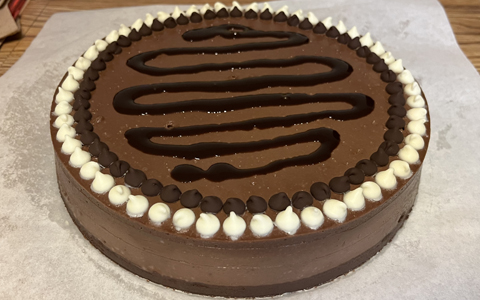
produce a wavy, swirl pattern (see photo below for an example).
(Top view of finished cheesecake, with a suggested pattern)
Use extra care in the
later installments when adding batter (i.e., gently scoop it) into the pan.
After adding an installment, bake the pan with its contents at 325 degrees for
15 minutes, in a tub filled with at least 1/4 to 1/2 inch of boiling water. To
reduce spillage risks, do not fill the tub all the way at this point, because
the whole tub-and-pan assembly is going to need to be removed from the oven (in
order to comfortably add contents to the pan) between installments.
After all this is done, there should be about 1 3/4 to 2 cups of batter
remaining, with 45 minutes of baking time reached at this point (15 minutes for
each of the first three installments). Now comes the fourth installment—add
the batter and syrup in the same way as with the earlier three installments. But
try to place (and swirl) the syrup as neatly as possible on top, because this is
what is going to end up being exposed. So appearance is particularly important
for this final installment. Next, return the entire pan-and-tub assembly to the
oven. At this point, fill up the tub generously with boiling water. Resume
baking, but with the oven temperature lowered to 300 degrees, for about another
75 minutes (based upon usage of a 9 1/2" pan).
Afterward, shut the oven off, and leave its door slightly ajar, with the
cheesecake still inside—and in the tub—for an hour. Next, remove the
cheesecake from the oven and tub, and—if desired—add a border of
chocolate chips around the edge of this cheesecake. Continue to cool it down at
room temperature for another two hours. After doing so, remove the cheesecake
from pan and refrigerate.
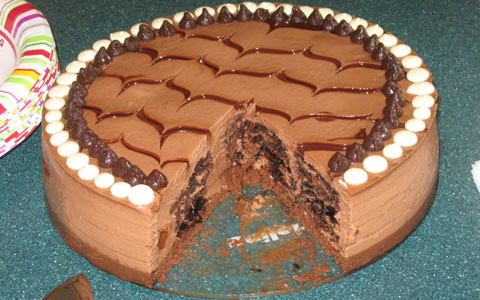
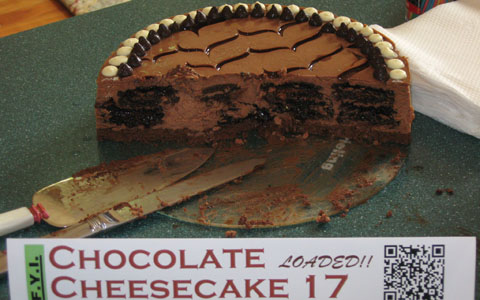
Baked Chocolate Cheesecake—Prototype 17 (7-Way Chocolate):
2-to-1 Blend of Yogurt Cheese and Cottage Cheese:
Prepare ahead of time 32 ounces of yogurt cheese, derived from two 32-ounce
containers (that's 64 ounces altogether) of nonfat yogurt. If the resulting
yogurt cheese falls below 32 ounces, add back enough of the whey (that was
strained out from the yogurt) to make up the difference. To this yogurt cheese
combine one 16-ounce container of whipped, lowfat cottage cheese.
Grease a 9 1/2" (or 9") pan, but do not wrap foil around it until just
before the batter is added (spreading the crust in an already wrapped pan can
result in greater disturbance to the foil, thus increasing leakage risks).
Chocolate Crust:
4 oz. semi-sweet chocolate, melted
2 tablespoons cocoa powder
8 oz. (1 cup) 2-to-1 blend of yogurt cheese and cottage cheese (see above)
3/8 cup granulated sugar
1 teaspoon vanilla
2 oz. finely ground All-Bran
Place resulting mixture in 9 1/2" (or 9") pan. Allow mixture to get
firm. See note in comments below for more information on this.
Chocolate Batter:
4 tablespoons melted/softened butter
3/8 cup cocoa powder
1 3/4 cups granulated sugar
1/4 cup all-purpose flour
3 tablespoons arrowroot
40 ounces (5 cups) 2-to-1 blend of yogurt cheese and cottage cheese (see above)
2 teaspoons vanilla
4 eggs
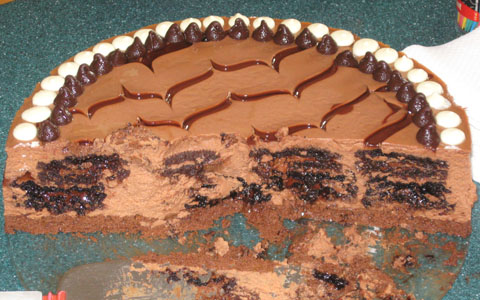
Double-chocolate sandwich cookies, about 2 dozen
Chocolate syrup (Trader Joe's Organic Midnight Moo recommended), about 6
tablespoons altogether
Expect more than 7 cups of the resulting batter, but do not add this to the pan
all at once (otherwise, the cookies and syrup, which are also added here, may
end up floating and/or sinking too much to a single level, due to density
differences). Rather, this needs to be done in five installments. Wrap the pan
in foil just before adding the first installment. Minimize the foil's
disturbance in order to minimize its leakage risk.
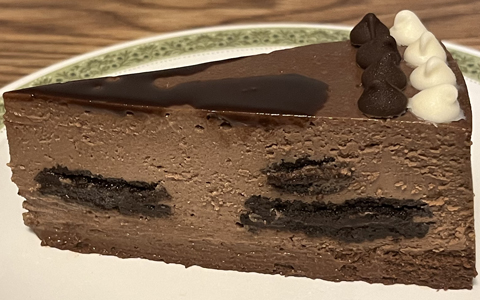
For each of the first four installments, gently scoop about 1 1/2 cups of
batter into the pan. Add about 6 cookies (don't bother breaking them up—keeping
them whole is fine and, in fact, recommended), ensuring that they are fully
coated and immersed. Then add a generous amount, close to 1/4 cup, of chocolate
syrup (almost 3 ounces by weight if using the TJ's brand recommended above)—but
add this syrup only for the second installment (of the first four
installments described here). The best way to do this is to squirt some thick,
parallel stripes of it throughout the pan (the TJ's syrup, as of this writing,
comes in a squeezable bottle with a squirt nozzle). But—do not
swirl the syrup with a knife on this second installment.
After adding an installment, bake the pan with its contents at 325 degrees for
15 minutes, in a tub filled with at least 1/4 to 1/2 inch of boiling water. To
reduce spillage risks, do not fill the tub all the way at this point, because
the whole tub-and-pan assembly is going to need to be removed from the oven (in
order to comfortably add contents to the pan) between installments.
For the fifth (and final) installment, gently add the remaining batter to the
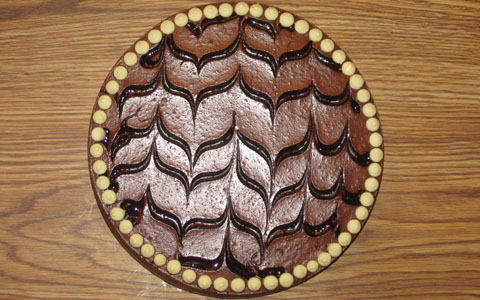
pan, but do not add any more cookies. Instead, add some more chocolate
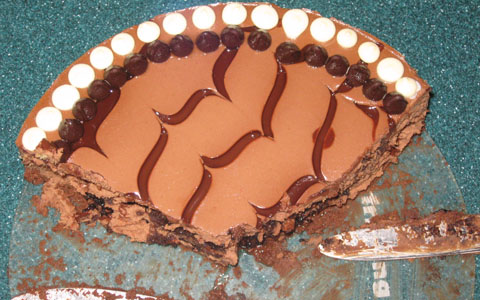
syrup on the top surface. Squirt thick, parallel stripes of this syrup,
about a couple of tablespoons altogether (almost 1 1/2 ounces by weight if using
TJ's), throughout the pan. Then pull a knife in perpendicular directions through
these top stripes in the batter (just deeply enough for the uppermost
installment's surface) in order to produce a wavy, swirl pattern (see photo
below for a suggestion). Do all this as neatly as possible (avoid cutting into
the lower installments underneath).
After the fifth installment (including the syrup) is in place, return the entire
pan-and-tub assembly to the oven. At this point, fill up the tub generously with
boiling water. Resume baking, but with the oven temperature lowered to 300 degrees,
for about another 65 minutes (based upon usage of a 9 1/2" pan).
Afterward, shut the oven off, and leave its door slightly ajar, with the
cheesecake still inside—and in the tub—for an hour. Next, remove the
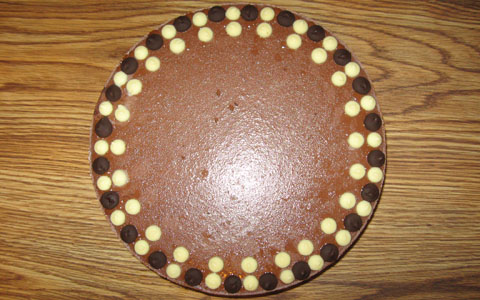
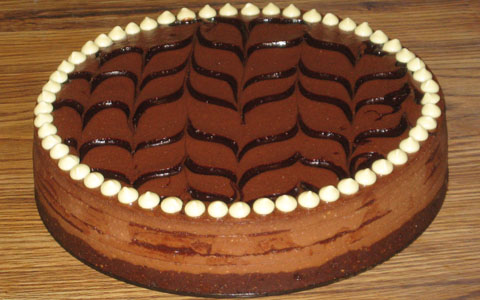
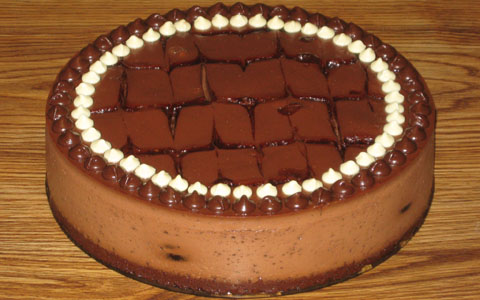
cheesecake from the oven and tub. Now, for the final chocolate touch, add a
border of chocolate chips, semi-sweet and white, around the edge of this
cheesecake (see photo below). Continue to cool it down at room temperature for
another two hours. After doing so, remove the cheesecake from pan and refrigerate.
Baked Chocolate Cheesecake—Prototype 18:
2-to-1 Blend of Yogurt Cheese and Cottage Cheese:
Prepare ahead of time 32 ounces of yogurt cheese, derived from two 32-ounce
containers (that's 64 ounces altogether) of nonfat yogurt. If the resulting
yogurt cheese falls below 32 ounces, add back enough of the whey (that was
strained out from the yogurt) to make up the difference. To this yogurt cheese
combine one 16-ounce container of whipped, lowfat cottage cheese.
Grease a 9 1/2" (or 9") pan, but do not wrap foil around it until just
before the batter is added (spreading the crust in an already wrapped pan can
result in greater disturbance to the foil, thus increasing leakage risks).
Chocolate Crust:
4 oz. semi-sweet chocolate, melted
2 tablespoons cocoa powder
8 oz. (1 cup) 2-to-1 blend of yogurt cheese and cottage cheese (see above)
3/8 cup granulated sugar
1 teaspoon vanilla
2 oz. finely ground All-Bran
Place resulting mixture in the greased pan and pre-bake without tub at 300
degrees for 10 minutes, then cool enough to comfortably touch at least the pan's
upper sidewall.
Chocolate Batter:
4 tablespoons melted/softened butter
3/8 cup cocoa powder
1 3/4 cups granulated sugar
1/4 cup all-purpose flour
3 tablespoons arrowroot
40 ounces (5 cups) 2-to-1 blend of yogurt cheese and cottage cheese (see above)
2 teaspoons vanilla
4 eggs
Wrap the pan in foil at this point. Carefully pour the batter over the crust and
bake this cheesecake in a hot water tub at 300 degrees for 105 minutes (if using
a 9 1/2" pan). Then shut off oven and cool cheesecake down while still in
it (and in tub), with door slightly ajar, for an hour. Afterwards, remove from
oven and tub and continue to cool down at room temperature for another 105
minutes, then remove from pan and refrigerate.
Baked Chocolate Cheesecake—Prototype 19:
3-Cheese Blend (1CT-1NC-4YG):
Prepare ahead of time 32 ounces of yogurt cheese, derived from two 32-ounce
containers (that's 64 ounces altogether) of nonfat yogurt. If the resulting
yogurt cheese falls below 32 ounces, add back enough of the whey (that was
strained out from the yogurt) to make up the difference. To this yogurt cheese
combine 8 ounces of whipped, lowfat cottage cheese and 8 ounces of softened
Neufchatel cheese ("light cream cheese").
Grease a 9 1/2" (or 9") pan, but do not wrap foil around it until just
before the batter is added (spreading the crust in an already wrapped pan can
result in greater disturbance to the foil, thus increasing leakage risks).
Chocolate Crust:
4 oz. semi-sweet chocolate, melted
3/8 cup granulated sugar
2 tablespoons cocoa powder
8 oz. (1 cup) 3-cheese blend (see above)
1 teaspoon vanilla
2 oz. finely ground All-Bran
Place the resulting mixture in the greased pan and pre-bake without tub at 300
degrees for 5-10 minutes, depending on the mixture's thickness (closer to 10
minutes if thin enough to be fully distributed across the pan's bottom by gentle
shaking, closer to 5 minutes if thick enough to require spreading out this
mixture by pressing on it with a utensil and/or fingers), then cool enough to
comfortably touch at least the pan's upper sidewall.
Chocolate Batter:
1 3/4 cups granulated sugar
3/8 cup cocoa powder
40 oz. (5 cups) 3-cheese blend (see above)
1/4 cup + 1 tablespoon (5 tablespoons altogether) arrowroot
2 teaspoons vanilla
5 eggs
Wrap the pan in foil at this point. Carefully pour the batter over the crust and
bake this cheesecake in a hot water tub at 300 degrees for 105 minutes (if using
a 9 1/2" pan). Then shut off oven and cool cheesecake down while still in
it (and in tub), with door slightly ajar, for an hour. Afterwards, remove from
oven and tub and (at this point, add a border of chocolate chips if desired)
continue to cool down at room temperature for another 105 minutes, then remove
from pan and refrigerate.
Baked Chocolate Cheesecake—Prototype 20 (7-Way Chocolate):
3-Cheese Blend (1CT-1NC-4YG):
Prepare ahead of time 32 ounces of yogurt cheese, derived from two 32-ounce
containers (that's 64 ounces altogether) of nonfat yogurt. If the resulting
yogurt cheese falls below 32 ounces, add back enough of the whey (that was
strained out from the yogurt) to make up the difference. To this yogurt cheese
combine 8 ounces of whipped, lowfat cottage cheese and 8 ounces of softened
Neufchatel cheese ("light cream cheese").
Grease a 9 1/2" (or 9") pan, but do not wrap foil around it until just
before the batter is added (spreading the crust in an already wrapped pan can
result in greater disturbance to the foil, thus increasing leakage risks).
Chocolate Crust:
4 oz. semi-sweet chocolate, melted
3/8 cup granulated sugar
2 tablespoons cocoa powder
8 oz. (1 cup) 3-cheese blend (see above)
1 teaspoon vanilla
2 oz. finely ground All-Bran
Place the resulting mixture in the greased pan and pre-bake without tub at 300
degrees for 5-10 minutes, depending on the mixture's thickness (closer to 10
minutes if thin enough to be fully distributed across the pan's bottom by gentle
shaking, closer to 5 minutes if thick enough to require spreading out this
mixture by pressing on it with a utensil and/or fingers), then cool enough to
comfortably touch at least the pan's upper sidewall.
Chocolate Batter:
1 3/4 cups granulated sugar
3/8 cup cocoa powder
40 oz. (5 cups) 3-cheese blend (see above)
1/4 cup + 1 tablespoon (5 tablespoons altogether) arrowroot
2 teaspoons vanilla
5 eggs
Double-chocolate sandwich cookies (such as Newman's Own), about 2 dozen
Dark Decoration Batter (thoroughly blend these two ingredients together):
2 tablespoons chocolate syrup (such as Trader Joe's Organic Midnight Moo)
2 tablespoons chocolate batter (see above)
Expect more than 7 cups of the resulting chocolate batter (and reserve 2
tablespoons of this for the dark decoration batter), but do not add this to the
pan all at once (otherwise, the cookies, which are also added here, may end up
floating and/or sinking too much to a single level, due to density differences).
Rather, this needs to be done in five installments. Wrap the pan in foil just
before adding the first installment. Minimize the foil's disturbance in order to
minimize its leakage risk.
For each of the first four installments, gently scoop about 1 1/2 cups of batter
into the pan. Add about 6 cookies (don't bother breaking them up—keeping
them whole is fine and, in fact, recommended), ensuring that they are fully
coated and—as much as possible—immersed.
After adding an installment, bake the pan with its contents at 325 degrees for
15 minutes, in a tub filled with at least 1/4 to 1/2 inch of boiling water. To
reduce spillage risks, do not fill the tub all the way at this point, because
the whole tub-and-pan assembly is going to need to be removed from the oven (in
order to comfortably add contents to the pan) between installments.
For the fifth (and final) installment, gently add the remaining batter to the
pan, but do not add any more cookies. Instead, add the dark decoration batter on
the top surface. From a beaker, pour thick, parallel stripes of this decorative
batter throughout the top surface in the pan. Then pull a knife in perpendicular
directions through these dark stripes in the lighter-colored batter (just deeply
enough for the uppermost installment's surface) in order to produce a wavy,
swirl pattern (see photo below). Do all this as neatly as possible (try to avoid
cutting into the lower installments underneath).
After the fifth installment (including the dark decoration batter) is in place,
return the entire pan-and-tub assembly to the oven. At this point, fill up the
tub generously with boiling water. Resume baking, but with the oven temperature
lowered to 300 degrees, for about another 65 minutes (based upon usage of a 9
1/2" pan).
Afterward, shut the oven off, and leave its door slightly ajar, with the
cheesecake still inside—and in the tub—for an hour. Next, remove the
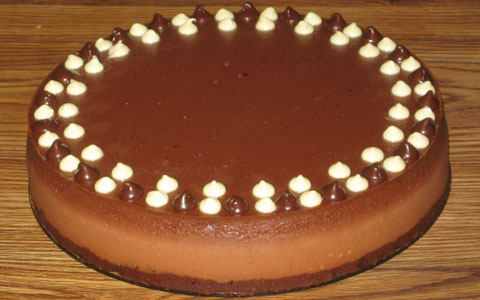
cheesecake from the oven and tub. Now, for the final chocolate touch, add a
border of chocolate chips, semi-sweet and white, around the edge of this
cheesecake (see photo below). Continue to cool it down at room temperature for
another two hours. After doing so, remove the cheesecake from pan and
refrigerate.
Baked Chocolate Cheesecake—Prototype 21:
3-Cheese Blend (3CT-1NC-2YG):
Prepare ahead of time 16 ounces of yogurt cheese, derived from one 32-ounce
container of nonfat yogurt. If the resulting yogurt cheese falls below 16
ounces, add back enough of the whey (that was strained out from the yogurt) to
make up the difference. To this yogurt cheese combine 24 ounces of whipped,
lowfat cottage cheese and 8 ounces of softened Neufchatel cheese ("light
cream cheese").
Grease a 9 1/2" (or 9") pan, but do not wrap foil around it until just
before the batter is added (spreading the crust in an already wrapped pan can
result in greater disturbance to the foil, thus increasing leakage risks).
Chocolate Crust:
4 oz. semi-sweet chocolate, melted
3/8 cup granulated sugar
2 tablespoons cocoa powder
8 oz. (1 cup) 3-cheese blend (see above)
1 teaspoon vanilla
2 oz. finely ground All-Bran
Place the resulting mixture in the greased pan and pre-bake without tub at 300
degrees for 5-10 minutes, depending on the mixture's thickness (closer to 10
minutes if thin enough to be fully distributed across the pan's bottom by gentle
shaking, closer to 5 minutes if thick enough to require spreading out this
mixture by pressing on it with a utensil and/or fingers), then cool enough to
comfortably touch at least the pan's upper sidewall.
Chocolate Batter:
1 3/4 cups granulated sugar
3/8 cup cocoa powder
40 oz. (5 cups) 3-cheese blend (see above)
1 1/2 teaspoons xanthan gum
2 teaspoons vanilla
5 eggs
Wrap the pan in foil at this point. Carefully pour the batter over the crust and
bake this cheesecake in a hot water tub at 300 degrees for 75 minutes (if using
a 9 1/2" pan). Then shut off oven and cool cheesecake down while still in
it (and in tub), with door slightly ajar, for an hour. Afterwards, remove from
oven and tub and (at this point, add a border of chocolate chips if desired)
continue to cool down at room temperature for another two hours, then remove
from pan and refrigerate.
Baked Chocolate Cheesecake—Prototype 22 (7-Way Chocolate):
3-Cheese Blend (3CT-1NC-2YG):
Prepare ahead of time 16 ounces of yogurt cheese, derived from one 32-ounce
container of nonfat yogurt. If the resulting yogurt cheese falls below 16
ounces, add back enough of the whey (that was strained out from the yogurt) to
make up the difference. To this yogurt cheese combine 24 ounces of whipped,
lowfat cottage cheese and 8 ounces of softened Neufchatel cheese ("light
cream cheese").
Grease a 9 1/2" (or 9") pan, but do not wrap foil around it until just
before the batter is added (spreading the crust in an already wrapped pan can
result in greater disturbance to the foil, thus increasing leakage risks).
Chocolate Crust:
4 oz. semi-sweet chocolate, melted
3/8 cup granulated sugar
2 tablespoons cocoa powder
8 oz. (1 cup) 3-cheese blend (see above)
1 teaspoon vanilla
2 oz. finely ground All-Bran
Place the resulting mixture in the greased pan and pre-bake without tub at 300
degrees for 5-10 minutes, depending on the mixture's thickness (closer to 10
minutes if thin enough to be fully distributed across the pan's bottom by gentle
shaking, closer to 5 minutes if thick enough to require spreading out this
mixture by pressing on it with a utensil and/or fingers), then cool enough to
comfortably touch at least the pan's upper sidewall.
Chocolate Batter:
1 3/4 cups granulated sugar
3/8 cup cocoa powder
40 oz. (5 cups) 3-cheese blend (see above)
1 1/2 teaspoons xanthan gum
2 teaspoons vanilla
6 eggs
Double-chocolate sandwich cookies (such as Newman's Own), about 2 dozen
Expect just over 7 cups of the resulting chocolate batter, but do not add this to
the pan all at once. Rather, this needs to be done in two installments. Wrap the
pan in foil just before adding the first installment. Minimize the foil's
disturbance in order to minimize its leakage risk.
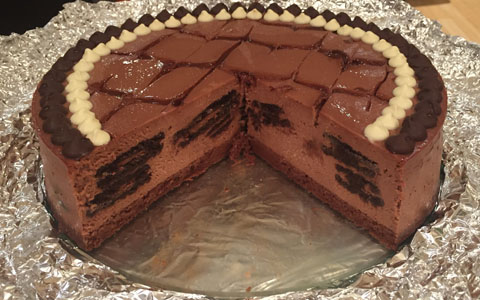
For the first installment, start off by gently scooping some batter into the
pan just until the crust is fully coated. Afterwards, lay flat about 6 cookies
onto this batter. Then add more batter, coating these cookies well. Lay flat
another 6 cookies, but try to place them such that they are not overlapping any
of the first layer of cookies. Coat this second layer as well with additional
batter. Next, add a third layer of about 6 cookies, laying them flat also. Try
to avoid overlapping the second layer. However, it is okay (and encouraged) if
they are directly above the first layer of cookies. Add more batter, coating the
third layer. Finally, add a fourth layer of about 6 cookies—laying these
flat too—and try to avoid overlap with the third layer cookies, but feel
free to position the fourth layer's directly above those of the second. Fully
coat this final cookie layer, and—with the rest of the batter less
roughly 1 1/2 to 2 cups—try to make the top surface of the batter
reasonably level within the pan (it's okay if some of the cookies float upward
and protrude a bit, but make sure that they are still lying horizontally).
After this is done, bake the pan with its contents at 325 degrees for 30
minutes, in a tub filled with at least about 1/2 inch of boiling water. To
reduce spillage risks, do not fill the tub all the way at this point, because
the whole tub-and-pan assembly is going to need to be removed from the oven (in
order to comfortably add contents to the pan) for the next installment.
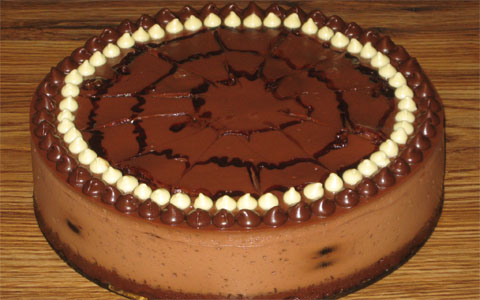
For that second (final) installment, gently add the remaining 1 1/2 to 2 cups of
batter to the pan (no additional cookies at this point). Then add some chocolate
syrup (such as Trader Joe's Organic Midnight Moo)—about a few tablespoons
altogether—by pouring thick, parallel stripes onto the top surface in the
pan. Then pull a knife in perpendicular directions through these dark stripes in
the lighter-colored batter (just deeply enough for the uppermost installment's
surface) in order to produce a wavy, swirl pattern. Do all this as neatly as
possible (try to avoid cutting into the lower installment underneath). (If
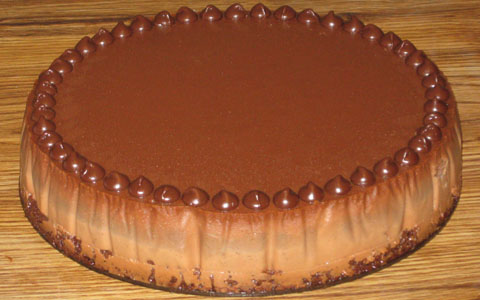
desired, try a different chocolate syrup pattern, such as concentric circles.
See photo and comments below.)
After this last installment is in place, return the entire pan-and-tub assembly
to the oven. At this point, fill up the tub more generously with boiling water.
Resume baking, but with the oven temperature lowered to 300 degrees, for about
another 75 minutes (based upon usage of a 9 1/2" pan).
Afterward, shut the oven off, and leave its door slightly ajar, with the
cheesecake still inside—and in the tub—for an hour. Next, remove the
cheesecake from the oven and tub. Now, for the final chocolate touch, add a
border of chocolate chips, semi-sweet and white, around the edge of this
cheesecake (see photo below). Continue to cool it down at room temperature for
another two hours. After doing so, remove the cheesecake from pan and
refrigerate.
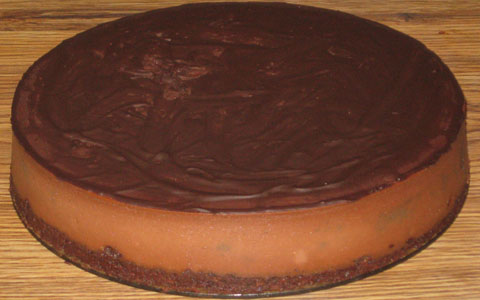
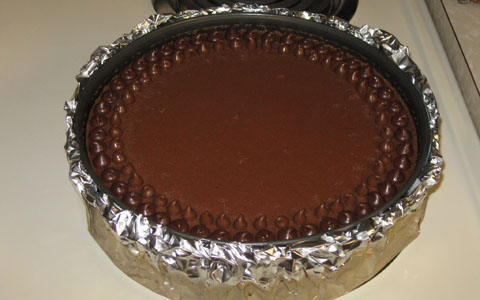
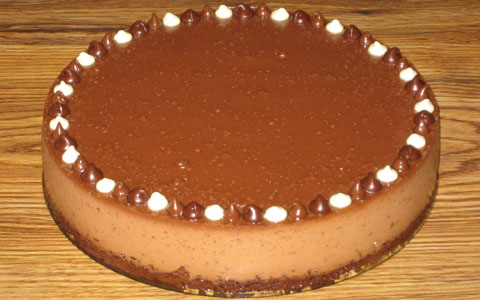
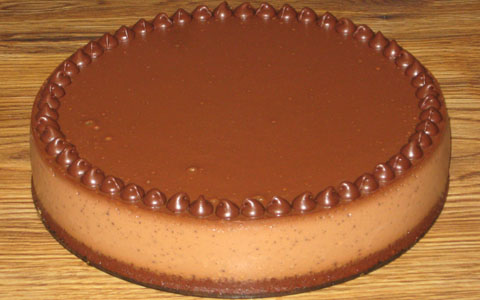
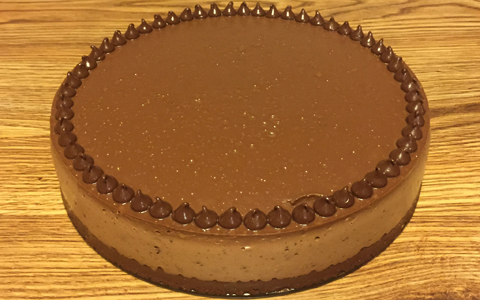
(The first cheesecake shown here made in January, the second one in March,
of 2018)
Baked Chocolate Cheesecake—Prototype 23:
3-Cheese Blend (3CT-1NC-2YG):
Prepare ahead of time 16 ounces of yogurt cheese, derived from one 32-ounce
container of nonfat yogurt. If the resulting yogurt cheese falls below 16
ounces, add back enough of the whey (that was strained out from the yogurt) to
make up the difference. To this yogurt cheese combine 24 ounces of whipped,
lowfat cottage cheese and 8 ounces of softened Neufchatel cheese ("light
cream cheese").
Grease a 9 1/2" (or 9") pan, but do not wrap foil around it until just
before the batter is added (spreading the crust in an already wrapped pan can
result in greater disturbance to the foil, thus increasing leakage risks).
Chocolate Crust:
4 oz. semi-sweet chocolate, melted
3/8 cup granulated sugar
2 tablespoons cocoa powder
8 oz. (1 cup) 3-cheese blend (see above)
1 teaspoon vanilla
2 oz. finely ground All-Bran
Place the resulting mixture in the greased pan and pre-bake without tub at 300
degrees for 5-10 minutes, depending on the mixture's thickness (closer to 10
minutes if thin enough to be fully distributed across the pan's bottom by gentle
shaking, closer to 5 minutes if thick enough to require spreading out this
mixture by pressing on it with a utensil and/or fingers), then cool enough to
comfortably touch at least the pan's upper sidewall.
Chocolate Batter:
1 3/4 cups granulated sugar
3/8 cup cocoa powder
40 oz. (5 cups) 3-cheese blend (see above)
1 1/2 teaspoons xanthan gum
2 teaspoons vanilla
6 eggs
Wrap the pan in foil at this point. Carefully pour the batter over the crust and
bake this cheesecake in a hot water tub at 300 degrees for 75 minutes (if using
a 9 1/2" pan). Then shut off oven and cool cheesecake down while still in
it (and in tub), with door slightly ajar, for an hour. Afterwards, remove from
oven and tub and (at this point, add a border of chocolate chips if desired)
continue to cool down at room temperature for another two hours, then remove
from pan and refrigerate.
Baked Chocolate Cheesecake—Prototype 24:
3-Cheese Blend (1CT-1NC-1YG):
Prepare ahead of time 16 ounces of yogurt cheese, derived from one 32-ounce
container of nonfat yogurt. If the resulting yogurt cheese falls below 16
ounces, add back enough of the whey (that was strained out from the yogurt) to
make up the difference. To this yogurt cheese combine 16 ounces of whipped,
lowfat cottage cheese and 16 ounces (two 8-ounce packages) of softened
Neufchatel cheese ("light cream cheese").
Grease a 9 1/2" (or 9") pan, but do not wrap foil around it until just
before the batter is added (spreading the crust in an already wrapped pan can
result in greater disturbance to the foil, thus increasing leakage risks).
Chocolate Crust:
4 oz. semi-sweet chocolate, melted
3/8 cup granulated sugar
2 tablespoons cocoa powder
8 oz. (1 cup) 3-cheese blend (see above)
1 teaspoon vanilla
2 oz. finely ground All-Bran
Place the resulting mixture in the greased pan and pre-bake without tub at 300
degrees for 5-10 minutes, depending on the mixture's thickness (closer to 10
minutes if thin enough to be fully distributed across the pan's bottom by gentle
shaking, closer to 5 minutes if thick enough to require spreading out this
mixture by pressing on it with a utensil and/or fingers), then cool enough to
comfortably touch at least the pan's upper sidewall.
Chocolate Batter:
1 3/4 cups granulated sugar
3/8 cup cocoa powder
40 oz. (5 cups) 3-cheese blend (see above)
1 1/2 teaspoons xanthan gum
2 teaspoons vanilla
6 eggs
Wrap the pan in foil at this point. Carefully pour the batter over the crust and
bake this cheesecake in a hot water tub at 300 degrees for 75 minutes (if using
a 9 1/2" pan). Then shut off oven and cool cheesecake down while still in
it (and in tub), with door slightly ajar, for an hour. Afterwards, remove from
oven and tub and (at this point, add a border of chocolate chips if desired)
continue to cool down at room temperature for another two hours, then remove
from pan and refrigerate.
Baked Chocolate Cheesecake—Prototype 25:
3-Cheese Blend (1CT-1NC-1YG):
Prepare ahead of time 16 ounces of yogurt cheese, derived from one 32-ounce
container of nonfat yogurt. If the resulting yogurt cheese falls below 16
ounces, add back enough of the whey (that was strained out from the yogurt) to
make up the difference. To this yogurt cheese combine 16 ounces of whipped,
lowfat cottage cheese and 16 ounces (two 8-ounce packages) of softened
Neufchatel cheese ("light cream cheese").
Grease a 9 1/2" (or 9") pan, but do not wrap foil around it until just
before the batter is added (spreading the crust in an already wrapped pan can
result in greater disturbance to the foil, thus increasing leakage risks).
Chocolate Crust:
4 oz. semi-sweet chocolate, melted
3/8 cup granulated sugar
2 tablespoons cocoa powder
8 oz. (1 cup) 3-cheese blend (see above)
1 teaspoon vanilla
2 oz. finely ground All-Bran
Place the resulting mixture in the greased pan and pre-bake without tub at 300
degrees for 5-10 minutes, depending on the mixture's thickness (closer to 10
minutes if thin enough to be fully distributed across the pan's bottom by gentle
shaking, closer to 5 minutes if thick enough to require spreading out this
mixture by pressing on it with a utensil and/or fingers), then cool enough to
comfortably touch at least the pan's upper sidewall.
Chocolate Batter:
1 3/4 cups granulated sugar
3/8 cup cocoa powder
40 oz. (5 cups) 3-cheese blend (see above)
1 teaspoon xanthan gum
2 teaspoons vanilla
6 eggs
Wrap the pan in foil at this point. Carefully pour the batter over the crust and
bake this cheesecake in a hot water tub at 300 degrees for 75 minutes (if using
a 9 1/2" pan). Then shut off oven and cool cheesecake down while still in
it (and in tub), with door slightly ajar, for an hour. Afterwards, remove from
oven and tub and (at this point, add a border of chocolate chips if desired)
continue to cool down at room temperature for another two hours, then remove
from pan and refrigerate.
New Late 2025 Crust Baking Procedure:
Pre-bake the crust mixture without tub at 300 degrees for 20
minutes, then remove from oven and cool down at room temperature, for at
least 30 minutes.
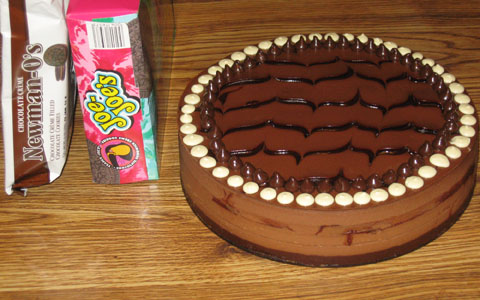
Baked Chocolate Cheesecake—Prototype 26 (7-Way Chocolate):
3-Cheese Blend (1CT-1NC-1YG):
Prepare ahead of time 16 ounces of yogurt cheese, derived from one 32-ounce
container of nonfat yogurt. If the resulting yogurt cheese falls below 16
ounces, add back enough of the whey (that was strained out from the yogurt) to
make up the difference. To this yogurt cheese combine 16 ounces of whipped,
lowfat cottage cheese and 16 ounces (two 8-ounce packages) of softened
Neufchatel cheese ("light cream cheese").
Grease a 9 1/2" (or 9") pan, but do not wrap foil around it
yet (see below).
Chocolate Crust:
4 oz. semi-sweet chocolate, melted
3/8 cup granulated sugar
2 tablespoons cocoa powder
8 oz. (1 cup) 3-cheese blend (see above)
1 teaspoon vanilla
2 oz. finely ground All-Bran
Place the resulting mixture in the greased pan and pre-bake without tub at 300
degrees for 10 minutes, then cool enough to comfortably touch at least the
pan's upper sidewall.
Chocolate Batter:
1 3/4 cups granulated sugar
3/8 cup cocoa powder
40 oz. (5 cups) 3-cheese blend (see above)
1 teaspoon xanthan gum
2 teaspoons vanilla
6 eggs
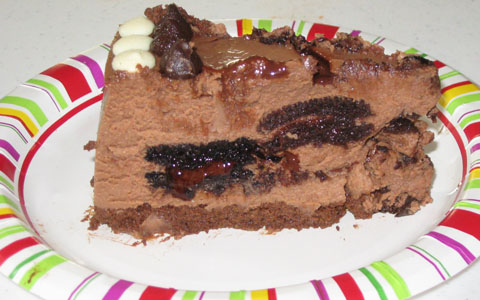
Cookies:
Double-chocolate sandwich cookies, about 2 dozen (Whole Foods 365 or
Newman's Own recommended)
Expect just over 7 cups of the resulting batter, but do not add this to the
pan all at once. Rather, this needs to be done in three installments. Wrap
the pan in foil just before adding the first installment (to minimize the
foil's disturbance and therefore its leakage risk, do not put it on any
earlier). Or as an alternative to using foil, place this pan in an
Easy Bath Cheesecake Wrap—and don't bother
waiting for the pan to get comfortably cool to do so.
For each of the first two installments, gently (especially with the second
installment!) scoop about 3 cups of batter into the pan, and add about 12
cookies (don't bother breaking them up—keeping them whole is fine and,
in fact, recommended), ensuring that they are fully coated and—as much
as possible—immersed. After adding the first installment, bake the pan
with its contents for 20 minutes, at 325 degrees. However, after adding the
second installment, bake the pan with its contents, still at 325 degrees,
but only for 15 minutes. Then reduce the temperature to 300 degrees, and
continue baking for another 15 minutes (that's a 30-minute "baking
installment" here—the first 15 minutes at 325 degrees and the
next 15 at 300). For both installments here, bake with the pan in a tub
filled with at least 1/4 to 1/2 inch of boiling water, but (to reduce
spillage risks) do not fill the tub all the way at this point, because the
whole tub-and-pan assembly is going to need to be removed from the oven
(in order to comfortably add contents to the pan) between installments.
After all this is done, there should be just over a cup of batter left,
with 50 minutes of baking time reached at this point (20 minutes for the
first installment, and 30 for the second one). Now comes the third
installment—carefully add the last of this batter (do not add any more
cookies at this point) on top of the pan's other contents. Try to fully coat
the entire surface, especially wherever cookie pieces may be showing. Next,
return the entire pan-and-tub assembly to the oven. At this point, fill up
the tub generously with boiling water. Resume baking at 300 degrees for
another 55 minutes (based upon usage of a 9 1/2" pan).
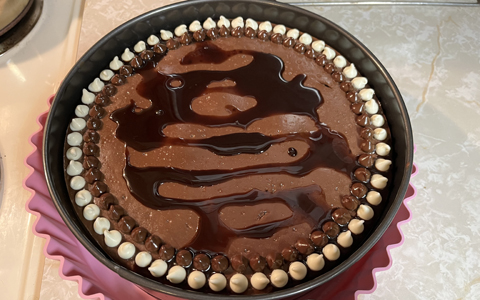
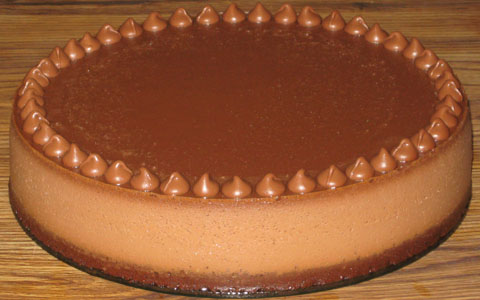
Afterward, shut the oven off, and leave its door slightly ajar, with the
cheesecake still inside—and in the tub—for an hour. Next, remove
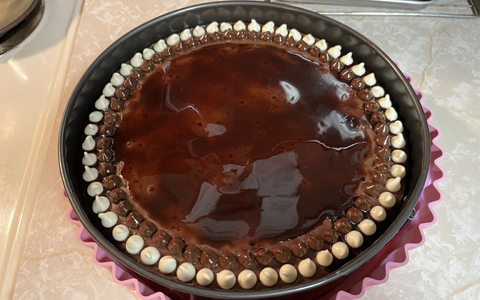
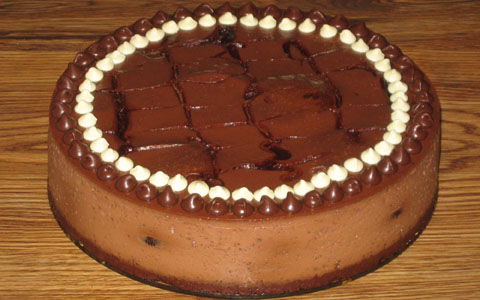
the cheesecake from the oven and tub. Now, for a special chocolate touch,
add two concentric borders of chocolate chips, one of semi-sweet and the
other of white, around the edge of this cheesecake (see photo below).
Continue to cool it down at room temperature for another two hours. After
doing so, remove the cheesecake from pan, then add a chocolate syrup drizzle
pattern on top (see photo below for a suggestion) and refrigerate
(or add the drizzle at a later point).
|
|

|