|
|
 |
Baked Chocolate Peanut Butter Cheesecake—Prototype 1:
(No tub used at all in baking the batter layers.)
Baked Chocolate Peanut Butter Cheesecake—Prototype 2:
Use a tub when baking.
Chocolate Batter:
1/2 cup skim milk
2 tablespoons melted or softened butter
3 tablespoons cocoa powder
7/8 cup sugar
1 teaspoon lemon juice
1/3 cup flour
1/4 teaspoon salt
2 1/2 cups (20 oz.) lowfat cottage cheese, whipped (no-salt-added
recommended)
1 teaspoon vanilla
2 eggs
Place this batter into a lightly buttered 9" cheesecake pan, and bake
at 300 degrees (batter only, no crust), for about 100 minutes (or until cake
tester comes out clean). Cool down, and remove from pan.
Chocolate Crust (bake this one together with the peanut butter batter,
below):
4 oz. semi-sweet chocolate, melted
1 1/3 tablespoons cocoa powder
1 cup (8 oz.) lowfat cottage cheese, whipped (no-salt-added recommended)
3/8 cup sugar
1 teaspoon vanilla (next to last ingredient here)
2.2 oz. finely ground Bran Buds
Promptly pour/press this crust mixture into the bottom of a lightly buttered
9" cheesecake pan.
Peanut Butter Batter:
2 tablespoons melted or softened butter
3 oz. unsalted peanut butter
1 teaspoon lemon juice
1/2 cup skim milk
3/4 cup sugar
1/3 cup flour
1/4 teaspoon salt
2 1/2 cups (20 oz.) lowfat cottage cheese, whipped (no-salt-added
recommended)
2 eggs
Add this batter on top of the chocolate crust in the pan, and bake at 300
degrees (batter only, no crust), for about 100 minutes (or until cake tester
comes out clean). After removing the pan from the oven, very carefully
transfer the cooled chocolate batter layer into the pan, on top of the
peanut butter layer. Then cool down, and afterwards remove entire cheesecake
from pan.
Baked Chocolate Peanut Butter Cheesecake—Prototype 3 (introduction):
Repeat Prototype 2, but...
Make these changes for each of the two batters:
Boost lemon juice by 2 teaspoons, to 1 tablespoon.
Boost flour by 2 teaspoons, to 3/8 cup.
And make this change for the peanut butter batter only:
Boost peanut butter by 1 oz., to 4 oz.
And carefully follow these steps below, many of which are new:
Pour/press the crust mixture into the bottom of a lightly buttered 9"
cheesecake pan.
Next, add the chocolate (not peanut butter!) batter on top of this crust.
Then carefully wrap foil around this pan.
Next, place this pan into a tub of boiling hot water, and put this into an
oven, preheated to 325 degrees (not 300 at this point).
Bake this only for about 30 minutes.
Now comes the tricky part! WARNING: Use plenty of caution at this
point, due to the pan being very hot! Carefully place the peanut
butter batter on top of the chocolate one. How?? Instead of dumping the
whole thing all at once on the chocolate, try this delicate approach. Start
off by scooping small amounts of the peanut butter batter out of its bowl
(or whatever container is being used). A small measuring cup (1/2-cup size
is good) or ladle is useful here. Pour these small amounts around the
edge of the pan, not the middle (but rather allow the batter to flow
there on its own, if possible). This should reduce the likelihood of the
peanut butter batter breaching the chocolate one. When the bowl of the
peanut butter batter is almost empty, it is probably safe to more directly
dump the rest of this right onto what just got poured, which itself should
be deep enough by then. Still, it is a good idea to do this gently enough to
avoid the chocolate breach.
Next, reduce the temperature to 300 degrees, and return the pan to
the oven. Resume baking for about 80 minutes (or until cake tester comes out
clean).
The usage of the oven isn't done yet! Now, turn off the oven, but keep the
cheesecake in it (along with its tub), with the oven's door slightly ajar.
Allow one hour for this gradual cooldown. Afterwards, take the cheesecake
out of the oven and out of the tub, but keep the cheesecake in its 9"
pan.
Next, cool the cheesecake off, at room temperature, for another two hours.
Finally, remove it from its pan and refrigerate.
Baked Chocolate Peanut Butter Cheesecake—Prototype 3 (full recipe
presentation):
For the cottage cheese, no-salt-added is recommended.
Chocolate Crust:
4 oz. semi-sweet chocolate, melted
1 1/3 tablespoons cocoa powder
1 cup (8 oz.) lowfat cottage cheese, whipped
3/8 cup sugar
1 teaspoon vanilla (next to last ingredient here)
2.2 oz. finely ground Bran Buds
Promptly pour/press this crust mixture into the bottom of a lightly buttered
9" cheesecake pan.
Chocolate Batter:
1/2 cup skim milk
2 tablespoons melted or softened butter
3 tablespoons cocoa powder
7/8 cup sugar
1 tablespoon lemon juice
3/8 cup flour
1/4 teaspoon salt
2 1/2 cups (20 oz.) lowfat cottage cheese, whipped
1 teaspoon vanilla
2 eggs
Pour this chocolate batter on top of the crust. Carefully wrap foil around
the pan afterwards. Remember to not put the foil on any earlier
than this! The goal is to disturb it as little as possible, as a
preventative measure against water leakage. Then place the wrapped pan
into a tub of boiling hot water, and bake all this at 325 degrees (make sure
oven is preheated) for about 40 minutes only.
Peanut Butter Batter:
2 tablespoons melted or softened butter
4 oz. unsalted peanut butter
1 tablespoon lemon juice
1/2 cup skim milk
3/4 cup sugar
3/8 cup flour
1/4 teaspoon salt
2 1/2 cups (20 oz.) lowfat cottage cheese, whipped
2 eggs
After the initial baking is done with the chocolate crust and batter,
carefully place the peanut butter batter on top by scooping small amounts
of it around the edge of the pan (try to let this batter flow towards
the middle on its own), in order to minimize the likelihood of breaching the
chocolate batter below.
Lower the oven temperature to 300 degrees, and resume baking for
about 80 minutes.
Afterwards, turn the oven off, but keep the cheesecake in it (along with its
tub), with the door slightly ajar. Allow one hour for this gradual cooldown.
Next, take the cheesecake out of the oven and out of the tub, but keep the
cheesecake in its 9" pan.
Cool the cheesecake off, at room temperature, for another two hours.
Finally, remove it from its pan and refrigerate.
Baked Chocolate Peanut Butter Cheesecake—Prototype 4:
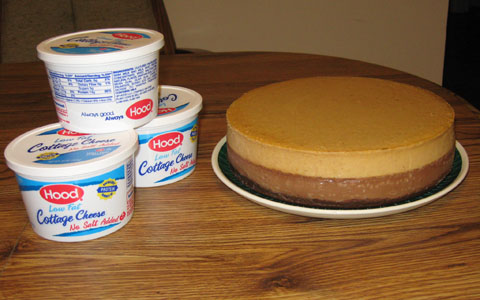
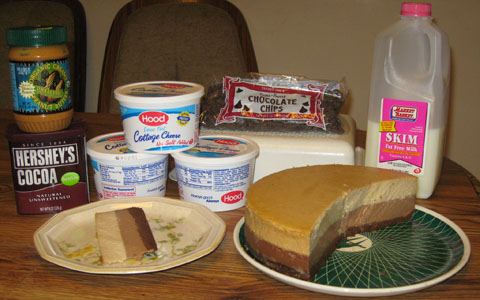
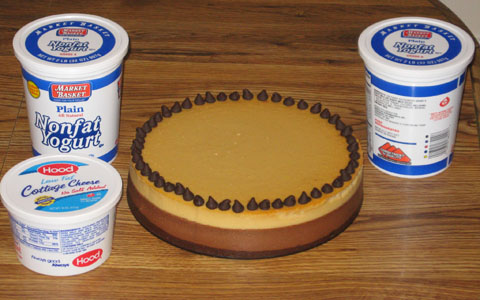
2-to-1 Blend of Yogurt Cheese and Cottage Cheese:
Prepare ahead of time 32 ounces of yogurt cheese, derived from two 32-ounce
containers (that's 64 ounces altogether) of nonfat yogurt. If the resulting
yogurt cheese falls below 32 ounces, add back enough of the whey (that was
strained out from the yogurt) to make up the difference. To this yogurt cheese
combine one 16-ounce container of whipped, lowfat cottage cheese.
Chocolate Crust:
4 oz. semi-sweet chocolate, melted
1 1/3 tablespoons cocoa powder
8 oz. (1 cup) 2-to-1 blend of yogurt cheese and cottage cheese (see above)
3/8 cup sugar
1 teaspoon vanilla
2.2 oz. finely ground Bran Buds
Place resulting mixture in 9 1/2" (or 9") pan.
Chocolate Batter:
2 tablespoons melted or softened butter
3 tablespoons cocoa powder
7/8 cup sugar
1/4 cup flour, all-purpose
1/4 teaspoon salt
20 oz. (2 1/2 cups) 2-to-1 blend of yogurt cheese and cottage cheese (see above)
1 teaspoon vanilla
2 eggs
Pour on top of crust. Wrap pan in foil and place in tub. Bake all this at 325
degrees for about 40 minutes.
Peanut Butter Batter:
2 tablespoons melted or softened butter
4 oz. unsalted peanut butter
3/4 cup sugar
1/4 cup flour, all-purpose
1/4 teaspoon salt
20 oz. (2 1/2 cups) 2-to-1 blend of yogurt cheese and cottage cheese (see above)
2 eggs
Carefully scoop this on top of the chocolate batter and return to oven, this
time at only 300 degrees. Bake for about 60 more minutes.
Turn oven off, leaving cheesecake in it (still in tub as well), with the door
slightly ajar, for another 50 minutes.
Remove cheesecake from oven and tub and let cool in its pan at room temperature
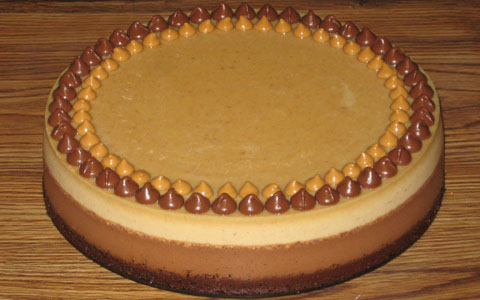
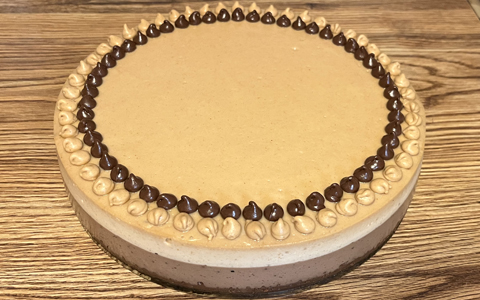
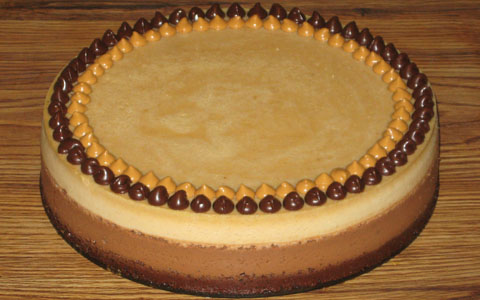
for another 100 minutes. As an option, immediately after removal from oven,
decorate this cheesecake with chocolate chips (or peanut butter cup candies such
as miniature size cups or broken pieces of larger cups) around its edge.
Afterwards, remove cheesecake from pan and refrigerate.
Baked Chocolate Peanut Butter Cheesecake—Prototype 5:
Repeat
Prototype 4,
but make these changes for each of the two batters:
Cut the all-purpose flour in half (i.e., reduce the flour by 2 tablespoons,
to only 2 tablespoons).
Add 1 1/3 tablespoons of arrowroot.
Remember, this is for each batter (i.e., the chocolate gets 1 1/3 tablespoons
of this "new" ingredient, and the peanut butter also gets 1 1/3 tablespoons of
it—so altogether for both batters, a total of 2 2/3 tablespoons of arrowroot
is directly replacing 4 of the flour's tablespoons, while the other 4 tablespoons
of this "older" ingredient are retained)! To summarize these updates...
Chocolate Batter:
2 tablespoons all-purpose flour
1 1/3 tablespoons arrowroot
Peanut Butter Batter:
2 tablespoons all-purpose flour
1 1/3 tablespoons arrowroot
Baked Chocolate Peanut Butter Cheesecake—Prototype 6:
2-to-1 Blend of Yogurt Cheese and Cottage Cheese:
Prepare ahead of time 32 ounces of yogurt cheese, derived from two 32-ounce
containers (that's 64 ounces altogether) of nonfat yogurt. If the resulting
yogurt cheese falls below 32 ounces, add back enough of the whey (that was
strained out from the yogurt) to make up the difference. To this yogurt cheese
combine one 16-ounce container of whipped, lowfat cottage cheese.
Grease a 9 1/2" (or 9") pan, but do not wrap foil around it until just
before the batter is added (spreading the crust in an already wrapped pan can
result in greater disturbance to the foil, thus increasing leakage risks).
Chocolate Crust:
4 oz. semi-sweet chocolate, melted
2 tablespoons cocoa powder
8 oz. (1 cup) 2-to-1 blend of yogurt cheese and cottage cheese (see above)
3/8 cup granulated sugar
1 teaspoon vanilla
2 oz. finely ground All-Bran
Place resulting mixture in the greased pan and pre-bake without tub at 300
degrees for 10 minutes, then cool enough to comfortably touch at least the pan's
upper sidewall.
Chocolate Batter:
2 tablespoons melted/softened butter (unsalted recommended)
3 tablespoons cocoa powder
7/8 cup granulated sugar
2 tablespoons all-purpose flour
1 1/2 tablespoons arrowroot
20 oz. (2 1/2 cups) 2-to-1 blend of yogurt cheese and cottage cheese (see above)
1 teaspoon vanilla
2 eggs
Wrap the pan in foil at this point. Carefully pour the batter on top of the
crust and bake all this in a hot water tub at 325 degrees for about 40 minutes.
Afterwards, take the tub-and-pan assembly out of the oven and promptly add the
batter indicated below.
Peanut Butter Batter:
2 tablespoons melted/softened butter (unsalted recommended)
4 oz. unsalted peanut butter
3/4 cup granulated sugar
2 tablespoons all-purpose flour
1 1/2 tablespoons arrowroot
20 oz. (2 1/2 cups) 2-to-1 blend of yogurt cheese and cottage cheese (see above)
2 eggs
Carefully scoop this on top of the chocolate batter (it is best to do this
around the edge of the pan and let the peanut butter batter flow towards the
middle) and return the tub-and-pan assembly to the oven, this time at only 300
degrees. Bake for about 60 more minutes (if using a 9 1/2" pan). Then shut
off the oven and cool the cheesecake down while still in it (and in tub), with
the oven door slightly ajar, for about an hour. Afterwards, remove the
cheesecake (still in its springform pan) from the oven and tub and continue to
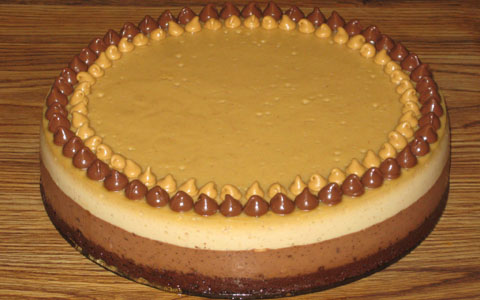
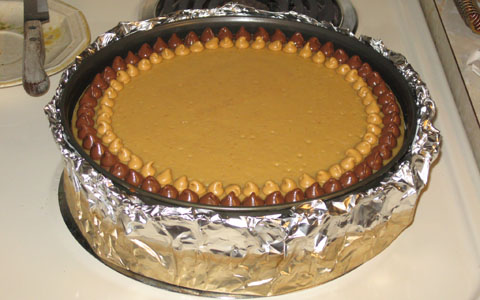
cool it down at room temperature for another 100 minutes. As an option,
immediately after removal from the oven, decorate this cheesecake with chocolate
chips (or peanut butter cup candies such as miniature size cups or broken pieces
of larger cups) around its edge.
After cooling down at room temperature, remove the cheesecake from its pan and
refrigerate.
Baked Chocolate Peanut Butter Cheesecake—Prototype 7:
3-Cheese Blend (1CT-1NC-4YG):
Prepare ahead of time 32 ounces of yogurt cheese, derived from two 32-ounce
containers (that's 64 ounces altogether) of nonfat yogurt. If the resulting
yogurt cheese falls below 32 ounces, add back enough of the whey (that was
strained out from the yogurt) to make up the difference. To this yogurt cheese
combine 8 ounces of whipped, lowfat cottage cheese and 8 ounces of softened
Neufchatel cheese ("light cream cheese").
Grease a 9 1/2" (or 9") pan, but do not wrap foil around it until just
before the batter is added (spreading the crust in an already wrapped pan can
result in greater disturbance to the foil, thus increasing leakage risks).
Chocolate Crust:
4 oz. semi-sweet chocolate, melted
3/8 cup granulated sugar
2 tablespoons cocoa powder
8 oz. (1 cup) 3-cheese blend (see above)
1 teaspoon vanilla
2 oz. finely ground All-Bran
Place the resulting mixture in the greased pan and pre-bake without tub at 300
degrees for 5-10 minutes, depending on the mixture's thickness (closer to 10
minutes if thin enough to be fully distributed across the pan's bottom by gentle
shaking, closer to 5 minutes if thick enough to require spreading out this
mixture by pressing on it with a utensil and/or fingers), then cool enough to
comfortably touch at least the pan's upper sidewall.
Chocolate Batter:
20 oz. (2 1/2 cups) 3-cheese blend (see above)
1 teaspoon vanilla
7/8 cup granulated sugar
3 tablespoons cocoa powder
2 1/2 tablespoons arrowroot
2 1/2 eggs *
Wrap the pan in foil at this point. Carefully pour the batter on top of the
crust and bake all this in a hot water tub at 325 degrees for about 40 minutes.
Afterwards, take the tub-and-pan assembly out of the oven and promptly add the
batter indicated below.
Peanut Butter Batter:
20 oz. (2 1/2 cups) 3-cheese blend (see above)
3/4 cup granulated sugar
4 oz. unsalted peanut butter
2 1/2 tablespoons arrowroot
2 1/2 eggs *
Carefully scoop this on top of the chocolate batter (it is best to do this
around the edge of the pan and let the peanut butter batter flow towards the
middle) and return the tub-and-pan assembly to the oven, this time at only 300
degrees. Bake for about 65-70 (but see comments below) more minutes
(if using a 9 1/2" pan). Then shut
off the oven and cool the cheesecake down while still in it (and in tub), with
the oven door slightly ajar, for about an hour. Afterwards, remove the
cheesecake (still in its springform pan) from the oven and tub and continue to
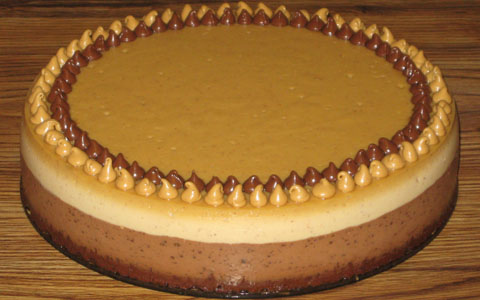
cool it down at room temperature for another 105-110 minutes. As an option,
immediately after removal from the oven, decorate this cheesecake with chocolate
and/or peanut butter chips (or peanut butter cup candies such as miniature size
cups or broken pieces of larger cups) around its edge.
After cooling down at room temperature, remove the cheesecake from its pan and
refrigerate.
* For more information on half-egg usage, see "Measuring Half Of An Egg" in
Cheesecake Tips.
Baked Chocolate Peanut Butter Cheesecake—Prototype 8:
3-Cheese Blend (3CT-1NC-2YG):
Prepare ahead of time 16 ounces of yogurt cheese, derived from one 32-ounce
container of nonfat yogurt. If the resulting yogurt cheese falls below 16
ounces, add back enough of the whey (that was strained out from the yogurt) to
make up the difference. To this yogurt cheese combine 24 ounces of whipped,
lowfat cottage cheese and 8 ounces of softened Neufchatel cheese ("light
cream cheese").
Grease a 9 1/2" (or 9") pan, but do not wrap foil around it until just
before the batter is added (spreading the crust in an already wrapped pan can
result in greater disturbance to the foil, thus increasing leakage risks).
Chocolate Crust:
4 oz. semi-sweet chocolate, melted
3/8 cup granulated sugar *
2 tablespoons cocoa powder *
8 oz. (1 cup) 3-cheese blend (see above)
1 teaspoon vanilla
2 oz. finely ground All-Bran
* (unintentionally omitted in the September 2018 instance—see comments
below for more details)
Place the resulting mixture in the greased pan and pre-bake without tub at 300
degrees for 5-10 minutes, depending on the mixture's thickness (closer to 10
minutes if thin enough to be fully distributed across the pan's bottom by gentle
shaking, closer to 5 minutes if thick enough to require spreading out this
mixture by pressing on it with a utensil and/or fingers), then cool enough to
comfortably touch at least the pan's upper sidewall.
Chocolate Batter:
7/8 cup granulated sugar
3 tablespoons cocoa powder
20 oz. (2 1/2 cups) 3-cheese blend (see above)
1 teaspoon vanilla
3/4 teaspoon xanthan gum
3 eggs
Wrap the pan in foil at this point. Carefully pour the batter on top of the
crust and bake all this in a hot water tub at 325 degrees for about 30 minutes.
Afterwards, take the tub-and-pan assembly out of the oven and promptly add the
batter indicated below.
Peanut Butter Batter:
3/4 cup granulated sugar
4 oz. unsalted peanut butter
20 oz. (2 1/2 cups) 3-cheese blend (see above)
3/4 teaspoon xanthan gum
3 eggs
Carefully scoop this on top of the chocolate batter (it is best to do this
around the edge of the pan and let the peanut butter batter flow towards the
middle) and return the tub-and-pan assembly to the oven, this time at only 300
degrees. Bake for about 55 more minutes (if using a 9 1/2"
pan). Then shut off the oven and cool the cheesecake down while still in it (and
in tub), with the oven door slightly ajar, for about an hour. Afterwards, remove
the cheesecake (still in its springform pan) from the oven and tub and continue
to cool it down at room temperature for another two hours. As an option,
immediately after removal from the oven, decorate this cheesecake with chocolate
and/or peanut butter chips (or peanut butter cup candies such as miniature size
cups or broken pieces of larger cups) around its edge.
After cooling down at room temperature, remove the cheesecake from its pan and
refrigerate.
Baked Chocolate Peanut Butter Cheesecake—Prototype 9:
3-Cheese Blend (3CT-1NC-2YG):
Prepare ahead of time 16 ounces of yogurt cheese, derived from one 32-ounce
container of nonfat yogurt. If the resulting yogurt cheese falls below 16
ounces, add back enough of the whey (that was strained out from the yogurt) to
make up the difference. To this yogurt cheese combine 24 ounces of whipped,
lowfat cottage cheese and 8 ounces of softened Neufchatel cheese ("light
cream cheese").
Grease a 9 1/2" (or 9") pan, but do not wrap foil around it until just
before the batter is added (spreading the crust in an already wrapped pan can
result in greater disturbance to the foil, thus increasing leakage risks).
Chocolate/Peanut Butter Crust:
2 oz. semi-sweet chocolate, melted
2 oz. peanut butter chips, melted
3/8 cup granulated sugar
2 tablespoons cocoa powder
8 oz. (1 cup) 3-cheese blend (see above)
1 teaspoon vanilla
2 oz. finely ground All-Bran
Place the resulting mixture in the greased pan and pre-bake without tub at 300
degrees for 10 minutes, then cool enough to comfortably touch at least the pan's
upper sidewall.
Chocolate Batter:
7/8 cup granulated sugar
3 tablespoons cocoa powder
20 oz. (2 1/2 cups) 3-cheese blend (see above)
1 teaspoon vanilla
3/4 teaspoon xanthan gum
3 eggs
Wrap the pan in foil at this point. Carefully pour the batter on top of the
crust and bake all this in a hot water tub at 325 degrees for about 30 minutes.
Afterwards, take the tub-and-pan assembly out of the oven and promptly add the
batter indicated below.
Peanut Butter Batter:
3/4 cup granulated sugar
4 oz. unsalted peanut butter
20 oz. (2 1/2 cups) 3-cheese blend (see above)
3/4 teaspoon xanthan gum
3 eggs
Carefully scoop this on top of the chocolate batter (it is best to do this
around the edge of the pan and let the peanut butter batter flow towards the
middle) and return the tub-and-pan assembly to the oven, this time at only 300
degrees. Bake for about 55 more minutes (if using a 9 1/2"
pan). Then shut off the oven and cool the cheesecake down while still in it (and
in tub), with the oven door slightly ajar, for about an hour. Afterwards, remove
the cheesecake (still in its springform pan) from the oven and tub and continue
to cool it down at room temperature for another two hours. As an option,
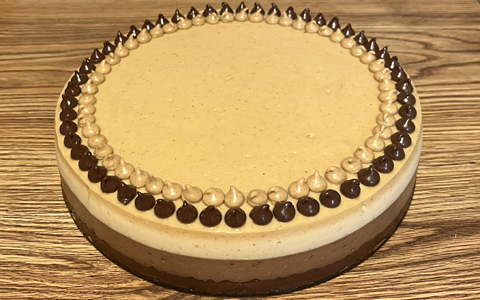
immediately after removal from the oven, decorate this cheesecake with chocolate
and/or peanut butter chips (or peanut butter cup candies such as miniature size
cups or broken pieces of larger cups) around its edge.
After cooling down at room temperature, remove the cheesecake from its pan and
refrigerate.
Baked Chocolate Peanut Butter Cheesecake—Prototype 10:
3-Cheese Blend (1CT-1NC-1YG):
Prepare ahead of time 16 ounces of yogurt cheese, derived from one 32-ounce
container of nonfat yogurt. If the resulting yogurt cheese falls below 16
ounces, add back enough of the whey (that was strained out from the yogurt) to
make up the difference. To this yogurt cheese combine 16 ounces of whipped,
lowfat cottage cheese and 16 ounces (two 8-ounce packages) of softened
Neufchatel cheese ("light cream cheese").
Grease a 9 1/2" (or 9") pan, but do not wrap foil around it until just
before the batter is added (spreading the crust in an already wrapped pan can
result in greater disturbance to the foil, thus increasing leakage risks).
Chocolate/Peanut Butter Crust:
2 oz. semi-sweet chocolate, melted
2 oz. peanut butter chips, melted
3/8 cup granulated sugar
2 tablespoons cocoa powder
8 oz. (1 cup) 3-cheese blend (see above)
1 teaspoon vanilla
2 oz. finely ground All-Bran
Place the resulting mixture in the greased pan and pre-bake without tub at 300
degrees for 10 minutes, then cool enough to comfortably touch at least the pan's
upper sidewall.
Chocolate Batter:
7/8 cup granulated sugar
3 tablespoons cocoa powder
20 oz. (2 1/2 cups) 3-cheese blend (see above)
1 teaspoon vanilla
1/2 teaspoon xanthan gum
3 eggs
Wrap the pan in foil at this point. Carefully pour the batter on top of the
crust and bake all this in a hot water tub at 325 degrees for about 30 minutes.
Afterwards, take the tub-and-pan assembly out of the oven and promptly add the
batter indicated below.
Peanut Butter Batter:
3/4 cup granulated sugar
4 oz. unsalted peanut butter
20 oz. (2 1/2 cups) 3-cheese blend (see above)
1/2 teaspoon xanthan gum
3 eggs
Carefully scoop this on top of the chocolate batter (it is best to do this
around the edge of the pan and let the peanut butter batter flow towards the
middle) and return the tub-and-pan assembly to the oven, this time at only 300
degrees. Bake for about 55 more minutes (if using a 9 1/2"
pan). Then shut off the oven and cool the cheesecake down while still in it (and
in tub), with the oven door slightly ajar, for about an hour. Afterwards, remove
the cheesecake (still in its springform pan) from the oven and tub and continue
to cool it down at room temperature for another two hours. As an option,
immediately after removal from the oven, decorate this cheesecake with chocolate
and/or peanut butter chips (or peanut butter cup candies such as miniature size
cups or broken pieces of larger cups) around its edge.
After cooling down at room temperature, remove the cheesecake from its pan and
refrigerate.
|
|

|